
Roof Repair & Product Knowledge Guide
Application guidance from Bergstrom Industries for Turbo Poly Seal and Super Silicone Seal. Choose a section, then select a topic to explore repair examples and questions and answers.
Before any repair: identify the leak source, check material compatibility and make sure the surface is completely dry.
Keep repairs consistent: use the same product for subsequent repairs. When switching products, remove the previous repair completely, clean the surface and let it dry.
No matching answers. Try a shorter search or choose a topic below.
Turbo Poly Seal
Overview
Uses for Turbo Poly Seal
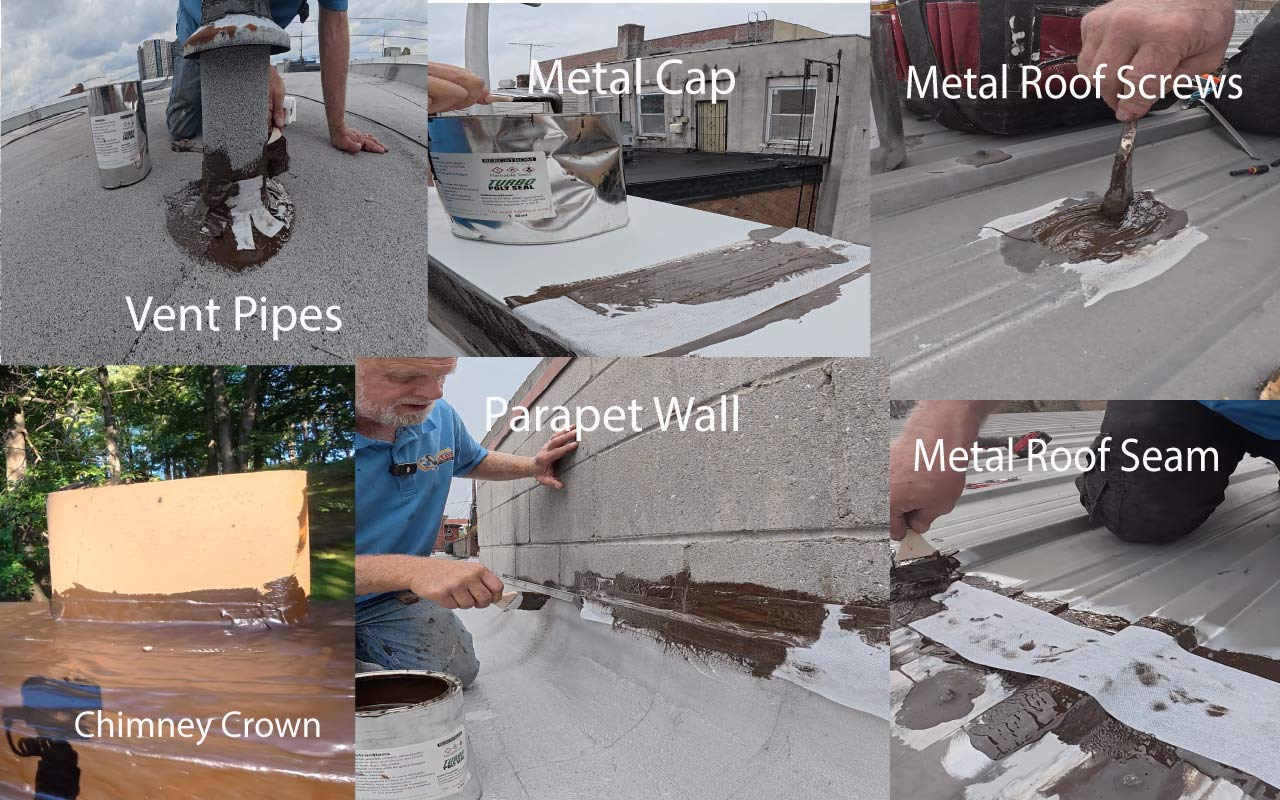
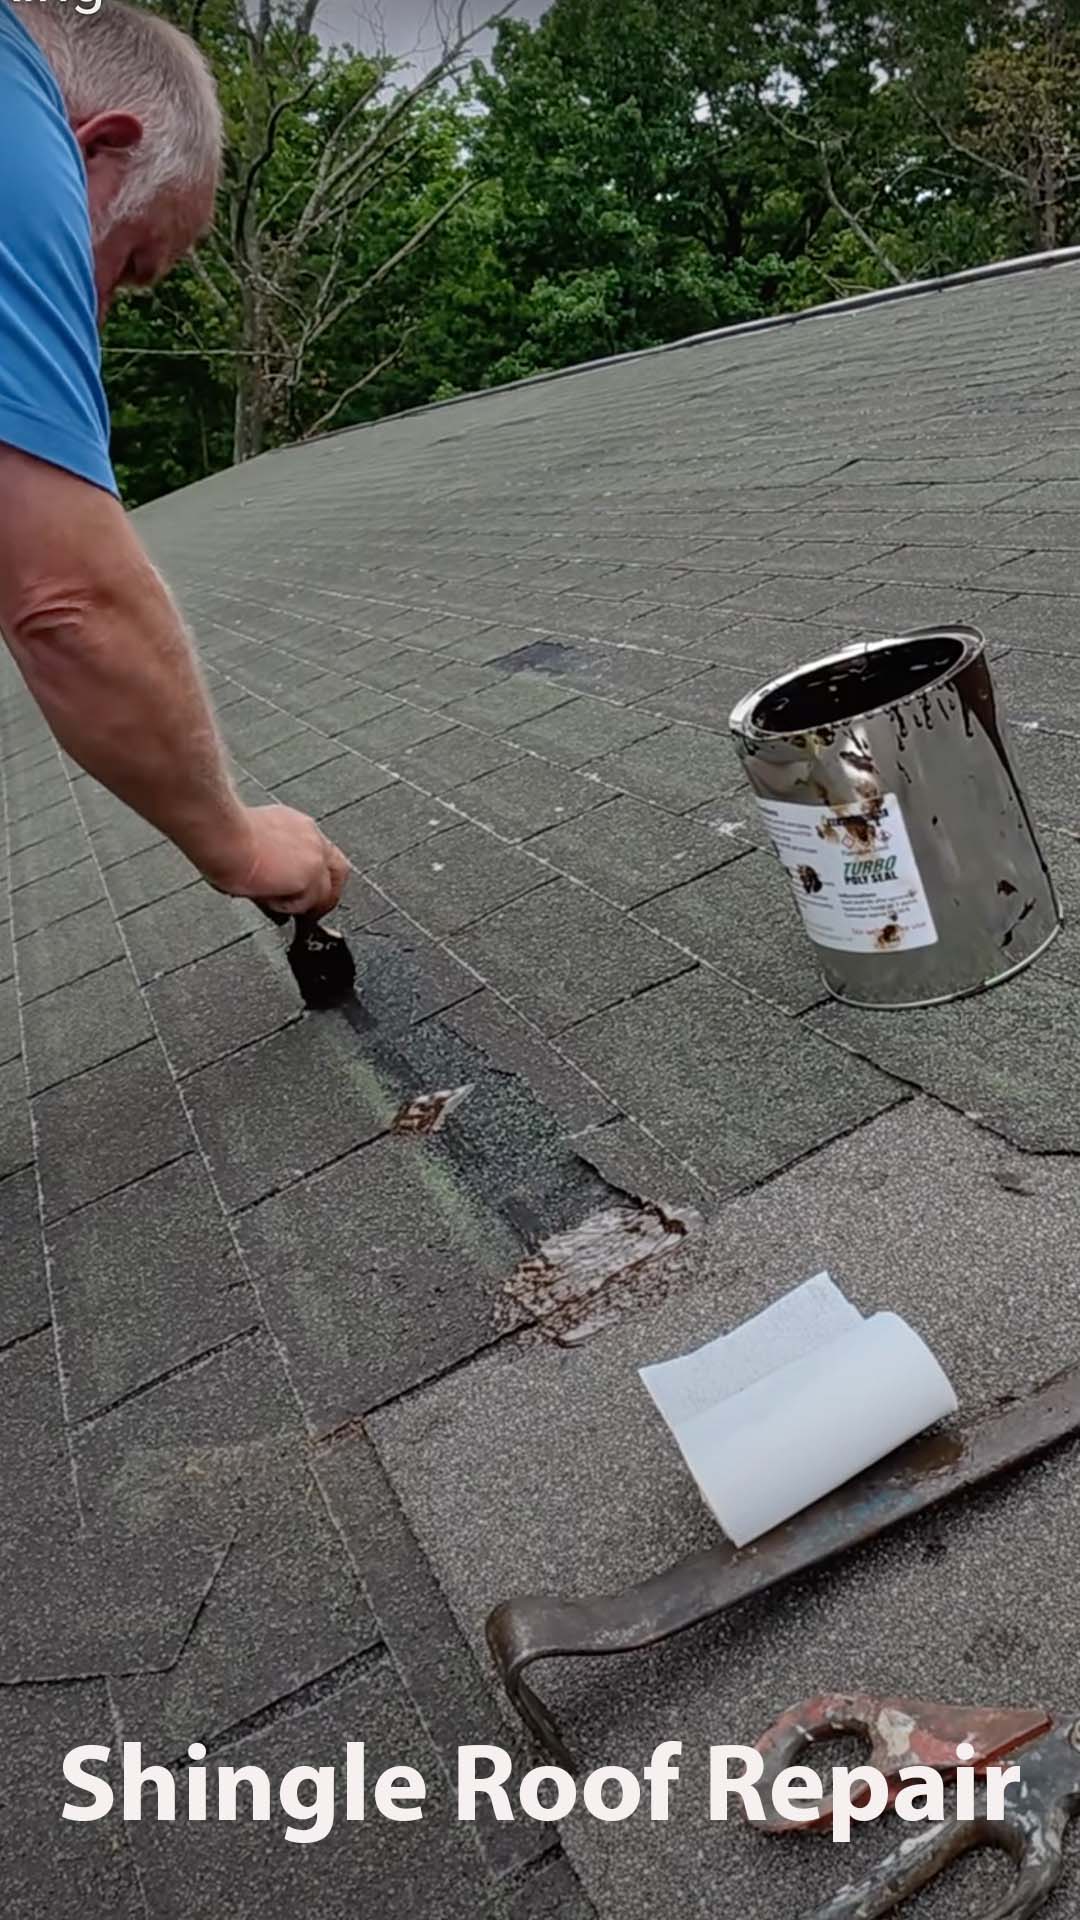
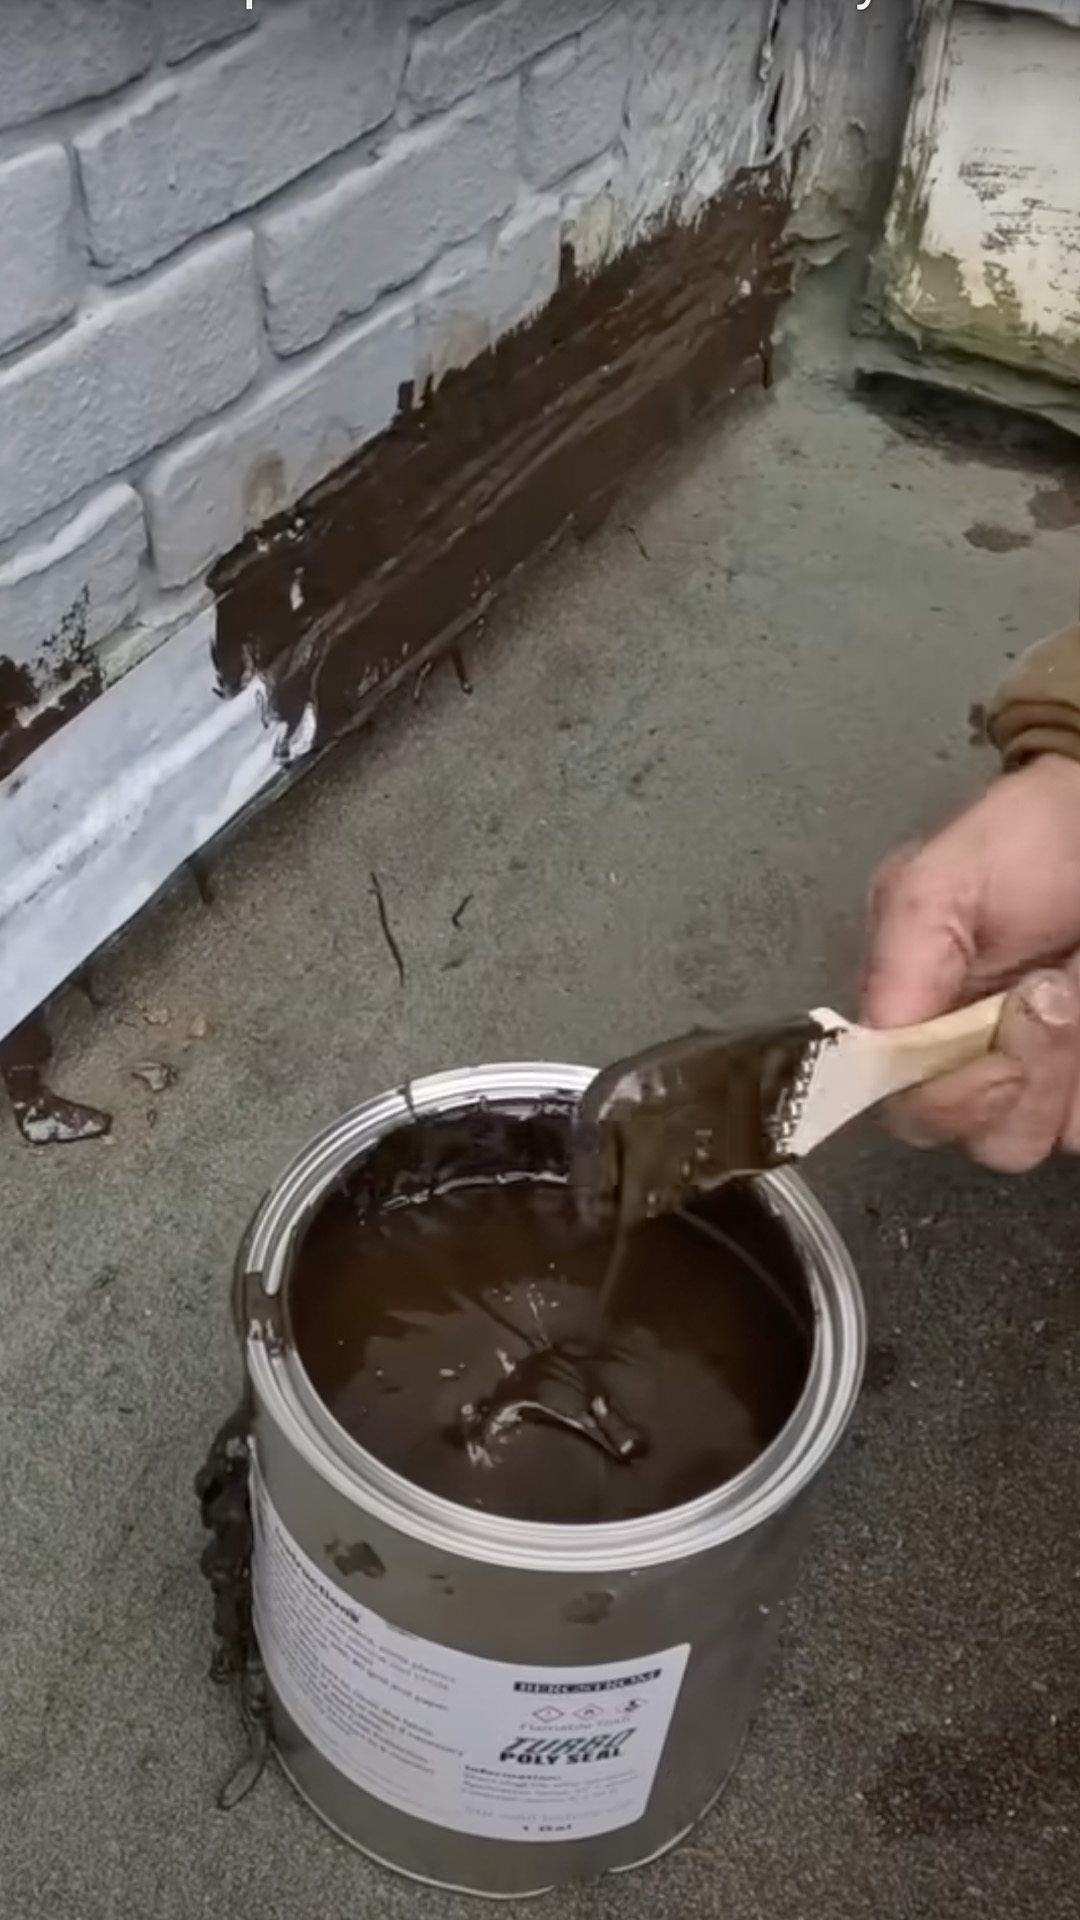
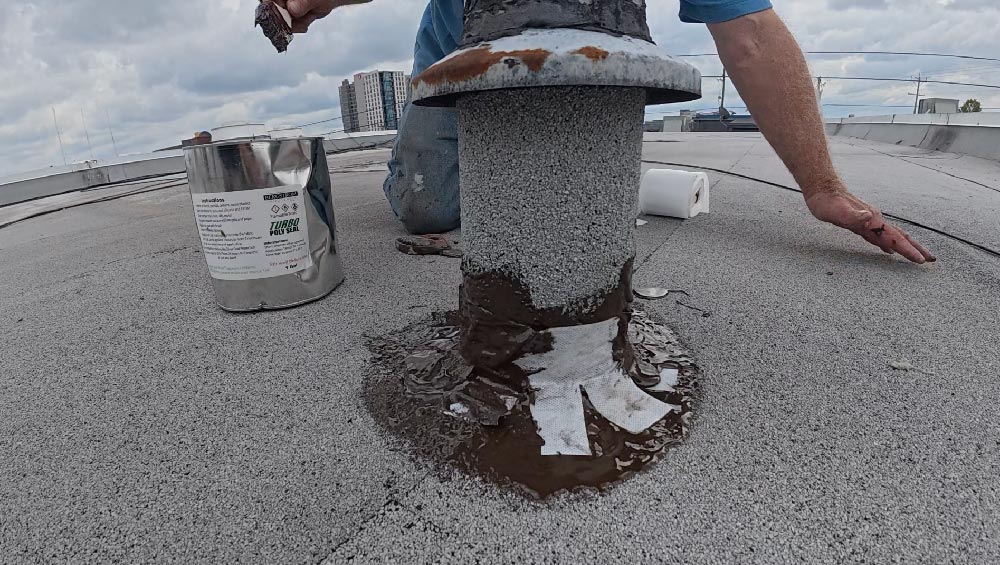
Turbo Poly Seal applications on vent pipes, metal caps, metal roof screws and seams, chimney crowns, and parapet walls.
Question
Answer
Turbo Poly Seal is used to repair leaks and seal the following areas:

Additional details
What makes Turbo Poly Seal a better choice than caulking for roof leak repairs?
- Strong adhesion: Thick caulking may not flow easily into a surface’s fine pores and irregularities. Turbo Poly Seal’s more fluid consistency helps it reach these small openings, creating closer contact with the surface and promoting a strong bond.
- Wider coverage: A bead of caulking typically covers a narrow area along a crack or joint. Turbo Poly Seal extends at least 1 inch onto the surface on each side of the repair, providing a broader area for adhesion.
- Lasting flexibility: Some caulking products become stiff or brittle as they age, making them more likely to crack or separate as surfaces move. Turbo Poly Seal remains pliable, allowing the repair to flex with that movement.
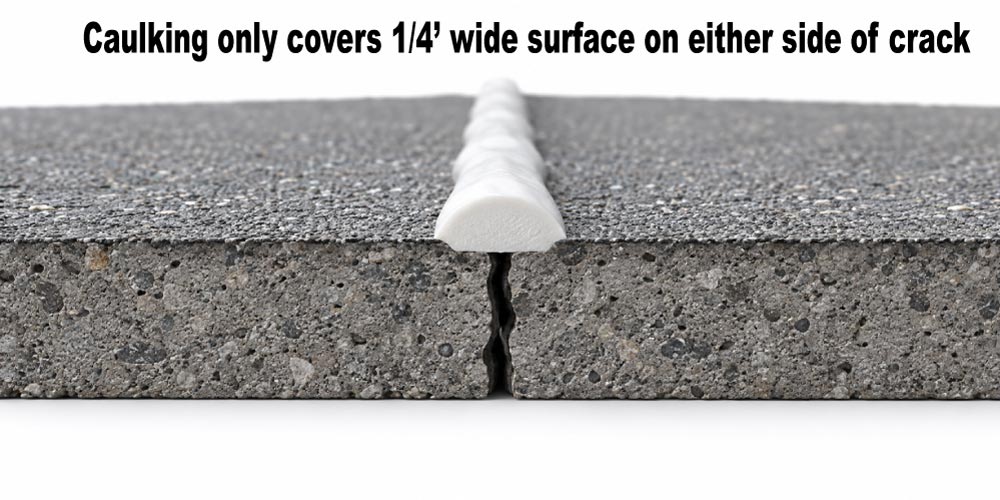
- Reinforced strength: A thin or uneven bead of caulking can leave weak spots. Turbo Poly Seal uses embedded polyester fleece to reinforce the repair. Fully saturating and covering the fleece creates a continuous, reinforced seal.
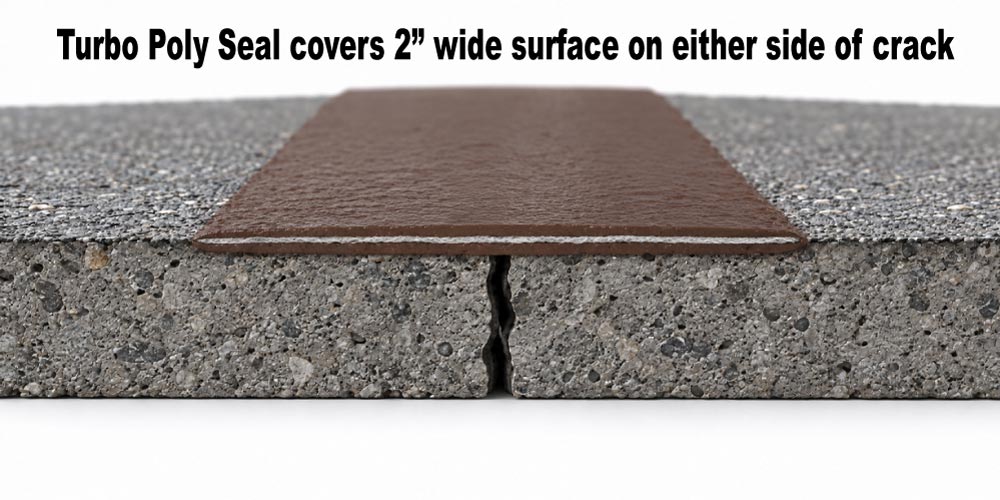
- Support over wider gaps: Caulking can serve as a gap filler beneath the repair. Turbo Poly Seal with polyester fleece can bridge gaps up to ½ inch, but filling larger openings first helps support the fleece and prevents it from sagging. Use a compatible filler and avoid silicone caulking where Turbo Poly Seal needs to adhere.
Compatibility
Question
Answer
Is Turbo Poly Seal and EPDM Rubber compatible?
Additional details
What should I use on EPDM rubber roofing?
Photos
Related videos

Question
Answer
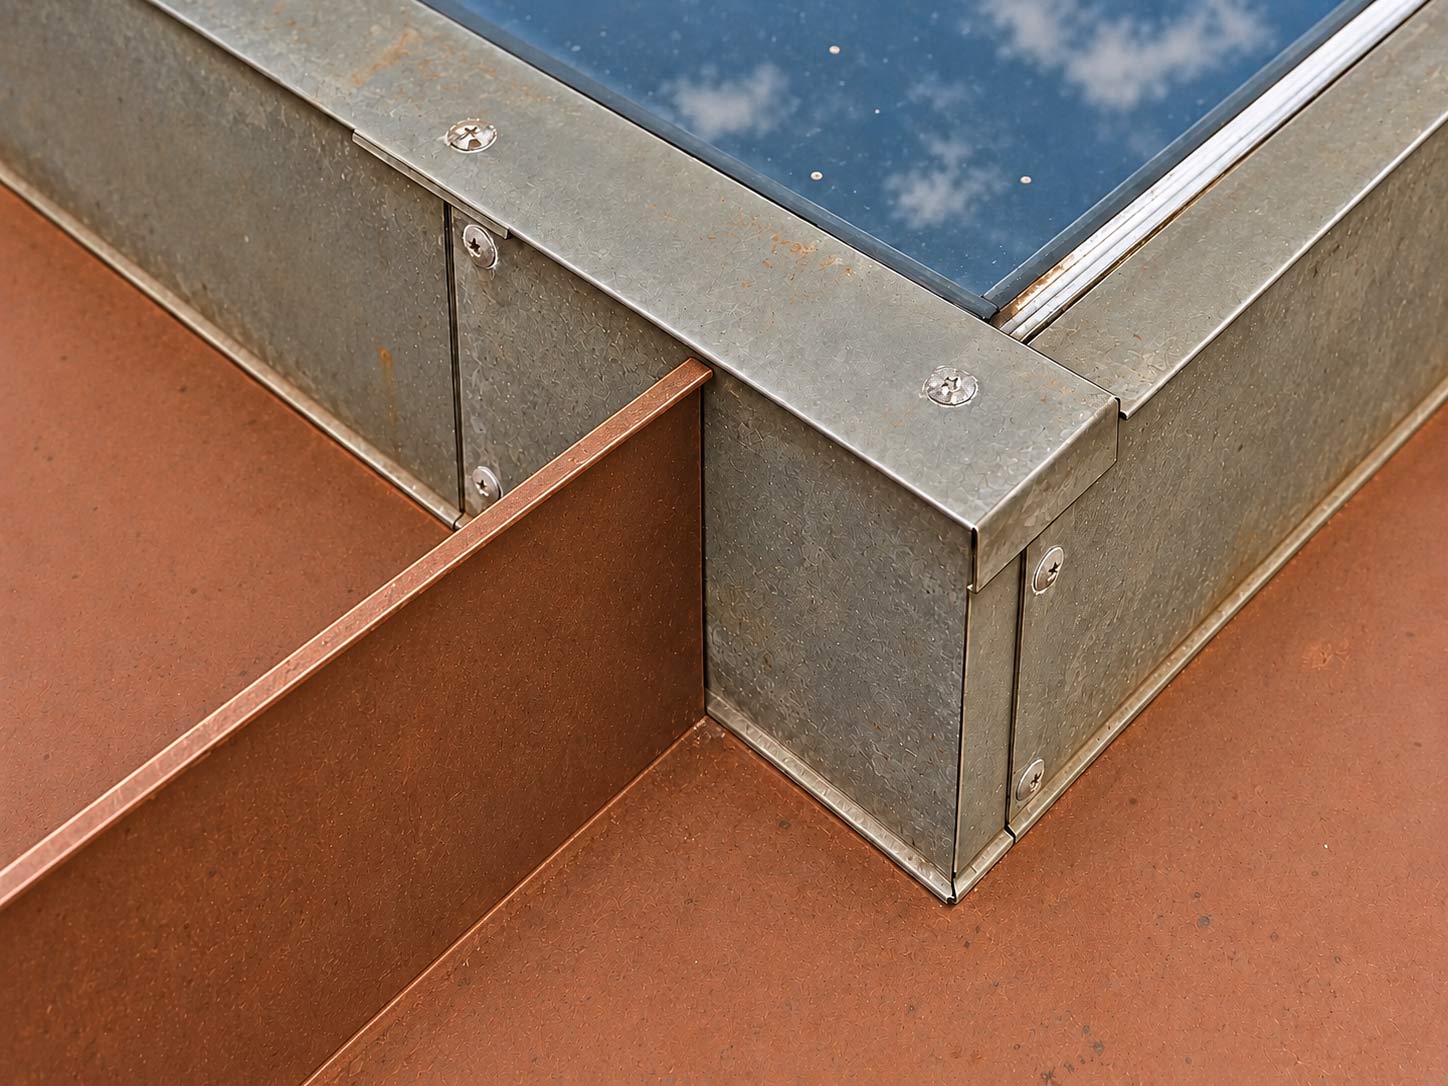
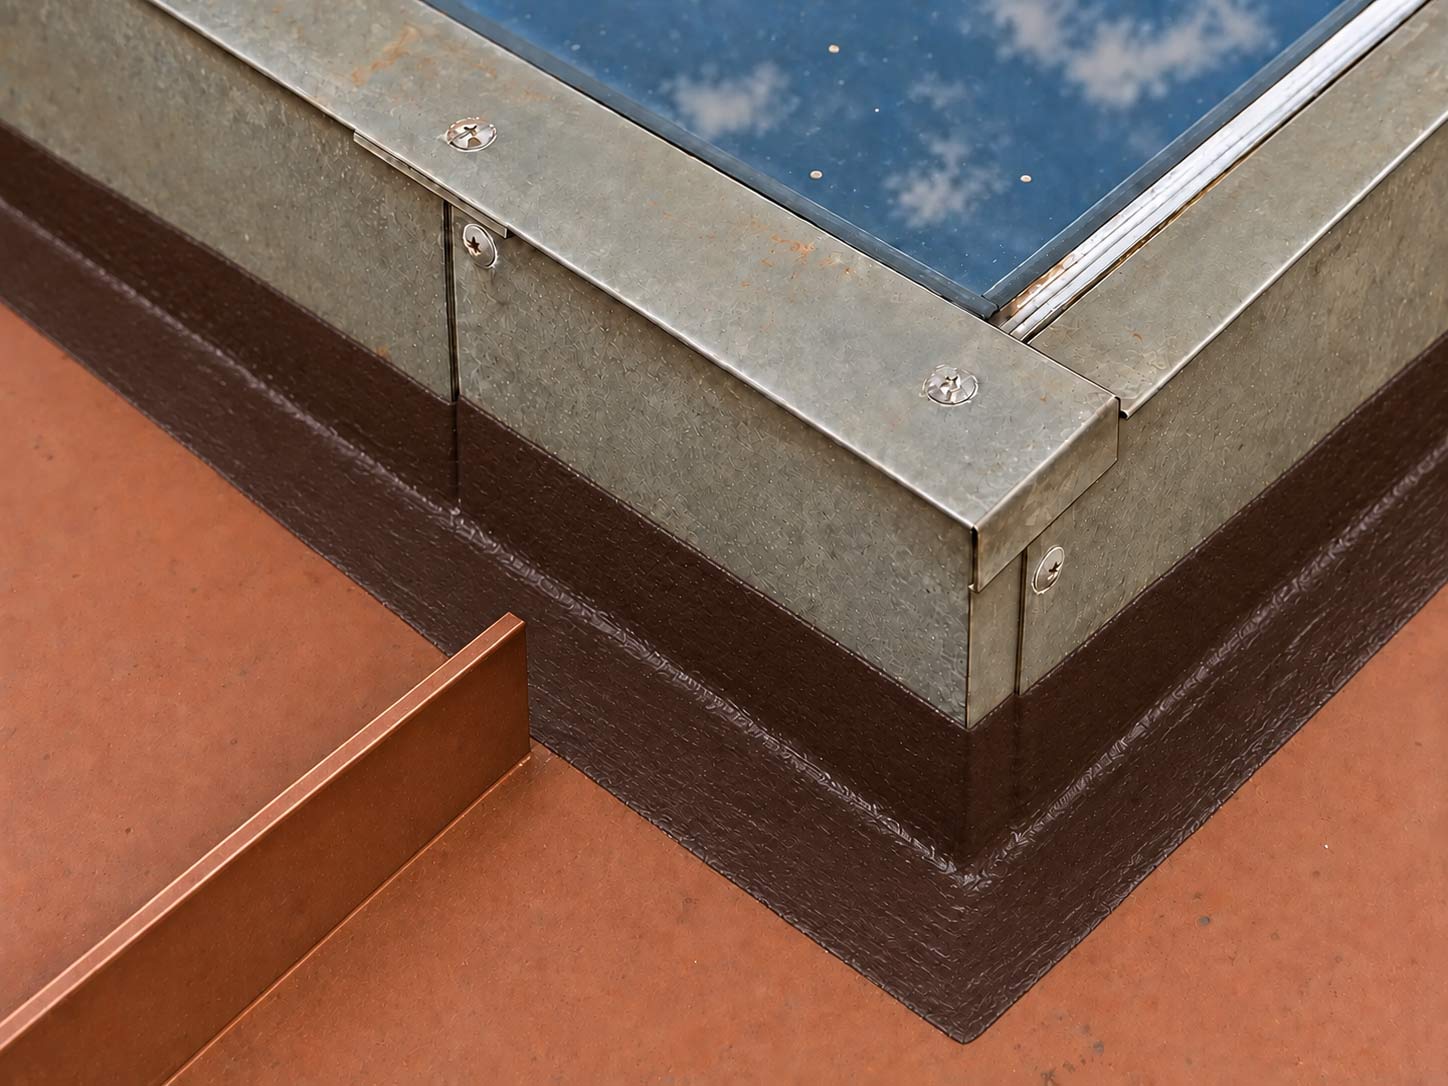
Can Turbo Poly Seal seal a glass or Plexiglas skylight?
Steps to seal a metal-to-Plexiglas joint
- Clean the surfaces: Remove dirt and debris from the metal frame and Plexiglas. Allow both surfaces to dry completely.
- Prepare the fleece: Cut polyester fleece into 2-inch-wide strips.
- Apply the base coat: Brush a generous coat of Turbo Poly Seal across the joint, covering approximately 1 inch of metal and 1 inch of Plexiglas.
- Embed the fleece immediately: Press it into the wet sealant, following the surface contours without leaving gaps or air pockets.
- Apply the topcoat: Completely cover the fleece with Turbo Poly Seal. Add enough material so that no exposed fibers or fabric weave remain visible.
- Clean up carefully: Use only a cleaner approved for Plexiglas on the skylight. Do not use lacquer thinner on the Plexiglas.
Optional UV protection
Watch the video below to see how we sealed a transition between a metal roof and a Plexiglas skylight.

Additional details
Photos
Question
Answer
Can silicone caulking remain beneath a Turbo Poly Seal repair?
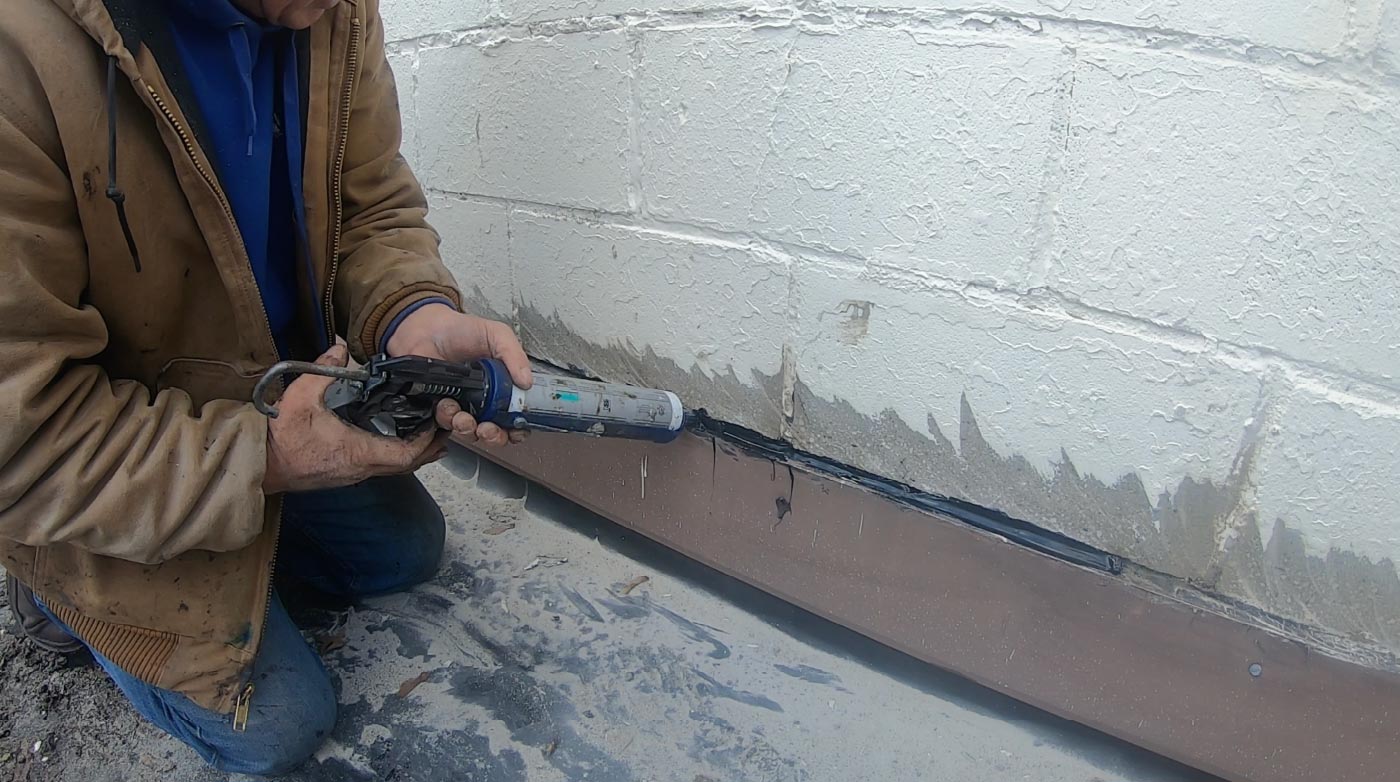
Steps to prepare and seal the repair
- Inspect the existing caulking: Remove loose caulking and any raised buildup that prevents the fleece from following the surface.
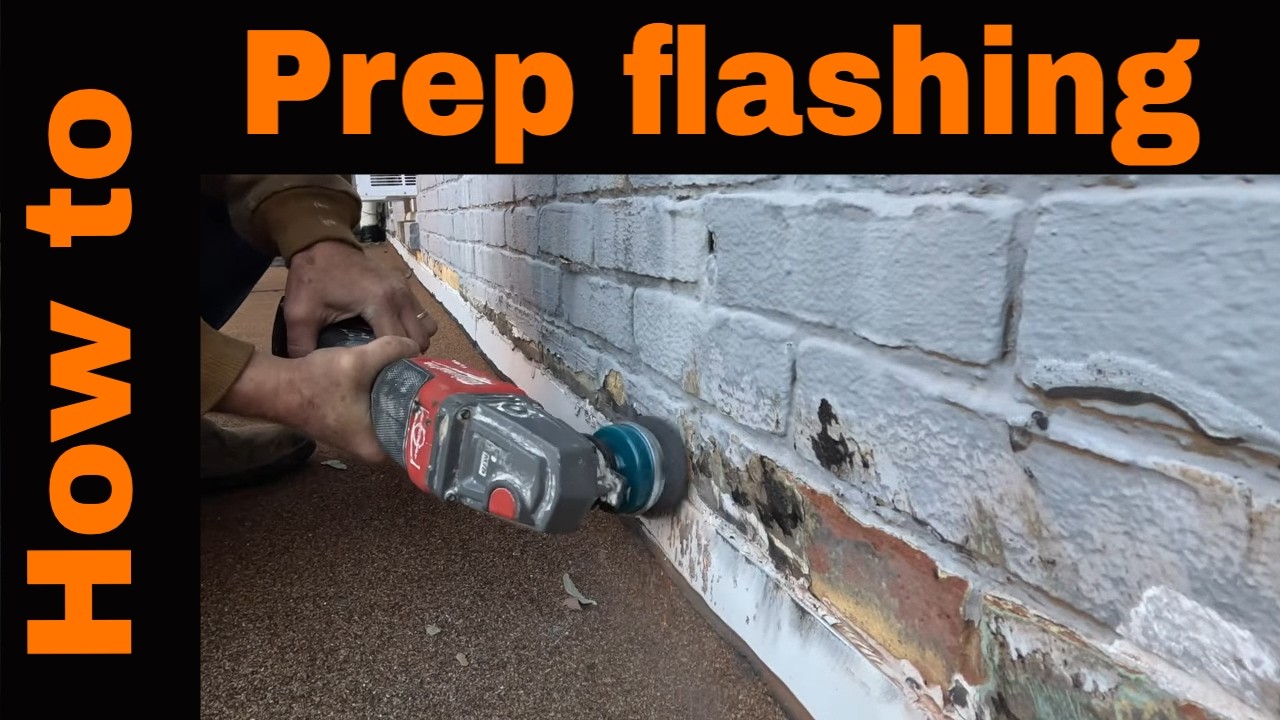
- Clean the bonding areas: On suitable brick or metal surfaces, use an angle grinder with a steel wire brush to remove silicone spread beyond the crack. Avoid damaging the underlying surface.
- Remove remaining residue: Wire brushing can smear a thin, difficult-to-see film of silicone across the surface.
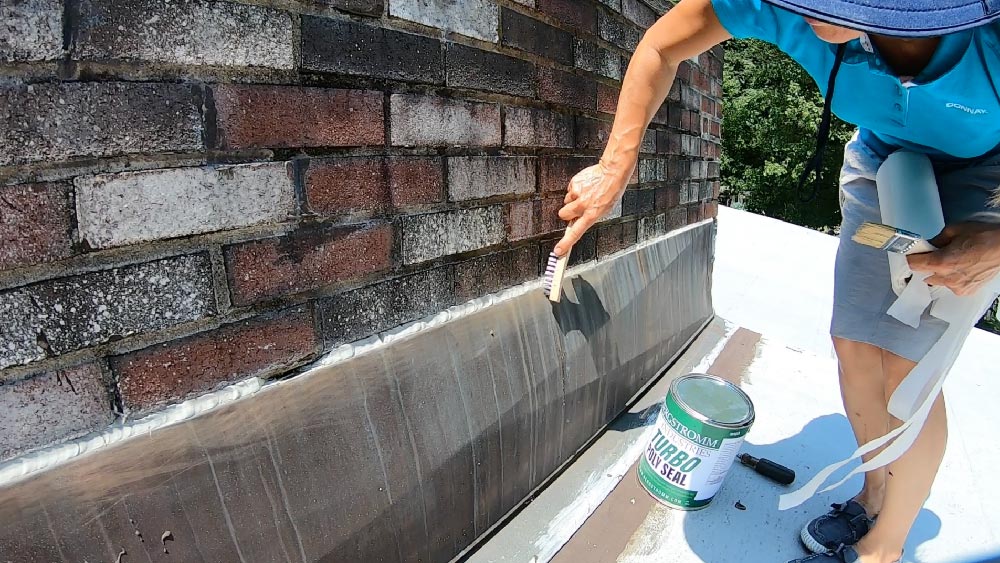
- Allow the surfaces to dry completely: Apply Turbo Poly Seal only when the bonding areas are clean and dry.
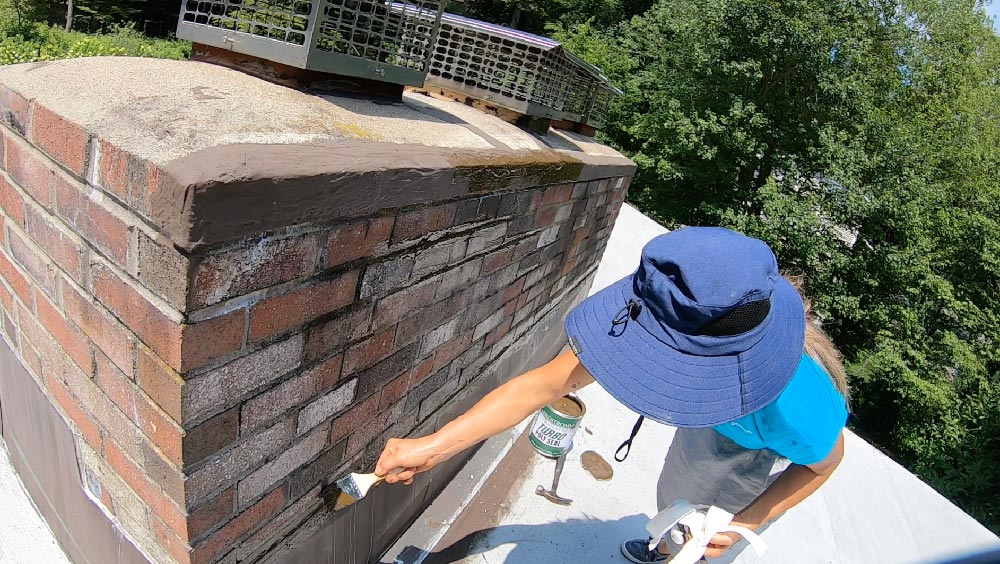
- Apply the base coat and fleece: Brush Turbo Poly Seal onto both sides of the crack, then immediately embed polyester fleece across the gap. Press it into the wet sealant without leaving air pockets.
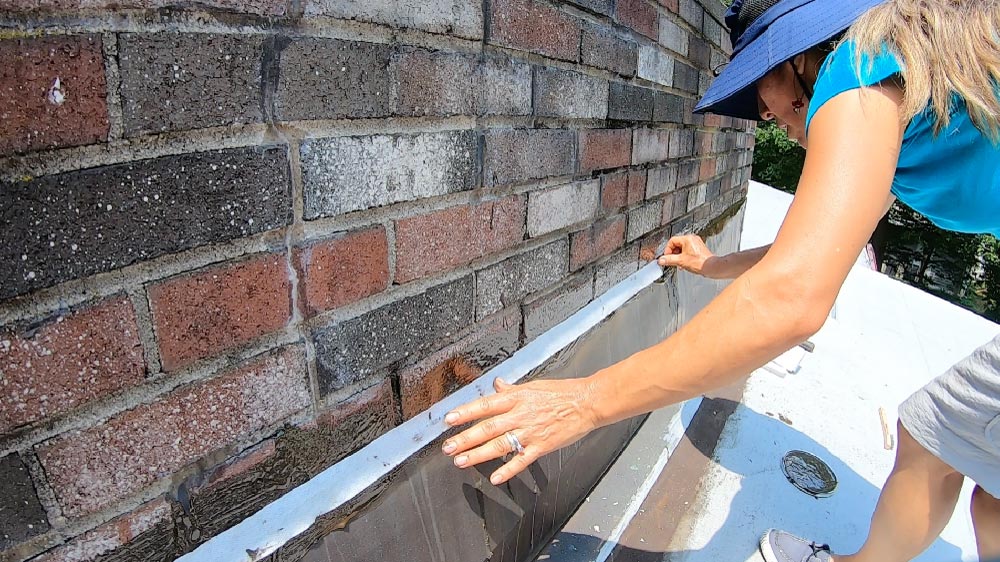
- Completely cover the fleece: Apply a generous topcoat until no exposed fibers or fabric weave remain visible.
The fleece bridges the filled gap, while Turbo Poly Seal bonds to the clean surfaces on either side.
Photos
Related videos


Question
Answer
If the coating type is still unclear, Bergstrom Industries recommends a small adhesion test:
- Clean the test spot by wiping it with a wet rag—the easier option, according to Bergstrom Industries—or use lacquer thinner. Allow the surface to dry completely before applying the dab.
- Apply a dab of Turbo Poly Seal.
- Allow it to cure before testing. Bergstrom Industries says the test dab may be ready in as little as 8 hours; test only after it has cured.
- Try to peel off the cured dab.
Question
Answer
Can Turbo Poly Seal be applied over aluminum paint or silver coating?
Inspect the existing coating before starting:
- Flaking or peeling coating: Remove all loose material from the repair area before applying Turbo Poly Seal.
- Widespread flaking: If a thin coating is flaking across the surrounding surface, remove it completely from the repair area—even sections that still appear attached.
- Fresh, firmly bonded coating: You may apply Turbo Poly Seal once the coating has fully dried and is securely bonded to the roof.
- Embed the Polyester Fleece that came with the Turbo Poly Seal kit.
- Apply a final coat of Turbo Poly Seal, covering the fleece completely
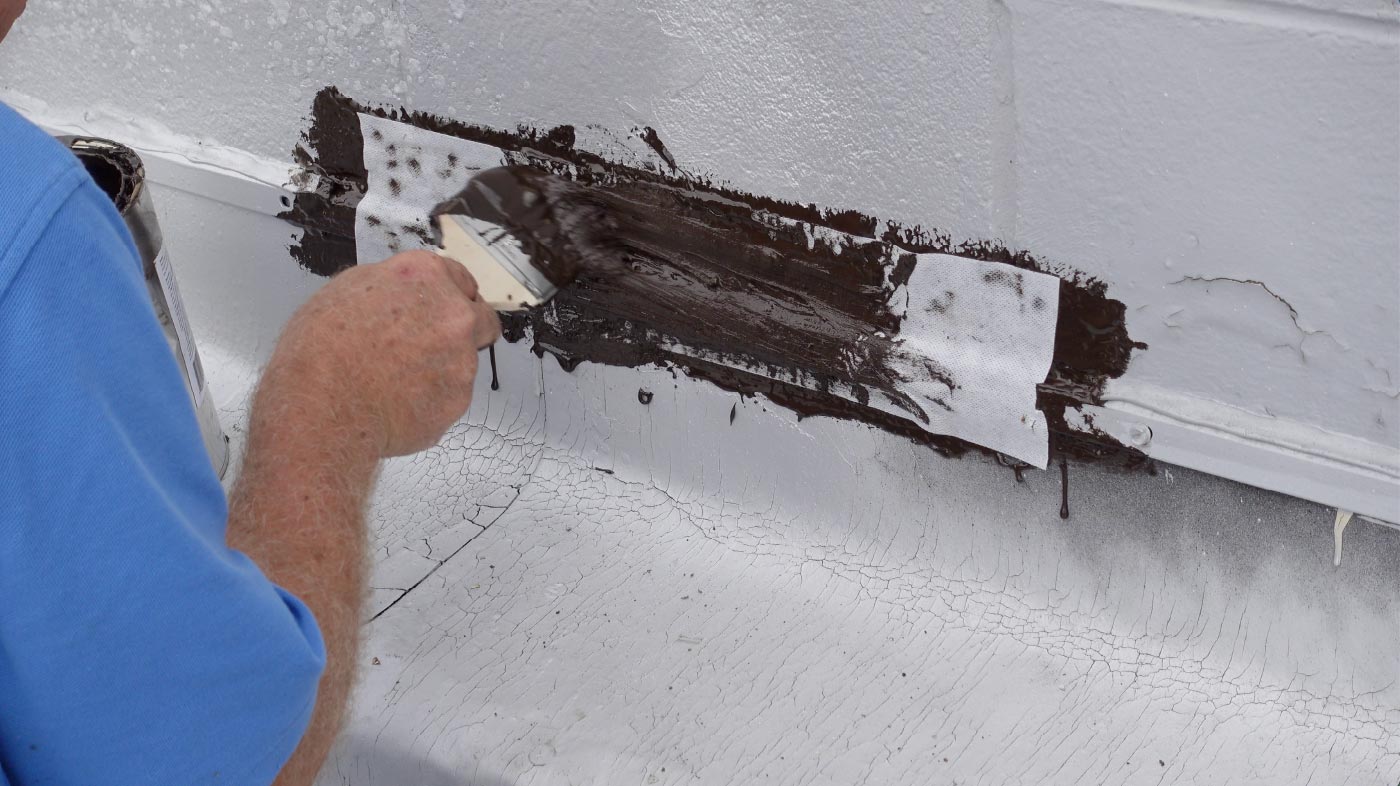
- You can use any paint to protect the Turbo Poly Seal against UV. This is optional. The Turbo Poly Seal can last over 10 years with no protection
For the most reliable bond on a torch-down roof, remove the silver coating from the entire repair area before applying Turbo Poly Seal.
Additional details
Photos
Related videos

Question
Answer
Additional details
Photos
Related videos

Question
Answer
Photos
Related videos

Coverage and kits
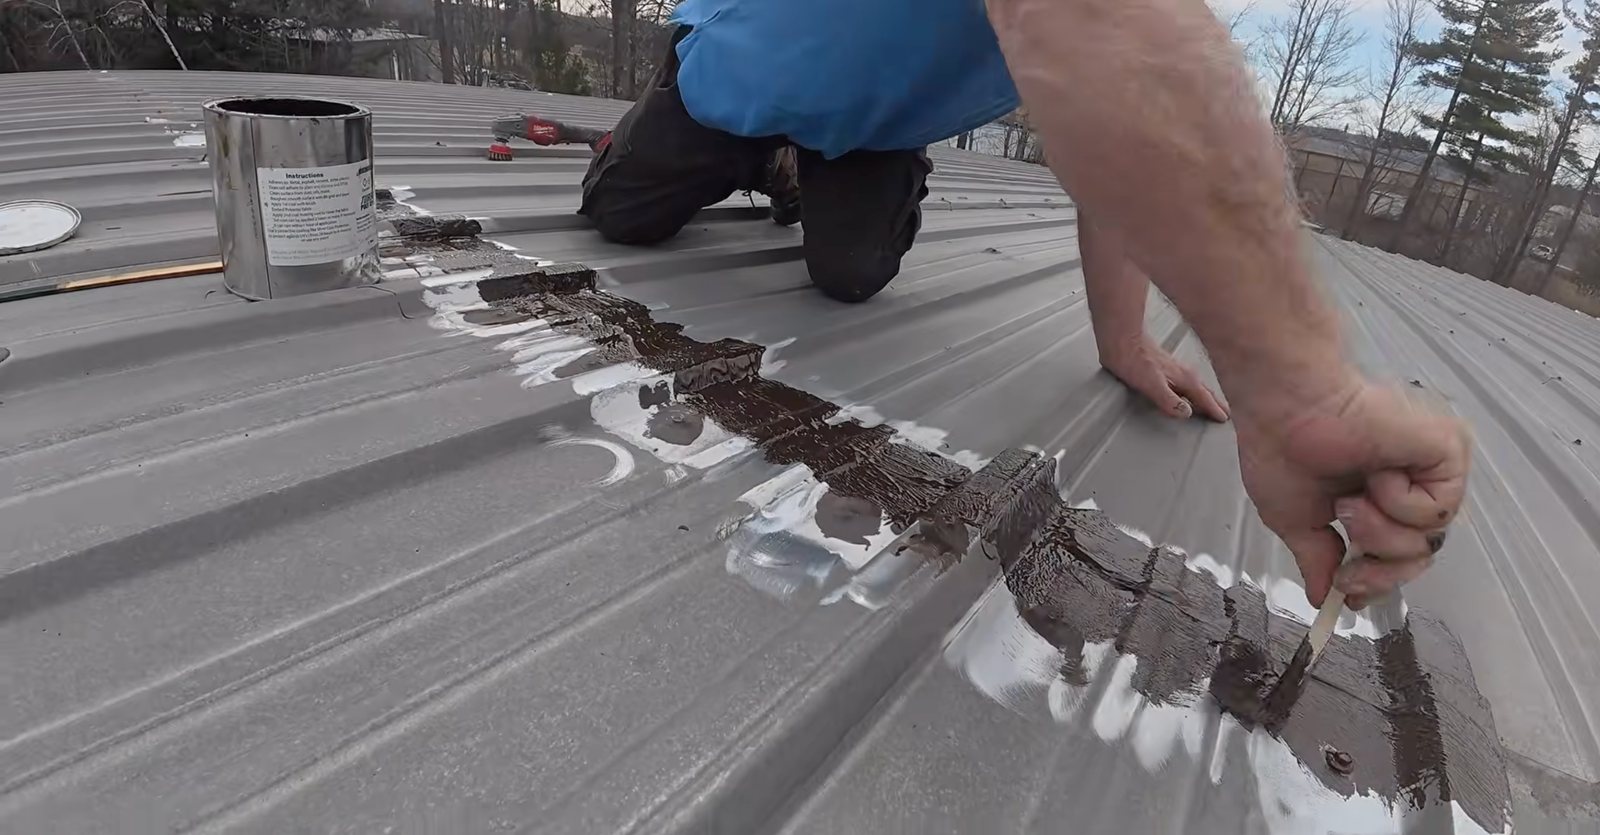
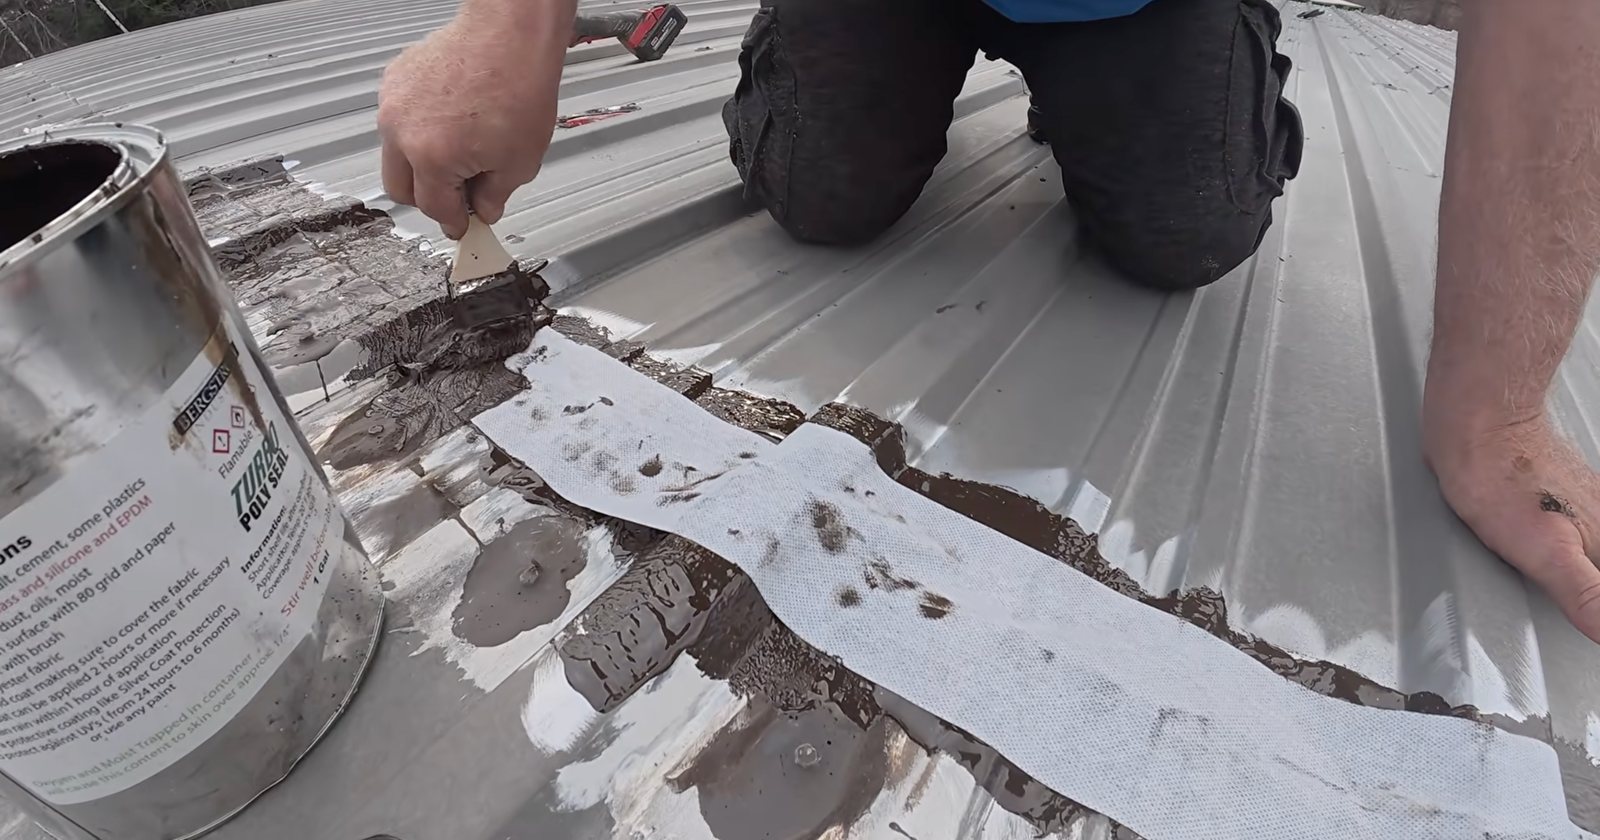
Metal roof seam repair with Turbo Poly Seal and polyester fleece
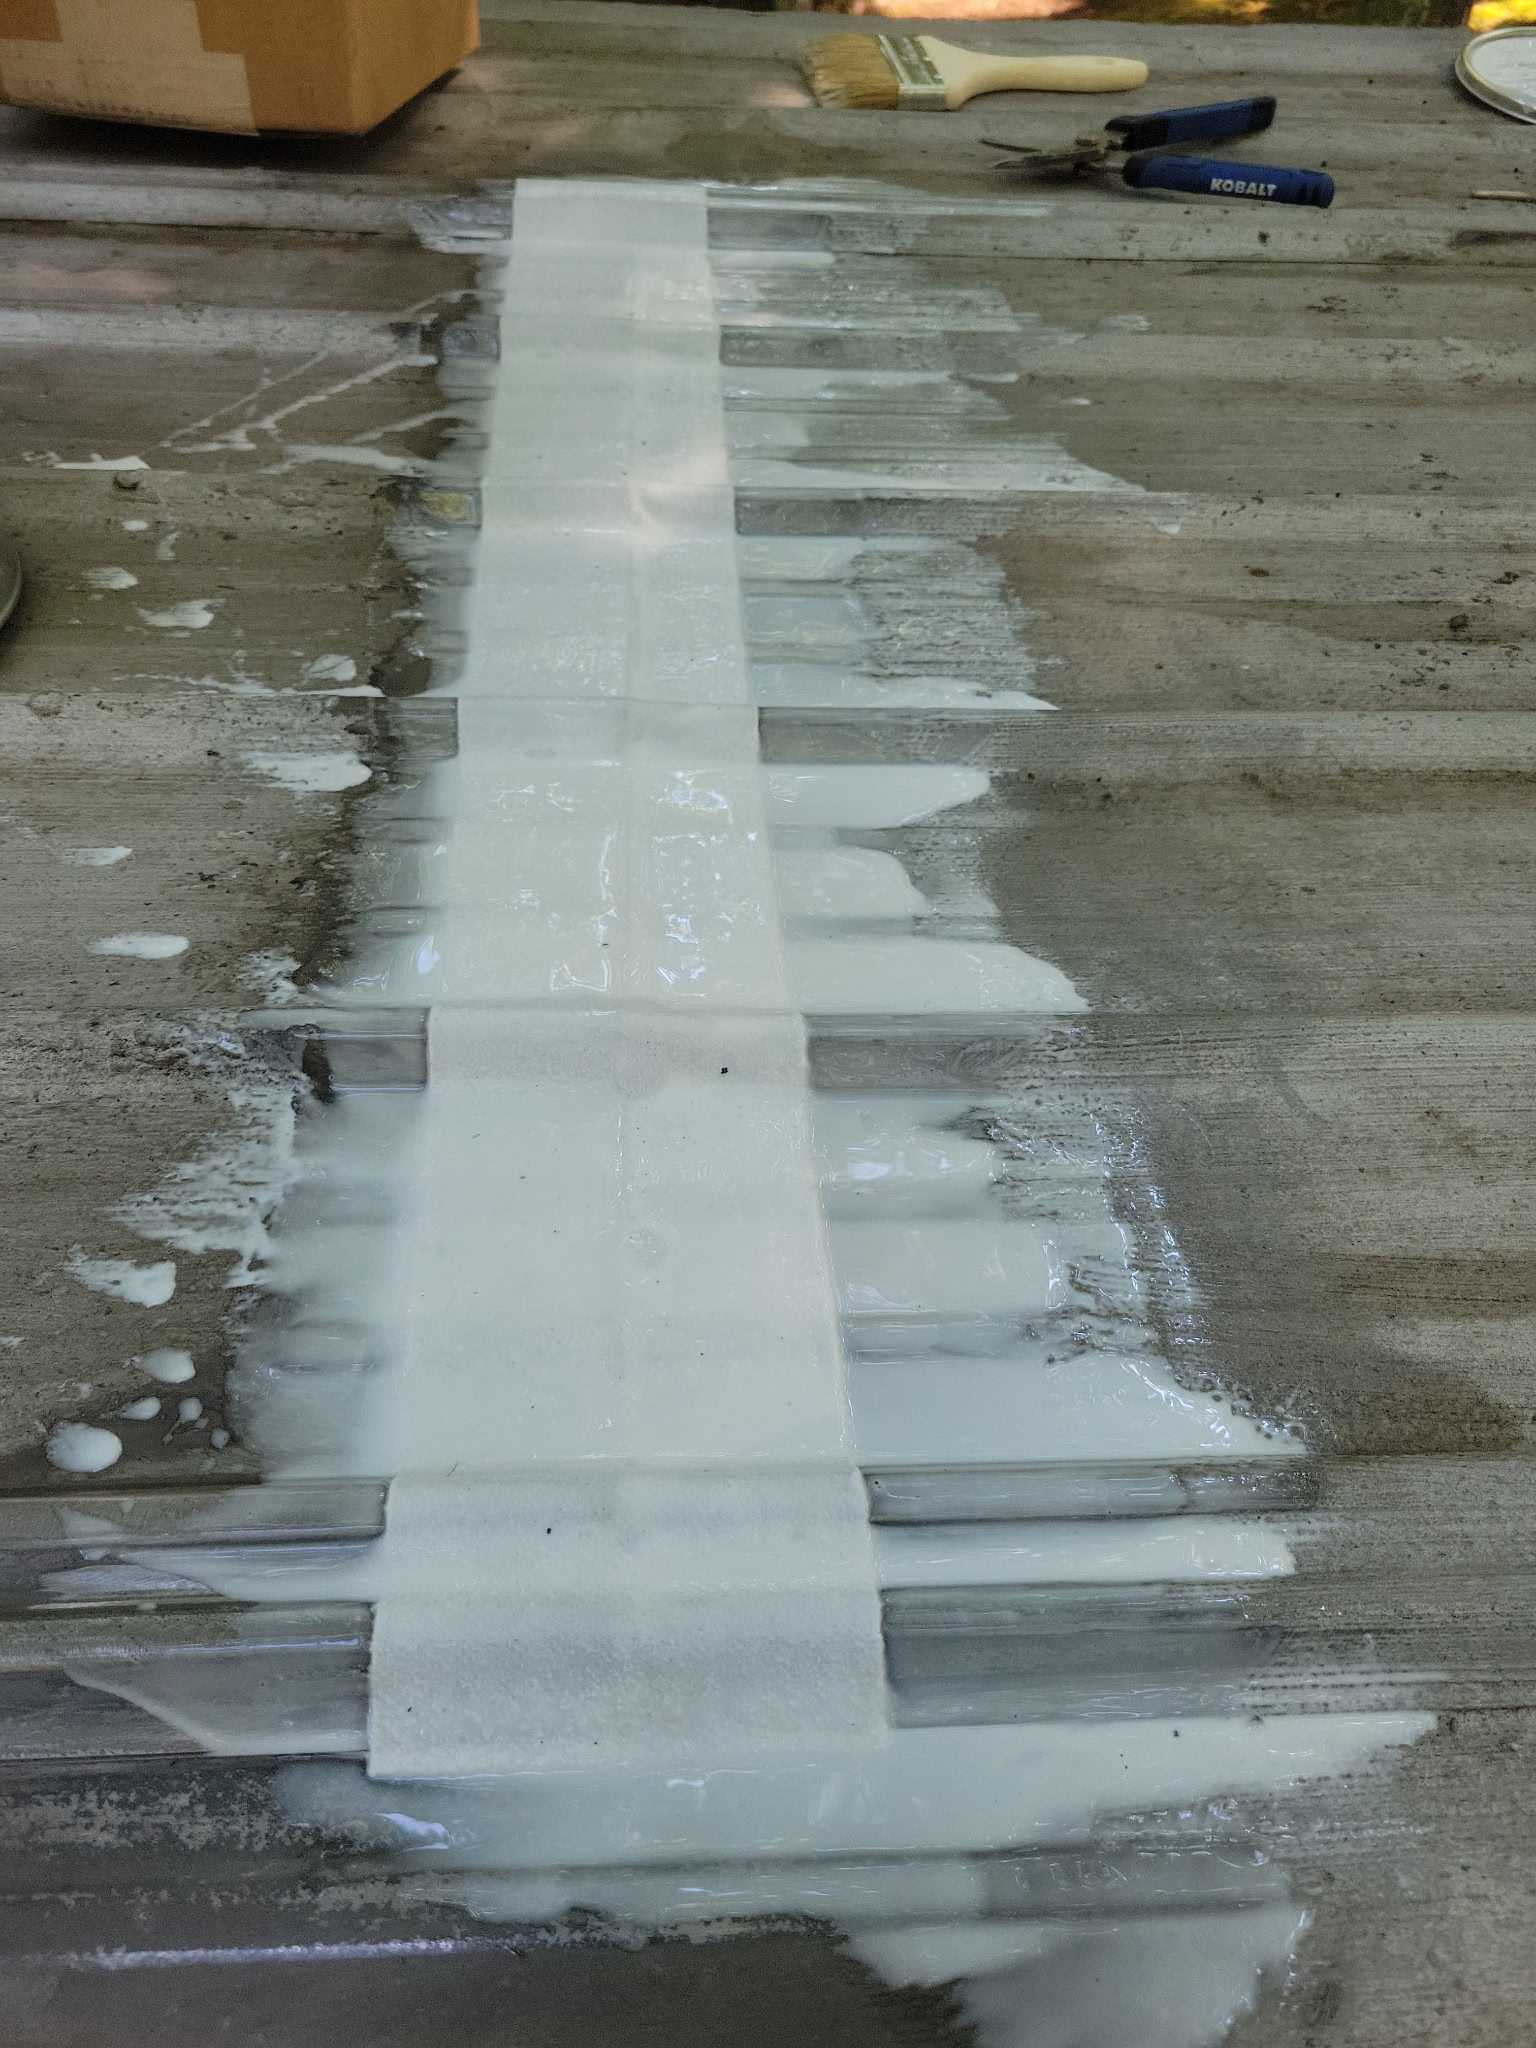
See Turbo Poly Seal and polyester fleece being applied along a metal roof seam. The photos show the fleece being covered and the top coat being applied. Watch the video for the demonstration.
Question
Answer
Additional details
How to apply Turbo Poly Seal over a seam repair
Turbo Poly Seal builds up more thickly on horizontal surfaces than on vertical surfaces, so horizontal repairs generally use more sealant. Avoid spreading it too thinly just to increase coverage.
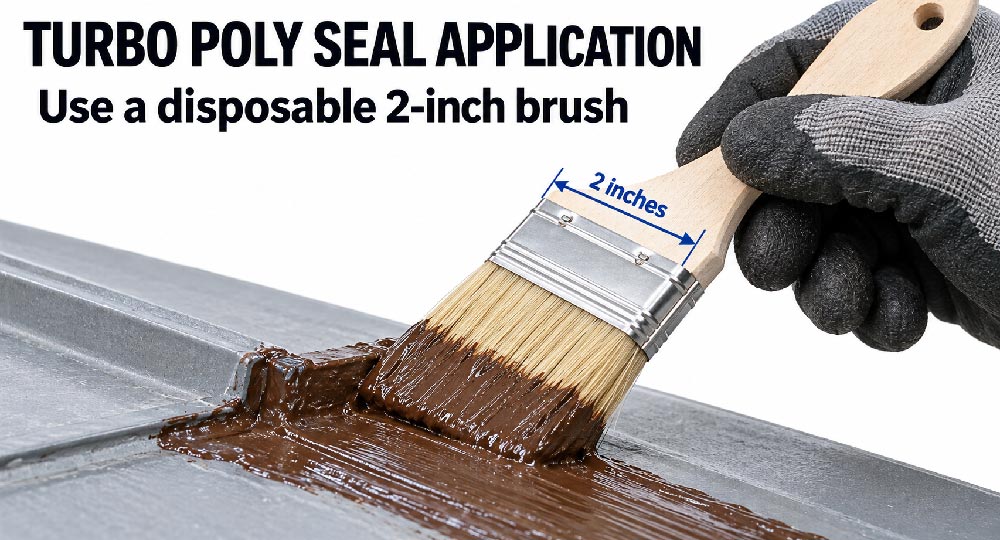
- Apply the base coat: Brush on a thin, even layer of Turbo Poly Seal, slightly wider than the polyester fleece.
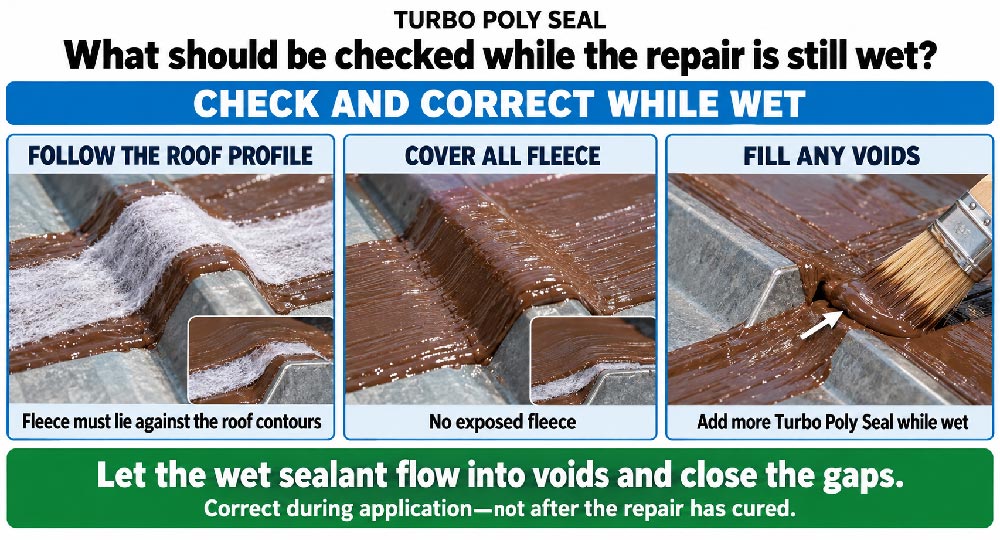
- Embed the fleece: Press the fleece into the wet base coat immediately, following the shape and contours of the surface. Make sure there are no gaps, air pockets, or spaces beneath it.
- Completely cover the fleece: Apply a generous topcoat. If you can still see the fabric’s weave, add more Turbo Poly Seal until the pattern is no longer visible.
- Avoid overbrushing: Turbo Poly Seal begins forming a skin quickly. Brushing over material that has started setting can leave brush marks and a rough finish.
- Add sealant where needed: If an area needs more coverage while you are applying the topcoat, load the brush with fresh sealant rather than repeatedly brushing the same material thinner.
Watch the video below to see how to apply Turbo Poly Seal to a metal roof seam.
Photos
Related videos
Question
Answer
Polyester Fleece
Additional details
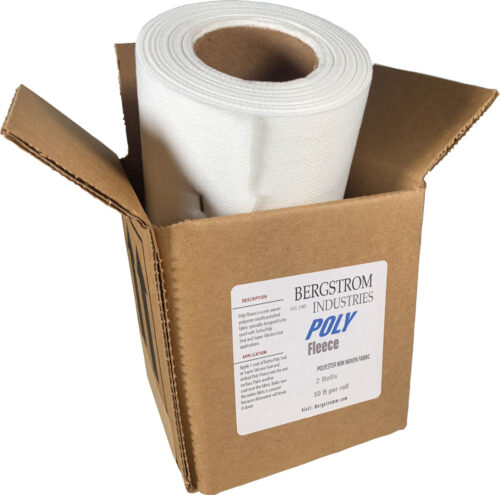 Poly Fleece roof leak repair 1 Roll - 50 ftView product →
Preparation
Question
Answer
Asphalt or Torch-Down Roofs
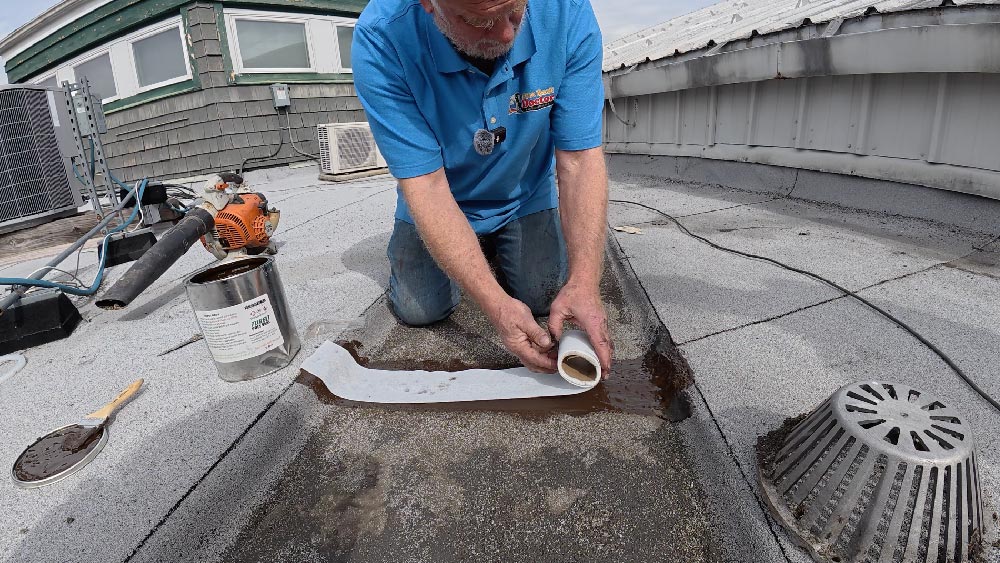
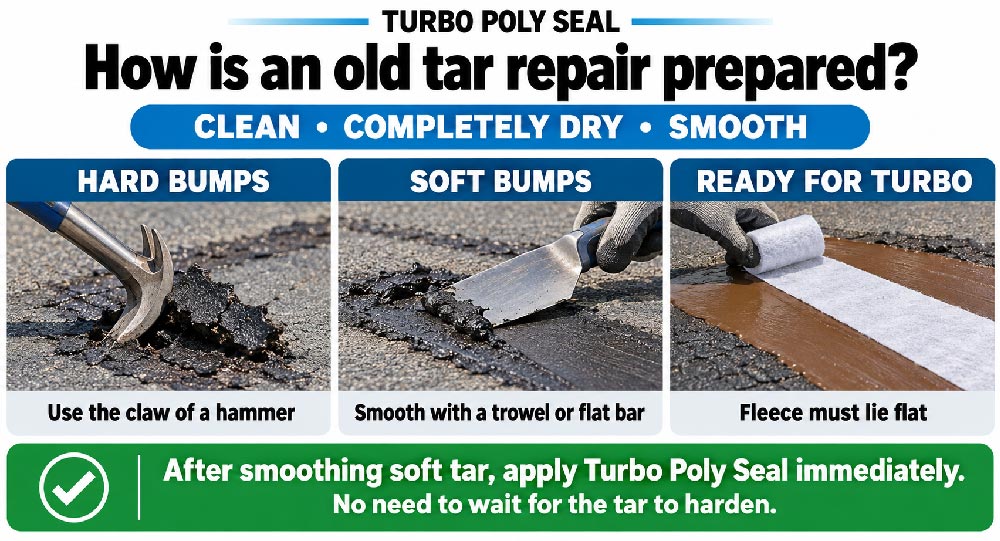
- Scrub the repair area with a stiff-bristled brush to loosen dirt and dust.
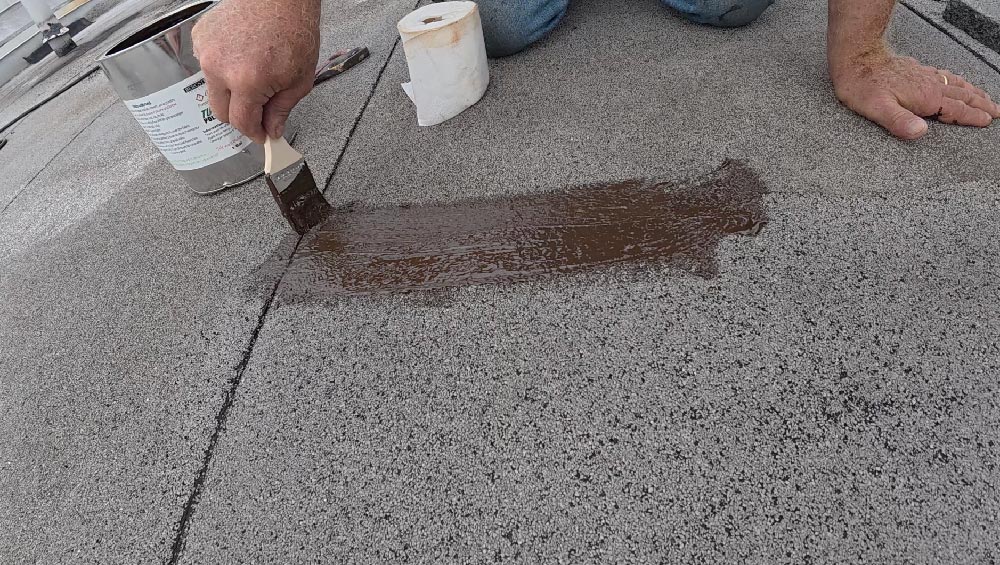
- Use a leaf blower to clear away the loosened debris.
- Remove unwanted caulking, tar, and old repair materials with a scraper or flat bar.
- Flatten or remove raised tar deposits and bumps to create a reasonably smooth surface.
- Clear away any remaining debris and make sure the surface is completely dry.
Metal Surfaces
- Remove old repair materials from the repair area.
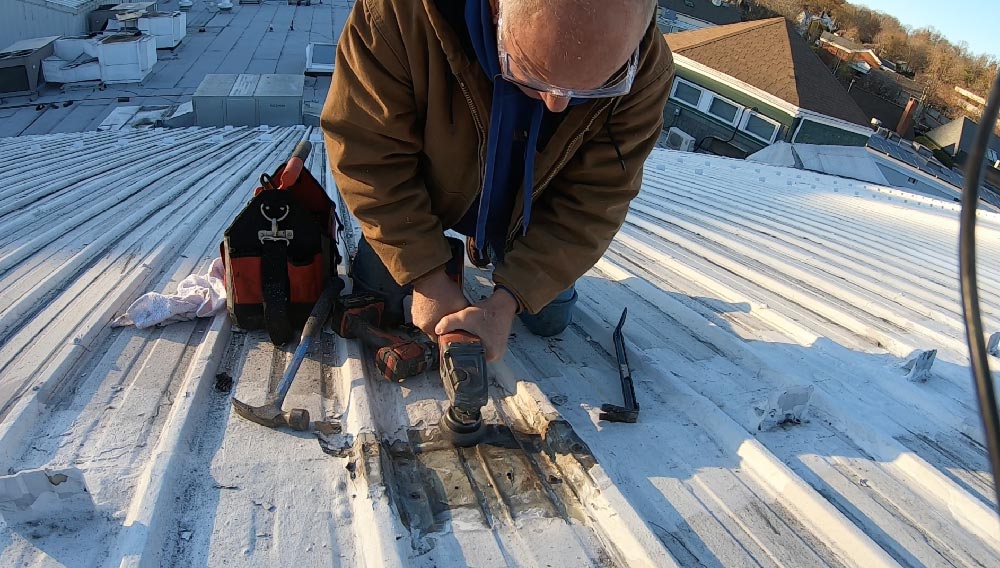
- Use an angle grinder fitted with a steel wire brush to remove unwanted caulking and sealants.
- Remove any latex paint from the area where Turbo Poly Seal will bond.
- Wipe the metal with lacquer thinner and a clean rag to remove residue, including any thin silicone film spread across the surface during grinding.
- Allow the surface to dry completely before applying Turbo Poly Seal.
Metal Flashing at Brick, Block, or Stucco Walls
- Remove old tar, caulking, and sealants from the repair area.
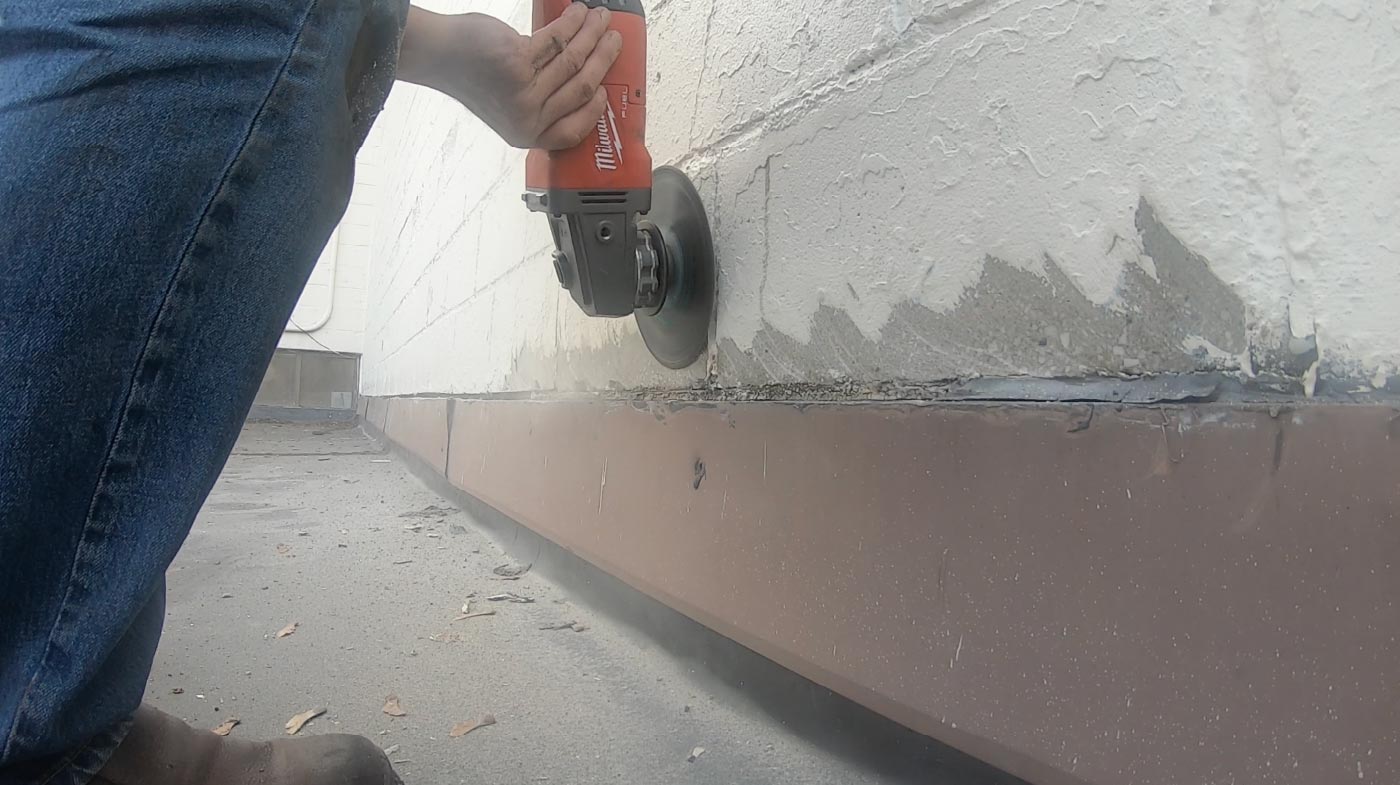
- Use an angle grinder with a suitable attachment to remove loose or flaking paint from the bonding surfaces.
- If the gap between the flashing and the wall is wider than ½ inch, fill it with butyl caulk to support the fleece across the gap.
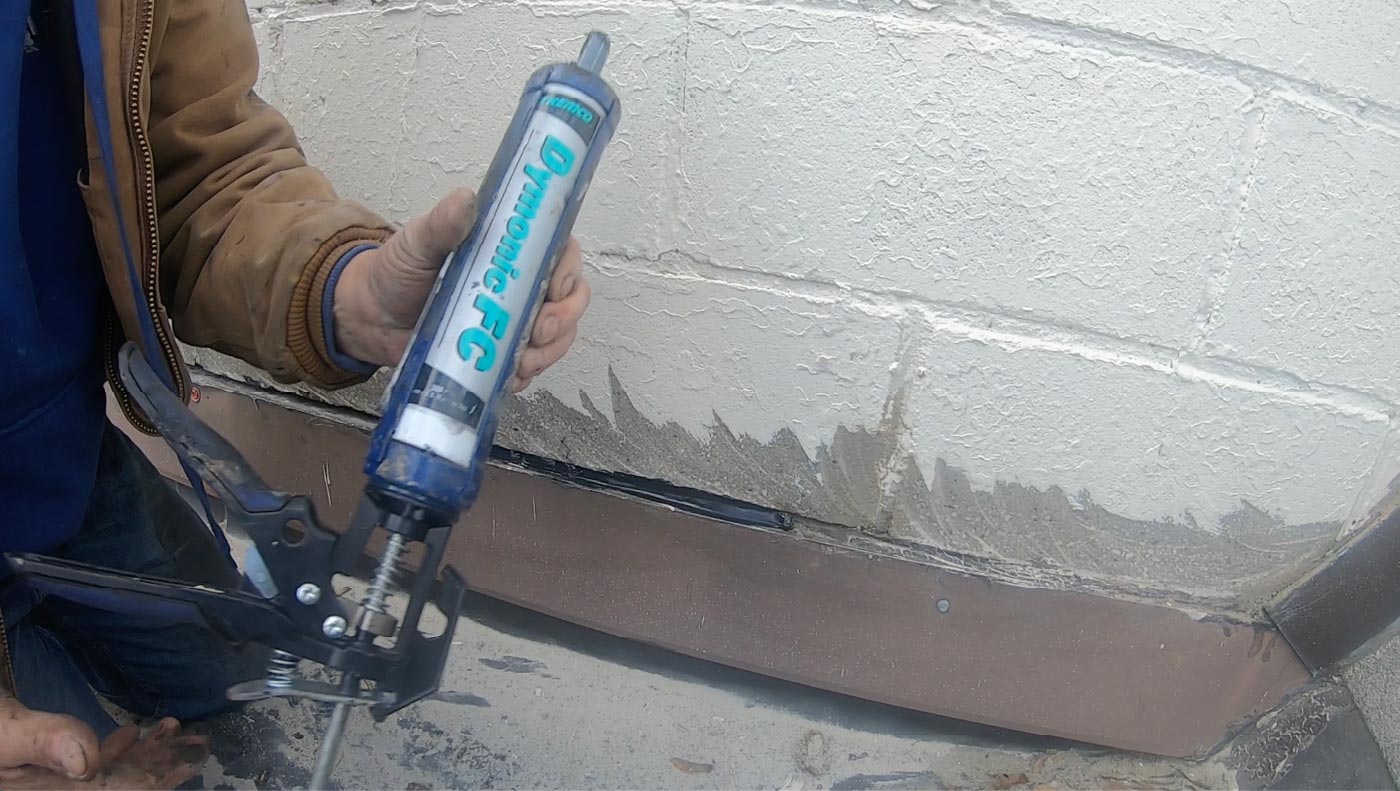
- If the flashing is loose, secure it firmly against the wall with suitable masonry fasteners.
- If needed, wipe the metal flashing with lacquer thinner and a clean rag.
- Make sure both the wall and the flashing are clean and completely dry before applying Turbo Poly Seal.
How to prepare Metal Roof Screws for sealant
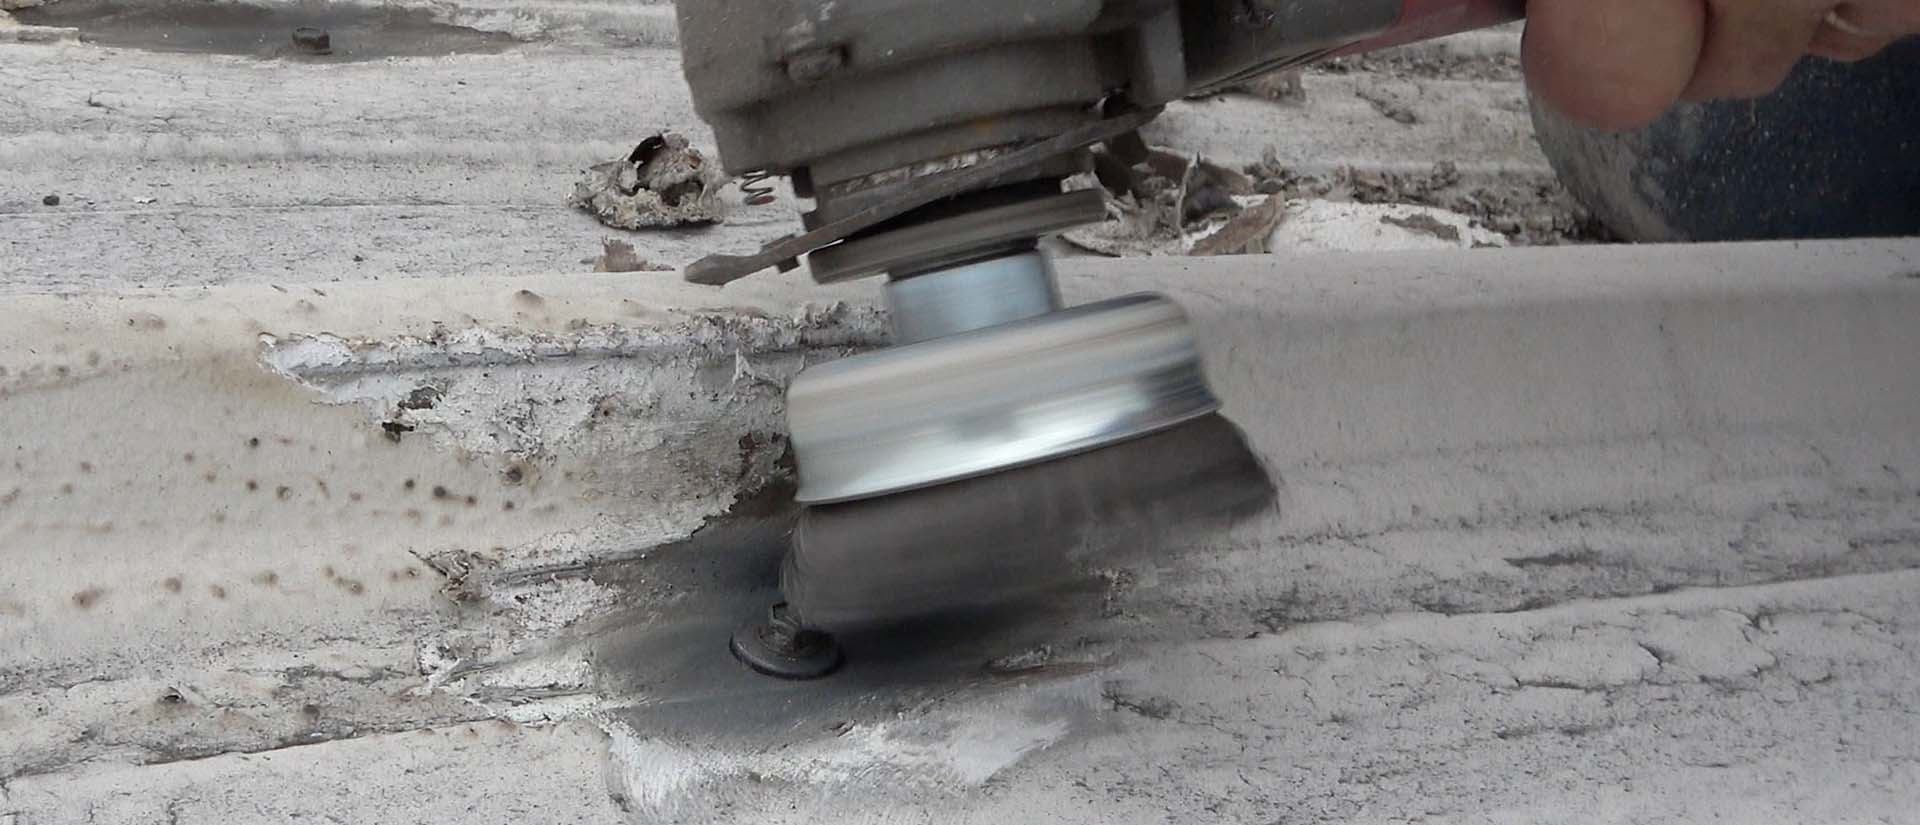
- Use an angle grinder with a metal cup brush to remove old caulking.
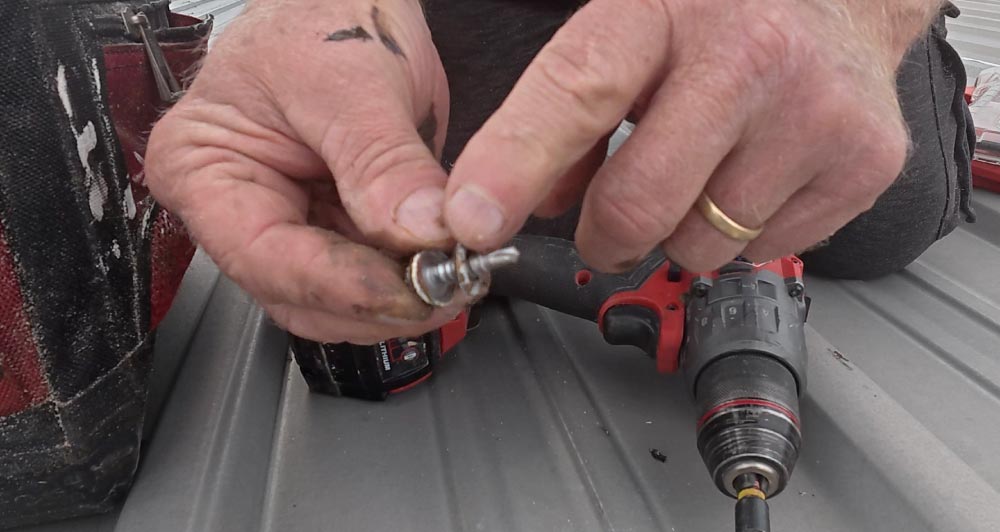
- Tighten the existing screw so the neoprene washer is tight against the metal roof surface. If the screw will not tighten, then replace it with a larger screw and neoprene washer.
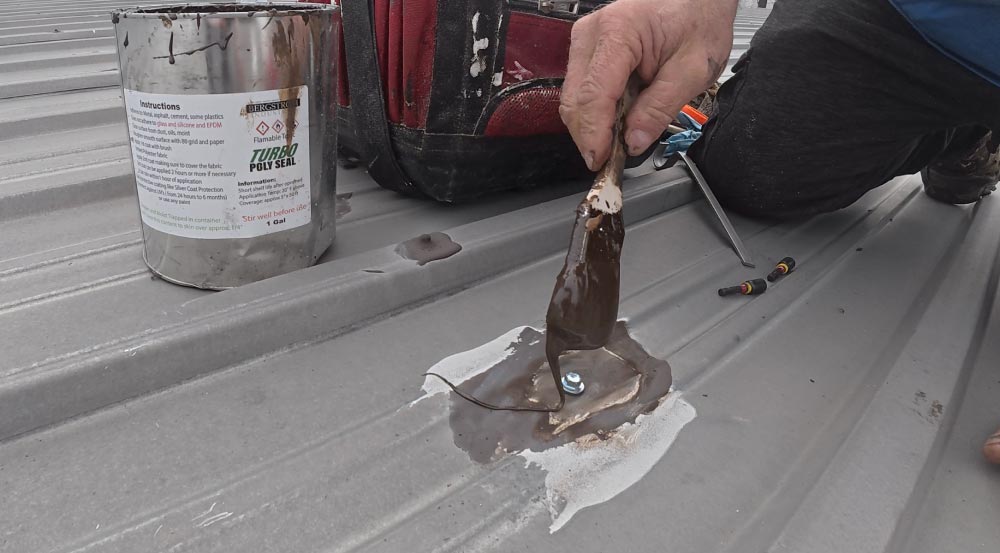
- Add a dab of Turbo Poly seal covering the entire screw and washer
Additional details
Related videos


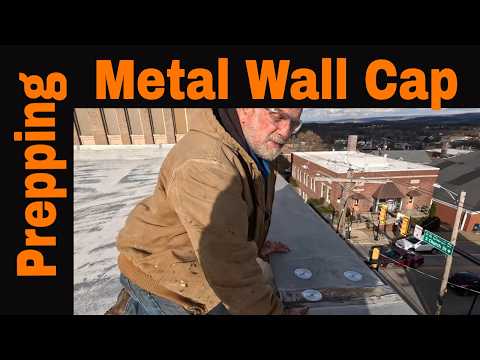
Question
Answer
TPO preparation, as provided by Bergstrom Industries:
- Wipe the TPO surface with a rag and lacquer thinner to remove unwanted surface residue.
- Remove any silicone caulking from the repair area.
- Ensure the surface is completely dry.
- Apply Turbo Poly Seal with polyester fleece.
Question
Answer
Torch-down roofing comes with a plain or granulated surface:
- If there is no paint or aluminum asphalt coating, use a stiff-bristled brush to remove dust, then clear the repair area with a leaf blower.
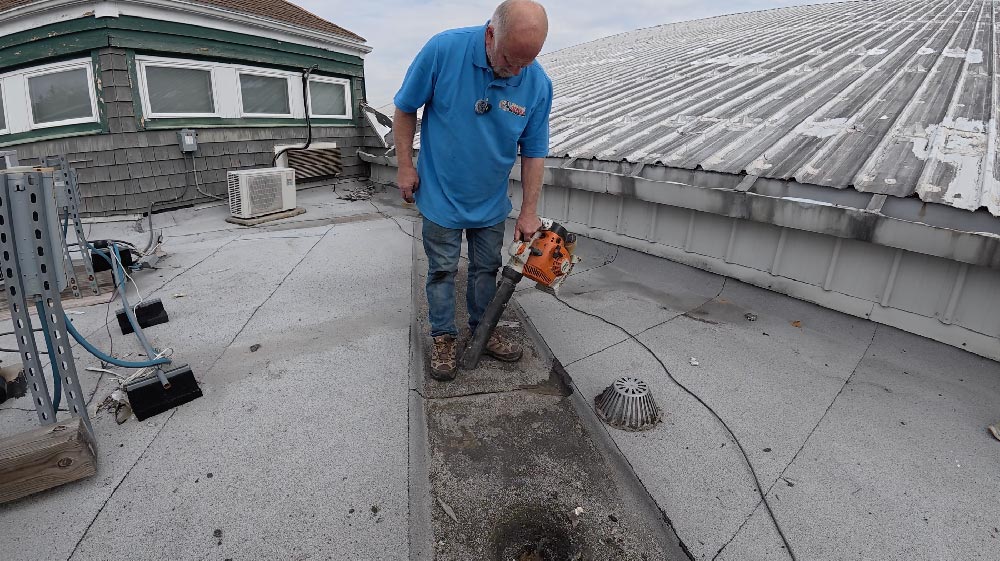
- If ordinary paint or aluminum asphalt (silver coating) is present, remove it from the repair area first. Use an angle grinder with a stiff metal brush. ( plain or smooth surface membrane)
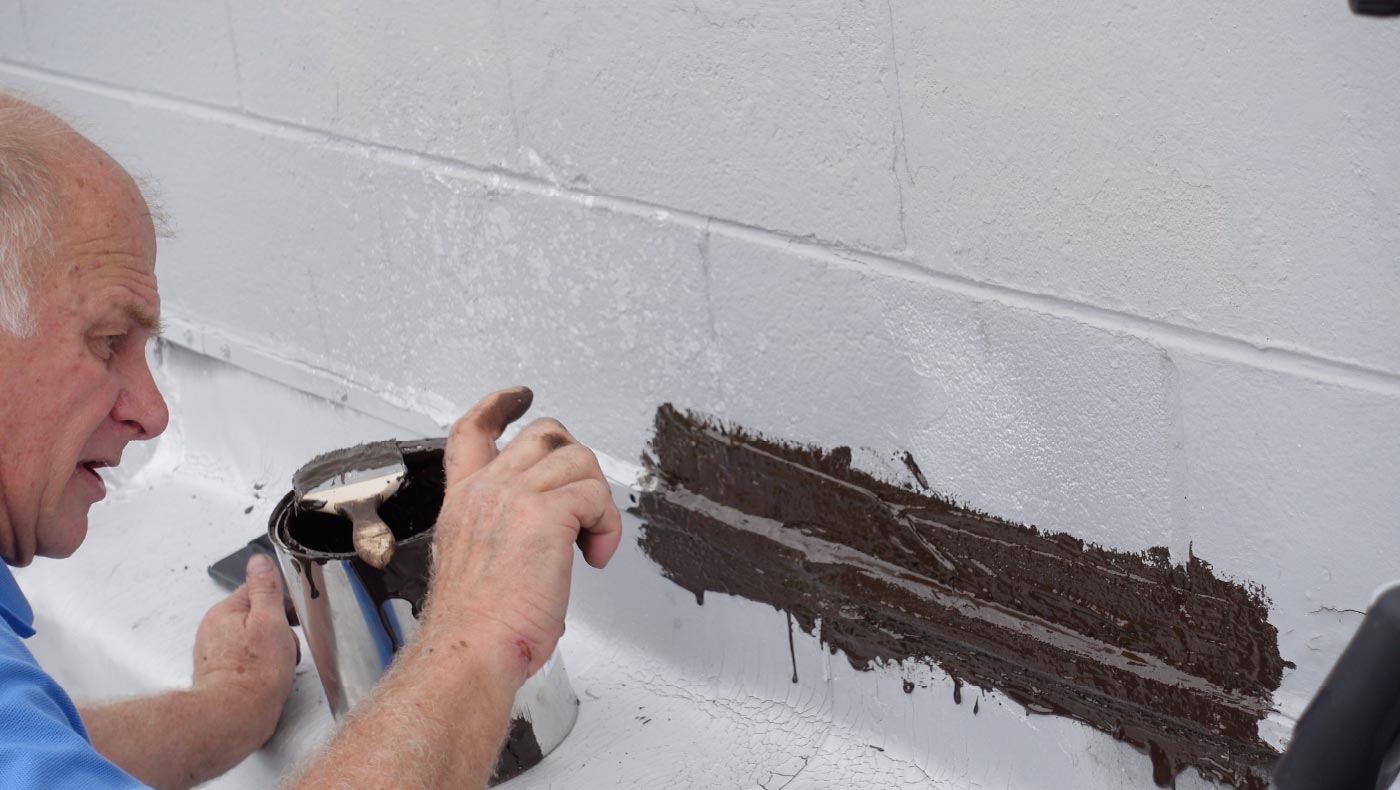
- If the membrane has a granulated surface, you may be able to leave it as-is and apply Turbo Poly Seal directly over it.
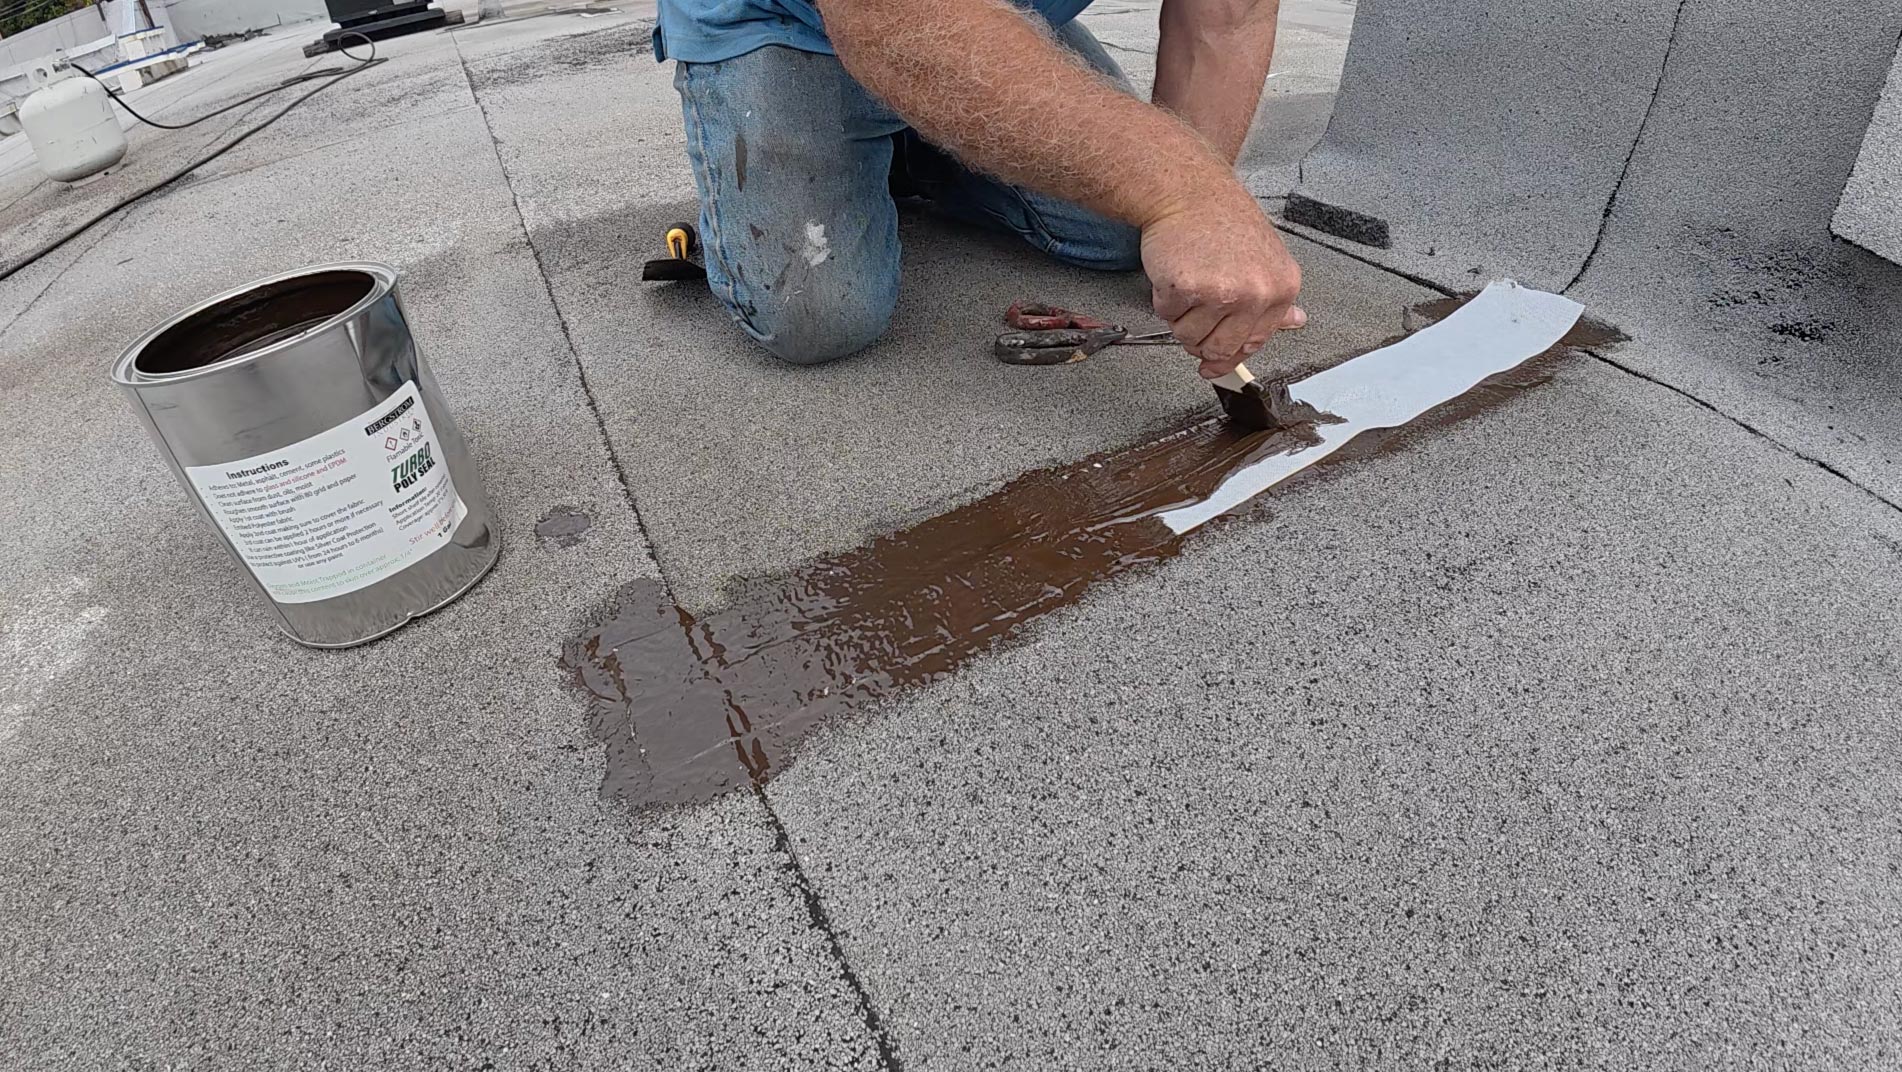
- Once the surface is fairly clean and completely dry, apply Turbo Poly Seal.
Photos
Question
Answer
- Remove any coating covering the seam and surrounding repair area using an angle grinder fitted with a steel wire brush.
- If adhesive tape is present, carefully soften it with a propane torch and lift it off with a flat bar.
- Use the angle grinder and steel wire brush to remove remaining adhesive and caulking.
- Thoroughly clean around the fasteners that hold the metal panels together.

- Once the surface has cooled and all flames are extinguished, wipe the repair area with a clean rag dampened with lacquer thinner to remove silicone and paint residue.
- Allow the surface to dry completely before applying the repair materials.

Photos
Application
Question
Answer
Why must polyester fleece be completely covered with Turbo Poly Seal?
What happens if the fleece is not fully covered?
- Proper coverage provides strength and protection: The fleece sits between the base coat and topcoat, reinforcing the sealant while remaining protected from exposure.
- Thin coverage weakens the repair: If the fabric’s weave is still visible, the topcoat is too thin and needs more Turbo Poly Seal.
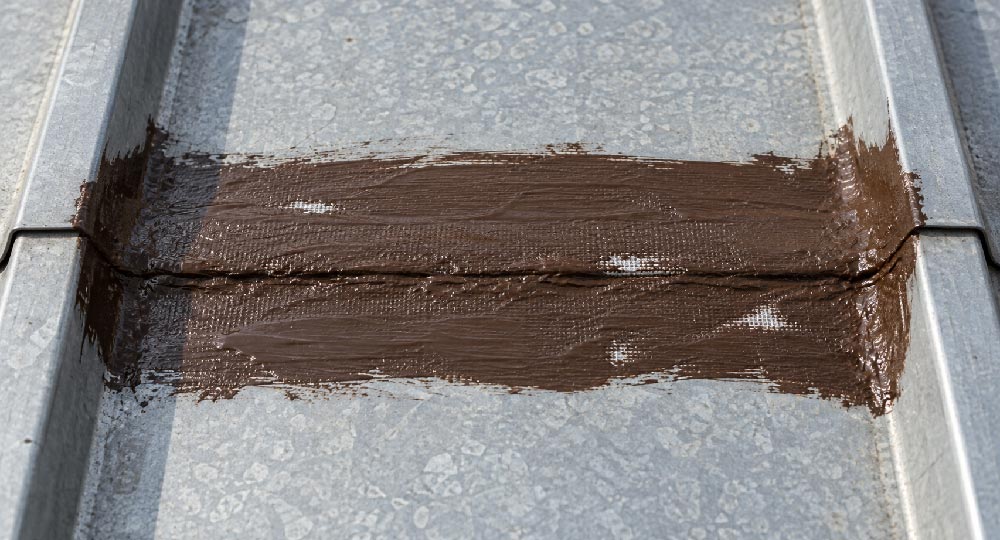
- Exposure can damage the fleece: As an insufficient topcoat wears away, sunlight can reach the fleece and cause it to deteriorate.
- The repair can fail prematurely: Inadequate coverage reduces the repair’s durability and expected lifespan.
Apply a generous topcoat until the fleece is completely covered and its weave is no longer visible. Do not stretch the sealant too thin just to cover a larger area.
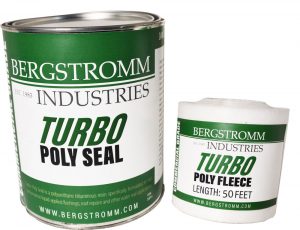 Turbo Poly Seal Roof Repair Kit – 1 Gallon + 50 ft Poly FleeceView product →
Question
Answer
Question
Answer
Question
Answer
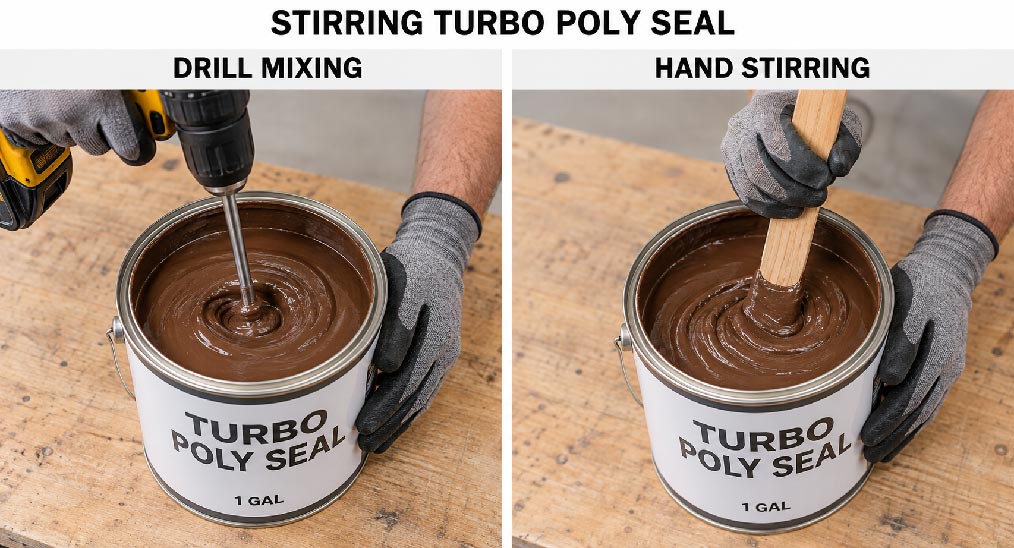
Should I stir Turbo Poly Seal before using it?
How to mix it
- Stir thoroughly by hand: Vigorous hand stirring is sufficient.
- Mix until the color is uniform: Continue until the sealant has a consistent brown appearance throughout, with no greenish layer or streaks remaining.
- Apply once fully mixed: The uniform brown color is your visual indication that Turbo Poly Seal is ready to use.
Question
Answer
Question
Answer
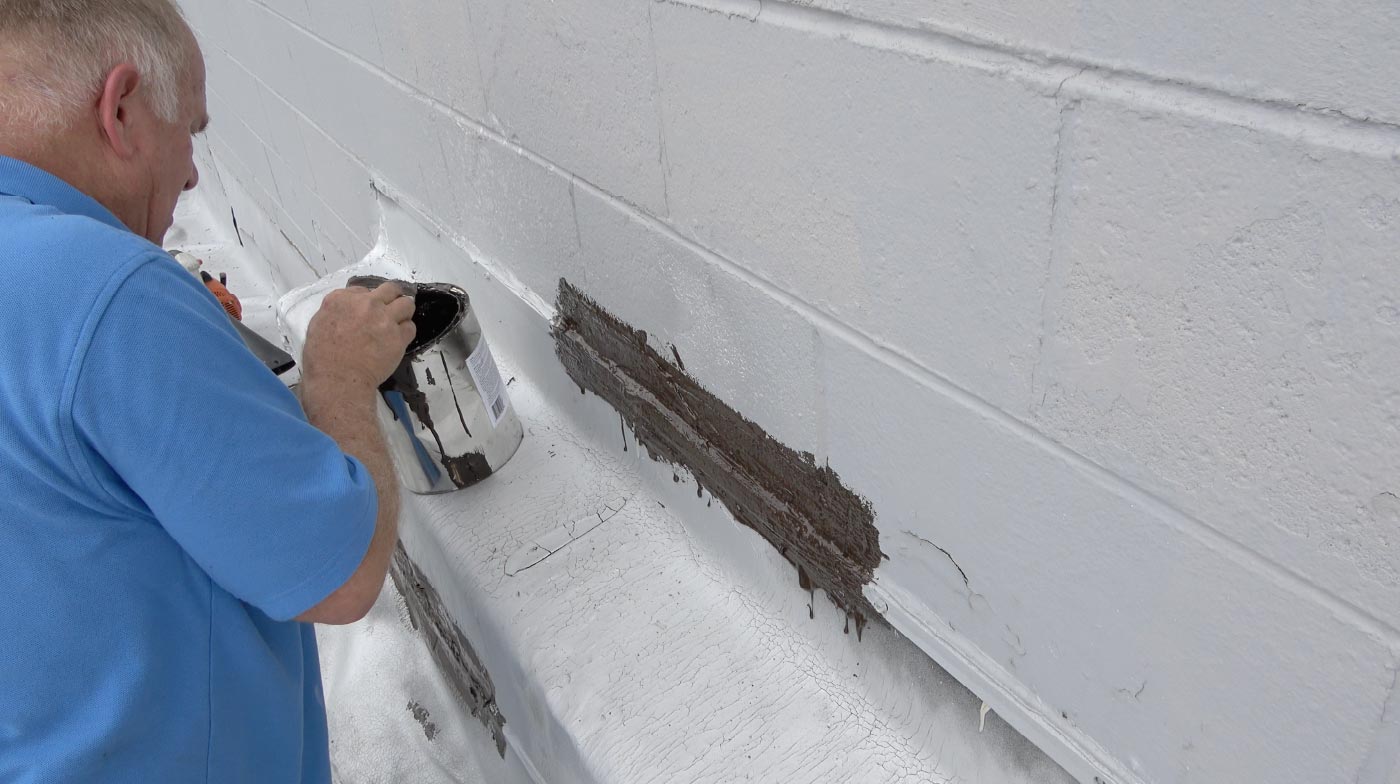
- Prepare the repair surface and ensure it is completely dry.
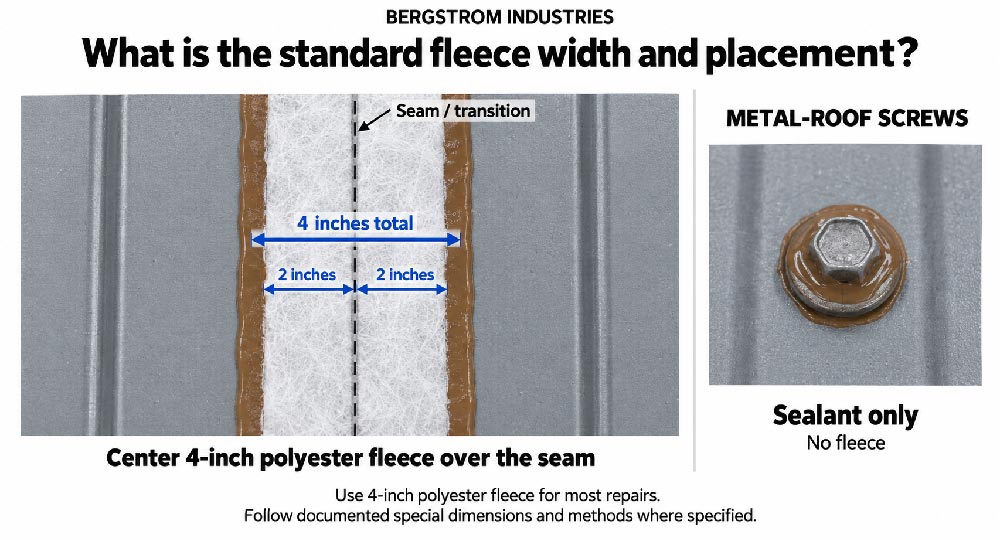
- Apply a relatively thin first coat of Turbo Poly Seal. The polyester fleece comes in 4-inch-wide rolls, so paint the first coat slightly wider than 4 inches to embed the entire width of the fleece.
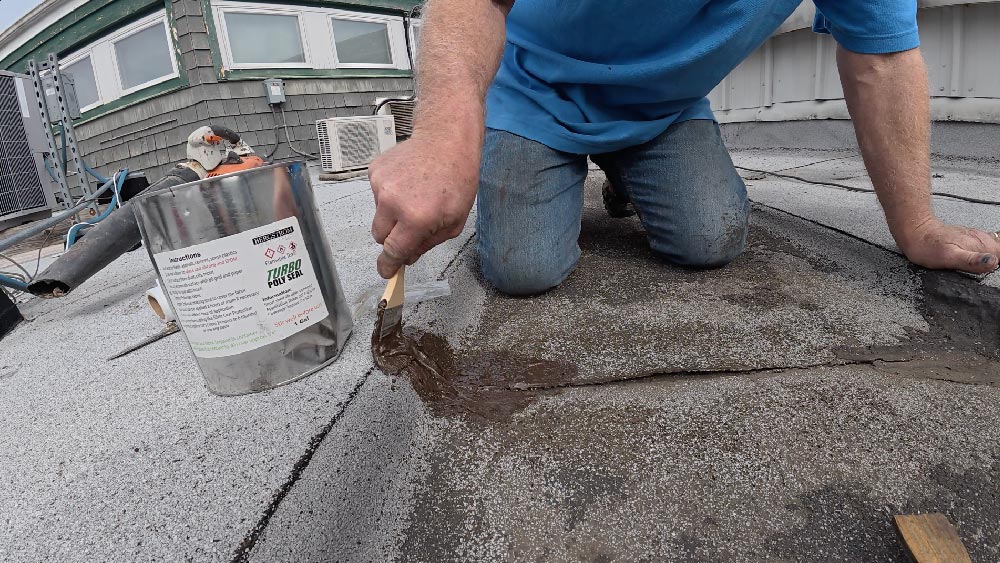
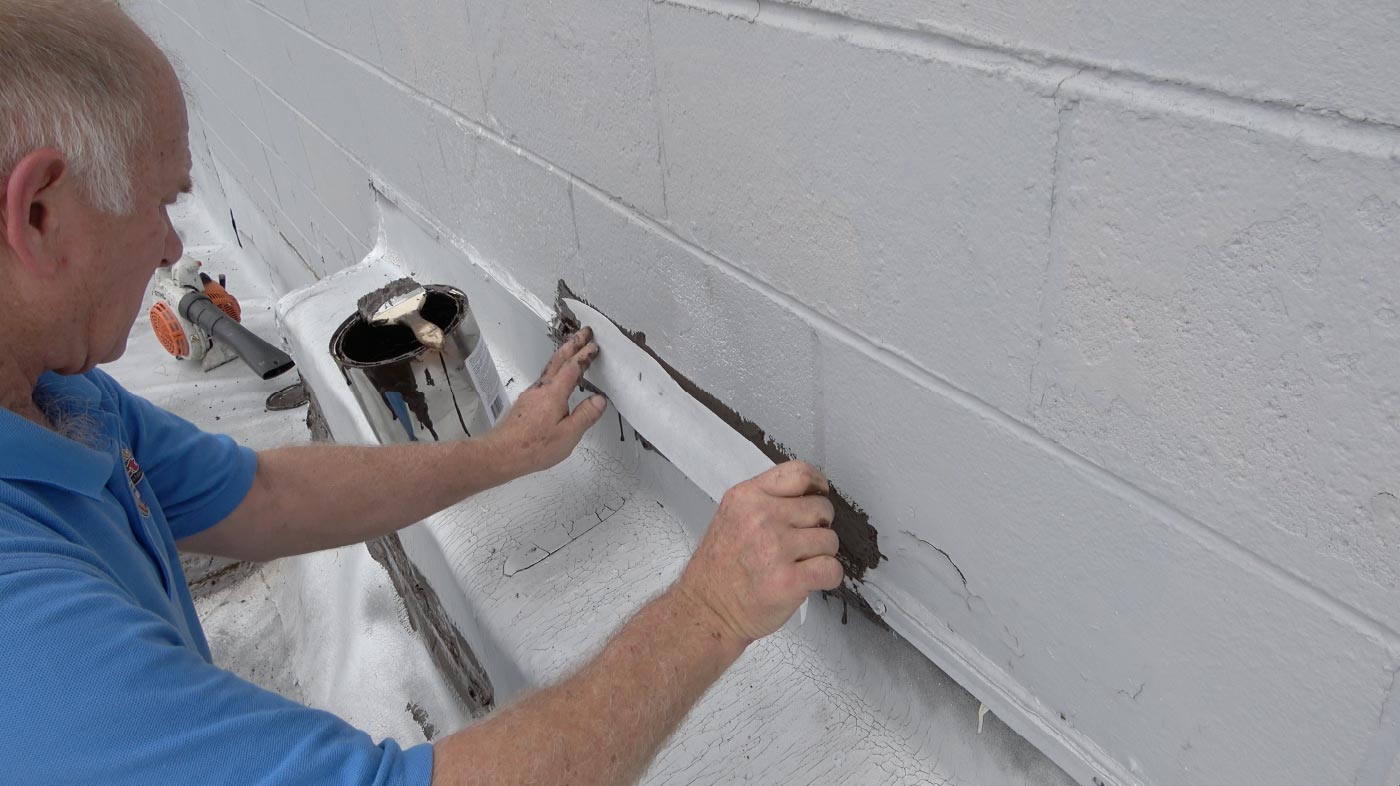
- Position the fleece so it extends 1 inch beyond the crack on each side and 1 inch past both ends, as recommended by Bergstrom Industries. Immediately embed the fleece into the wet first coat, before a surface skin forms. A skin will prevent proper embedding.
- Where two pieces of fleece meet, overlap them by 1/2 inch and apply Turbo Poly Seal between the overlapping pieces.
- While the first coat is still wet, apply a relatively thick top coat, fully covering the fleece. The fleece is designed to let Turbo Poly Seal flow through its pores so the top coat connects with the first coat.
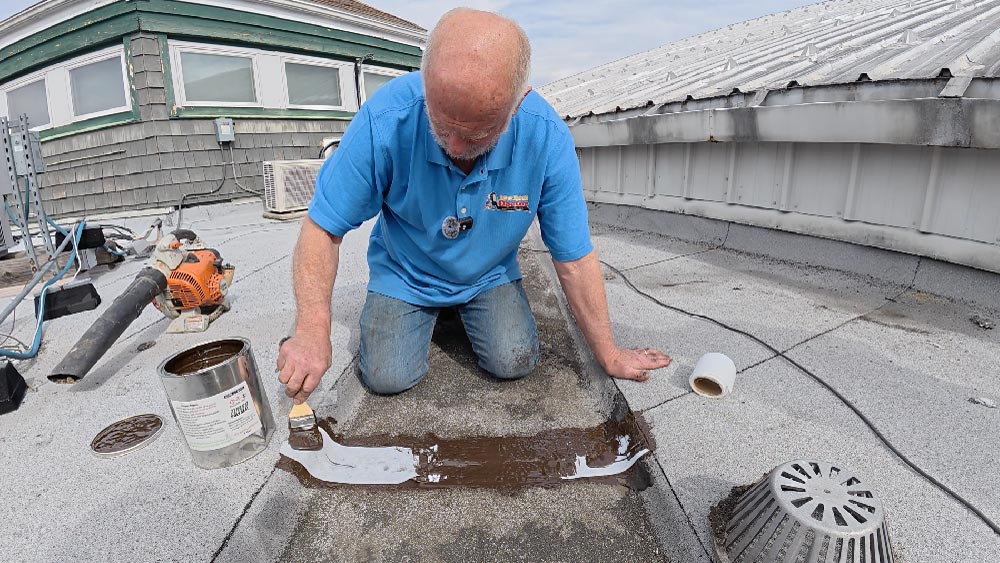
- Check the top-coat coverage: neither the fabric pattern nor any white fleece should remain visible. The top coat must cover the fleece completely.
Question
Answer
Question
Answer
Weather and curing
Question
Answer

Question
Answer
Question
Answer
Question
Answer
Storage
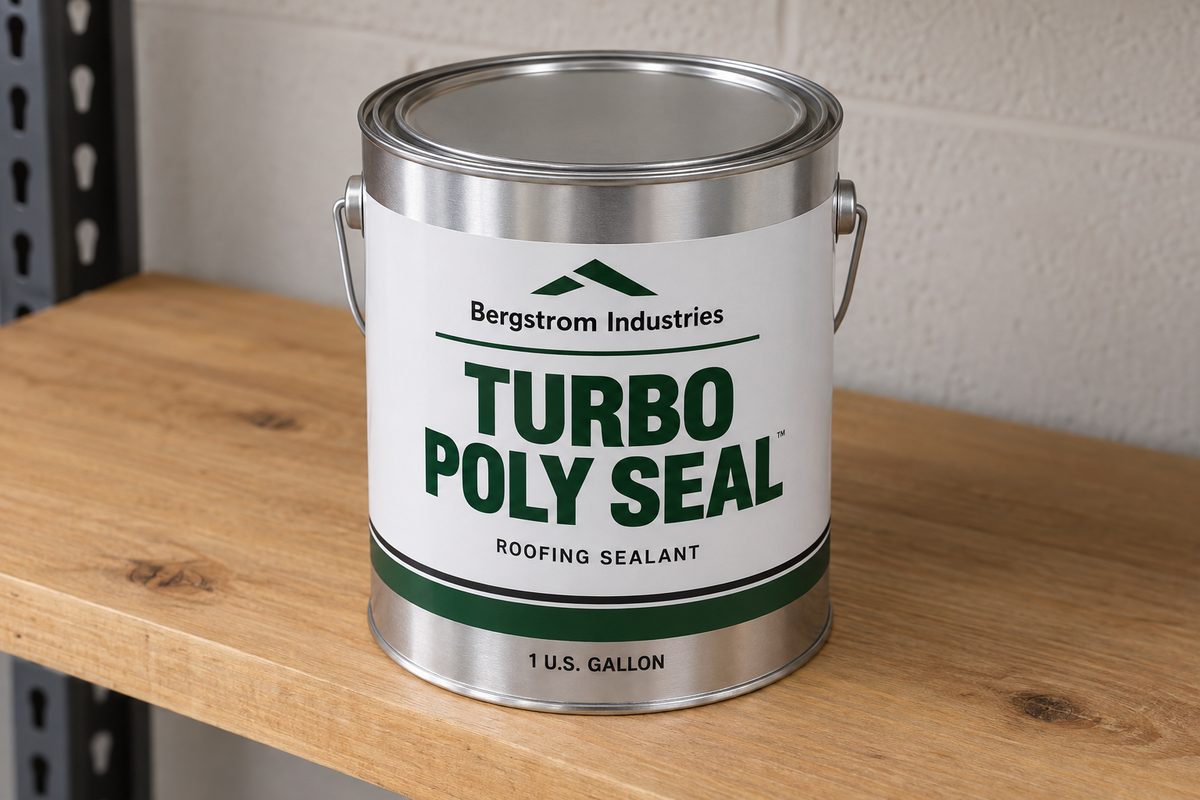
Storing Turbo Poly Seal
Keep the lid tightly sealed and store in a cool, dry place.
Question
Answer
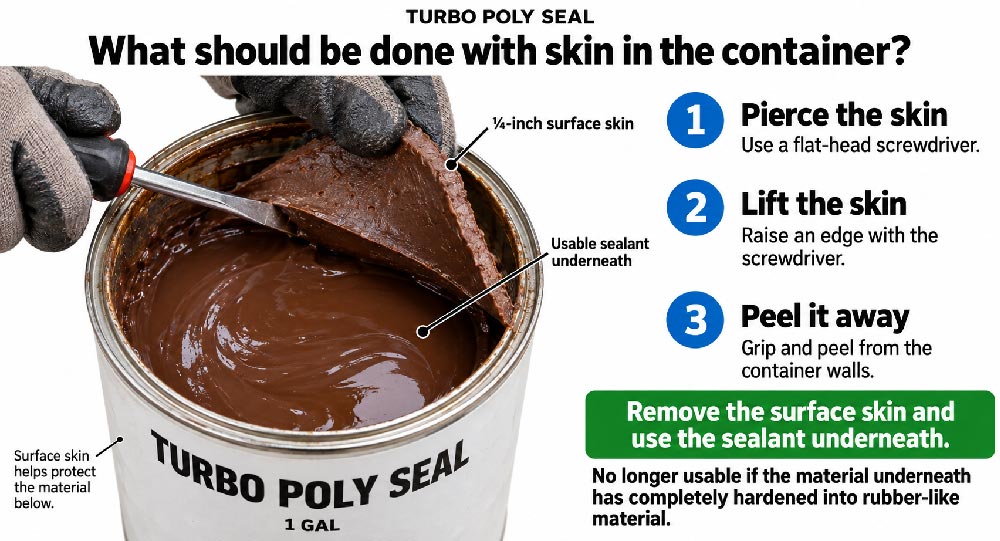
To remove the surface skin:
- Use a flat-head screwdriver to pierce a hole in the skin.
- Lift the skin with the screwdriver.
- Grip the lifted skin as needed and peel it away from the container walls.
Question
Answer
Resealing the container:
- Remove any spilled sealant from the rim groove where the lid seats. Use a rag and a screwdriver to reach into the groove.
- Replace the lid on the container.
- Use a small rubber mallet to tap the lid down until it makes a tight seal.
Recoating
Question
Answer
Protection and maintenance
Question
Answer
Question
Answer
Question
Answer
Question
Answer
Cleanup
Question
Answer
Question
Answer
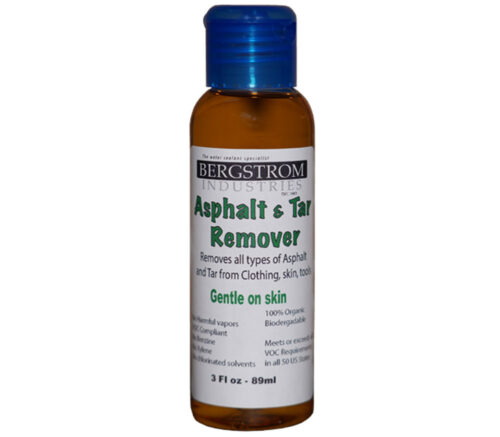 Asphalt and Tar Remover 4 ozView product →. Apply about 1/2 teaspoon to the hands and rub it over the areas with Turbo residue. Keep rubbing until the asphalt dissolves and visibly comes off the skin. The company reports that dissolution begins almost immediately. After a few minutes, wipe off with a paper towel, then wash with water. The lacquer-thinner procedure above is for surrounding surfaces, not the skin-cleanup method. Bergstrom Industries confirms that this tar-remover method also removes dried Turbo residue from skin.


Question
Answer
Question
Answer
Safety and SDS
Question
Answer
Leak diagnosis
Question
Answer
Question
Answer
Question
Answer
Question
Answer
Question
Answer
Troubleshooting
Question
Answer
Question
Answer
Question
Answer
Question
Answer
Torch-down roofs
Question
Answer
- Use a stiff-bristled brush to remove loose ceramic granules and debris around the leaking seam.
- Use a leaf blower to clear away the remaining dust and loose material.
- Make sure the surface is completely dry.
- Apply Turbo Poly Seal along the seam, immediately embed polyester fleece into the wet sealant, and apply a top coat that fully covers the fleece.

Metal roofs
Question
Answer
Metal roof preparation, as provided by Bergstrom Industries:
- If no previous repairs have been attempted, wipe the repair area clean with a wet rag. Original factory-applied paint that is firmly attached should remain and should not be removed.
- If paint or coating was previously applied as a repair, remove all of that repair material from the repair area using an angle grinder with a stiff wire brush.
- If silicone caulking was used, remove it mechanically. Bergstrom Industries recommends wiping the area with lacquer thinner and a rag to remove the silicone film left by grinding.
- Where rust is present, use an angle grinder with a steel wire brush to remove coarse rust and loose rusted material. Bergstrom Industries says removing every trace of rust is unnecessary.
- Allow the cleaned surface to dry completely before applying Turbo Poly Seal.
- No primer is needed on exposed or previously rusted metal. Do not apply new primer or paint before Turbo Poly Seal; this does not mean removing firmly attached original factory paint. Bergstrom Industries advises that paint could react with Turbo Poly Seal and states that Turbo Poly Seal itself acts as a rust inhibitor.
Question
Answer
Question
Answer
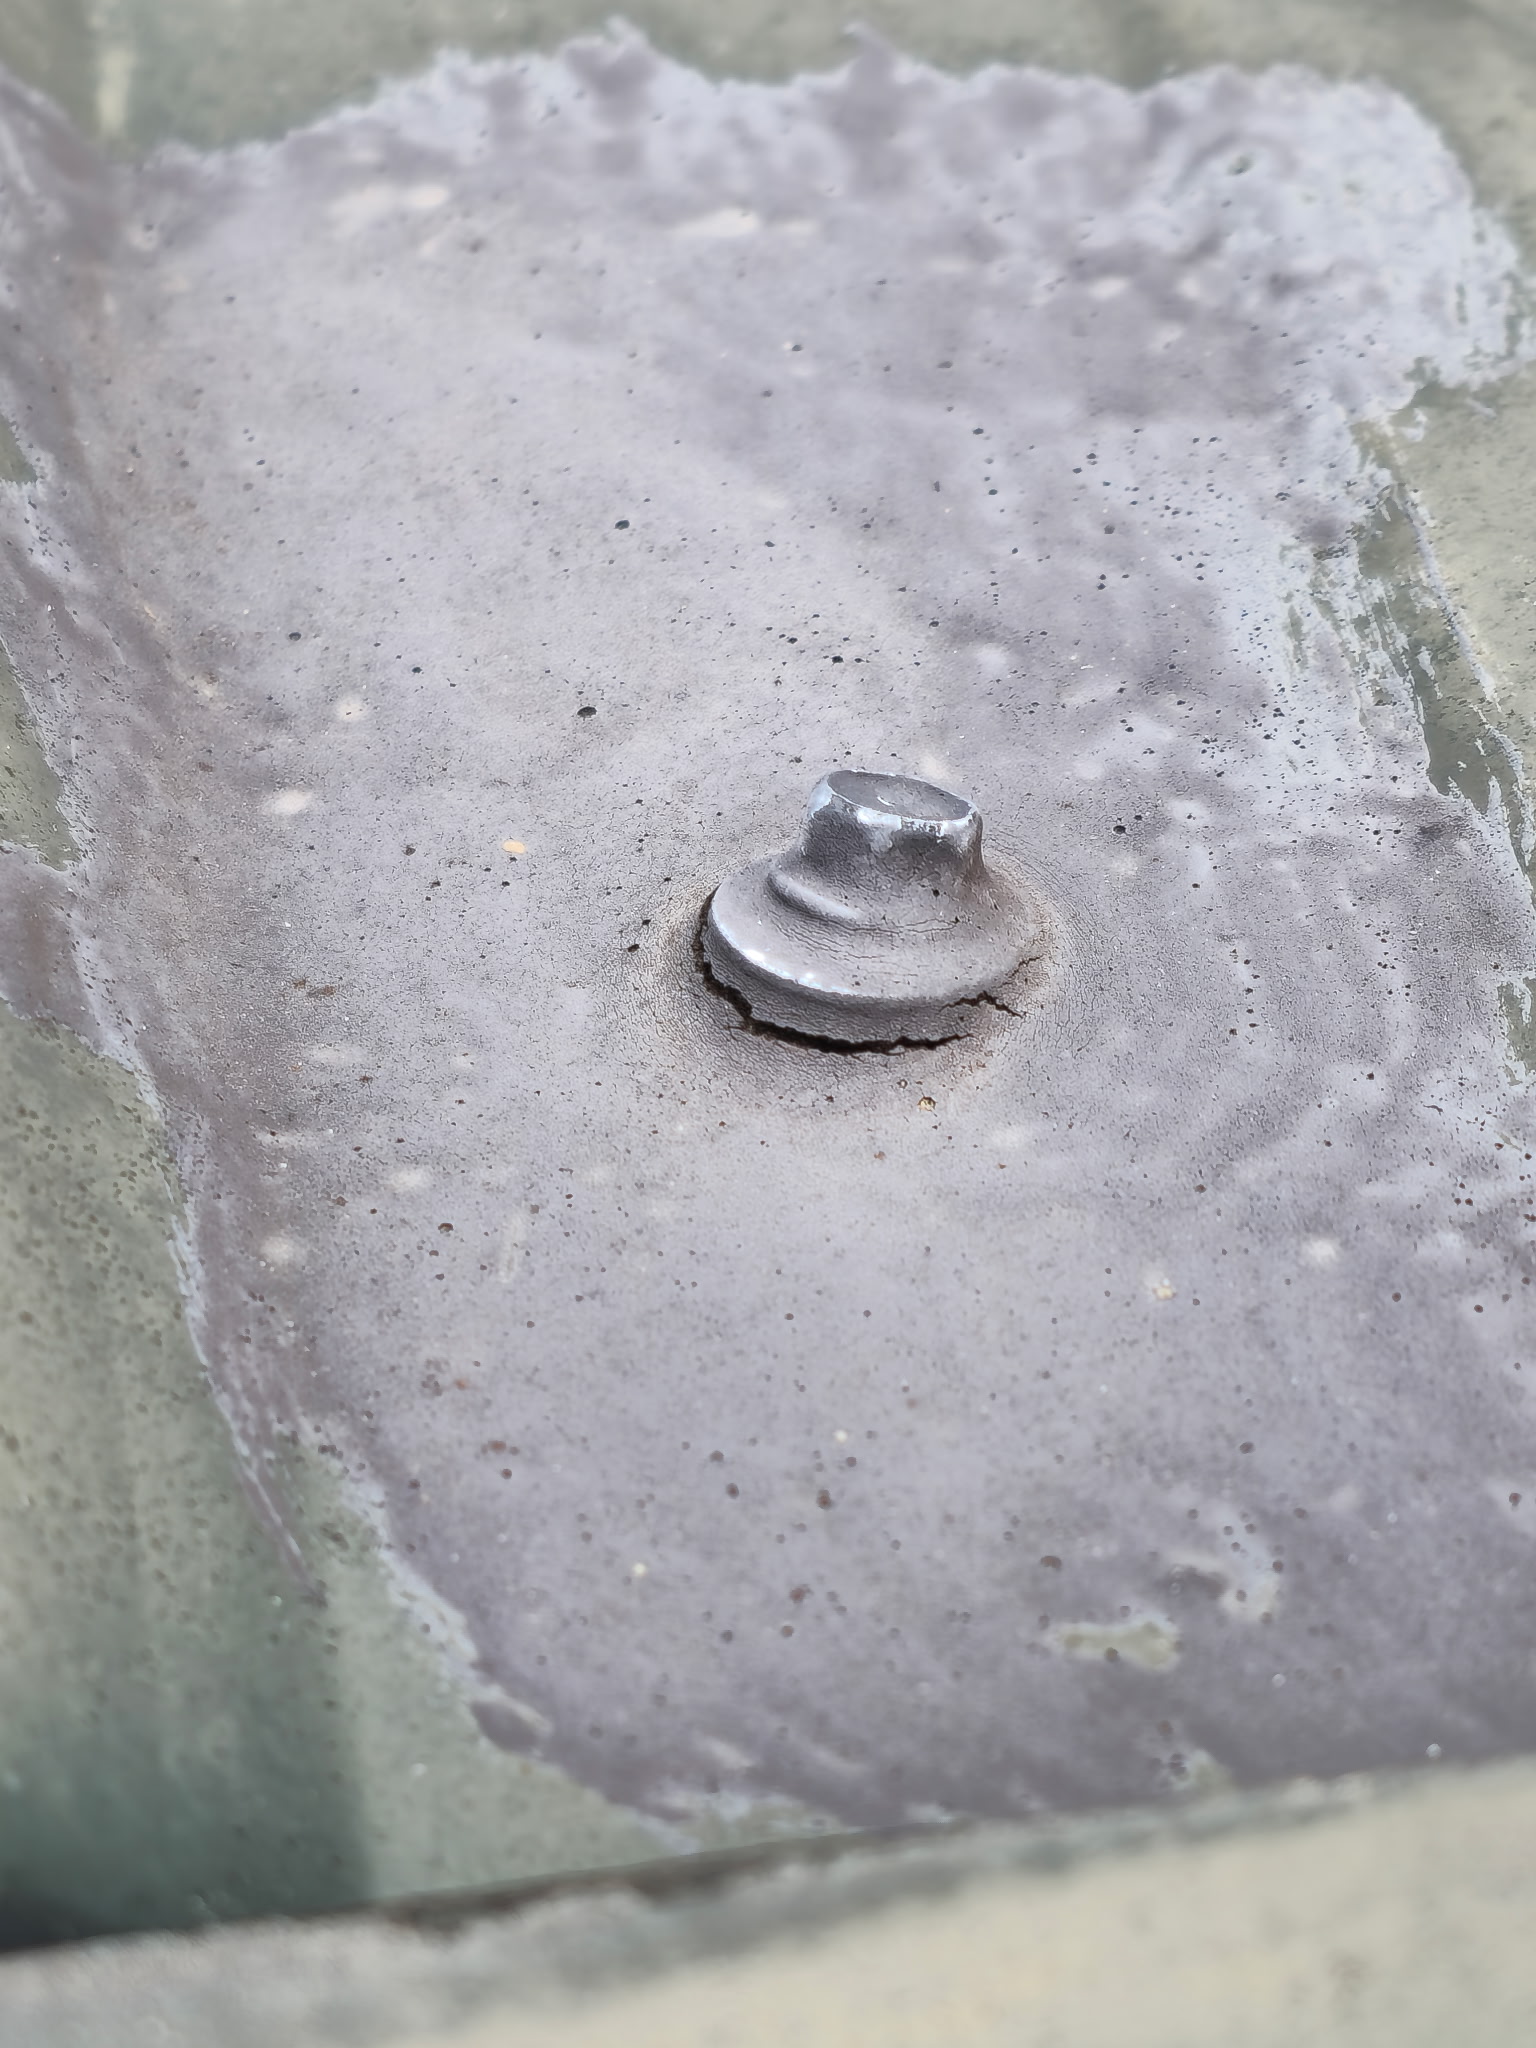
Loose metal roof screws — Bergstrom Industries' repair sequence before sealing:
- Always tighten the screw securely before applying sealant.
- If the screw will not tighten securely, replace it with a larger screw.
- If the larger screw still will not tighten, remove it and fasten the roof with a new screw in a new location approximately 2 inches away.
- Cover the abandoned screw hole with polyester fleece embedded in Turbo Poly Seal and fully covered using the fleece application steps above.
- Seal the new screw head and washer with a dab of Turbo Poly Seal, covering both and sealing where the washer meets the roof surface. Do not use fleece over the new screw.
Question
Answer
Question
Answer

Question
Answer
Question
Answer
Question
Answer
Shingle roofs
Question
Answer
Question
Answer
Question
Answer
Question
Answer
Question
Answer
Question
Answer
Gutters and drip edges
Question
Answer
Question
Answer
Question
Answer
Question
Answer
Question
Answer
Question
Answer
Roof drains
Question
Answer
Question
Answer
Question
Answer
Question
Answer
Question
Answer
Question
Answer
Question
Answer
Question
Answer
Question
Answer
Question
Answer
Scuppers
Question
Answer
Parapets
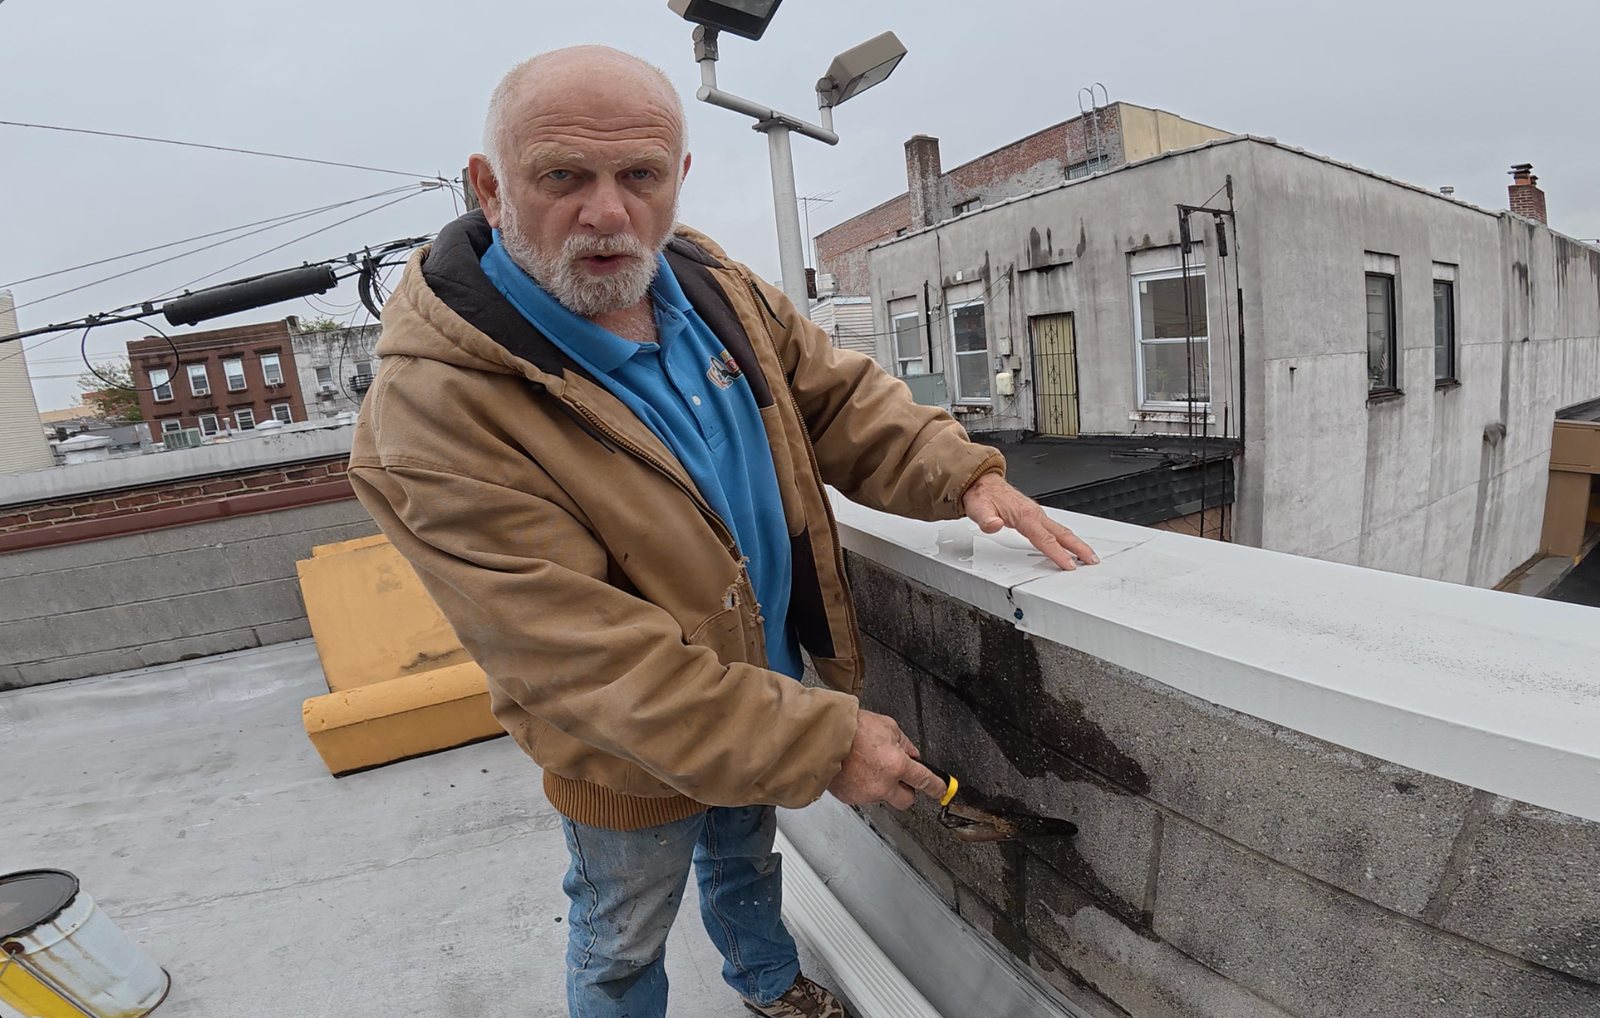
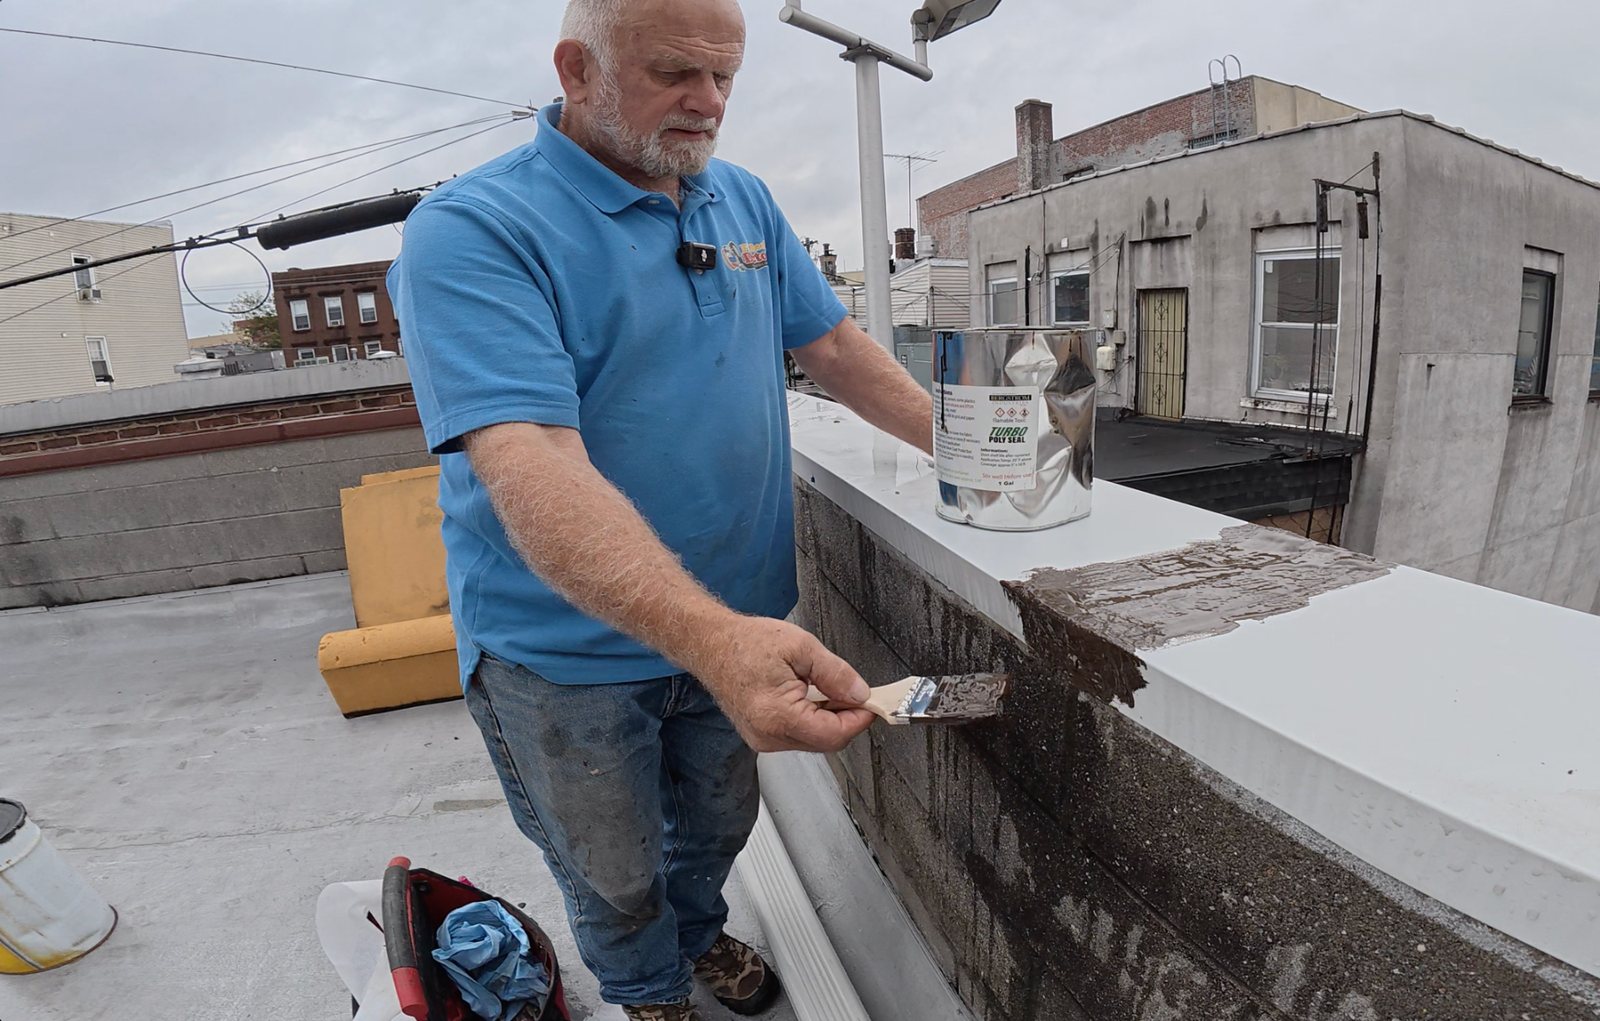
Parapet wall cap joint repair with Turbo Poly Seal
A parapet wall cap joint before repair and after Turbo Poly Seal application. Watch the repair video for the demonstration.

Question
Answer
Question
Answer
Question
Answer
Question
Answer
Question
Answer
Question
Answer
Question
Answer
Question
Answer
Question
Answer
Question
Answer
Question
Answer
Question
Answer
Chimneys
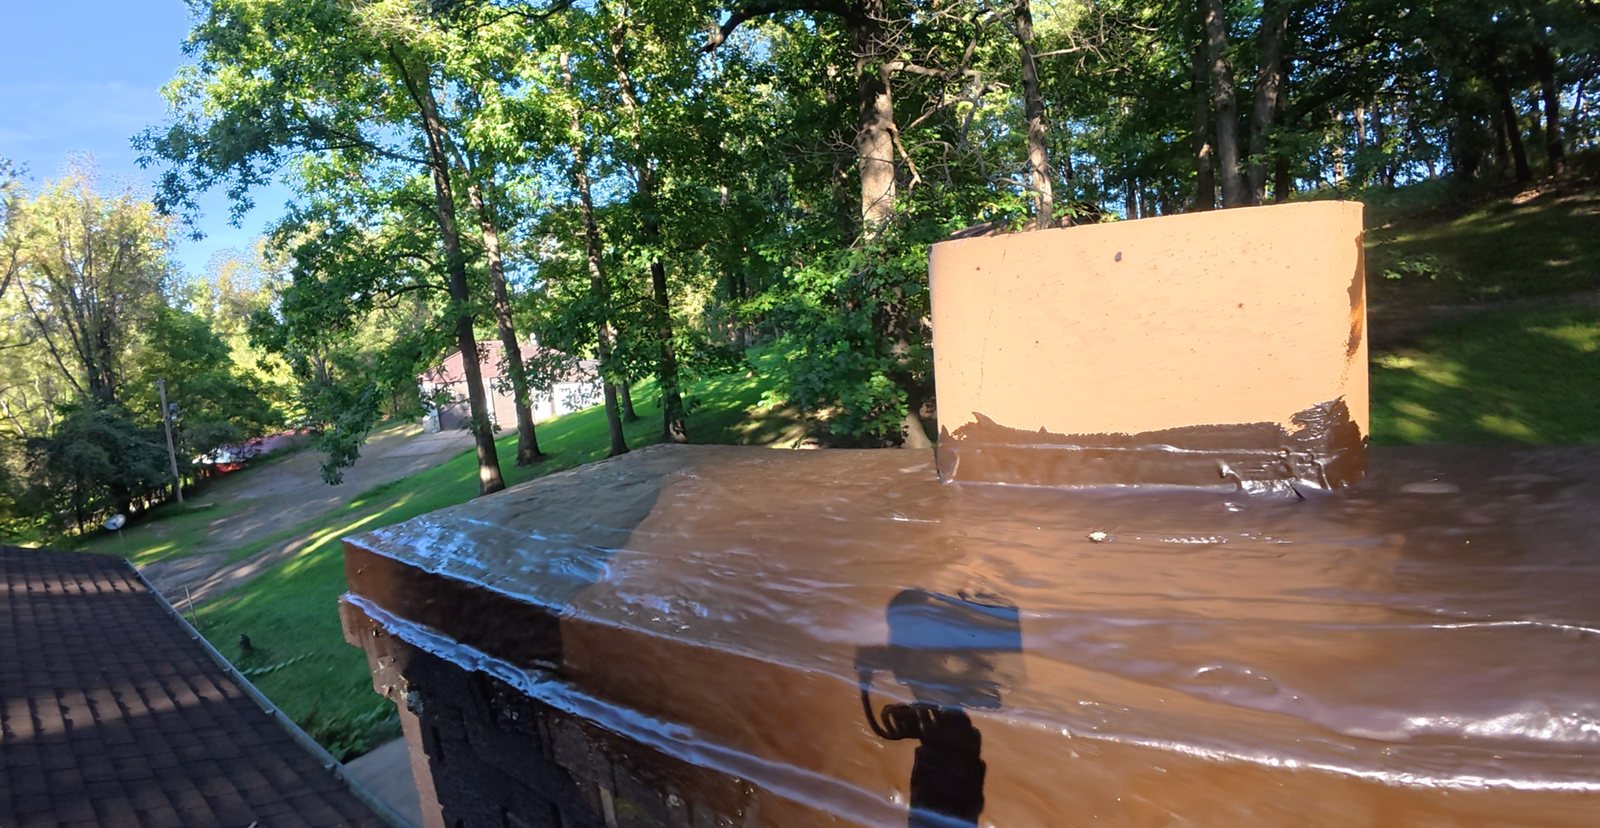
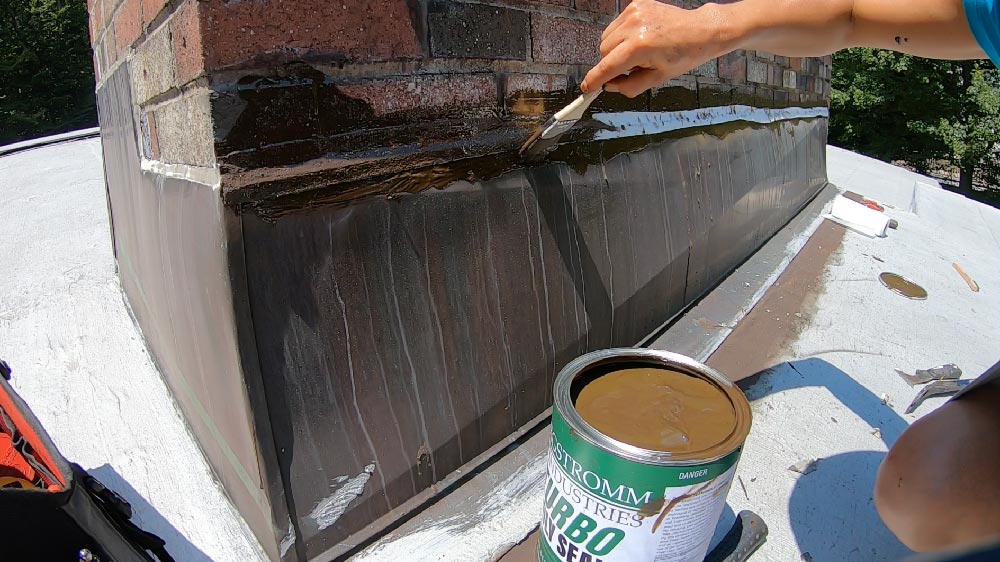
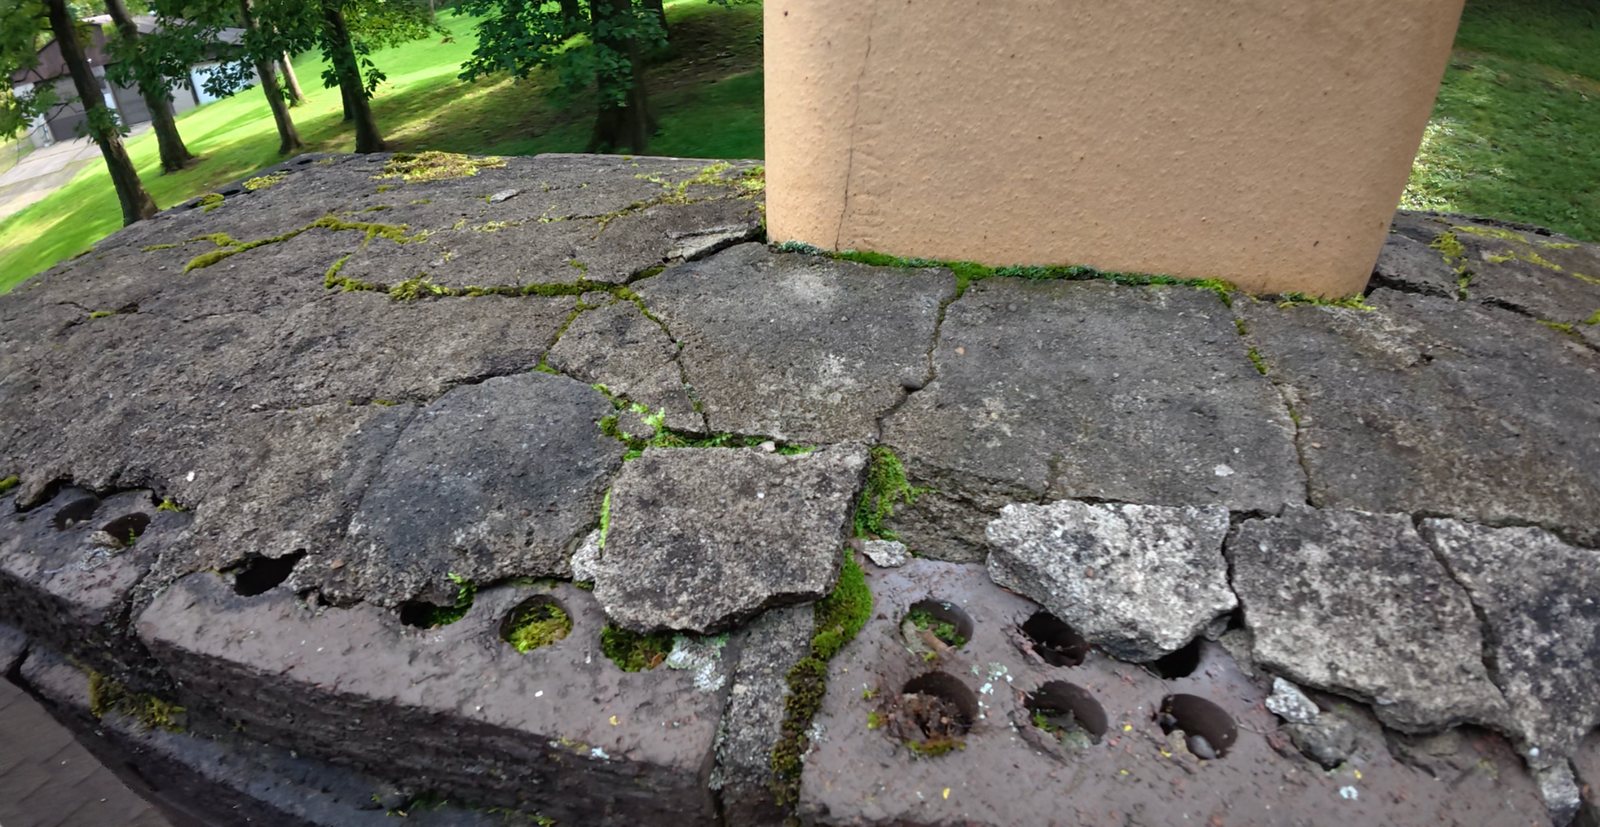
Chimney crown repair with Turbo Poly Seal
A chimney crown before repair and after Turbo Poly Seal application. Watch the repair video for the demonstration.

Question
Answer
Question
Answer
Question
Answer
Question
Answer
Vent and stove pipes
Question
Answer
Question
Answer
Reinforced cover for a cracked EPDM vent-pipe boot, as described by Bergstrom Industries:
- Start on the vent pipe 2 inches above the rubber boot, using fleece and Turbo Poly Seal.
- Continue downward with additional fleece and Turbo Poly Seal, overlapping the previous fleece by approximately 1/2 inch. Apply Turbo Poly Seal between overlapping pieces.
- Continue until the entire rubber boot is covered and the repair reaches the roof surface. For the final transition, extend the fleece approximately 2 inches beyond the boot onto the compatible roof surface.
- Cut tabs as needed so the fleece conforms to the boot’s shape. Embed and fully cover all fleece using the application steps above.
Question
Answer
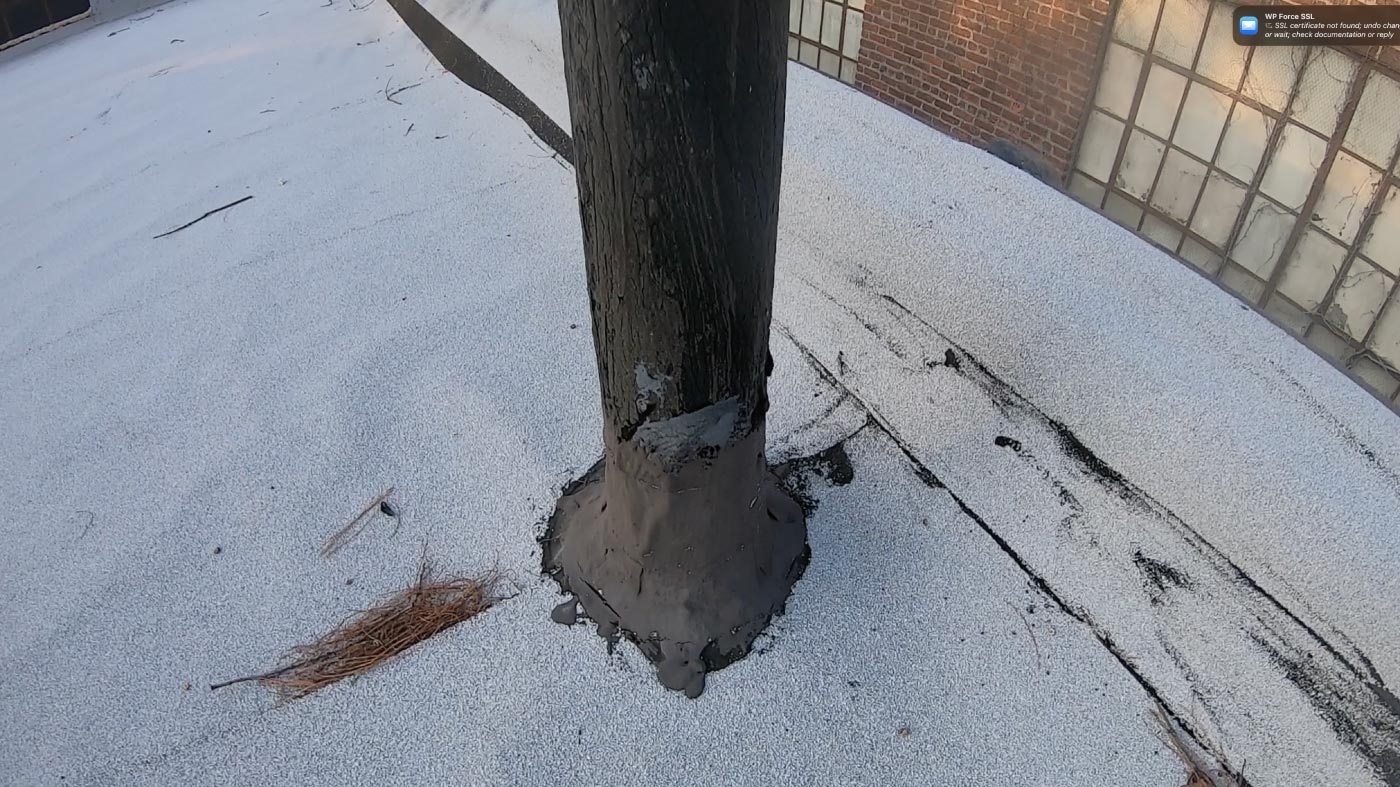
- Remove old tar and built-up caulking from previous repairs using a hammer claw or flat bar.
- Remove any existing sealant or coating from the roof surface within the repair area.
- Use an angle grinder fitted with a wire brush to remove silicone and smooth the surface around the stove pipe.
- Wipe away remaining silicone residue with a rag and lacquer thinner. Allow the surface to dry completely.
- For an asphalt-based or torch-down roof, use Turbo Poly Seal and polyester fleece to form new flashing around the pipe.
- Brush a thick coat of Turbo Poly Seal onto the prepared roof surface and around the base of the pipe.
- Cut a length of 4-inch-wide polyester fleece long enough to wrap around the pipe with a 4-inch overlap. Along one edge, make cuts every 2 inches, stopping at the center of the strip to form tabs.
- Embed the fleece into the wet sealant. Lay the tabs flat against the roof and wrap the uncut half around the pipe. Apply sealant between the overlapping fleece layers.
- Apply a top coat of Turbo Poly Seal, completely covering the fleece.

Skylights
Question
Answer
Can Turbo Poly Seal seal a glass or Plexiglas skylight?
Steps to seal a metal-to-Plexiglas joint
- Clean the surfaces: Remove dirt and debris from the metal frame and Plexiglas. Allow both surfaces to dry completely.
- Prepare the fleece: Cut polyester fleece into 2-inch-wide strips.
- Apply the base coat: Brush a generous coat of Turbo Poly Seal across the joint, covering approximately 1 inch of metal and 1 inch of Plexiglas.
- Embed the fleece immediately: Press it into the wet sealant, following the surface contours without leaving gaps or air pockets.
- Apply the topcoat: Completely cover the fleece with Turbo Poly Seal. Add enough material so that no exposed fibers or fabric weave remain visible.
- Clean up carefully: Use only a cleaner approved for Plexiglas on the skylight. Do not use lacquer thinner on the Plexiglas.
Optional UV protection
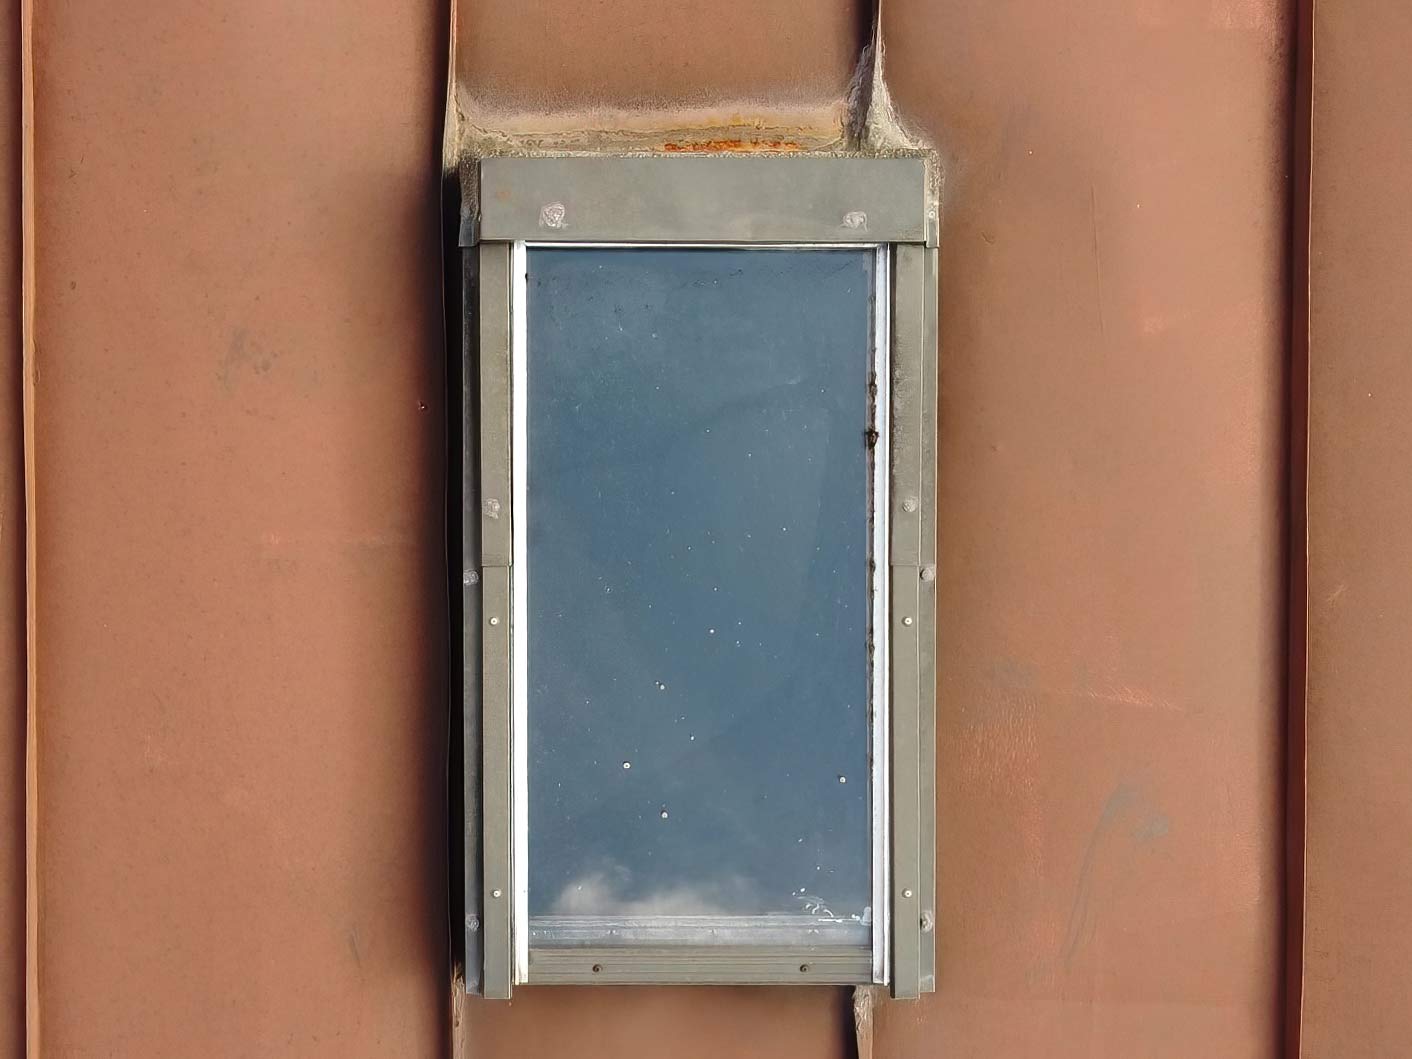
Watch the video below to see how we sealed a transition between a metal roof and a Plexiglas skylight.
Additional details
Photos
Question
Answer
Question
Answer
Question
Answer
Application at the Plexiglas-to-metal-frame transition, as provided by Bergstrom Industries:
- Apply masking tape to the Plexiglas, leaving a 1-inch strip exposed next to the frame.
- Cut the polyester fleece into 2-inch-wide strips.
- Fill the groove between the Plexiglas and the metal frame with Turbo Poly Seal. Also coat the exposed Plexiglas up to the masking tape and the adjoining metal frame.
- Once the groove is filled, immediately embed the fleece into the wet Turbo Poly Seal. The fleece must bridge the groove and cover part of the frame and part of the Plexiglas.
- Apply another coat of Turbo Poly Seal over the fleece, fully covering it according to the general fleece application entry.
- Remove the masking tape immediately after finishing the top coat.
Question
Answer

Additional details
Photos
Related videos

A/C curbs
Question
Answer
Question
Answer
Windows, doors and wood
Question
Answer
Question
Answer
Question
Answer
Question
Answer
Customer reviews
Question
Answer
Turbo Poly Seal Roof Repair Kit – 1 Gallon + 50 ft Poly FleeceView product →Flashing – Transitions
Question
Answer
- Remove loose paint and caulking from the repair area using an angle grinder and a stiff wire brush.
- Wipe away all dust from the brick and metal surfaces.
- If necessary, secure the loose metal flashing with concrete nails.
- Existing caulking can remain inside the groove as a filler, provided it does not cover the surrounding brick or metal bonding surfaces.
- If the groove or gap is too wide, fill it with butyl or silicone caulk. Keep the caulk inside the gap, off the surrounding brick and metal surfaces. The polyester fleece bridges this small filled gap, while Turbo Poly Seal bonds to the clean brick and metal on either side.
- Make sure the surface is completely dry. Apply Turbo Poly Seal across the brick-to-metal transition, immediately embed polyester fleece into the wet sealant, and apply a top coat that fully covers the fleece.

Additional details
Photos
Related videos

Question
Answer
- Remove any loose caulking.
- Use masking tape to outline a repair area approximately 3 inches wide across the flashing and brick.
- Apply one coat of Turbo Poly Seal with a disposable brush.
- Embed 2-inch-wide polyester fleece into the freshly applied sealant.
- Apply a top coat of Turbo Poly Seal over the fleece, covering it completely.
- Remove the masking tape.
- Use a rag with lacquer thinner to remove any excess or spillover sealant from the metal.
Question
Answer
- Leave the existing caulking in place inside the groove or gap, keeping the surrounding brick and metal bonding surfaces free of caulk.
- Brush the repair area clean and make sure the surface is completely dry.
- Apply one coat of Turbo Poly Seal with a disposable brush.
- Embed 2-inch-wide polyester fleece into the freshly applied sealant.
- Apply a top coat of Turbo Poly Seal over the fleece, covering it completely.

Question
Answer
Fieldstone chimneys can be particularly difficult to seal against leaks because the mortar between the stones can crack, as can the mortar in the groove where the flashing meets the chimney.
- Secure the skirt flashing with concrete nails.
- Brush off loose cement and debris. Make sure the repair area is completely dry.
- Apply one coat of Turbo Poly Seal across the flashing-to-stone joint, covering approximately 2 inches onto the flashing and 2 inches onto the chimney surface.
- Embed polyester fleece into the freshly applied sealant.
- Apply another coat of Turbo Poly Seal over the fleece, covering it completely.

Super Silicone Seal
Compatibility
Question
Answer
Question
Answer
Preparation
Question
Answer
Question
Answer
Question
Answer
Question
Answer
Question
Answer
Question
Answer
Question
Answer
- Clean the seam and surrounding repair area with water and a rag.
- Remove old repair materials using a scraper, lacquer thinner, or a stiff-bristle brush, as needed.
- If the seam has separated, make sure both layers lie flat against each other. If tension pulls them apart, secure them with 2½-inch washers and 3-inch roofing screws.
- The seam and surrounding repair area must be completely dry before applying Super Silicone Seal.
- Once the seam is secured and the area is completely dry, repair it with Super Silicone Seal and polyester fleece.
Application
Question
Answer
Question
Answer
Question
Answer
Question
Answer
Question
Answer
Question
Answer
Question
Answer
Question
Answer
Weather and curing
Question
Answer
Question
Answer
Question
Answer
Question
Answer
Coverage and kits
Question
Answer
Question
Answer
Question
Answer
Question
Answer
Storage
Question
Answer
Question
Answer
Recoating and durability
Question
Answer
Question
Answer
Question
Answer
Question
Answer
EPDM repairs
Question
Answer
Question
Answer
Question
Answer
- Clean the seam and surrounding repair area with water and a rag.
- Remove old repair materials using a scraper, lacquer thinner, or a stiff-bristle brush, as needed.
- If the seam has separated, make sure both layers lie flat against each other. If tension pulls them apart, secure them with 2½-inch washers and 3-inch roofing screws.
- The seam and surrounding repair area must be completely dry before applying Super Silicone Seal.
- Once the seam is secured and the area is completely dry, repair it with Super Silicone Seal and polyester fleece.
Question
Answer
Metal roofs
Question
Answer
Question
Answer
Part of maintenance every 10 years
- Tighten screws before sealing: Use a Milwaukee screw gun or any other tool to torque down existing screws. Neoprene washers shrink over time and loosen, so this is part of maintenance.
- If a screw will not tighten and spins loosely, try a larger screw; if it still will not tighten, relocate it about 2 inches away.
- Correct angled screws so the washer lies flat and tight.
- Patch the abandoned hole with fleece and Super Silicone Seal.
- Apply a dab over the screw head and washer without fleece.
95% of commercial roofs neglect this. This type of maintenance is very important to prevent a sudden roof replacement.
Additional details
Photos
Question
Answer
Skylights
Question
Answer
Question
Answer
Question
Answer
Question
Answer
Gutters and drains
Question
Answer
Question
Answer
Chimneys and walls
Question
Answer
Vent boots
Question
Answer
Troubleshooting
Question
Answer
Question
Answer
Question
Answer
Question
Answer
Cleanup
Question
Answer
Question
Answer
Safety and SDS
Question
Answer
Business policies
Question
Answer
Whole-roof coating
Question
Answer
Question
Answer
Question
Answer
Question
Answer
Metal pinholes
Question
Answer
Commercial A/C ducts
Question
Answer
Customer reviews
Question
Answer
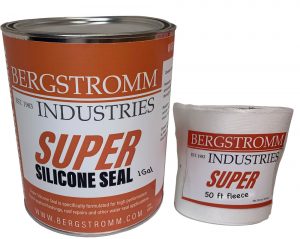 White Super Silicone Seal Leak Repair 1 Gal + 50 ft Poly FleeceView product →
General roof repairs
Parapet walls
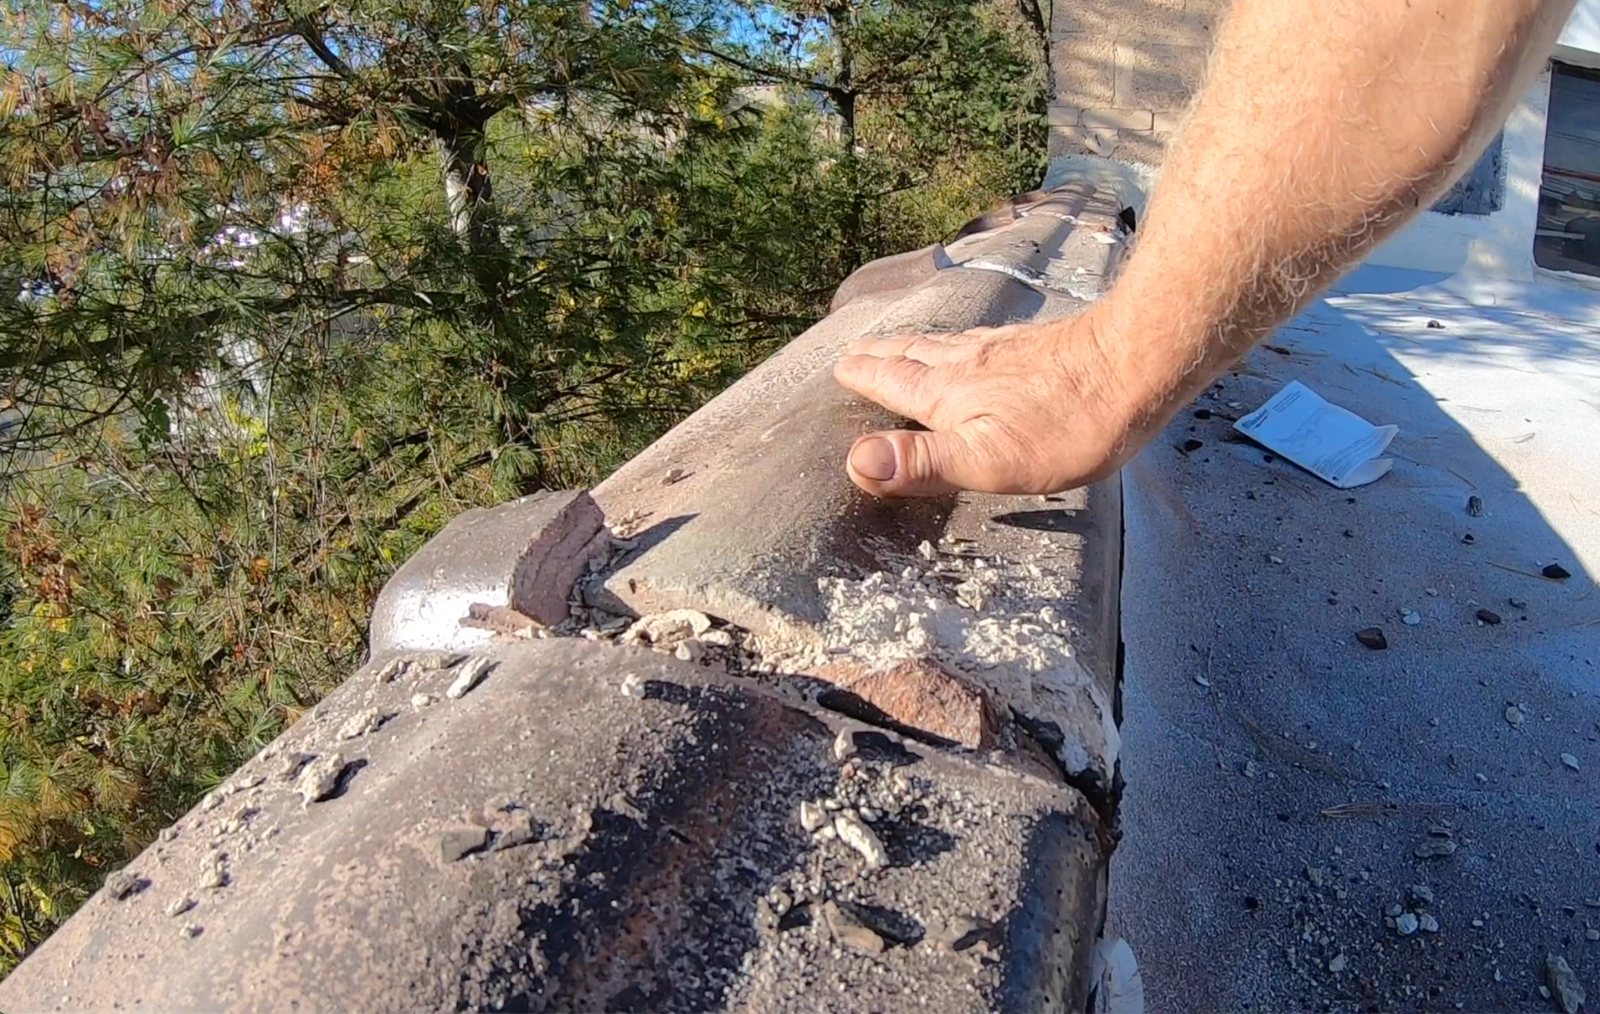
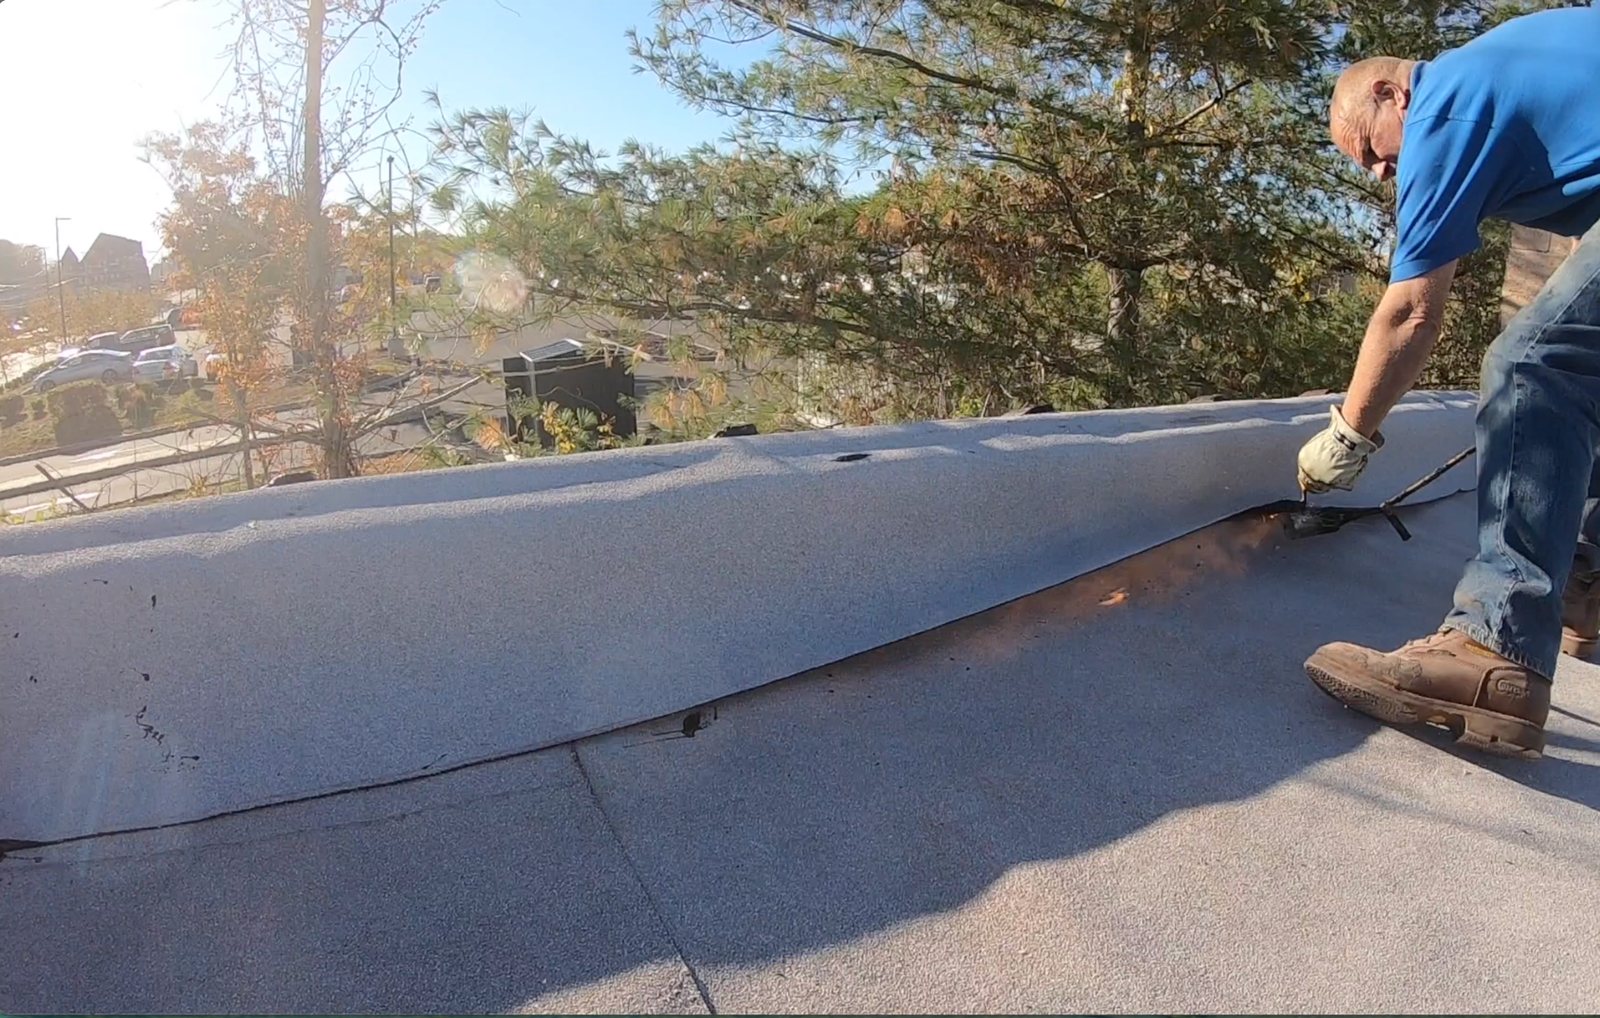
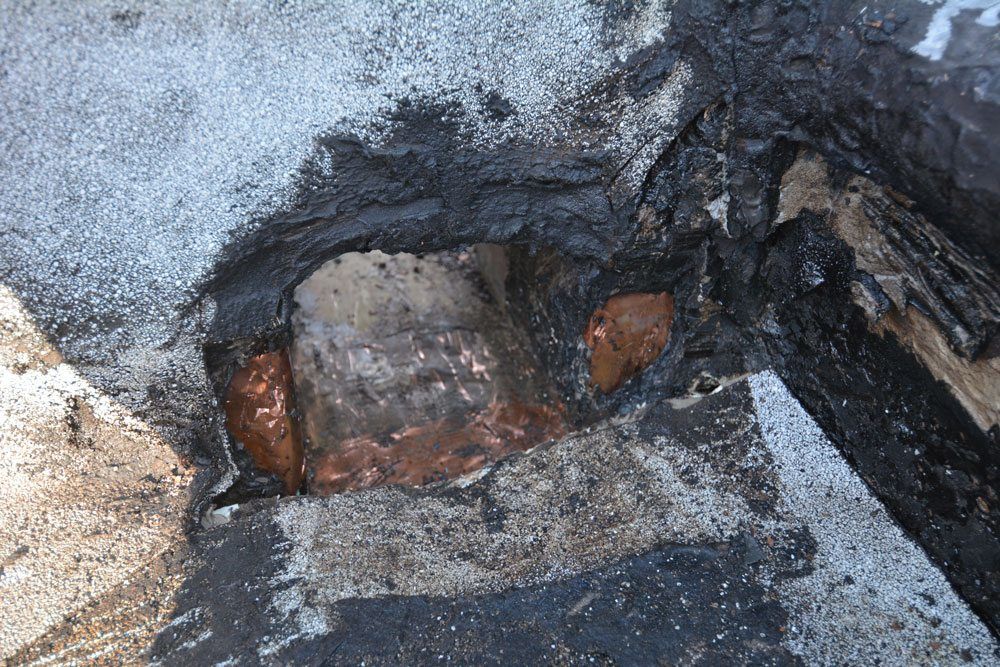
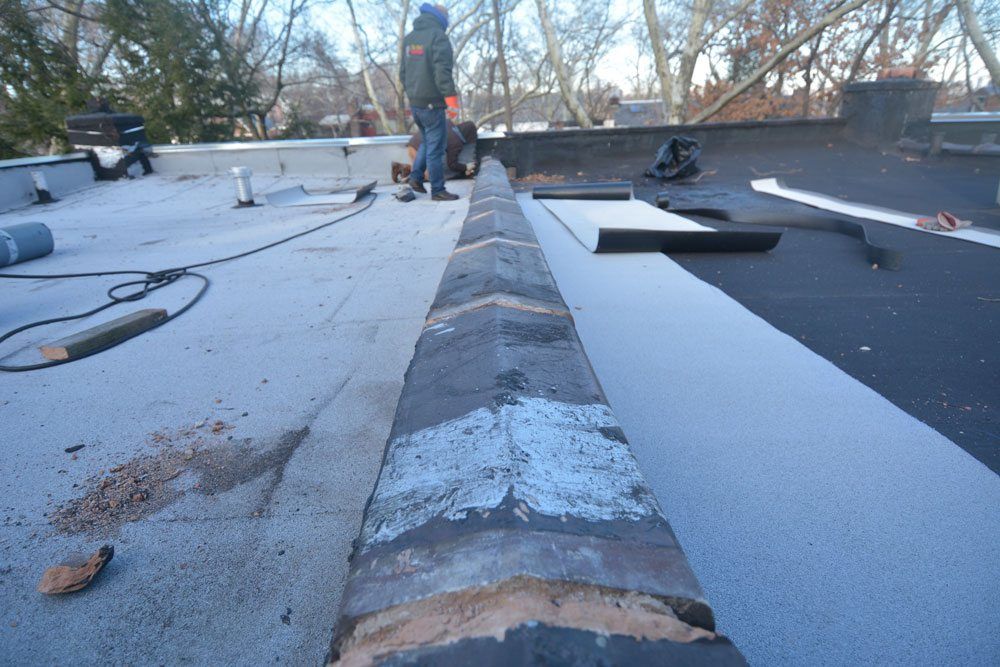
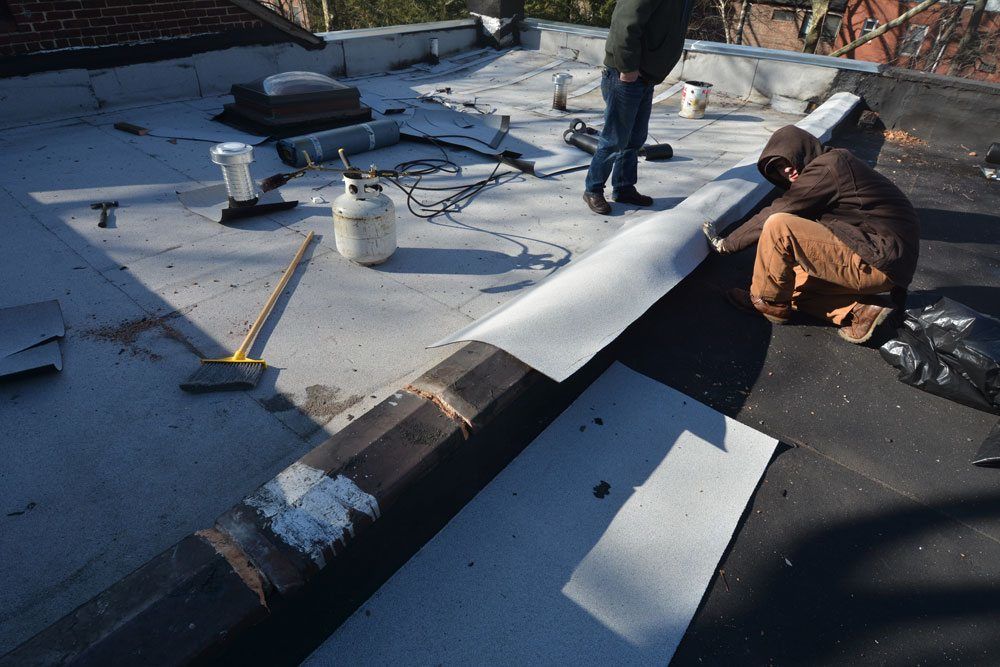
Roofing membrane over half-round clay parapet caps
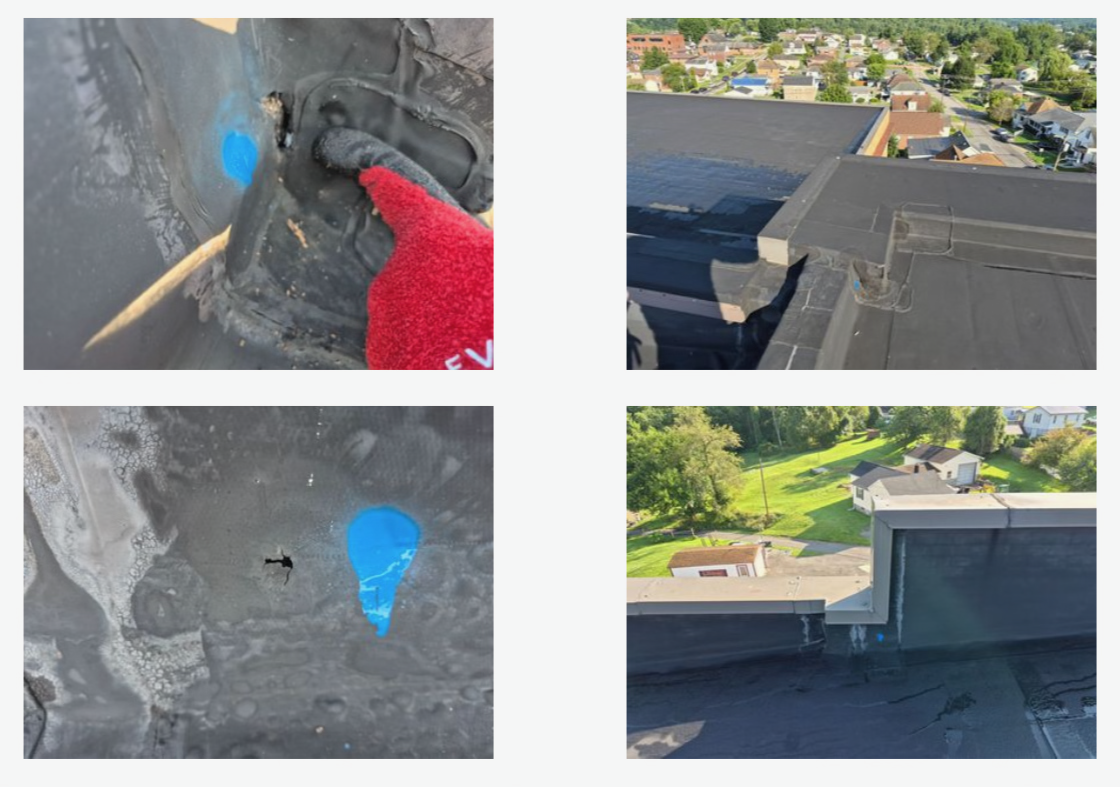
This project covers half-round clay parapet caps with roofing membrane. The photos show the condition before repair and the membrane being installed. No Turbo Poly Seal or Super Silicone Seal was used.

Ordering and support
About Bergstrom Industries
Question
Answer
Question
Answer
Cancellations
Question
Answer
Question
Answer
Consultation and crew training
Question
Answer
Question
Answer
Question
Answer
Question
Answer
Customer support
Question
Answer
Question
Answer
Question
Answer
Question
Answer
Question
Answer
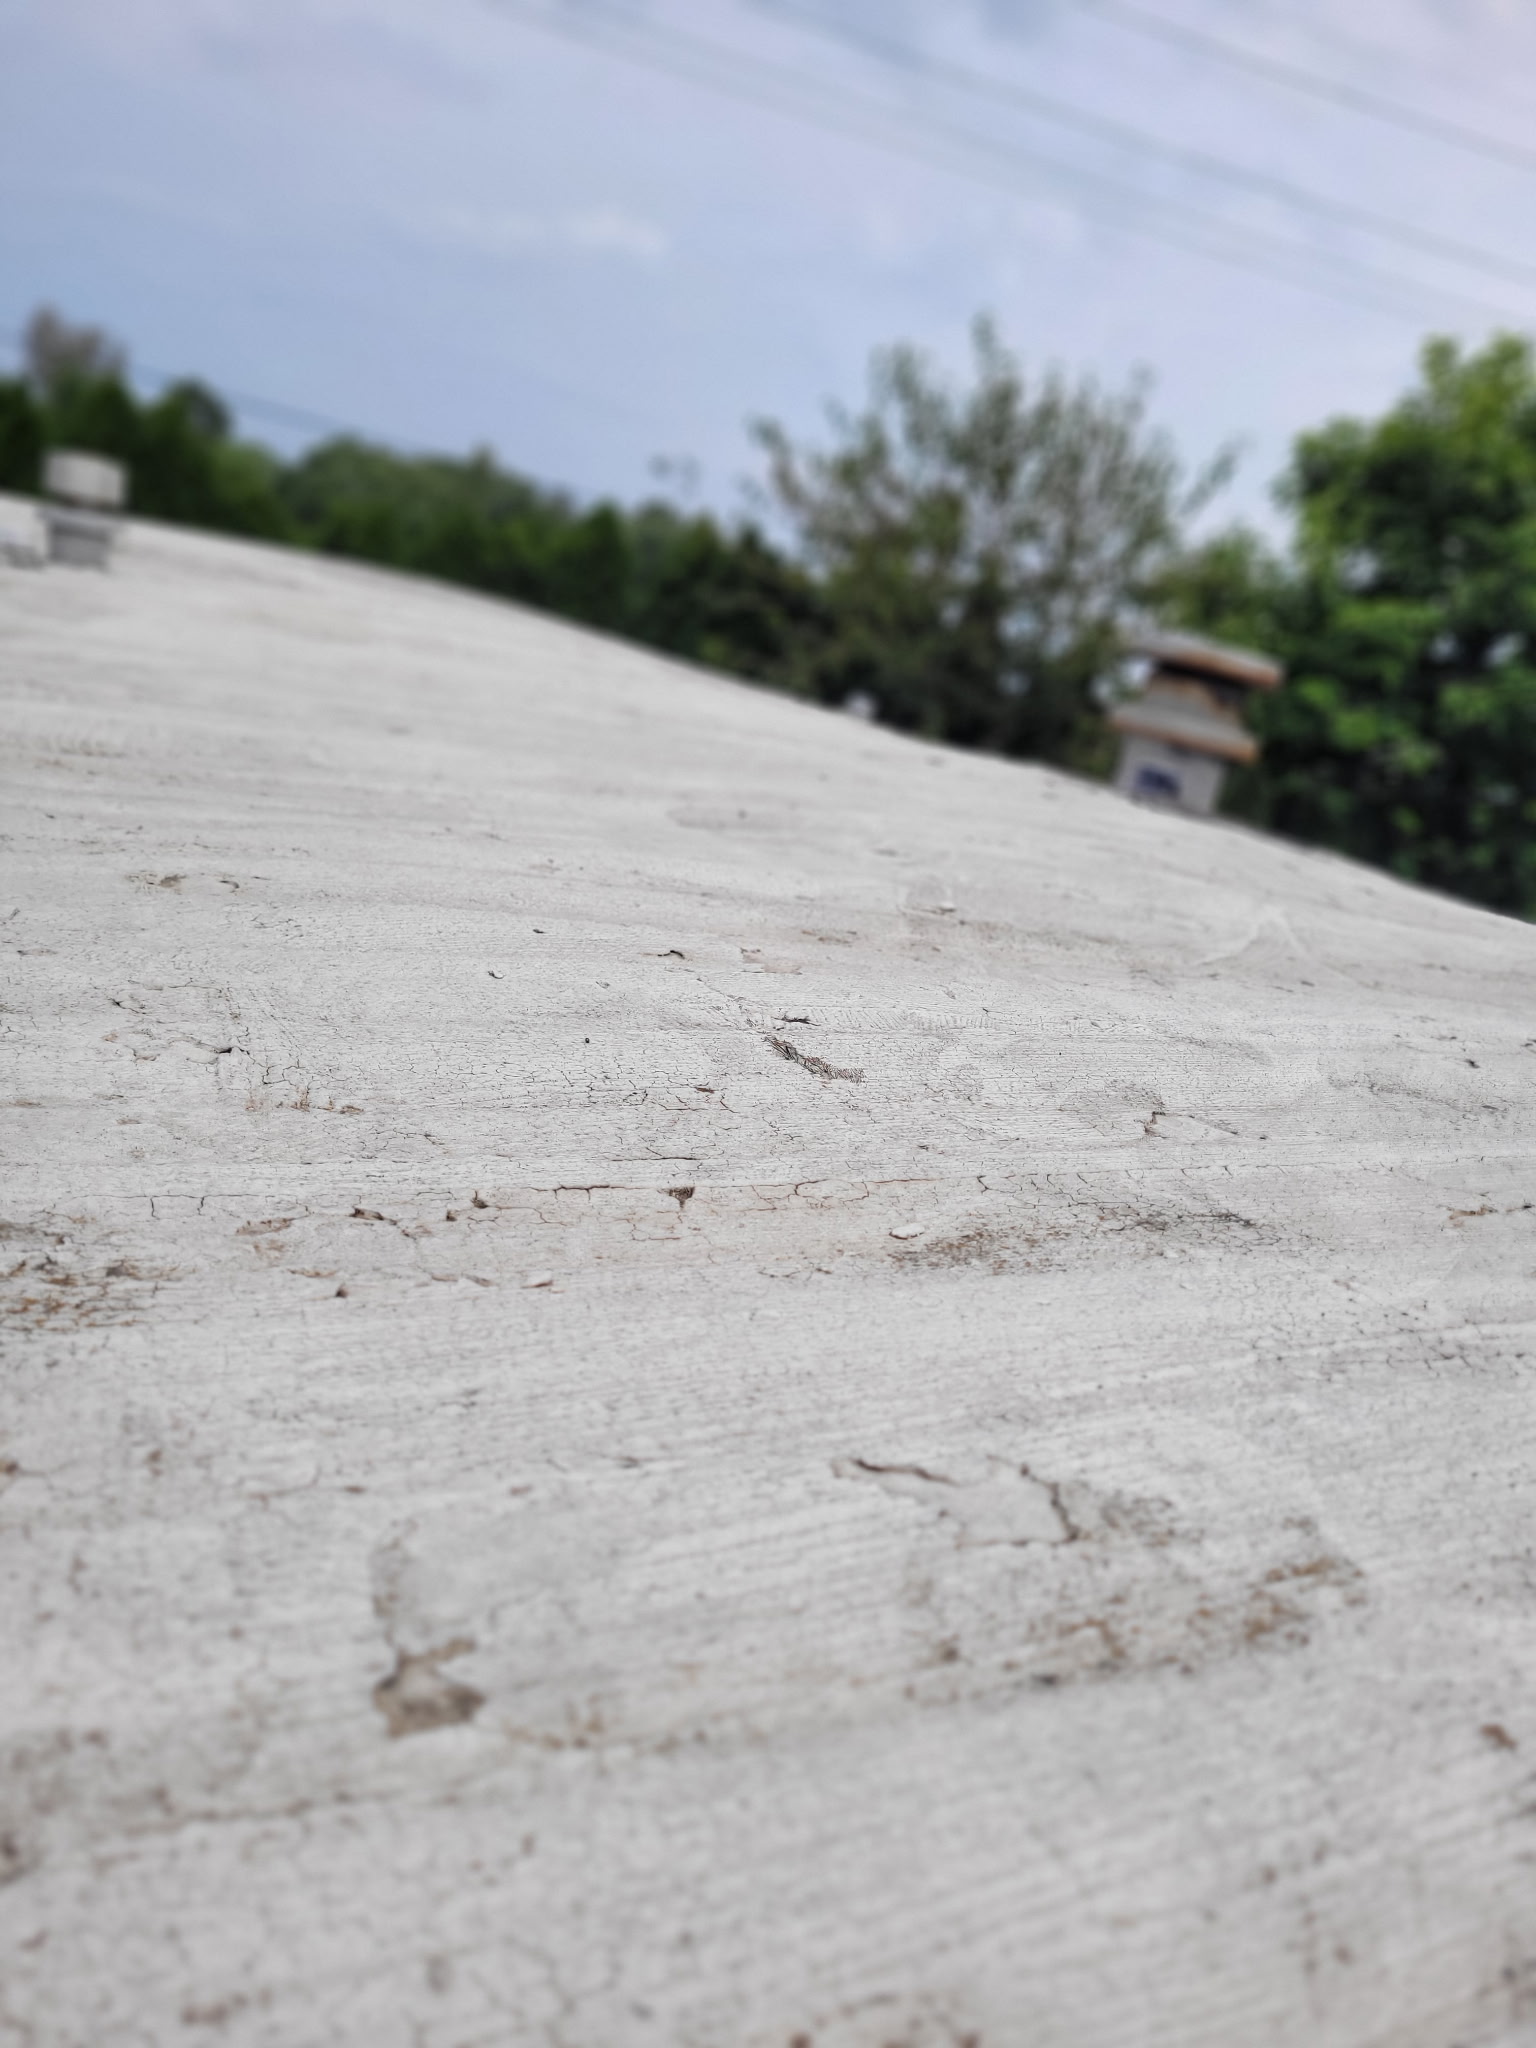
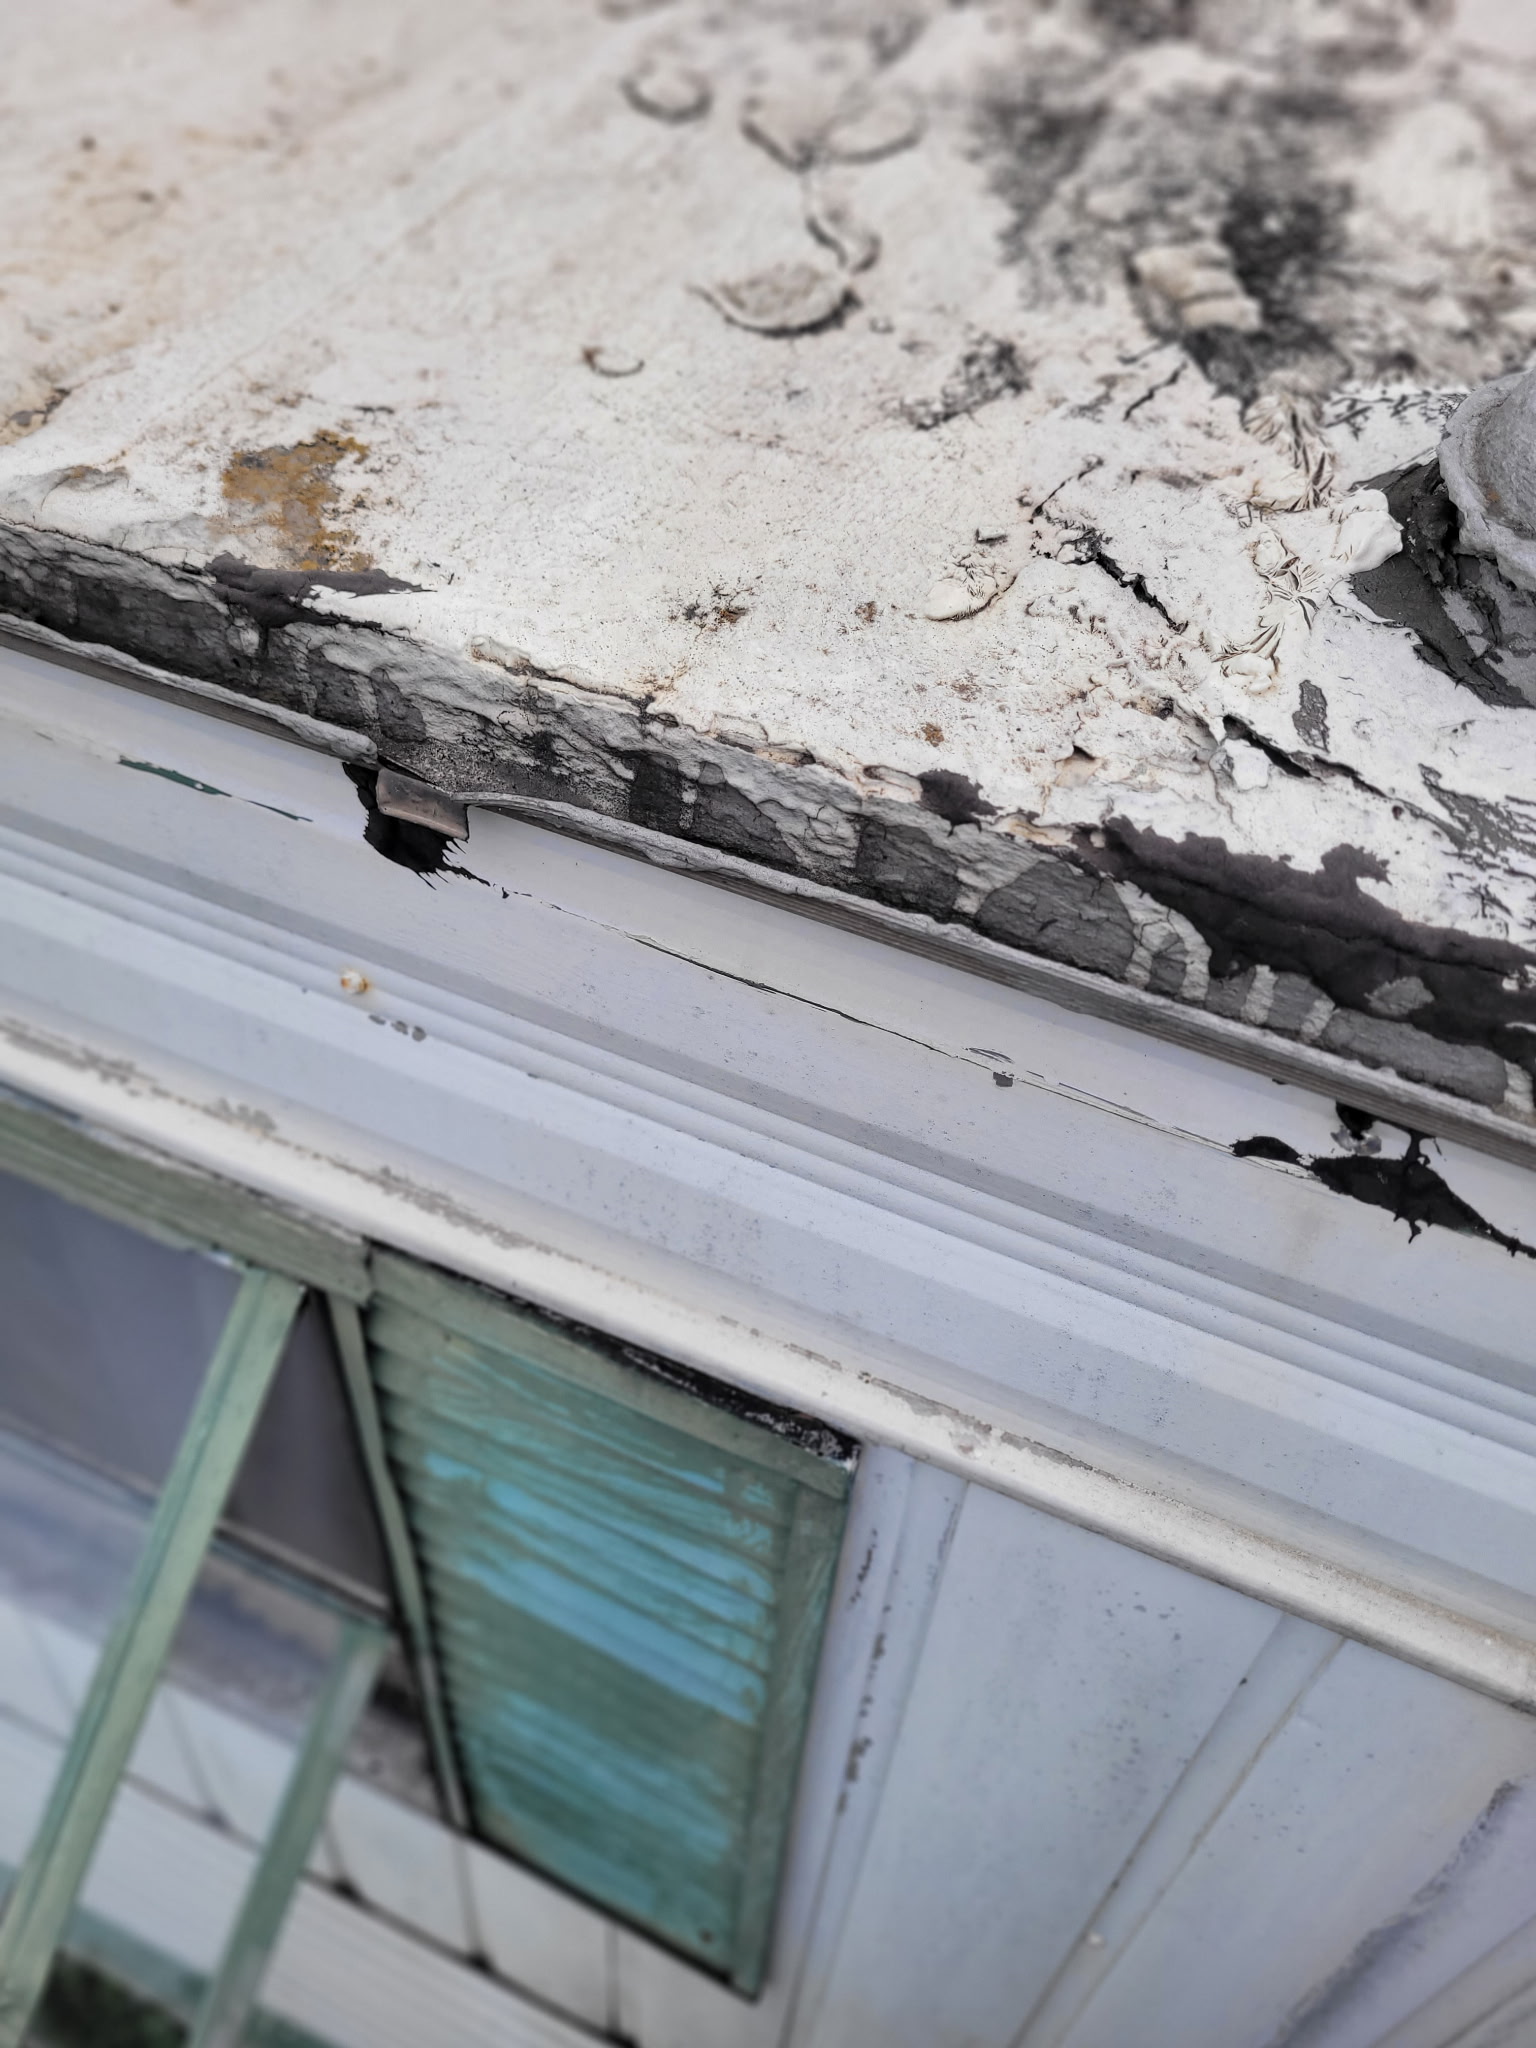
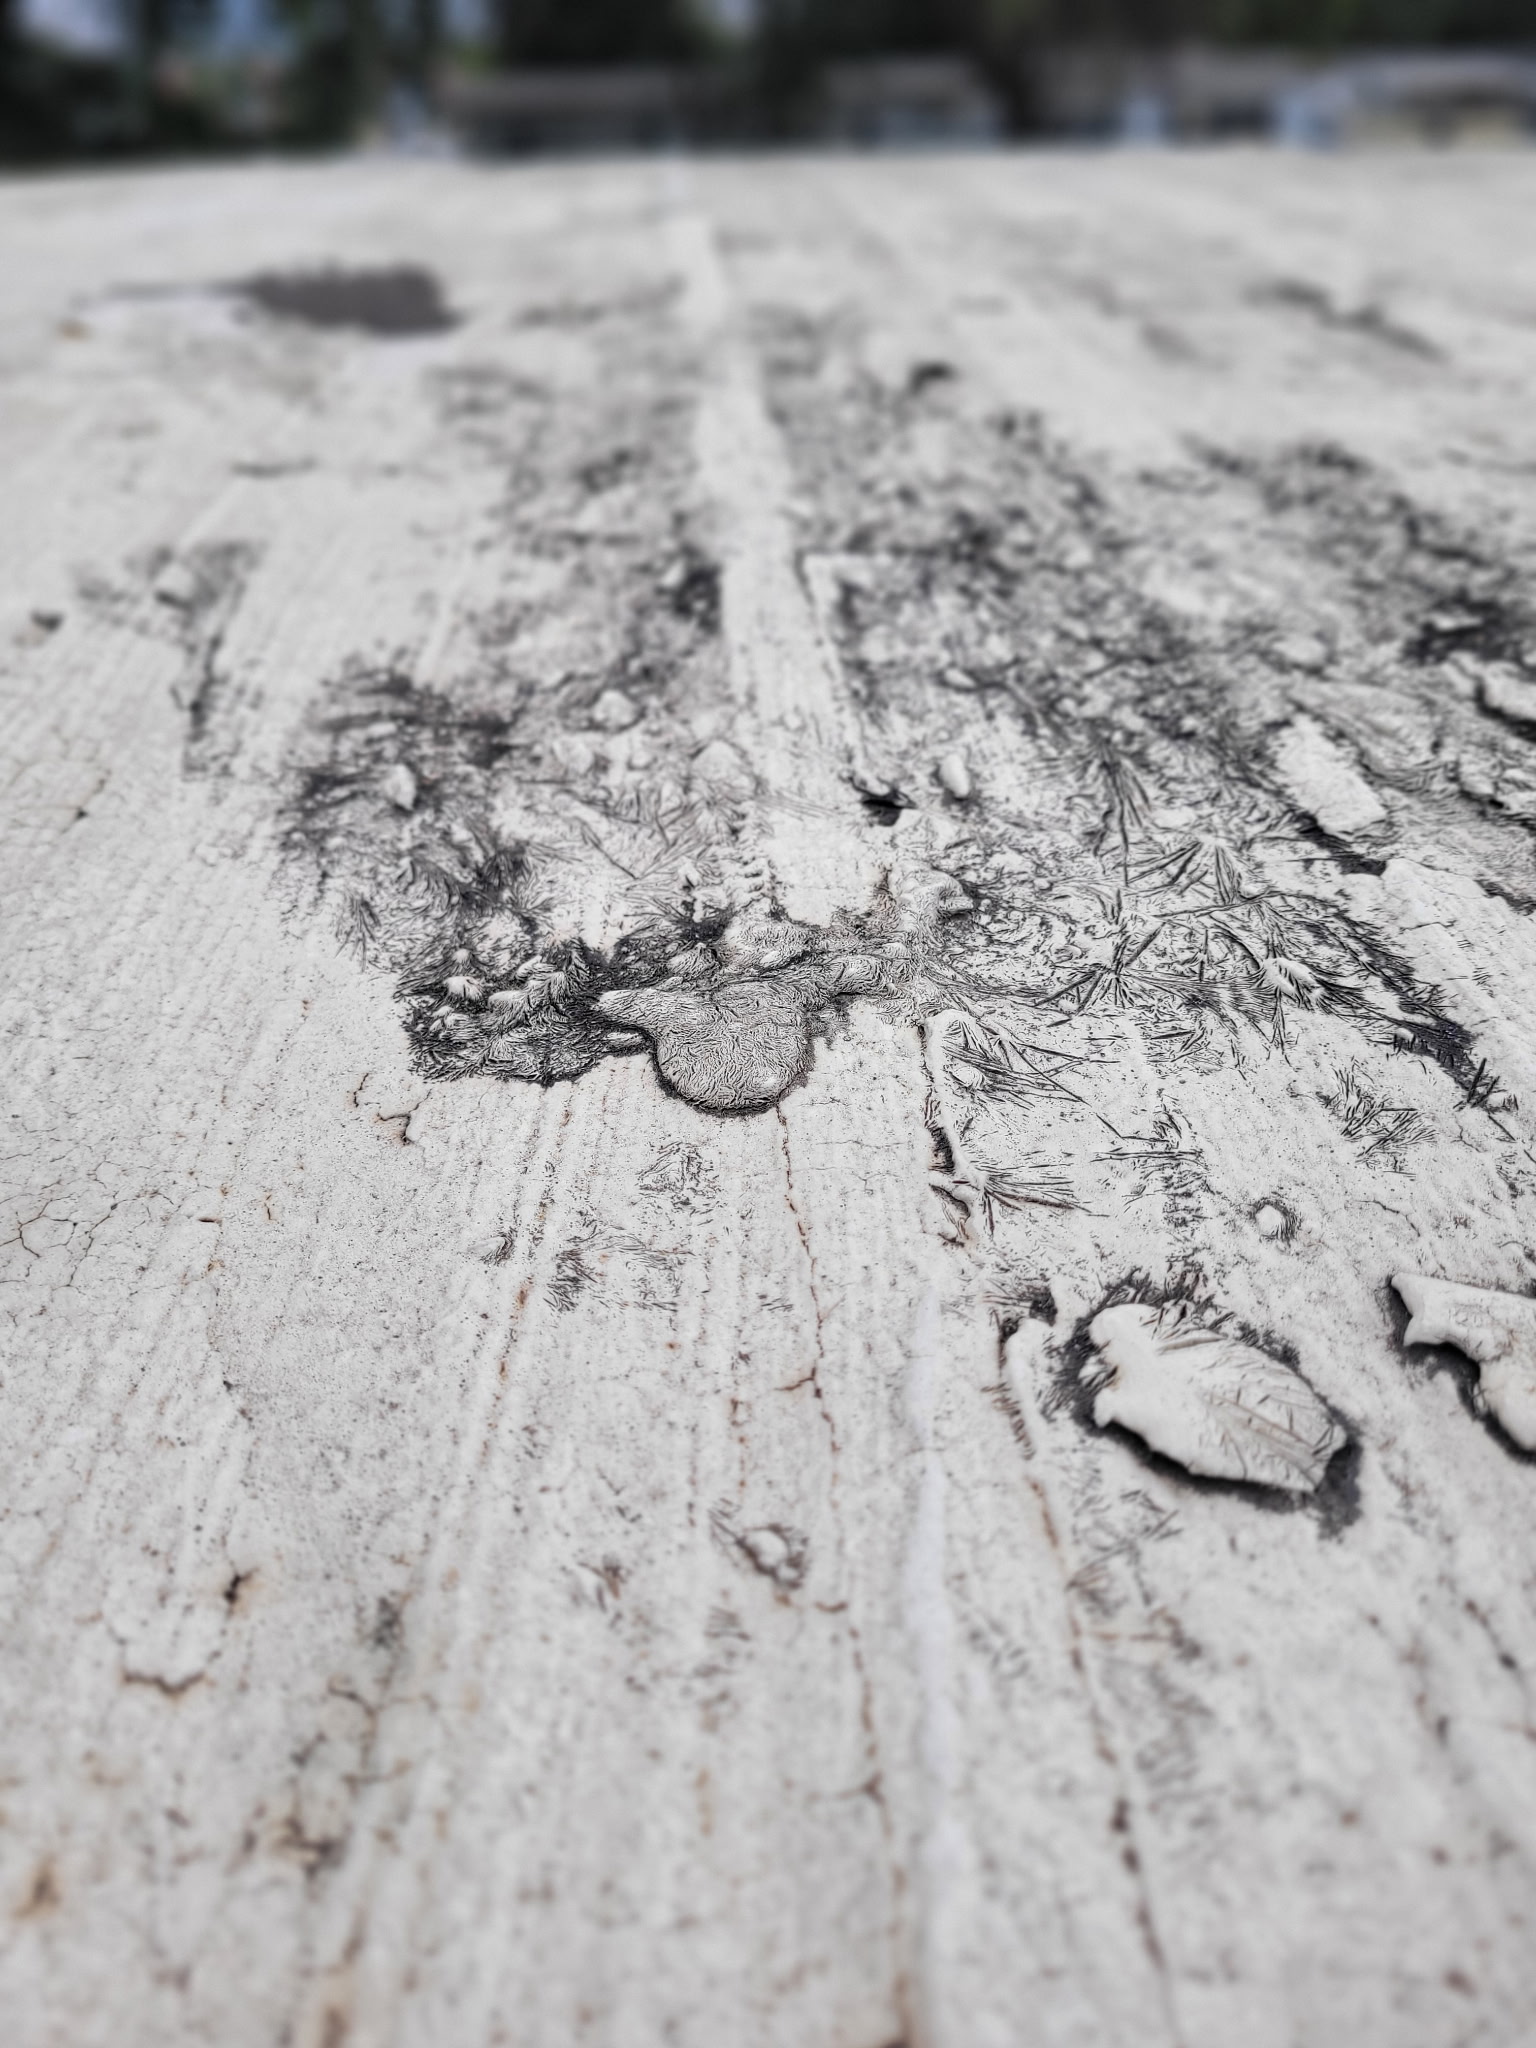
Question
Answer
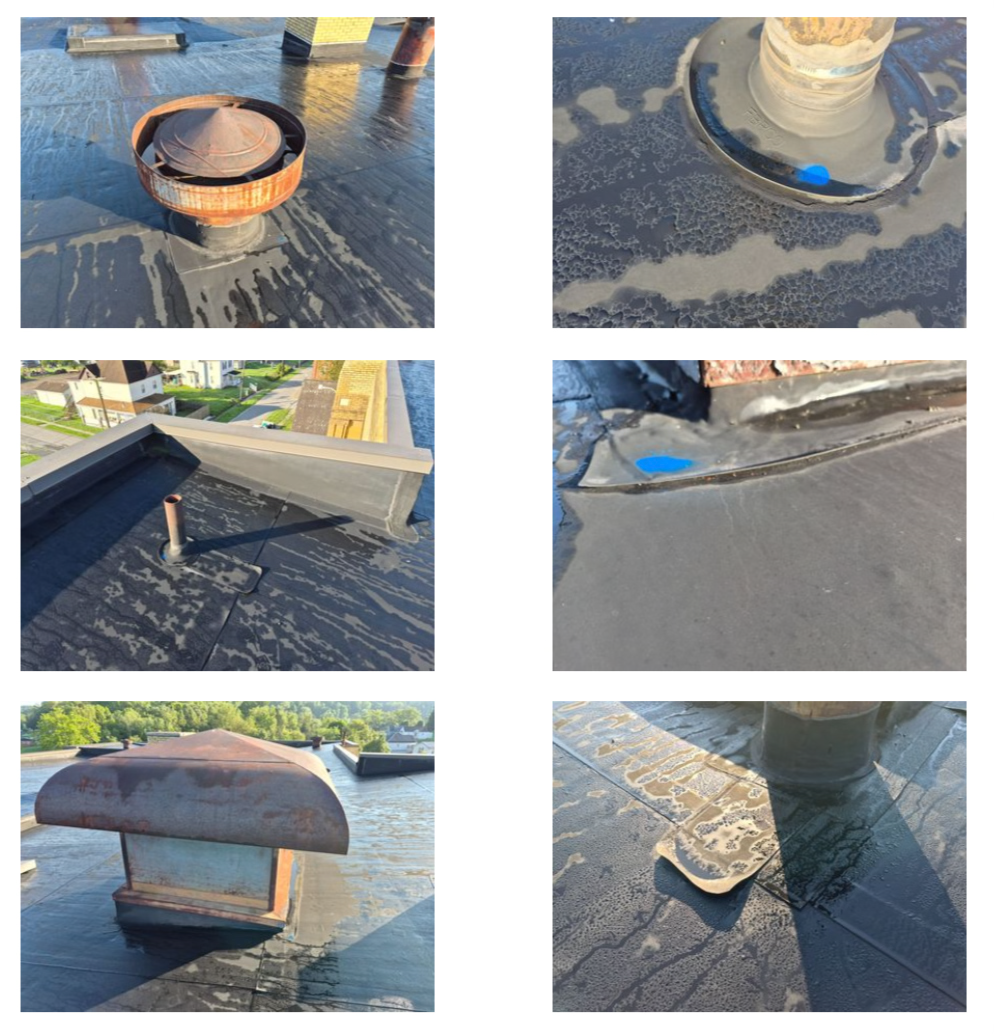
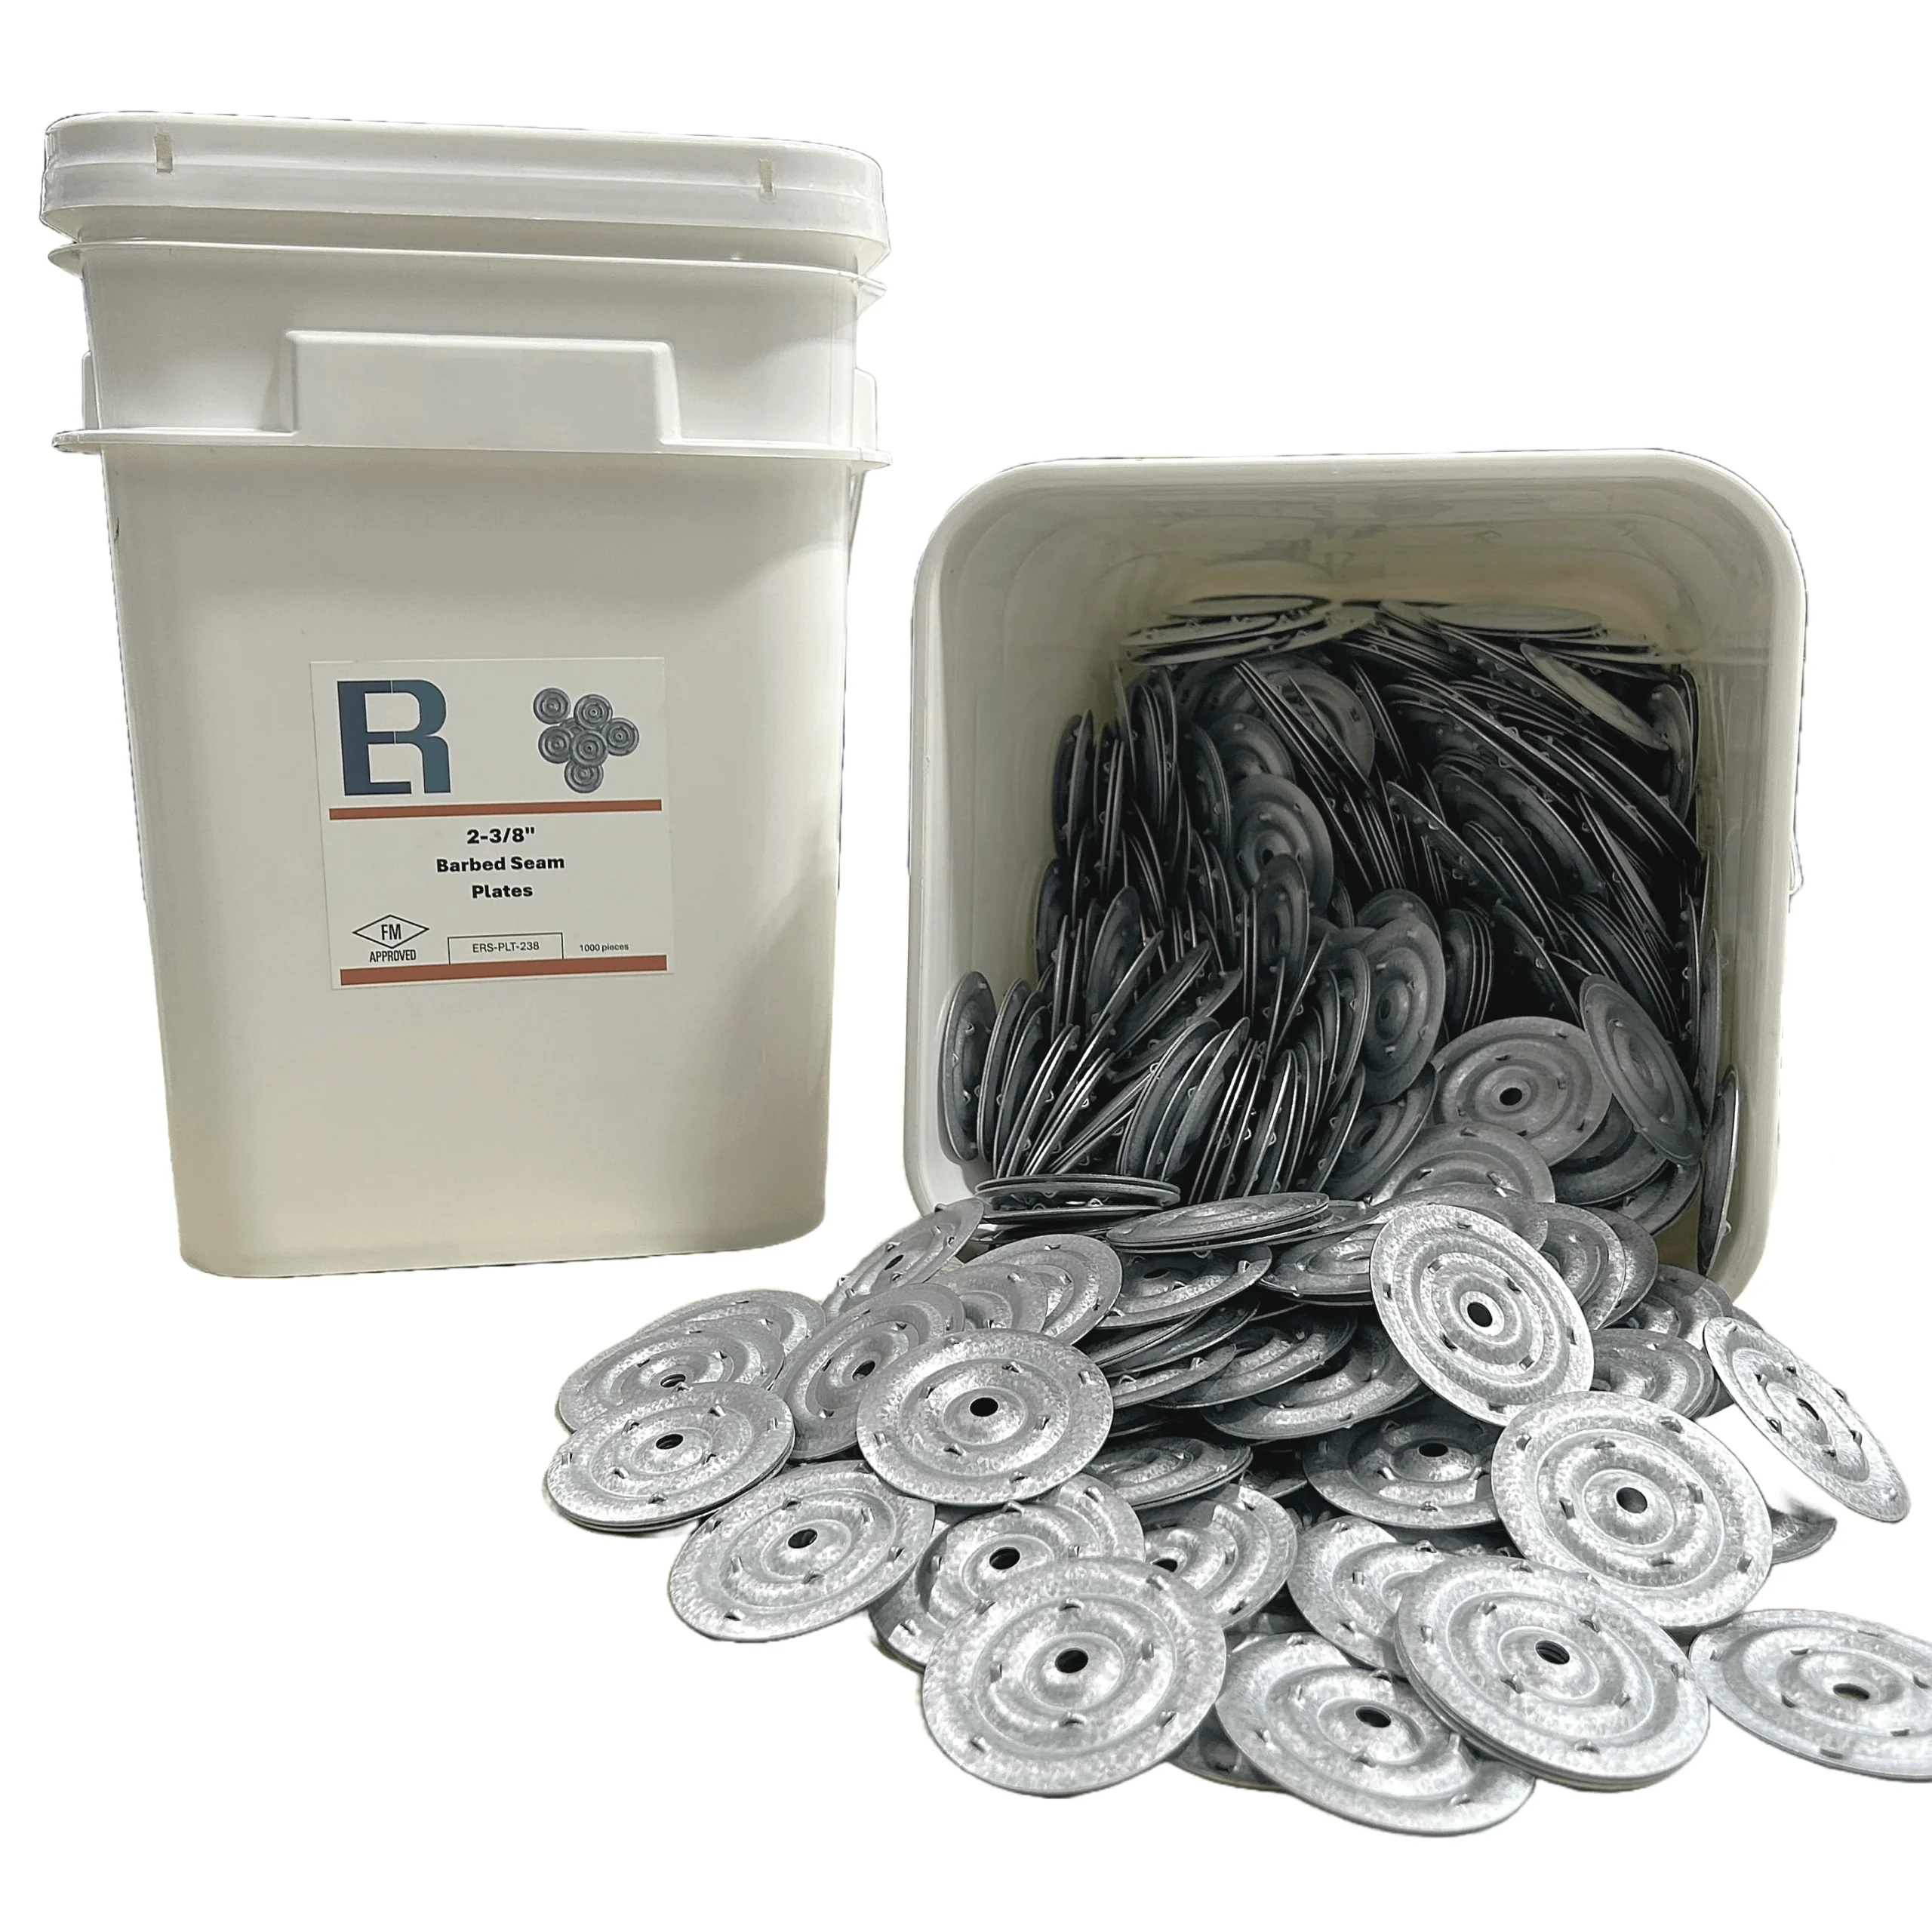
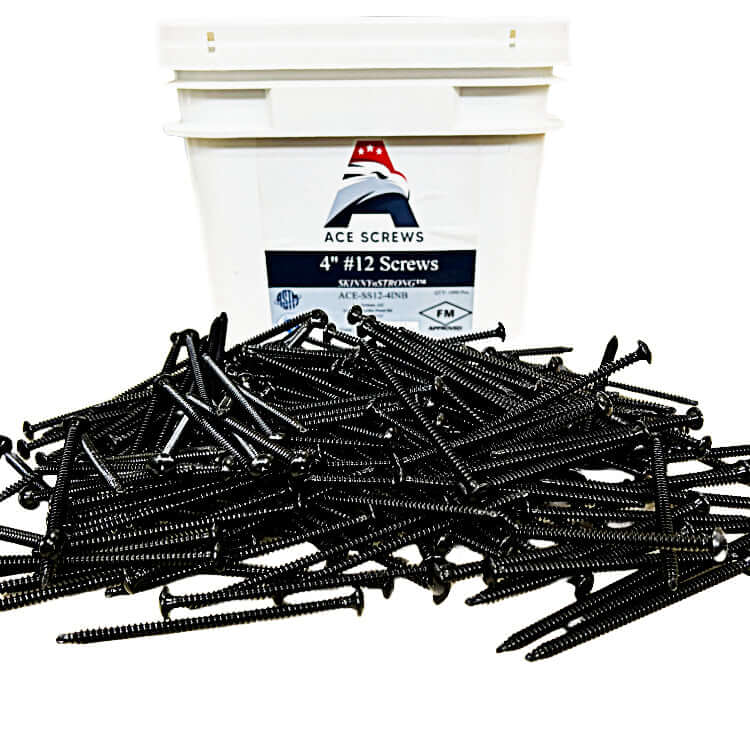

Additional details
Returns and refunds
Question
Answer
Question
Answer
Roofing referrals
Question
Answer
Question
Answer
Shipping
Question
Answer
Question
Answer
Question
Answer
Question
Answer
Question
Answer
Warranty
Question
Answer
Extracted from Inbox
Super Silicone Seal — Application
Can I paint over Turbo Poly Seal or Super Silicone Seal?
Customer question — Sep 18, 2025
Reply from Naas
Painting over Turbo Poly Seal
Additional details
When can I paint over Turbo Poly Seal, and what paint should I use?
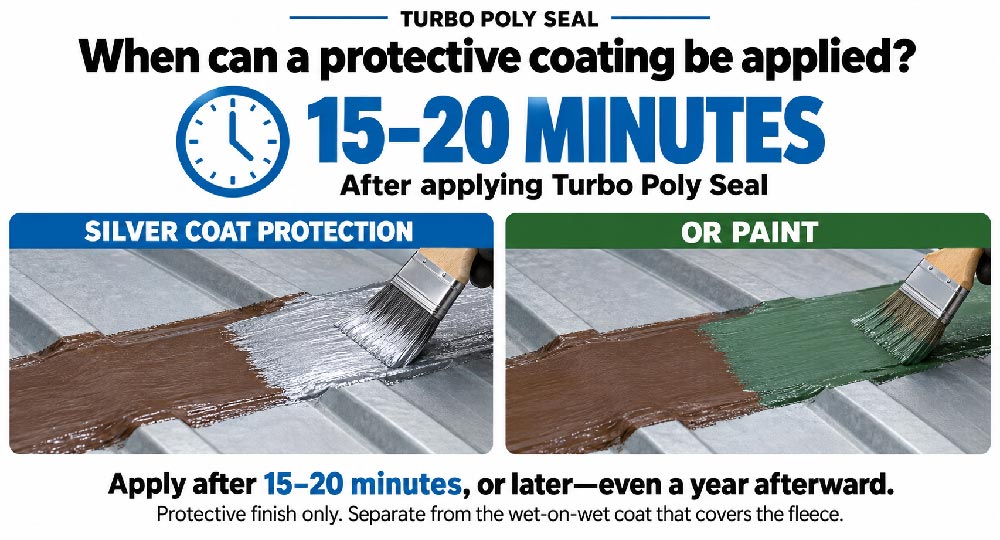
- When to paint: On a hot day, Turbo Poly Seal forms a dry surface skin quickly. Once this skin has formed, you can apply the protective coat.
- Silver Coat Protection: Formulated with asphalt resins compatible with Turbo Poly Seal, this coating contains aluminum flakes that reflect sunlight and help protect the repair from UV exposure.
- Oil-based paint: Can be used as a protective topcoat.
- Latex paint: Can also be used to cover and protect Turbo Poly Seal.
- Spray paint: Another option for applying a protective coat.
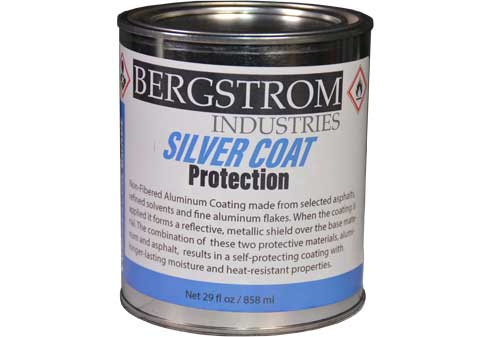 Silver Coat Protection Metal Rust Proofing 1 QuartView product →
Photos
Related videos

Does Super Silicone Seal need a painted UV-protection coat?
Customer question — Nov 4, 2025
Reply from Naas
An EPDM seam repair with a customer follow-up
Customer question — Feb 22, 2022
Ok, here are a couple of pictures of the seam I need to repair, In some places it’s wider than 4 inches that need repaired.
- Do you double the fabric tape in this case?
- Would you recommend super silicone or the turbo poly? I have a lot to do so I’m hoping the super silicone seal will work.
- Is the white any better than the black?
- Will the black 5 gallon buckets be coming back into stock any time soon?
Reply from Naas
White or black Super Silicone Seal: what does the color tell me?
Customer question — Nov 14, 2024
Reply from Naas
White or black Super Silicone Seal: what does the color tell me? — separate customer conversation
Customer question — May 10, 2022
Reply from Naas
Turbo Poly Seal — Painting and protection
Can I paint over Turbo Poly Seal or Super Silicone Seal?
Customer question — Sep 18, 2025
Reply from Naas
Painting over Turbo Poly Seal
Additional details
When can I paint over Turbo Poly Seal, and what paint should I use?
- When to paint: On a hot day, Turbo Poly Seal forms a dry surface skin quickly. Once this skin has formed, you can apply the protective coat.
- Silver Coat Protection: Formulated with asphalt resins compatible with Turbo Poly Seal, this coating contains aluminum flakes that reflect sunlight and help protect the repair from UV exposure.
- Oil-based paint: Can be used as a protective topcoat.
- Latex paint: Can also be used to cover and protect Turbo Poly Seal.
- Spray paint: Another option for applying a protective coat.
Silver Coat Protection Metal Rust Proofing 1 QuartView product →Photos
Related videos
Can I paint over Turbo Poly Seal or Super Silicone Seal? — separate customer conversation
Customer question — Nov 1, 2023
Reply from Naas
Additional details
Photos
Related videos
Turbo Poly Seal — Storage and shelf life
Can an unopened can of Turbo Poly Seal be kept for a later repair?
Customer question — Nov 20, 2021
Reply from Naas
Can an unopened can of Turbo Poly Seal be kept for a later repair? — separate customer conversation
Customer question — Oct 22, 2022
Reply from Naas
Super Silicone Seal — Rubber roof seams
Which sealant did Naas recommend for a suspected rubber-roof seam leak?
Customer question — Dec 14, 2024
Reply from Naas
Turbo Poly Seal — Surface preparation
Can Turbo Poly Seal be applied to a wet surface?
Customer question — Dec 4, 2022
Reply from Naas
Why can painting over an old coating leave a weak point?
Customer question — Feb 6, 2025
Reply from Naas
What did Naas recommend for an aluminum roof with old silicone?
Customer question — Apr 15, 2026
Reply from Naas
Super Silicone Seal — Metal roof seams
Should I switch sealants partway through a low-pitch metal-roof repair?
Customer question — Sep 18, 2026
Reply from Naas
Photos
Turbo Poly Seal — Metal wall seams
Can Turbo Poly Seal be used on leaking exterior metal-wall seams?
Customer question — Mar 22, 2026
Reply from Naas
General roof repairs — Metal roof seams
Can the seam repair run from the top of a metal roof toward the bottom?
Customer question — Sep 19, 2025
Reply from Naas
Turbo Poly Seal — Copper flashing
Repairing a reported crack in copper roof flashing
Customer question — Sep 10, 2025
Reply from Naas
Photos
Turbo Poly Seal — Application
Can I apply Turbo Poly Seal with a screw-sealing dispenser?
Customer question — May 12, 2026
Reply from Naas
Can gravel go back over a repaired tar-and-gravel roof?
Customer question — Mar 5, 2025
Reply from Naas
Can cotton cloth replace the polyester repair fleece?
Customer question — Apr 10, 2021
Reply from Naas
A Quonset hut leak at the metal-to-concrete junction
Customer question — Mar 18, 2023
Reply from Naas
How should fleece follow a chimney crack?
Customer question — Feb 28, 2023
Reply from Naas
Small holes left by lettering on metal siding
Customer question — Aug 22, 2022
Reply from Naas
Repairing a leak in a ponding area is different from filling the depression
Customer question — Nov 6, 2025
Reply from Naas
Keeping an exposed metal-flashing repair neat
Customer question — Mar 10, 2022
Reply from Naas
Turbo Poly Seal — Cleanup
Can I apply Turbo Poly Seal with a screw-sealing dispenser?
Customer question — May 12, 2026
Reply from Naas
Turbo Poly Seal — Metal roofs
Can I apply Turbo Poly Seal with a screw-sealing dispenser?
Customer question — May 12, 2026
Reply from Naas
A leaking metal roof valley with old tar and caulking
Customer question — Dec 11, 2025

Reply from Naas
Localized rust holes in a galvanized steel roof
Customer question — Jul 1, 2025
Reply from Naas
Cracking at a roof-to-porch transition: what needs checking?
Customer question — Aug 29, 2022
Reply from Naas
There could be several reasons why it would crack like that.
- If the content wasn’t stirred properly
- If there is significant movement between the 2 surfaces
- If the transition from one panel to the lower one has a large space
Photos
Leaks along an insulated aluminum patio-roof seam
Customer question — Dec 31, 2022
Reply from Naas
Choosing a sealant for metal-roof seams versus screw heads
Customer question — May 22, 2023
Reply from Naas
Customer report: a patio roof stayed dry during heavy rain
Customer question — Dec 21, 2021
Reply from Naas
A leak at the metal roof edge and drip edge
Customer question — Oct 12, 2021
Reply from Naas
A mobile-home roof transition needs a closer look
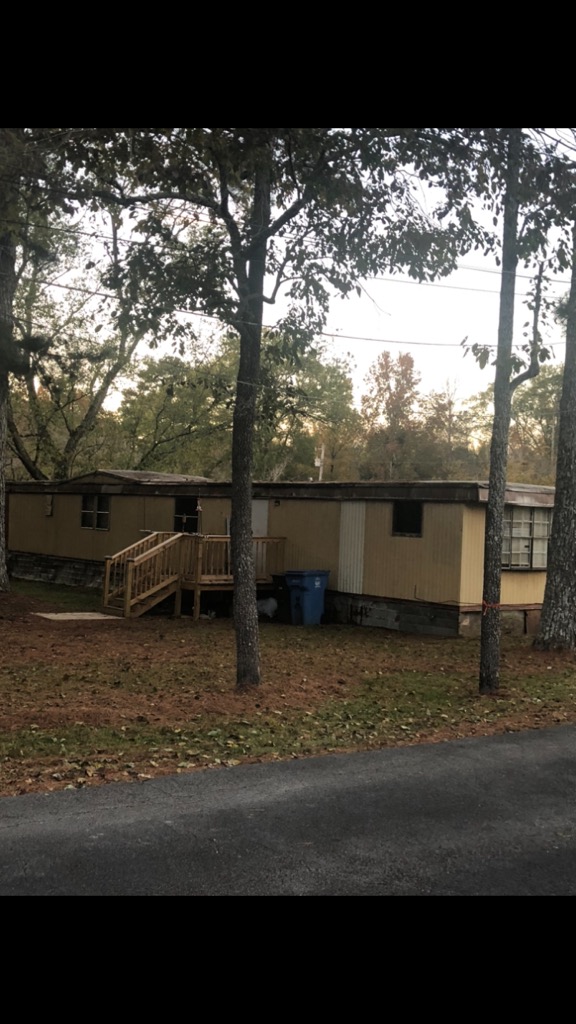
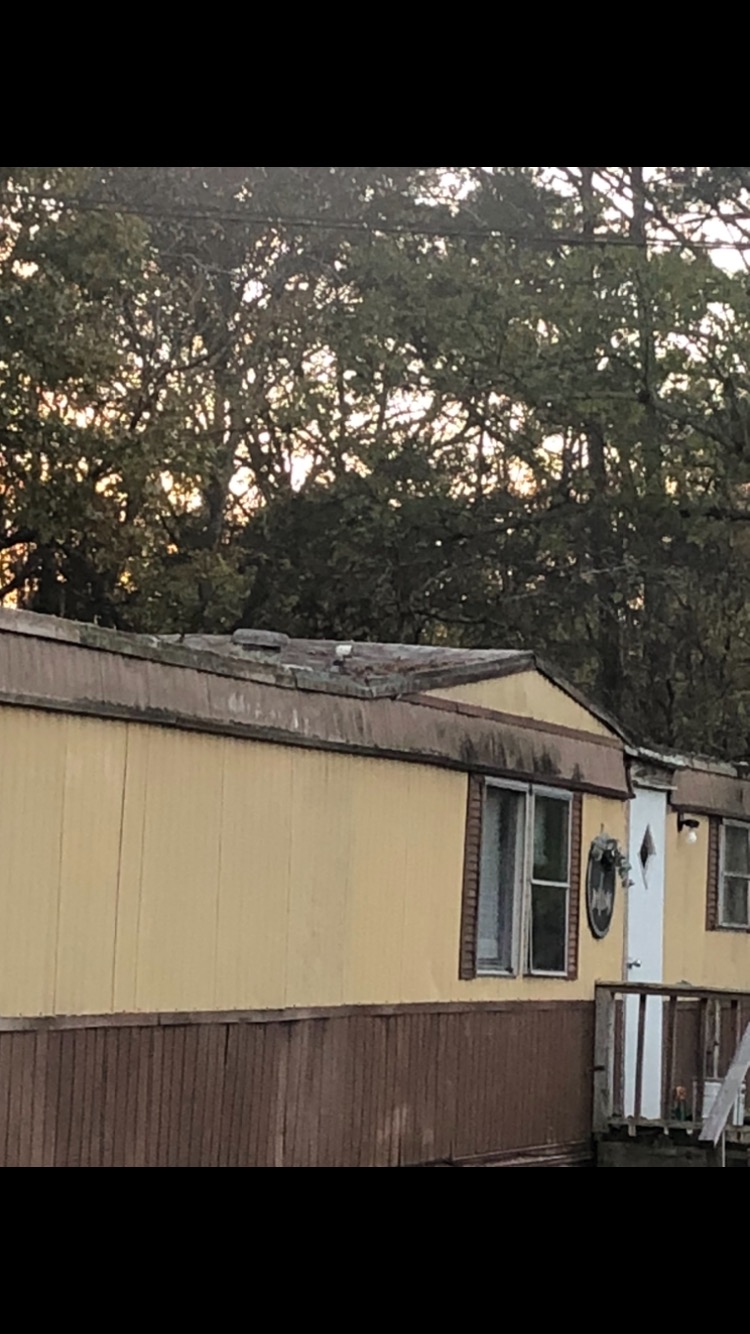
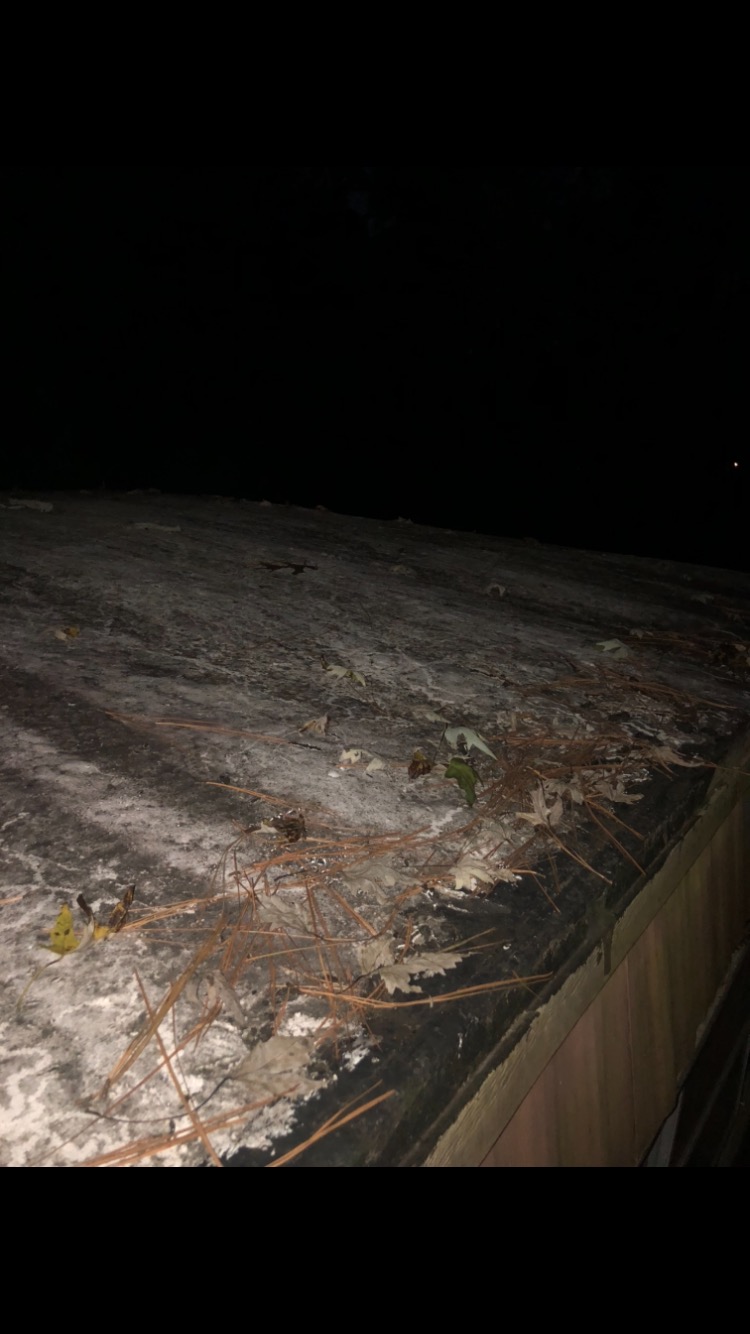
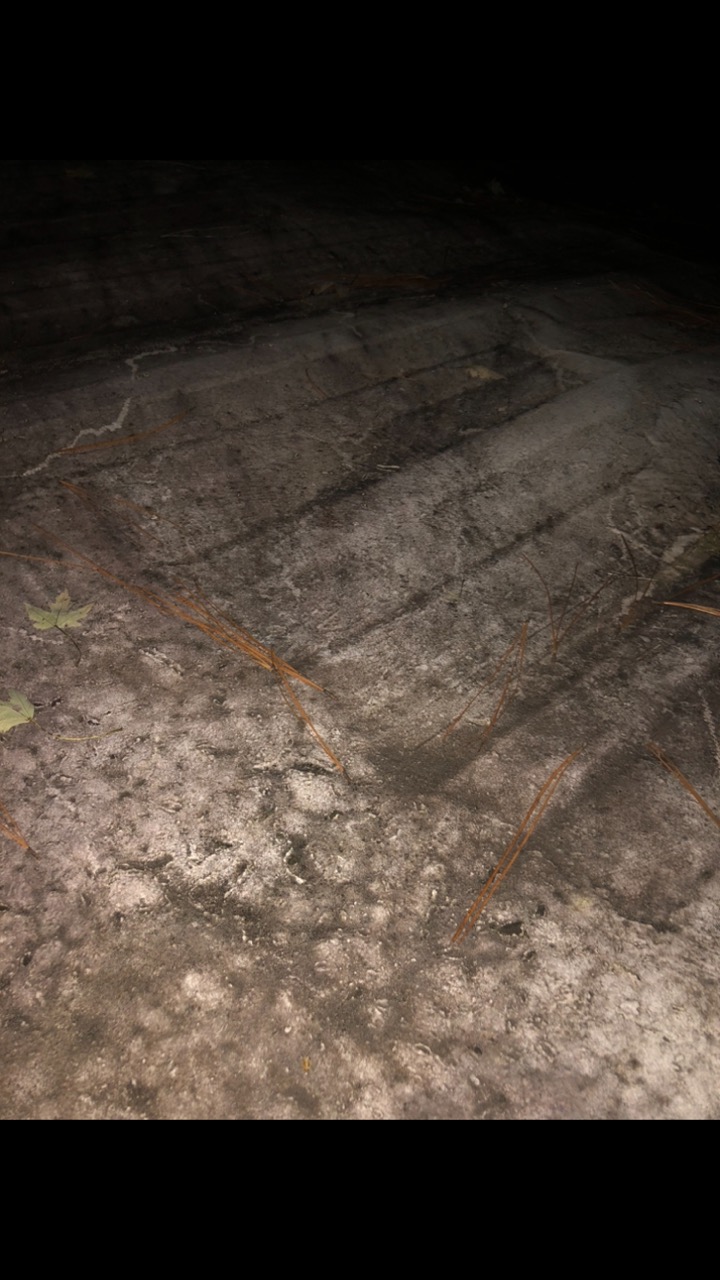
Customer question — May 17, 2025
Reply from Naas
I was looking at the pic just now and had questions.
- What material is on the roof?
- Where is the problem?
A metal barn roof with leaking nails and rubber washers
Customer question — Jun 12, 2022
Reply from Naas
An unknown white strip over a metal-roof seam
Customer question — Oct 3, 2022
Reply from Naas
A gap near a metal-panel overlap: which way does water flow?
Customer question — Aug 16, 2025
Reply from Naas
Turbo Poly Seal — Preparation
A leaking metal roof valley with old tar and caulking
Customer question — Dec 11, 2025
Reply from Naas
Roof membrane to wall transitions: surface condition and vertical application
Customer question — Sep 1, 2025
Reply from Naas
How to seal a roof-to-wall transition with Turbo Poly Seal
Step-by-step repair instructions
- Prepare the repair area: Clean the wall and metal termination bar thoroughly. Both surfaces must be completely dry before applying Turbo Poly Seal.
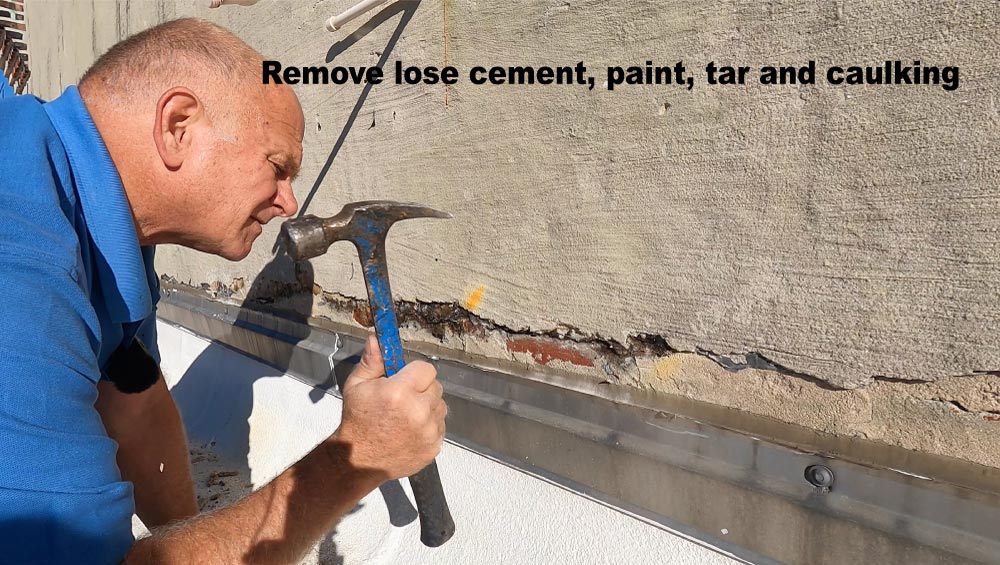
- Prepare TPO where applicable: New TPO may have an oily or plastic-like manufacturing film that interferes with adhesion. Clean it thoroughly with lacquer thinner and allow it to dry completely.
- Apply the base coat: Brush Turbo Poly Seal onto the wall and termination bar across the joint you are sealing.
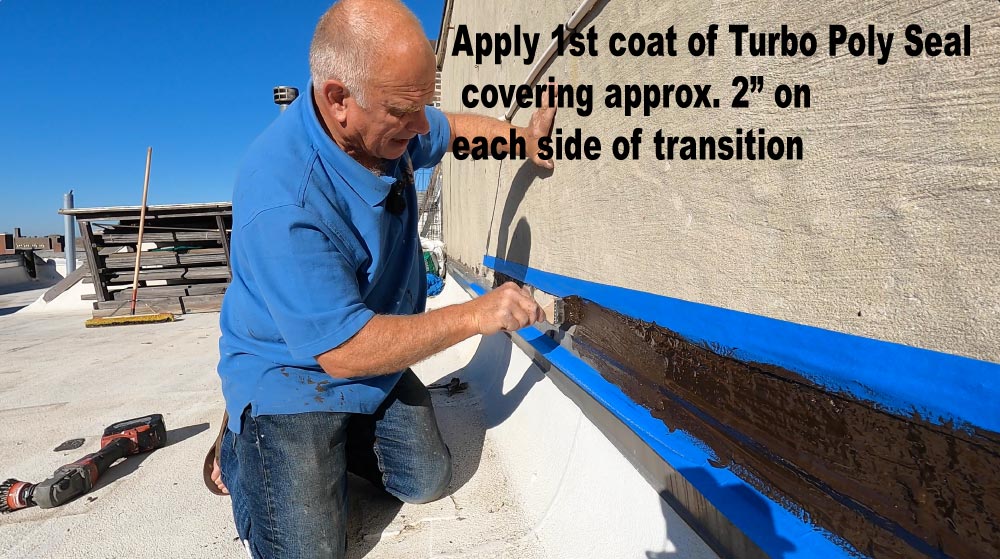
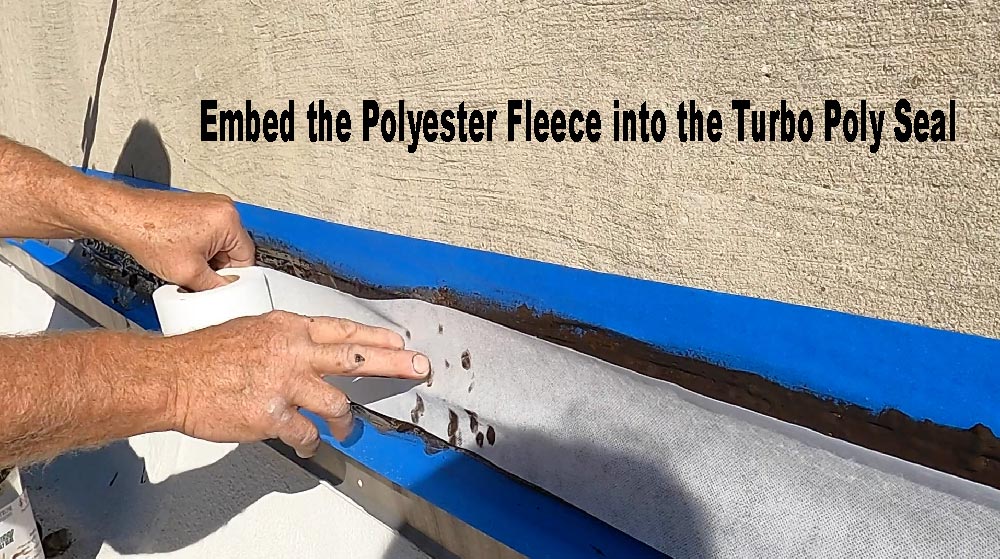
- Embed the polyester fleece immediately: Cover the termination bar and extend the fleece onto the wall above it. Press it into the wet sealant, following the surface contours without leaving gaps or air pockets.
- Completely cover the fleece: Apply a generous topcoat of Turbo Poly Seal until the fabric’s weave is no longer visible.
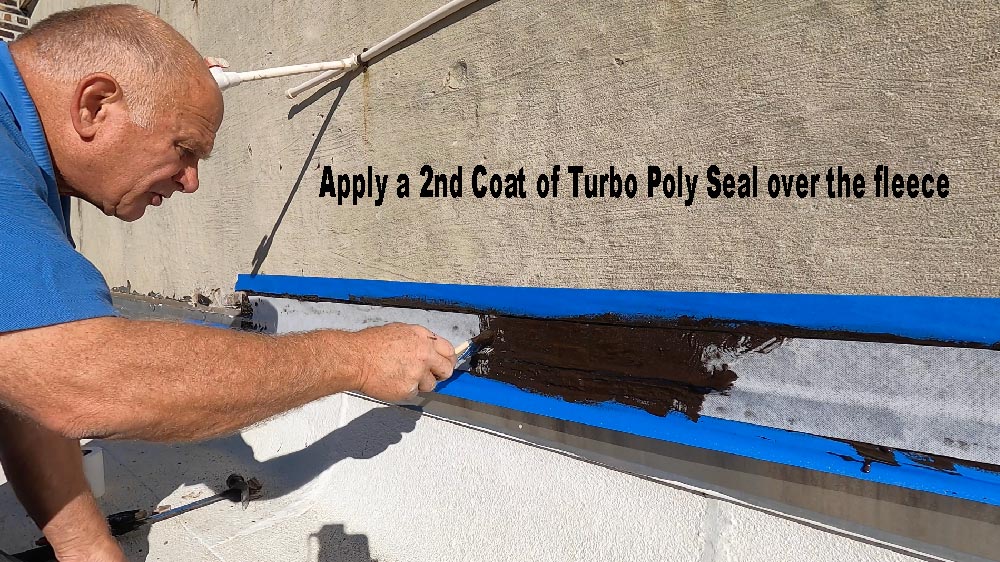
The finished repair forms a reinforced seal across the wall-to-bar joint, providing wider coverage than a narrow bead of caulking.
Additional details
Which roof surfaces does Turbo Poly Seal adhere to?
We have tested Turbo Poly Seal on the following surfaces:
Photos
Related videos
TPO-to-wall transitions: surface condition and vertical application — separate customer conversation
Customer question — Feb 20, 2025
Reply from Naas
Before removing old repairs, identify the roof membrane
Customer question — May 10, 2025
Reply from Naas
Photos
An elastomeric-coated wall: check the layer underneath
Customer question — Mar 18, 2024
Reply from Naas
Preparing old mastic around a skylight curb and vent pipe
Customer question — Oct 29, 2024
Reply from Naas
Leaks along an insulated aluminum patio-roof seam
Customer question — Dec 31, 2022
Reply from Naas
Old sealant on chimney brick before a Turbo Poly Seal repair
Customer question — May 28, 2025
Reply from Naas
A metal barn roof with leaking nails and rubber washers
Customer question — Jun 12, 2022
Reply from Naas
An exhaust-fan flashing repair against a block wall
Customer question — Apr 3, 2022
Reply from Naas
An unknown white strip over a metal-roof seam
Customer question — Oct 3, 2022
Reply from Naas
Super Silicone Seal — Metal roofs
Leaking metal-roof screws: check the fasteners before sealing
Customer question — May 1, 2025
Reply from Naas
Leaking metal-roof screws: check the fasteners before sealing — separate customer conversation
Customer question — Nov 4, 2025
Reply from Naas
How many metal-roof screws will a container cover?
Customer question — Nov 4, 2025
Reply from Naas
Choosing a sealant for metal-roof seams versus screw heads
Customer question — May 22, 2023
Reply from Naas
Super Silicone Seal — Preparation
Leaking metal-roof screws: check the fasteners before sealing
Customer question — May 1, 2025
Reply from Naas
Leaking metal-roof screws: check the fasteners before sealing — separate customer conversation
Customer question — Nov 4, 2025
Reply from Naas
TPO roof-edge flashing that has pulled loose
Customer question — Feb 13, 2020
Reply from Naas
Super Silicone Seal — Coverage and kits
How many metal-roof screws will a container cover?
Customer question — Nov 4, 2025
Reply from Naas
An EPDM roof: choose the compatible product before estimating quantity
Customer question — Sep 20, 2025
Reply from Naas
Super Silicone Seal — Recoating and durability
Does Super Silicone Seal need a painted UV-protection coat?
Customer question — Nov 4, 2025
Reply from Naas
Turbo Poly Seal — Chimneys
Should I coat an entire deteriorated chimney with Turbo Poly Seal?
Customer question — Oct 30, 2025
I have a chimney that is not being used and in poor condition. It is the source of leaks in the house. Rather than demo or repair the chimney, I would like to coat the entire chimney with turbo poly seal.
- Do you recommend it be used for this purpose?
- Any must do tips that aren’t covered in your chimney crown repair video?
- Do you sell or recommend bigger sheets of fleece for this purpose?
Reply from Naas
Fine bubbles in a chimney-crown repair
Customer question — May 28, 2024
Last year we were having problems with our chimney leaking water, so I ordered your product and cleaned off the old cracked chimney crown sealer that was previously on and prepped and applied your product. After the first coat I noticed a lot of fine bubbles coming to the surface, so the following day I applied a second coat and it seemed to seal up and worked fine until now when I noticed some leakage in our family room. I just inspected it and a number of fine bubbles have appeared causing several spots where water can infiltrate. My questions are:
- Are the air bubbles due to too much brushing? Ie when I put it on I really had to work it in, maybe I did it too much?
- If I re-apply another coat of turbo seal will this seal up the fine holes or do I need to strip off the turbo seal I put on last year?
Reply from Naas
How should fleece follow a chimney crack?
Customer question — Feb 28, 2023
Reply from Naas
Old sealant on chimney brick before a Turbo Poly Seal repair
Customer question — May 28, 2025
Reply from Naas
A leak near the chimney: crown or flashing?
Customer question — Nov 25, 2023
Reply from Naas
General roof repairs — Chimneys
Should I coat an entire deteriorated chimney with Turbo Poly Seal?
Customer question — Oct 30, 2025
I have a chimney that is not being used and in poor condition. It is the source of leaks in the house. Rather than demo or repair the chimney, I would like to coat the entire chimney with turbo poly seal.
- Do you recommend it be used for this purpose?
- Any must do tips that aren’t covered in your chimney crown repair video?
- Do you sell or recommend bigger sheets of fleece for this purpose?
Reply from Naas
Turbo Poly Seal — Compatibility
Roof membrane to wall transitions: surface condition and vertical application
Customer question — Sep 1, 2025
Reply from Naas
How to seal a roof-to-wall transition with Turbo Poly Seal
Step-by-step repair instructions
- Prepare the repair area: Clean the wall and metal termination bar thoroughly. Both surfaces must be completely dry before applying Turbo Poly Seal.
- Prepare TPO where applicable: New TPO may have an oily or plastic-like manufacturing film that interferes with adhesion. Clean it thoroughly with lacquer thinner and allow it to dry completely.
- Apply the base coat: Brush Turbo Poly Seal onto the wall and termination bar across the joint you are sealing.
- Embed the polyester fleece immediately: Cover the termination bar and extend the fleece onto the wall above it. Press it into the wet sealant, following the surface contours without leaving gaps or air pockets.
- Completely cover the fleece: Apply a generous topcoat of Turbo Poly Seal until the fabric’s weave is no longer visible.
The finished repair forms a reinforced seal across the wall-to-bar joint, providing wider coverage than a narrow bead of caulking.
Additional details
Which roof surfaces does Turbo Poly Seal adhere to?
We have tested Turbo Poly Seal on the following surfaces:
Photos
Related videos
TPO-to-wall transitions: surface condition and vertical application — separate customer conversation
Customer question — Feb 20, 2025
Reply from Naas
Skylight glazing and curb flashing are different repair surfaces
Customer question — May 5, 2024
Reply from Naas
Skylight glazing and curb flashing are different repair surfaces — separate customer conversation
Customer question — Jul 25, 2023
Reply from Naas
An elastomeric-coated wall: check the layer underneath
Customer question — Mar 18, 2024
Reply from Naas
Can Turbo Poly Seal be used on a cracked roof shingle?
Customer question — Jun 23, 2021
Reply from Naas
An EPDM roof: choose the compatible product before estimating quantity
Customer question — Sep 20, 2025
Reply from Naas
A leaking EPDM-to-copper roof edge
Customer question — Oct 25, 2023
Reply from Naas
A PVC pipe entering a concrete foundation
Customer question — Mar 27, 2022
Reply from Naas
An unknown white strip over a metal-roof seam
Customer question — Oct 3, 2022
Reply from Naas
PVC roofing: material condition matters to product selection
Customer question — Feb 6, 2024
Reply from Naas
General roof repairs — Walls and transitions
Roof membrane to wall transitions: surface condition and vertical application
Customer question — Sep 1, 2025
Reply from Naas
How to seal a roof-to-wall transition with Turbo Poly Seal
Step-by-step repair instructions
- Prepare the repair area: Clean the wall and metal termination bar thoroughly. Both surfaces must be completely dry before applying Turbo Poly Seal.
- Prepare TPO where applicable: New TPO may have an oily or plastic-like manufacturing film that interferes with adhesion. Clean it thoroughly with lacquer thinner and allow it to dry completely.
- Apply the base coat: Brush Turbo Poly Seal onto the wall and termination bar across the joint you are sealing.
- Embed the polyester fleece immediately: Cover the termination bar and extend the fleece onto the wall above it. Press it into the wet sealant, following the surface contours without leaving gaps or air pockets.
- Completely cover the fleece: Apply a generous topcoat of Turbo Poly Seal until the fabric’s weave is no longer visible.
The finished repair forms a reinforced seal across the wall-to-bar joint, providing wider coverage than a narrow bead of caulking.
Additional details
Which roof surfaces does Turbo Poly Seal adhere to?
We have tested Turbo Poly Seal on the following surfaces:
Photos
Related videos
TPO-to-wall transitions: surface condition and vertical application — separate customer conversation
Customer question — Feb 20, 2025
Reply from Naas
An elastomeric-coated wall: check the layer underneath
Customer question — Mar 18, 2024
Reply from Naas
Coping and flashing: confirm both the material and the leak source
Customer question — Jun 24, 2024
Reply from Naas
A Quonset hut leak at the metal-to-concrete junction
Customer question — Mar 18, 2023
Reply from Naas
Small holes left by lettering on metal siding
Customer question — Aug 22, 2022
Reply from Naas
A mobile-home roof transition needs a closer look
Customer question — May 17, 2025
Reply from Naas
I was looking at the pic just now and had questions.
- What material is on the roof?
- Where is the problem?
A flat-roof leak may begin at the shingle transition above it
Customer question — May 18, 2025
Reply from Naas
An exhaust-fan flashing repair against a block wall
Customer question — Apr 3, 2022
Reply from Naas
Turbo Poly Seal — Overview
Why does Turbo Poly Seal look different in different videos?
Customer question — Jul 15, 2025
Reply from Naas
Super Silicone Seal — Compatibility
Why does Turbo Poly Seal look different in different videos?
Customer question — Jul 15, 2025
Reply from Naas
TPO roof-edge flashing that has pulled loose
Customer question — Feb 13, 2020
Reply from Naas
White or black Super Silicone Seal: what does the color tell me?
Customer question — Nov 14, 2024
Reply from Naas
White or black Super Silicone Seal: what does the color tell me? — separate customer conversation
Customer question — May 10, 2022
Reply from Naas
PVC roofing: material condition matters to product selection
Customer question — Feb 6, 2024
Reply from Naas
Turbo Poly Seal — Protection and maintenance
Localized rust holes in a galvanized steel roof
Customer question — Jul 1, 2025
Reply from Naas
Keeping an exposed metal-flashing repair neat
Customer question — Mar 10, 2022
Reply from Naas
General roof repairs — Leak diagnosis
Which photos help Naas assess a roof leak?
Customer question — Aug 12, 2025
Reply from Naas
Which photos help Naas assess a roof leak? — separate customer conversation
Customer question — Nov 7, 2024
Reply from Naas
Which photos help Naas assess a roof leak? — separate customer conversation
Customer question — May 15, 2023
Reply from Naas
Just purchasing a product is not solving leaks.
- You have to identify where the water is leaking from
- Once you know , then you could use product, maybe just temporally, to stop the leak.
Before removing old repairs, identify the roof membrane
Customer question — May 10, 2025
Reply from Naas
Photos
Surface cracks may not be the source of a roof leak
Customer question — Aug 27, 2023
Reply from Naas
A persistent skylight-area leak during wind-driven rain
Customer question — Sep 18, 2024
Reply from Naas
Photos
Loose satellite-dish screws on a flat roof
Customer question — Sep 12, 2021
Reply from Naas
Turbo Poly Seal — Leak diagnosis
Which photos help Naas assess a roof leak?
Customer question — Aug 12, 2025
Reply from Naas
Which photos help Naas assess a roof leak? — separate customer conversation
Customer question — Nov 7, 2024
Reply from Naas
Which photos help Naas assess a roof leak? — separate customer conversation
Customer question — May 15, 2023
Reply from Naas
Just purchasing a product is not solving leaks.
- You have to identify where the water is leaking from
- Once you know , then you could use product, maybe just temporally, to stop the leak.
Coping and flashing: confirm both the material and the leak source
Customer question — Jun 24, 2024
Reply from Naas
Surface cracks may not be the source of a roof leak
Customer question — Aug 27, 2023
Reply from Naas
A mobile-home roof transition needs a closer look
Customer question — May 17, 2025
Reply from Naas
I was looking at the pic just now and had questions.
- What material is on the roof?
- Where is the problem?
A flat-roof leak may begin at the shingle transition above it
Customer question — May 18, 2025
Reply from Naas
A leak near the chimney: crown or flashing?
Customer question — Nov 25, 2023
Reply from Naas
An exhaust-fan flashing repair against a block wall
Customer question — Apr 3, 2022
Reply from Naas
A gap near a metal-panel overlap: which way does water flow?
Customer question — Aug 16, 2025
Reply from Naas
Super Silicone Seal — Skylights
Which photos help Naas assess a roof leak?
Customer question — Aug 12, 2025
Reply from Naas
Which photos help Naas assess a roof leak? — separate customer conversation
Customer question — Nov 7, 2024
Reply from Naas
Which photos help Naas assess a roof leak? — separate customer conversation
Customer question — May 15, 2023
Reply from Naas
Just purchasing a product is not solving leaks.
- You have to identify where the water is leaking from
- Once you know , then you could use product, maybe just temporally, to stop the leak.
Skylight glazing and curb flashing are different repair surfaces
Customer question — May 5, 2024
Reply from Naas
Skylight glazing and curb flashing are different repair surfaces — separate customer conversation
Customer question — Jul 25, 2023
Reply from Naas
A persistent skylight-area leak during wind-driven rain
Customer question — Sep 18, 2024
Reply from Naas
Photos
Turbo Poly Seal — Torch-down roofs
Before removing old repairs, identify the roof membrane
Customer question — May 10, 2025
Reply from Naas
Photos
Surface cracks may not be the source of a roof leak
Customer question — Aug 27, 2023
Reply from Naas
Turbo Poly Seal — Weather and curing
Can gravel go back over a repaired tar-and-gravel roof?
Customer question — Mar 5, 2025
Reply from Naas
Turbo Poly Seal — Storage
Why can a previously opened Turbo Poly Seal can form a skin?
Customer question — Aug 20, 2024
Reply from Naas
Turbo Poly Seal — Troubleshooting
Why can a previously opened Turbo Poly Seal can form a skin?
Customer question — Aug 20, 2024
Reply from Naas
Cracking at a roof-to-porch transition: what needs checking?
Customer question — Aug 29, 2022
Reply from Naas
There could be several reasons why it would crack like that.
- If the content wasn’t stirred properly
- If there is significant movement between the 2 surfaces
- If the transition from one panel to the lower one has a large space
Photos
Fine bubbles in a chimney-crown repair
Customer question — May 28, 2024
Last year we were having problems with our chimney leaking water, so I ordered your product and cleaned off the old cracked chimney crown sealer that was previously on and prepped and applied your product. After the first coat I noticed a lot of fine bubbles coming to the surface, so the following day I applied a second coat and it seemed to seal up and worked fine until now when I noticed some leakage in our family room. I just inspected it and a number of fine bubbles have appeared causing several spots where water can infiltrate. My questions are:
- Are the air bubbles due to too much brushing? Ie when I put it on I really had to work it in, maybe I did it too much?
- If I re-apply another coat of turbo seal will this seal up the fine holes or do I need to strip off the turbo seal I put on last year?
Reply from Naas
Turbo Poly Seal — Skylights
Skylight glazing and curb flashing are different repair surfaces
Customer question — May 5, 2024
Reply from Naas
Skylight glazing and curb flashing are different repair surfaces — separate customer conversation
Customer question — Jul 25, 2023
Reply from Naas
Preparing old mastic around a skylight curb and vent pipe
Customer question — Oct 29, 2024
Reply from Naas
Turbo Poly Seal — Coverage and kits
Can cotton cloth replace the polyester repair fleece?
Customer question — Apr 10, 2021
Reply from Naas
Turbo Poly Seal — Parapets
Coping and flashing: confirm both the material and the leak source
Customer question — Jun 24, 2024
Reply from Naas
Turbo Poly Seal — Vent and stove pipes
Preparing old mastic around a skylight curb and vent pipe
Customer question — Oct 29, 2024
Reply from Naas
Turbo Poly Seal — Windows, doors and wood
Leaks along an insulated aluminum patio-roof seam
Customer question — Dec 31, 2022
Reply from Naas
Ordering and support — Shipping damage
What photos help when a product shipment arrives damaged?
Customer question — Mar 29, 2023
Reply from Naas
Super Silicone Seal — EPDM repairs
An EPDM seam repair with a customer follow-up
Customer question — Feb 22, 2022
Ok, here are a couple of pictures of the seam I need to repair, In some places it’s wider than 4 inches that need repaired.
- Do you double the fabric tape in this case?
- Would you recommend super silicone or the turbo poly? I have a lot to do so I’m hoping the super silicone seal will work.
- Is the white any better than the black?
- Will the black 5 gallon buckets be coming back into stock any time soon?
Reply from Naas
An EPDM roof: choose the compatible product before estimating quantity
Customer question — Sep 20, 2025
Reply from Naas
A leaking EPDM-to-copper roof edge
Customer question — Oct 25, 2023
Reply from Naas
General roof repairs — Customer repair reports
Customer report: a patio roof stayed dry during heavy rain
Customer question — Dec 21, 2021
Reply from Naas
Turbo Poly Seal — Gutters and drip edges
A leak at the metal roof edge and drip edge
Customer question — Oct 12, 2021
Reply from Naas
Super Silicone Seal — Gutters and drains
TPO roof-edge flashing that has pulled loose
Customer question — Feb 13, 2020
Reply from Naas
A leaking EPDM-to-copper roof edge
Customer question — Oct 25, 2023
Reply from Naas
Turbo Poly Seal — Shingle roofs
Can Turbo Poly Seal be used on a cracked roof shingle?
Customer question — Jun 23, 2021
Reply from Naas
A flat-roof leak may begin at the shingle transition above it
Customer question — May 18, 2025
Reply from Naas
General roof repairs — Ponding and drainage
Repairing a leak in a ponding area is different from filling the depression
Customer question — Nov 6, 2025
Reply from Naas
General roof repairs — Pipe penetrations
A PVC pipe entering a concrete foundation
Customer question — Mar 27, 2022
Reply from Naas
General roof repairs — Roof equipment
Loose satellite-dish screws on a flat roof
Customer question — Sep 12, 2021
Reply from Naas
Help & safety documents
Read the appropriate Safety Data Sheet before use. Product pages also provide technical and safety documents.
For demonstrations, visit Flat Roof Doctor on YouTube.
Chimney Crown Repair with Turbo Poly Seal