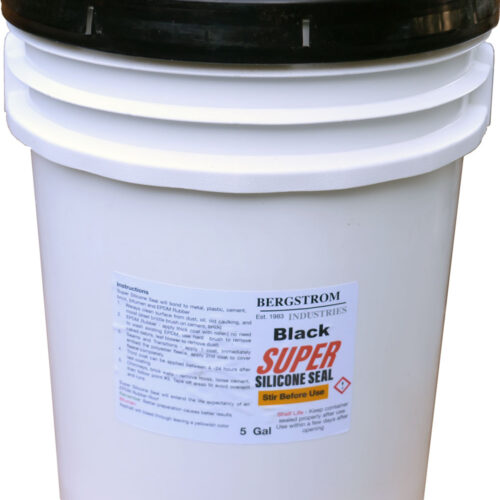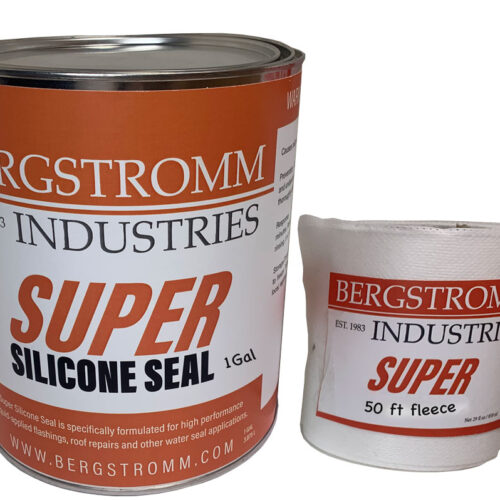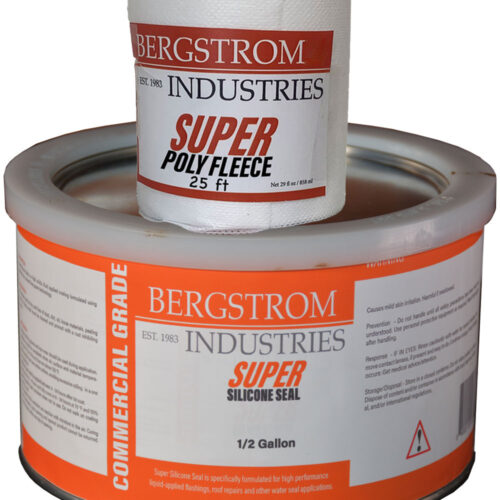
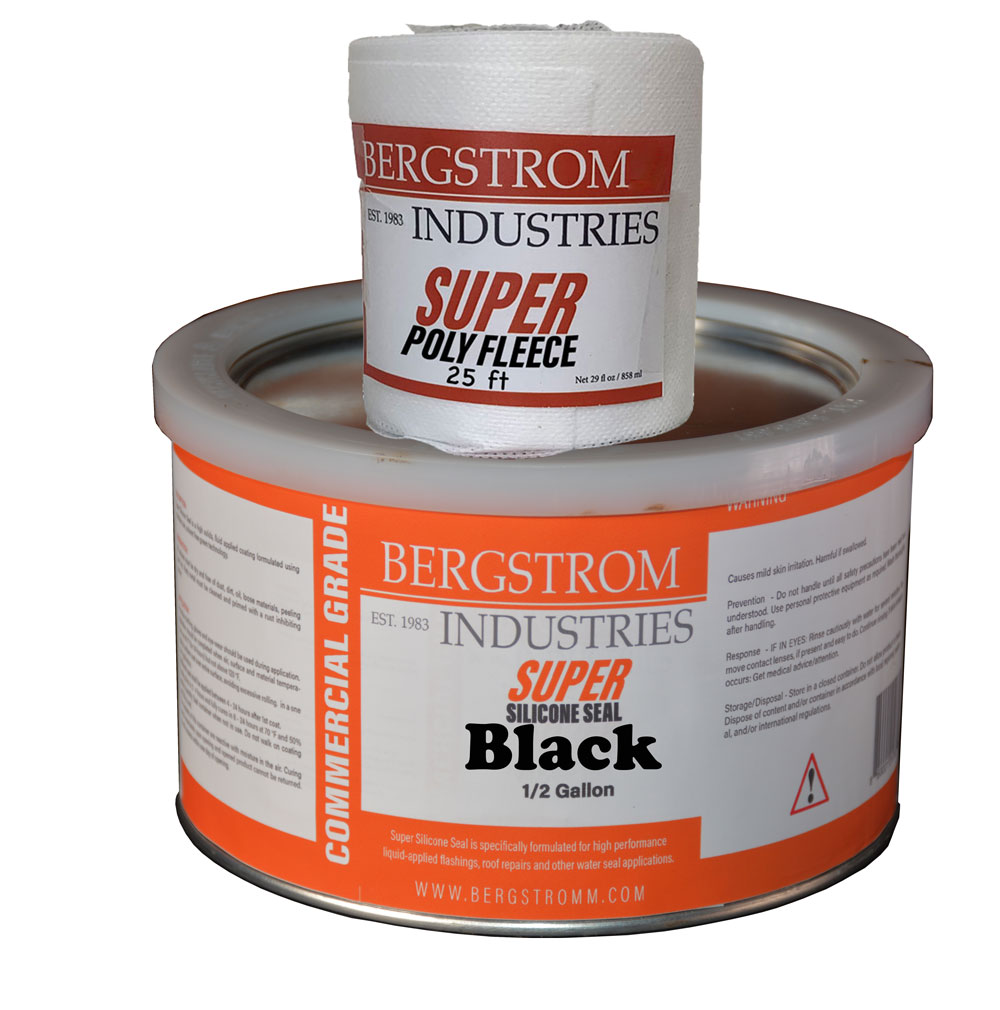
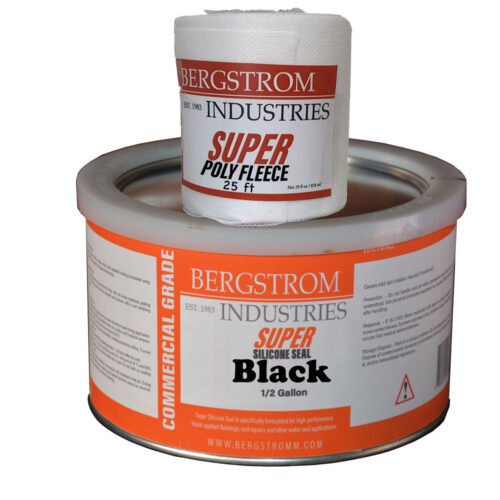
Black Super Silicone Seal Leak Repair 1/2 Gal + 25 ft Poly Fleece

Black Super Silicone Seal repairs leaks at seams and transitions on EPDM rubber, TPO, metal, glass, and concrete. Use with polyester fleece to reinforce the repair.

Kit includes: ½ gallon of Black Super Silicone Seal and one 25-foot roll of 4-inch-wide Poly Fleece.

Approximate coverage: 20–22.5 linear feet of repair using 4-inch fleece, including the first coat and topcoat. Coverage varies with surface texture and application thickness. The included fleece length does not equal sealant coverage.

Apply to a clean, completely dry surface. Not paintable.

Shipping note: Metal cans may arrive dented from shipping.

From: $142.00

No additional shipping charges on products below in this package

Extra Poly Fleece — 50-foot roll (optional)

Your kit already includes one 25-foot roll

Z-Gutter Leaf Filter / Strainer 8 pcs

Keep your downspouts clear with this low-profile gutter filter. Designed to prevent clogs, it ensures water flows freely—even when gutters are filled with leaves and debris. Reliable drainage, no matter the season.

  • Secure Payments
  • Returns on Unopened Products
Guaranteed Safe Checkout
SKU: SSS 1/2 Gal Black Categories: ,
QuestionTurbo Poly SealSuper Silicone Seal
How much repair does one gallon cover?Approximately 35–40 linear feet using 4-inch fleece, including the first coat and topcoat. Coverage varies with surface texture, temperature and application thickness.Approximately 40–45 linear feet using 4-inch fleece, including the first coat and topcoat. Coverage varies with surface texture and application thickness.
How much fleece comes with the kit?The 1/2-gallon kit includes 25 feet of 4-inch fleece; the 1-gallon kit includes 50 feet. The 2-gallon kit includes two 50-foot rolls. Included fleece length is not a sealant-coverage guarantee.The 1/2-gallon kit includes 25 feet of 4-inch fleece; the 1-gallon kit includes 50 feet. The 5-gallon bucket does not include fleece. Included fleece length is not a sealant-coverage guarantee.
Can it be applied to a wet surface?No. Prepare the surface and let it dry completely before applying Turbo Poly Seal.No. Every application surface must be completely dry, including surfaces cleaned with a wet rag.
Can it be used on EPDM rubber roofing?No. Do not apply Turbo Poly Seal directly to EPDM rubber roofing.Yes. Apply to clean, completely dry EPDM. No sanding or primer is required.
Does it adhere to glass or Plexiglas?Not to glass. It can bond to Plexiglas and metal for the documented skylight frame-to-Plexiglas repair.Yes. It can bond to glass and Plexiglas for glazing-to-frame repairs. Follow the surface-specific preparation instructions.
Can it be applied over an existing silicone coating?No. Remove silicone caulking and silicone roof coatings from the bonding area.Firmly attached existing silicone coating can remain. Remove loose silicone, wipe clean with a wet rag and allow the surface to dry completely.
How is TPO prepared?Wipe with a rag and lacquer thinner, remove silicone caulking from the repair area, and let the surface dry completely before applying sealant and fleece.Wipe clean with a wet rag and let it dry completely. No sanding or primer is required.
Can it be applied over asphalt or torch-down roofing?Yes. The repair area must be clean, completely dry and smooth enough for fleece to lie flat. Remove or smooth bumps before applying.Do not use on asphalt or plain torch-down membrane. Granulated torch-down is suitable only while the granulated surface remains intact; use Turbo if preparation exposes plain asphalt.
How is a metal roof prepared?Remove old repair materials and loose rust. Firmly attached original factory paint may remain. Clean the bonding area and let it dry completely. Do not add new primer or paint beneath the repair.Remove dust, oil, debris and loose or flaking rust. Firmly attached factory paint may remain. Let the surface dry completely before application.
Should the product be stirred?Yes. Stir thoroughly by hand until the sealant has a consistent brown appearance throughout.Yes. Stir thoroughly. Use a drill with a paint-mixing attachment for a 5-gallon bucket; hand stirring is sufficient for smaller containers.
Can the sealant be thinned?No. Use exactly as supplied. Do not add solvents or thinner.No. Use exactly as supplied. Do not add solvents, thinner or other materials.
What brush should I use?Use an inexpensive, 2-inch disposable brush.Use an inexpensive, 2-inch disposable brush for repairs. Whole-roof coating uses a 1/2-inch-nap roller.
How are horizontal repairs reinforced with fleece?Apply a thin first coat, immediately embed fleece, and apply a thick topcoat while the first coat is wet. Overlap adjoining fleece by 1/2 inch with sealant between the layers. Fully cover the fleece.Apply a thick first coat, immediately embed fleece, and apply a thick topcoat. No wait is needed between these layers. Fully cover the fleece so no fabric pattern or exposed fleece remains visible.
How are upright flashing transitions repaired?Bridge compatible, clean, dry wall and metal surfaces with fleece embedded in sealant, then fully cover the fleece. Existing groove filler can remain if it is not loose or preventing the fleece from lying flat; the repair must bond to the exposed compatible surfaces.Apply a thin first coat and let it become tacky. Embed fleece and add another thin coat. Wait 30–45 minutes before the additional coat that fully covers the fleece.
How are metal-roof screws sealed?After tightening the screw and seating the washer flat, cover the screw head and washer with a dab of sealant. No fleece is needed over the screw.After tightening the screw and seating the washer flat, cover the screw head and washer with a dab of sealant. No fleece is needed over the screw. Patch abandoned screw holes with fleece and sealant.
How are metal-roof seams repaired?Fasten separated panels tightly together before sealing. Reinforce the seam with fleece and sealant, following the panel profile. Keep seam fleece off the screws and seal screw heads separately.Fasten separated panels tightly together before sealing. Reinforce the seam with fleece and sealant, following the panel profile. Keep seam fleece off the screws and seal screw heads separately.
Can it repair gutter seams?Yes. Secure loose joints with commercial rivets, clean and dry the area, and seal from inside the gutter with fleece following the bottom and both sides.Yes. Secure loose joints with commercial rivets, clean and dry the area, and seal from inside the gutter with fleece following the bottom and both sides.
Can it repair a concrete chimney crown?Yes. Reinforce every crack with fleece and fully cover it. One coat on concrete covers approximately 15 square feet per 1/2 gallon; areas reinforced with fleece require more material.Yes. Reinforce every crack with fleece and fully cover it. Follow the chimney-crown preparation and repair instructions; the surface must be completely dry.
Which skylight repairs can it be used for?Primarily skylight curb flashing, especially curb corners. It can also seal the documented Plexiglas-to-metal-frame transition. It does not adhere to glass and is not a solution for every skylight leak.It can seal compatible glass- or Plexiglas-to-frame joints using sealant and fleece. Clean and prepare the bonding areas, embed and fully cover the fleece, and remove masking tape immediately after the topcoat.
Can it repair a cracked EPDM vent boot?Only as the documented reinforced cover anchored to the pipe above and the compatible roof surface below. It does not bond to EPDM. Follow the full vent-boot repair instructions.Yes. Reinforce with fleece extending onto the pipe and compatible surrounding roof surface. Follow the thin-coat vertical method on upright sections.
What application temperatures are recommended?Recommended air temperature: 20–110°F. Ideal: 25–90°F. The surface must be completely dry; cold weather slows curing and high heat makes the sealant runnier.Recommended air temperature: 20–110°F. Ideal: 25–90°F. The surface must be completely dry. Cold weather delays rain readiness and curing.
How soon can rain fall on the repair?Allow approximately 10–15 minutes as a conservative estimate; about 5 minutes may be enough on a warm day. Surface skin formation is different from full cure. Cold-weather timing varies.Allow about 30 minutes on a warm day. Below 32°F, allow 3–4 hours. Rain readiness is different from full cure.
How long does curing take?Allow approximately 24–48 hours as conservative guidance. Heat speeds curing; cold conditions slow it.Allow approximately 24 hours under suitable conditions. Cold weather can extend curing time.
Can it be recoated with the same sealant?A fresh repair can receive another coat within a few hours. Once cured, wait 6–12 months for the standard maintenance recoat and wipe the uncoated surface with a dry rag. Earlier recoating or repairs covered with paint or Silver Coat require the separate preparation instructions.Yes. There is no mandatory waiting period for adding more sealant to a fresh repair, apart from the waits in the vertical application method. For an older repair, wipe clean with a wet rag and let it dry completely.
Can it be painted or given a protective coating?Yes. Silver Coat or non-fibered aluminum asphalt is recommended for protective coating; paint can also be used. Follow the separate protective-coating instructions.No paint or protective topcoat is needed. The sealant is UV-resistant and not paintable. It can be recoated with Super Silicone Seal.
How long can a properly applied repair last?Bergstrom Industries estimates approximately 10–12 years without a protective coating. Actual service life depends on preparation, application and conditions.Bergstrom Industries estimates approximately 12–20 years. Actual service life depends on preparation, application and conditions.
How should containers be stored?Store tightly sealed in a cool place. Recommended use: unopened within 3–4 months of shipping; opened within 3–6 months. Uncured material may remain usable longer, but this is not guaranteed.Store tightly sealed in a cool place. Recommended use: unopened within 3–4 months of shipping; opened within 3–4 months. Uncured material may remain usable longer, but this is not guaranteed.
What if a skin forms inside the container?Remove the surface skin and use the uncured sealant beneath it. Do not use material that has hardened throughout.Remove the surface skin and use the uncured sealant beneath it. Do not use hardened material.
How do I clean wet spills from tools or surrounding surfaces?Wipe up the bulk with paper towels, then clean surface residue with lacquer thinner. Follow the cleaner's precautions. This is a surface-cleanup method, not a skin-cleaning instruction.Immediately wipe off the uncured sealant with a damp rag. It is not water-soluble. Clean it up while it is still wet.
What common application mistakes should I avoid?Poor preparation, insufficient stirring, exposed fleece, and voids where fleece does not follow the roof profile. Check and correct the repair while it is wet, and follow the recoating instructions.Poor preparation, insufficient stirring, exposed fleece, and voids where fleece does not follow the roof profile. Follow the appropriate horizontal or vertical application method.

Need more answers?
Explore preparation tips, repair instructions, and product information.

Repair Guide & FAQs

Product Description

Black Super Silicone Seal: Important Information and Application Guide

Black Super Silicone Seal is a flexible, UV-resistant waterproofing sealant for roof repairs on EPDM rubber, TPO, metal, glass, skylights, ponds, gutters, concrete, and other compatible surfaces.

Brush or roll it onto a properly prepared, completely dry surface. Use Poly Fleece to reinforce seams, cracks, gaps, and transitions.

Repairing a leaking metal roof? Follow our metal roof seam repair guide for step-by-step instructions and a demonstration video using Super Silicone Seal and polyester fleece.

Best Uses

Black Super Silicone Seal is suitable for:

  • EPDM rubber roof seams and repairs
  • TPO roof repairs
  • Low-slope metal roof seams and screws
  • Skylight frames and glass-to-metal transitions
  • Roof flashing and penetrations
  • Chimney caps and concrete crown cracks
  • Gutter seams and joints
  • A/C ductwork and roof equipment
  • RV and shipping-container roof surfaces
  • EPDM pond-liner seams
  • Areas exposed to ponding water after curing
  • Full-surface coating of compatible roofs

Compatible Surfaces

Super Silicone Seal adheres to many properly prepared surfaces, including:

  • EPDM rubber
  • TPO roofing membrane
  • Metal
  • Aluminum and copper
  • Glass and Plexiglass
  • Concrete and cement
  • Brick
  • Wood
  • Painted surfaces
  • Some plastics

Always test a small area when the exact surface material or previous coating is unknown.

Do Not Apply Over

Super Silicone Seal should not be applied over:

  • Wet, frosted, or icy surfaces
  • Dirt, dust, oil, grease, or loose debris
  • Existing silicone caulking
  • Loose or peeling paint and roof coatings
  • Unstable, cracked, or deteriorated materials
  • Asphalt or tar surfaces
  • Surfaces where water can reach the uncured sealant

Super Silicone Seal will not bond properly to oily surfaces or existing silicone residue.

Important: Super Silicone Seal Cannot Be Painted

Super Silicone Seal is already UV resistant and does not require exterior paint for protection.

Do not apply paint over it because most paints will not adhere properly. If you need an additional layer, apply another coat of Super Silicone Seal.

Poly Fleece Is Essential

Always reinforce the following repairs with Poly Fleece:

  • Cracks
  • Open seams
  • Gaps and joints
  • Skylight transitions
  • Pond-liner seams
  • Roof flashing
  • Transitions between different materials

Poly Fleece helps distribute movement across the repair and prevents weak points from separating.

Fleece is generally unnecessary when coating a continuous roof surface or sealing individual metal roof screw heads.

Surface Preparation

Good preparation is essential for maximum adhesion.

  1. Make sure the repair area is completely dry.
  2. Remove loose dirt, dust, rust, caulk, oil, grease, and debris.
  3. Remove old silicone caulking and silicone residue.
  4. Lightly roughen smooth or glossy surfaces with 120-grit sandpaper.
  5. Wipe the surface with a clean rag and a compatible cleaner.
  6. Allow all cleaning solvents to evaporate completely.
  7. Use masking tape around the repair to keep edges clean and straight.

When cleaning EPDM, TPO, painted surfaces, plastics, or pond liners, test the cleaner in an inconspicuous area first. Strong solvents may damage certain materials.

Personal Protection

Before beginning:

  • Wear protective gloves.
  • Wear safety glasses.
  • Wear old clothes or protective clothing.
  • Use disposable brushes and rollers.
  • Work in a well-ventilated area.
  • Follow the safety instructions on the product label and Safety Data Sheet.

Super Silicone Seal can permanently stain clothing and may be difficult to remove after it begins curing.

Repairing Seams, Cracks, and Transitions

  1. Clean, prepare, and completely dry the repair area.
  2. Cut the Poly Fleece to the required length.
  3. Let the fleece extend about2–3 inches beyond each side of the seam or crack.
  4. Apply a generous first coat of Super Silicone Seal.
  5. Immediately embed the fleece into the wet sealant.
  6. Use a disposable brush to press the fleece firmly into the coating.
  7. Smooth out wrinkles, dry spots, and trapped air.
  8. Apply a second coat over the fleece until it is completely saturated and covered.
  9. Remove the masking tape before the sealant skins over.
  10. Allow the repair to cure without being disturbed.

You may apply an additional coat of Super Silicone Seal after about 4–12 hours, depending on temperature, humidity, and coating thickness.

Skylight Repairs

Super Silicone Seal is suitable for sealing many skylight leaks because it adheres to both glass and metal.

For best results:

  • Remove old, loose, or failed caulking.
  • Lightly roughen smooth surfaces where appropriate.
  • Clean and dry the repair area.
  • Apply the sealant across the entire leaking transition.
  • Use Poly Fleece to bridge the joint between the glass and frame.
  • Apply a second coat that completely covers the fleece.

Do not block skylight drainage channels or weep holes.

EPDM and TPO Roof Repairs

Use Super Silicone Seal to repair seams, flashing, cracks, and deteriorated areas on EPDM and compatible TPO roofing.

  • Clean the membrane without damaging it.
  • Make sure the surface is completely dry.
  • Use Poly Fleece over seams, cracks, gaps, and transitions.
  • Extend the repair beyond the damaged area.
  • Apply enough sealant to completely cover the fleece.

For TPO and other smooth membranes, test adhesion on a small area before beginning a large project.

Full-Roof Coating

You can roll or brush Super Silicone Seal over compatible EPDM, TPO, and low-slope metal roof surfaces.

  • Repair seams, cracks, holes, and flashing before coating the roof.
  • Use Poly Fleece only on seams, cracks, gaps, and transitions.
  • Use a 1/2-inch nap roller for larger roof areas.
  • Apply an even coat without leaving thin or missed areas.
  • Apply additional coats as needed.

Coverage may reach about 50–70 square feet per gallon, depending on surface texture, porosity, condition, and application thickness.

Rough, porous, badly weathered, or uneven surfaces will require more material.

Metal Roof Applications

Use Super Silicone Seal on low-slope metal roof seams, screws, rusted areas, and flashing.

  • Remove loose rust and unstable coatings.
  • Tighten or replace loose fasteners.
  • Use Poly Fleece over panel seams and transitions.
  • Fleece is generally unnecessary over individual screw heads.
  • Avoid applying excessive material on steep surfaces because the sealant can run before curing.

The coating helps protect sealed metal areas from moisture and additional corrosion.

Application Temperature and Weather

For best results:

  • Apply at approximately 25°F or higher.
  • Do not apply to wet, frozen, frosted, or icy surfaces.
  • Avoid application when rain is imminent.
  • Protect the repair from water until a surface skin has developed.
  • Allow approximately 24 hours for full curing.

The surface may become rain-ready in approximately 30 minutes, but cold temperatures, high humidity, heavy applications, and poor airflow can increase curing time.

Cleaning Spills and Tools

Clean spills immediately while the product is still wet.

  • Wipe away excess material with a clean rag.
  • You may use soap and water to clean up while the sealant is still wet.
  • Test any stronger cleaner on roofing membranes, paint, plastic, or glass before using it.
  • Cured material may require mechanical removal.

Storage After Opening

Exposure to air and moisture can cause a skin to form inside the container.

To preserve unused material:

  • Clean the container rim before closing.
  • Replace the lid immediately after use.
  • Seal the container as tightly as possible.
  • Store the container upright.
  • Keep it in a dry, temperature-controlled location.
  • Protect it from freezing and excessive heat.

A skin approximately 1/4 inch thick may form during shipping or storage. This is normal and does not necessarily affect the usable sealant underneath it.

UV Resistance and Durability

Super Silicone Seal is UV resistant and remains flexible under normal exterior exposure. It does not require a separate protective paint.

Service life depends on:

  • Surface preparation
  • Application thickness
  • Roof movement
  • Drainage
  • Climate
  • Condition of the underlying roof
  • Regular inspection and maintenance

Inspect all repaired or coated areas periodically and recoat them when signs of wear or damage appear.

Black Super Silicone Seal for EPDM Pond Liners

Black Super Silicone Seal can repair compatible EPDM pond-liner seams.

Pond-Liner Seam Application

  1. Drain or lower the water so the repair area remains completely dry.
  2. Clean the EPDM liner thoroughly.
  3. Allow the surface to dry completely.
  4. Cut a strip of Poly Fleece long enough to cover the seam.
  5. Extend the fleece approximately 2–3 inches beyond each side.
  6. Apply a generous first coat directly over the seam.
  7. Immediately embed the fleece into the wet sealant.
  8. Remove air pockets and make sure the fleece lies flat.
  9. Apply a second coat until the fleece is fully saturated and covered.
  10. Allow the repair to cure undisturbed for at least 24 hours or for the complete period stated on the product label.
  11. Do not return the repaired area to service until the sealant is fully cured.

Keep fish and aquatic plants away from the repair area during preparation and curing. Confirm the product’s current pond-use instructions before using it in any aquarium, potable-water system, or fully submerged application.

Product Information

Specification Information
Color Black
Container weight Approximately 6 lbs
Container dimensions Approximately 7 × 7 × 9 inches
Application method Brush or roller
Recommended application temperature Approximately 25°F and above
Approximate curing time 24 hours
UV protection Built in
Paintable No
Reinforcing material Poly Fleece for seams, cracks, and transitions
Approximate coverage 50–70 square feet per gallon, depending on the surface

Important Shipping and Return Information

  • Metal containers may arrive with minor dents caused by carrier handling.
  • A dent does not normally affect the sealant if the container remains sealed and is not leaking.
  • Contact us immediately if the container arrives leaking or the seal has been compromised.
  • Opened packages cannot be returned.
  • Review the current return policy before ordering for all deadlines, fees, and eligibility requirements.

Watch Super Silicone Seal Application Videos

See step-by-step roof, skylight, EPDM, metal, and pond-repair demonstrations:

Videos on Super Silicone Application:
This Roof Coating will REPAIR water LEAKS on ROOFS. Fixing leaky Rubber ROOF stopped water leaks. Watch how I saved the owner from having to replace this roof. Even Roofing Contractors don't know this secret. A Do It Yourself Repair. This method will extend your flat roofing rubber by 5 - 10 years. There is no need to call Roofing Contractors to do any roof repair. To buy Turbo Poly Seal or Super Silicone Seal - https://bergstromm.com/. This method can be applied to metal roofs, torch-down roofs, EPDM Rubber Roofs, and TPO Roofs.
Super Silicone Seal  - https://bergstromm.com/
FTC Affiliate Disclaimer -  I get commissions for purchases made through links in this post.
In this video, you will see the following:
1. The heat difference from a black rubber roof to a white-coated rubber roof
2. Flexibility test between roofing products
3. Best practice to save your rubber roof
4. How to calculate the  cost of repairing your own roof per square feet
5. Tools you need for roofing repairs
6. The importance of a protective coating against Ultraviolets and heat

0:00 How to save an EPDM Rubber Roof
0:28 Seam Tape destroyed by heat
0:44 Roof Temp over 180 F
1:06 Rubber is very thin
1:17 Explaining the concept
1:40 No need to clean thoroughly
1:57 Proof that SSS sticks well
2:35 What other Roofers do
2:50 How to repair seam with SSS
3:54 Painting Seems to extend the life
4:47 Old Silicone Coated Roof
5:44 Flexibility Test between products
7:00 Showing Stretchability
7:36 How much 1 Gal covers
10:30 End

This is one of the best videos to get knowledge on rubber roofing that can help you make decisions on your next flat roof repair.
You can avoid the expense of a new Rubber Flat Roof if you would only follow the instructions in this video.  Learn from the experience of The Flat Roof Doctor to make the proper decision.
EPDM Rubber Roofs are known to leak within 5 years of installation. The best practice would be to protect every seam and flashing from the heat and ultraviolet rays. This way you will extend your EPDM Roof life expectancy. Coating the seams with Super Silicone Seal from Bergstromm.com will reduce the heat on all the seams and at the same time protect the cover tape from ultraviolet degradation.
The cost is very low when you do this repair within a few years of the installation of your rubber roof. A five-gallon pale of Super Silicone Seal will cost approximately $400 and a 6" roller and handle and you can cover all the seams on a fairly large EPDM Rubber roof.

How to repair or extend the life of an EPDM Rubber Roof:
1. Brush clean all the seams with a stiff bristle brush to remove debris and dust that has caked on
2. Use a leaf blower to remove dust and debris
3. Buy Super Silicone Seal from Bergstromm.com
4. Shake the pale or stir with a paint stirrer
5. Apply one coat of Super Silicone Seal with a six-inch roller
6. Apply a second coat the following day

By following these steps above you will extend your roof's life and eliminate repairs in the future.
The super Silicone Seal bonds to the EPDM and reduces the heat by 50% on any sunny day. In the video, you will see where I measured the heat and in some areas, the roof temperature was 180 degrees Fahrenheit. Use this Flat Roof Coating to Repair/Fix leaks| Extend EPDM Rubber Roof Life | SUPER SILICONE SEAL

Use this Flat Roof Coating to Repair/Fix leaks| Extend EPDM Rubber Roof Life | SUPER SILICONE SEAL

244.8K views

Seal any Roof Leak, whether a Chimney Cap Leak, Rubber Roof Seam, or Skylight Leak, with Super Silicone Seal in 5 min with little preparation. This is a DIY repair kit that will save you lots of money. No need to contact a roofer to fix leaks
Super Silicone Seal can be bought at https://bergstromm.com/
FTC Affiliate Disclaimer -  I get commissions for purchases made through links in this post.
Super Silicone Seal will adhere to almost any surface. It is good for skylight leak repairs, transitioning from the metal frame to the glass.
It will seal cracks on chimney crowns. 
Super Silicone Seal is excellent for repairing seams on a rubber roof.
There are many uses and benefits for this product that help make Repairs a breeze. 
00:00 Sealing Metal Ductwork
00:57 Chimney Cap Sealed
02:27 Skylight Sealed
03:28 Rubber roof low spot filled
04:04 Rubber Roof Seam sealed

Four Easy Steps on How to Repair Leaks on Chimneys, Skylights, and Rubber Roofs:
1. Wipe clean the surface with a rag
2. Brush on a coat of sealant over the seam or crack about 2 inches on either side
3. Apply the polyester fleece, embedding it into the sealant
4. Apply a second coat covering the fleece 

For cleaner results, you can use masking tape to tape the area off where you don't want any of the sealants. Remember to remove the masking tape as soon as you have applied the second coat before it cures.

In many cases, you don't need to use Polyester Fleece. 
Super Silicone can build up a low spot where water is pooling on a roof. STOP ANY LEAK period - chimney cap, duct work, rubber roof, skylight - seal/Fix/ Repair leaks

STOP ANY LEAK period - chimney cap, duct work, rubber roof, skylight - seal/Fix/ Repair leaks

6K views

Videos on Super Silicone Application:
This Roof Coating will REPAIR water LEAKS on ROOFS. Fixing leaky Rubber ROOF stopped water leaks. Watch how I saved the owner from having to replace this roof. Even Roofing Contractors don't know this secret. A Do It Yourself Repair. This method will extend your flat roofing rubber by 5 - 10 years. There is no need to call Roofing Contractors to do any roof repair. To buy Turbo Poly Seal or Super Silicone Seal - https://bergstromm.com/. This method can be applied to metal roofs, torch-down roofs, EPDM Rubber Roofs, and TPO Roofs.
Super Silicone Seal  - https://bergstromm.com/
FTC Affiliate Disclaimer -  I get commissions for purchases made through links in this post.
In this video, you will see the following:
1. The heat difference from a black rubber roof to a white-coated rubber roof
2. Flexibility test between roofing products
3. Best practice to save your rubber roof
4. How to calculate the  cost of repairing your own roof per square feet
5. Tools you need for roofing repairs
6. The importance of a protective coating against Ultraviolets and heat

0:00 How to save an EPDM Rubber Roof
0:28 Seam Tape destroyed by heat
0:44 Roof Temp over 180 F
1:06 Rubber is very thin
1:17 Explaining the concept
1:40 No need to clean thoroughly
1:57 Proof that SSS sticks well
2:35 What other Roofers do
2:50 How to repair seam with SSS
3:54 Painting Seems to extend the life
4:47 Old Silicone Coated Roof
5:44 Flexibility Test between products
7:00 Showing Stretchability
7:36 How much 1 Gal covers
10:30 End

This is one of the best videos to get knowledge on rubber roofing that can help you make decisions on your next flat roof repair.
You can avoid the expense of a new Rubber Flat Roof if you would only follow the instructions in this video.  Learn from the experience of The Flat Roof Doctor to make the proper decision.
EPDM Rubber Roofs are known to leak within 5 years of installation. The best practice would be to protect every seam and flashing from the heat and ultraviolet rays. This way you will extend your EPDM Roof life expectancy. Coating the seams with Super Silicone Seal from Bergstromm.com will reduce the heat on all the seams and at the same time protect the cover tape from ultraviolet degradation.
The cost is very low when you do this repair within a few years of the installation of your rubber roof. A five-gallon pale of Super Silicone Seal will cost approximately $400 and a 6" roller and handle and you can cover all the seams on a fairly large EPDM Rubber roof.

How to repair or extend the life of an EPDM Rubber Roof:
1. Brush clean all the seams with a stiff bristle brush to remove debris and dust that has caked on
2. Use a leaf blower to remove dust and debris
3. Buy Super Silicone Seal from Bergstromm.com
4. Shake the pale or stir with a paint stirrer
5. Apply one coat of Super Silicone Seal with a six-inch roller
6. Apply a second coat the following day

By following these steps above you will extend your roof's life and eliminate repairs in the future.
The super Silicone Seal bonds to the EPDM and reduces the heat by 50% on any sunny day. In the video, you will see where I measured the heat and in some areas, the roof temperature was 180 degrees Fahrenheit. Use this Flat Roof Coating to Repair/Fix leaks| Extend EPDM Rubber Roof Life | SUPER SILICONE SEAL

Use this Flat Roof Coating to Repair/Fix leaks| Extend EPDM Rubber Roof Life | SUPER SILICONE SEAL

244.8K views

Seal any Roof Leak, whether a Chimney Cap Leak, Rubber Roof Seam, or Skylight Leak, with Super Silicone Seal in 5 min with little preparation. This is a DIY repair kit that will save you lots of money. No need to contact a roofer to fix leaks
Super Silicone Seal can be bought at https://bergstromm.com/
FTC Affiliate Disclaimer -  I get commissions for purchases made through links in this post.
Super Silicone Seal will adhere to almost any surface. It is good for skylight leak repairs, transitioning from the metal frame to the glass.
It will seal cracks on chimney crowns. 
Super Silicone Seal is excellent for repairing seams on a rubber roof.
There are many uses and benefits for this product that help make Repairs a breeze. 
00:00 Sealing Metal Ductwork
00:57 Chimney Cap Sealed
02:27 Skylight Sealed
03:28 Rubber roof low spot filled
04:04 Rubber Roof Seam sealed

Four Easy Steps on How to Repair Leaks on Chimneys, Skylights, and Rubber Roofs:
1. Wipe clean the surface with a rag
2. Brush on a coat of sealant over the seam or crack about 2 inches on either side
3. Apply the polyester fleece, embedding it into the sealant
4. Apply a second coat covering the fleece 

For cleaner results, you can use masking tape to tape the area off where you don't want any of the sealants. Remember to remove the masking tape as soon as you have applied the second coat before it cures.

In many cases, you don't need to use Polyester Fleece. 
Super Silicone can build up a low spot where water is pooling on a roof. STOP ANY LEAK period - chimney cap, duct work, rubber roof, skylight - seal/Fix/ Repair leaks

STOP ANY LEAK period - chimney cap, duct work, rubber roof, skylight - seal/Fix/ Repair leaks

6K views

Read or download the Super Silicone Seal technical and safety information.

Returns & Refunds

To qualify for a return, send the unused product back in its unopened original packaging within 20 days of the date we shipped your order. The deadline applies to when you hand the return package to the carrier, not when it arrives back at our address.

Refunds exclude original shipping charges and are subject to a 25% restocking fee. Customers are responsible for return shipping costs.

Read the full return and refund policy

Create a Return Label

Find your order using the link below to create a return label.

Find your order and create a return label

Metal Cans & Shipping Damage

Metal cans may arrive with minor dents from shipping. Minor cosmetic dents should not affect the sealant when the container remains sealed and does not leak.

If your order arrives leaking or with a damaged seal, please contact us promptly for assistance.