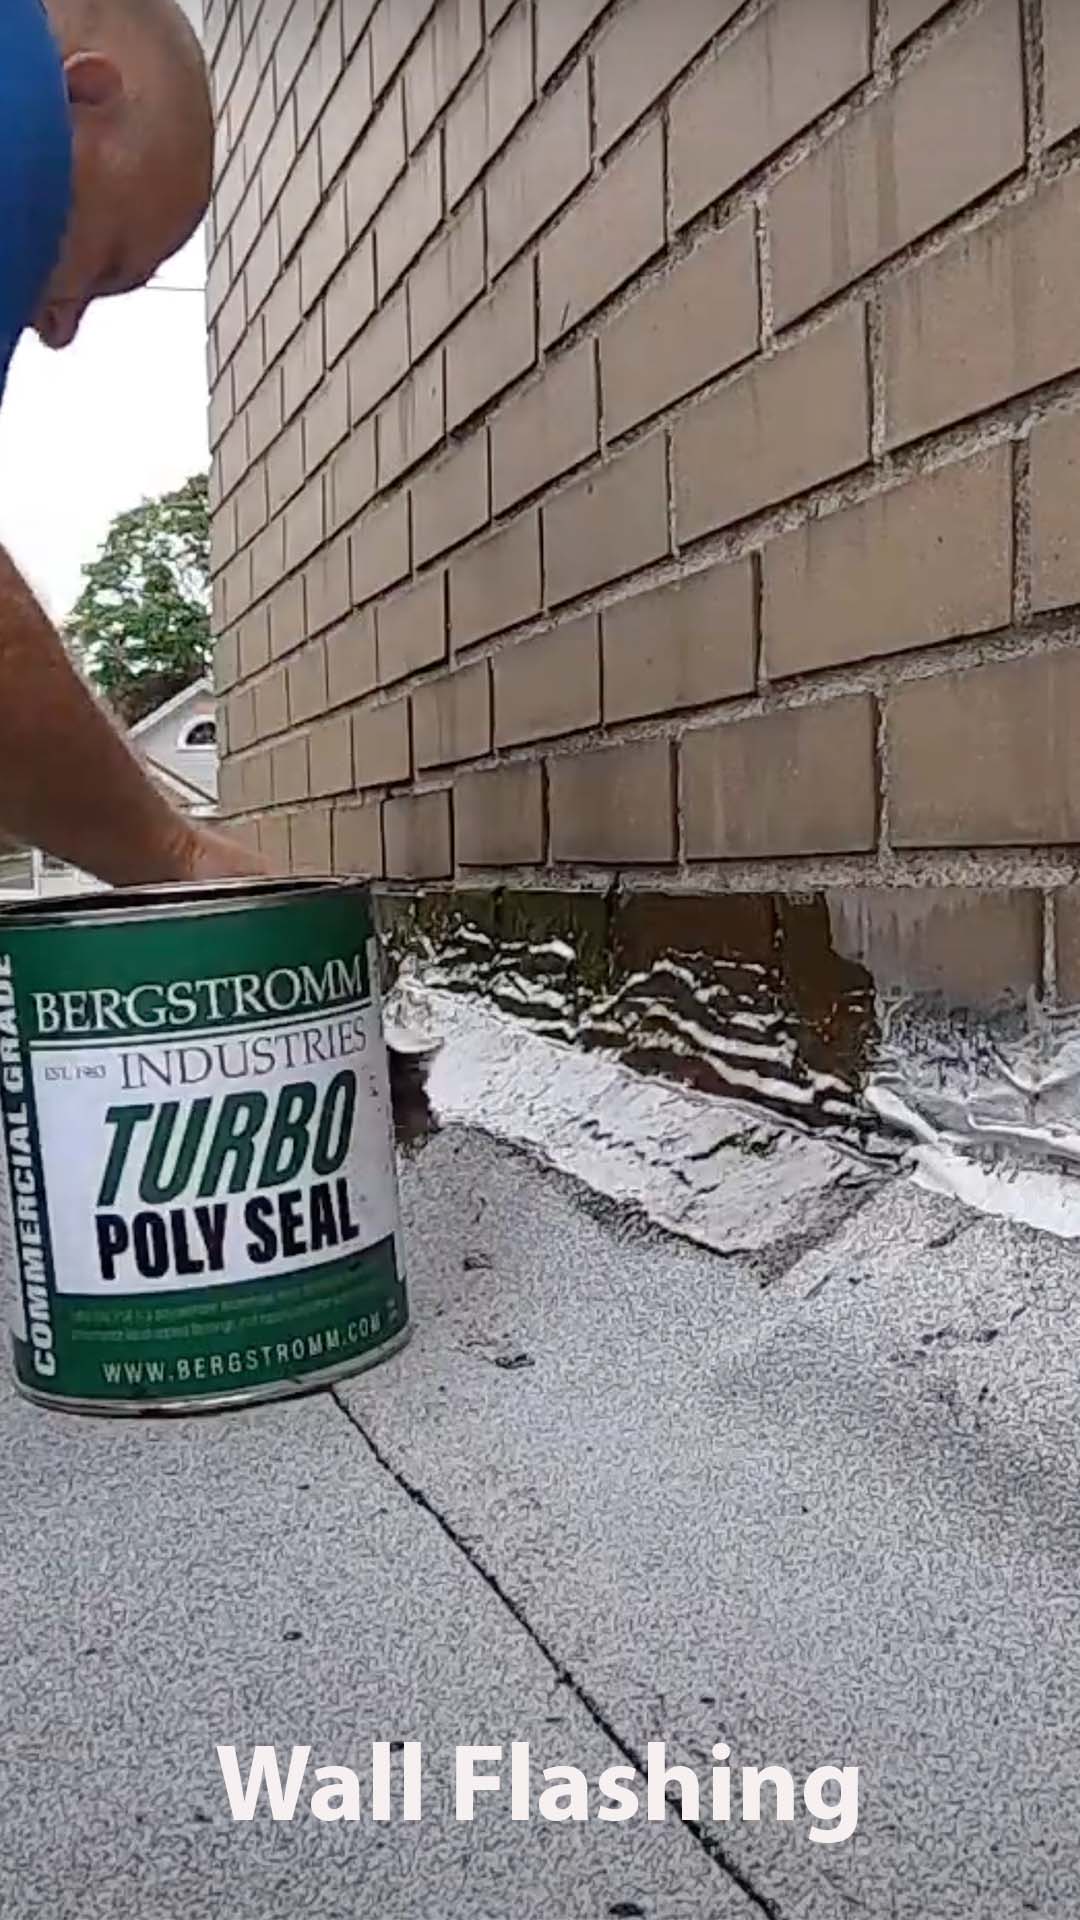
Turbo Poly Seal – the Ultimate Sealant
Enhanced Durability
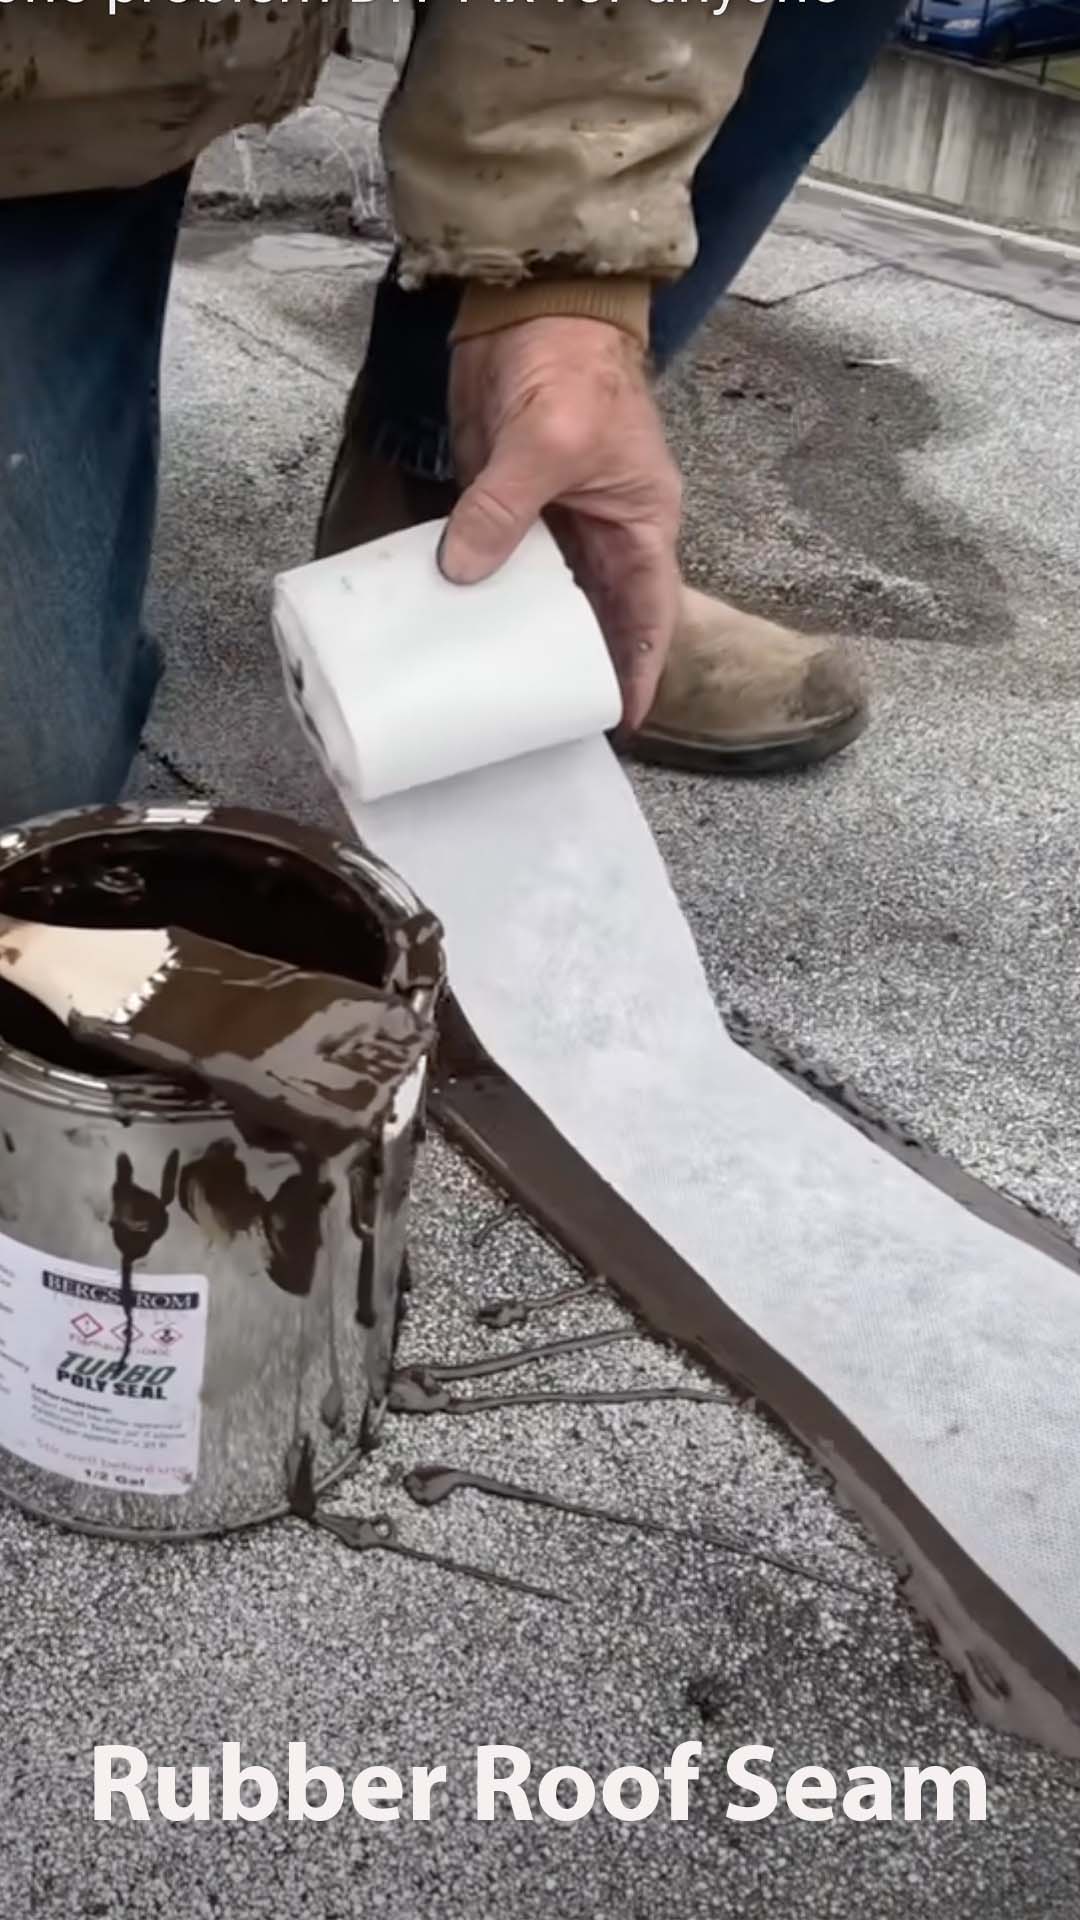
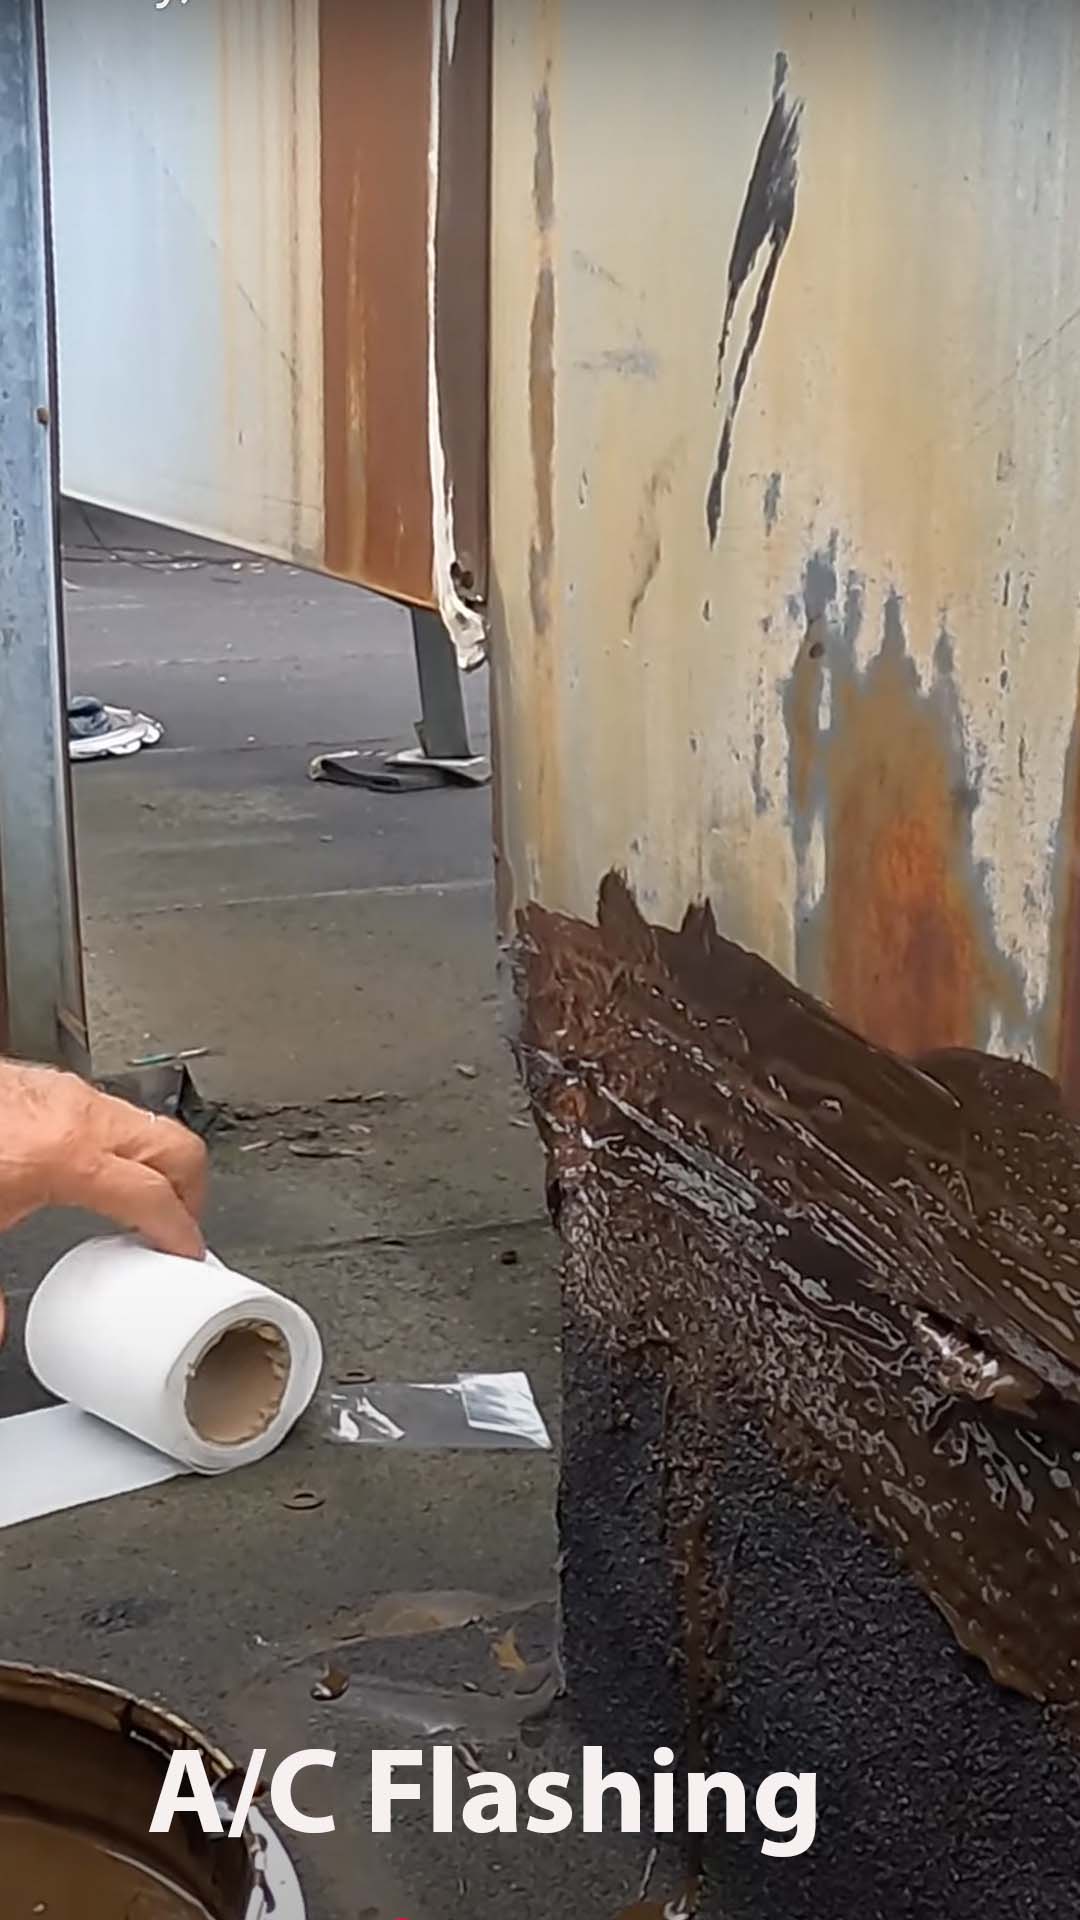
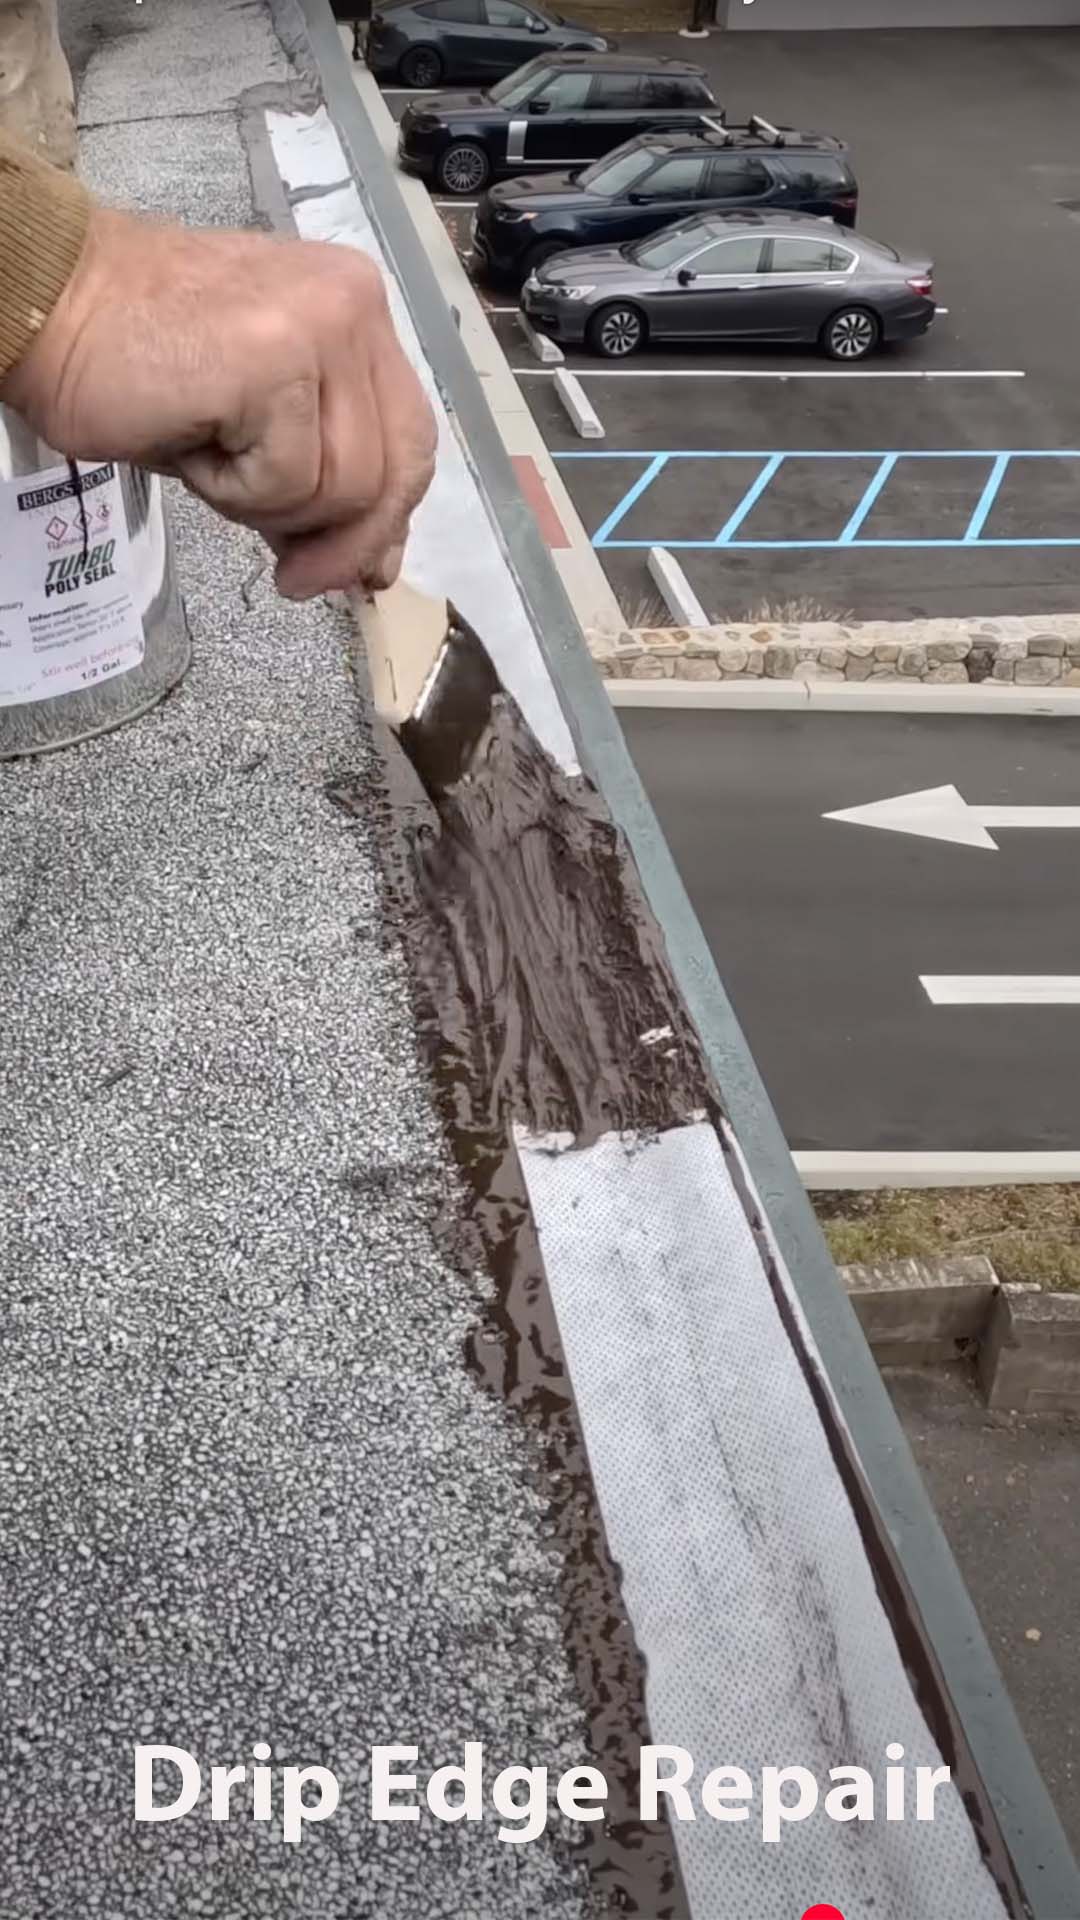
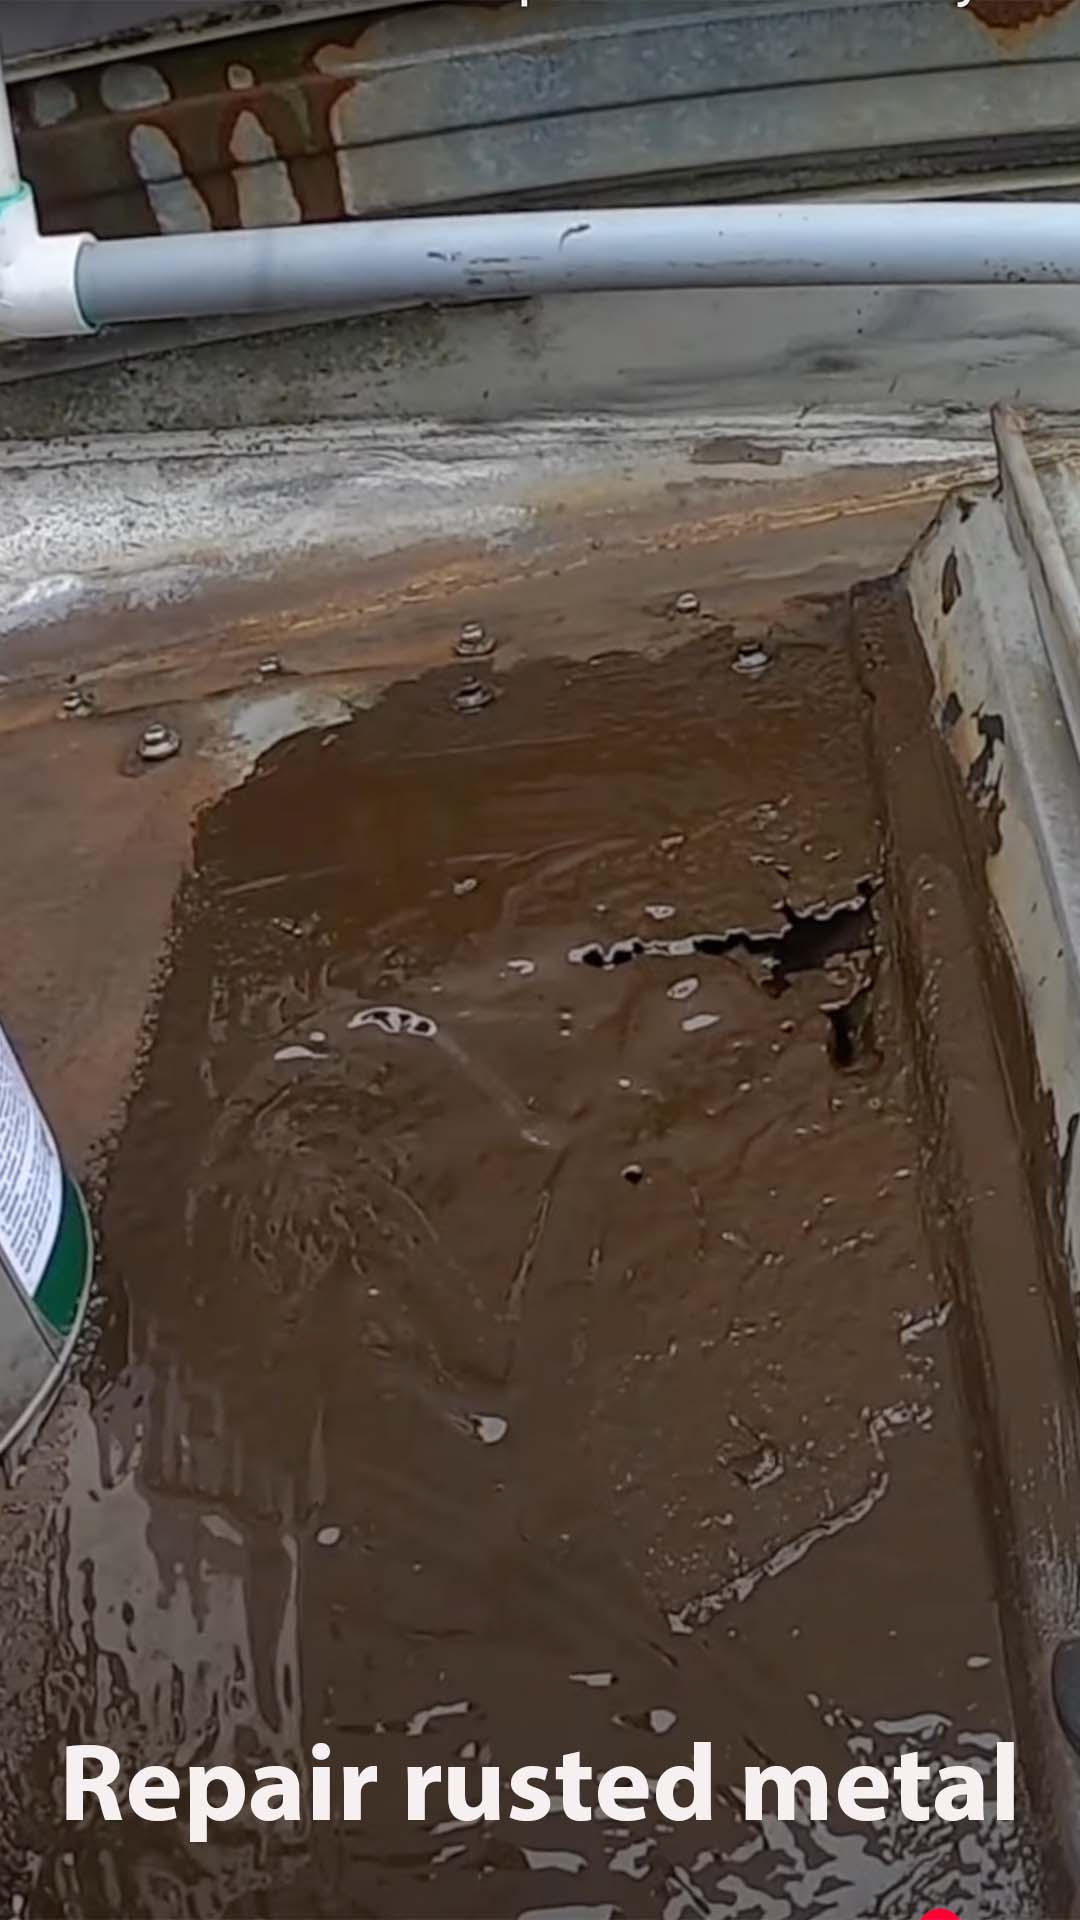
Turbo Poly Seal provides long-lasting protection on flashing and seam repairs
Easy Application
It is simple to apply—just brush on, add a fleece and add another coat
Versatile Use
Ideal for a variety of surfaces, Metal, Asphalt, TPO, and Modified Bitumen Rubber
Cost Effective
Even with no experience and little preparation anyone can use it.
Turbo Poly Seal for all repairs
Where and Where not
-
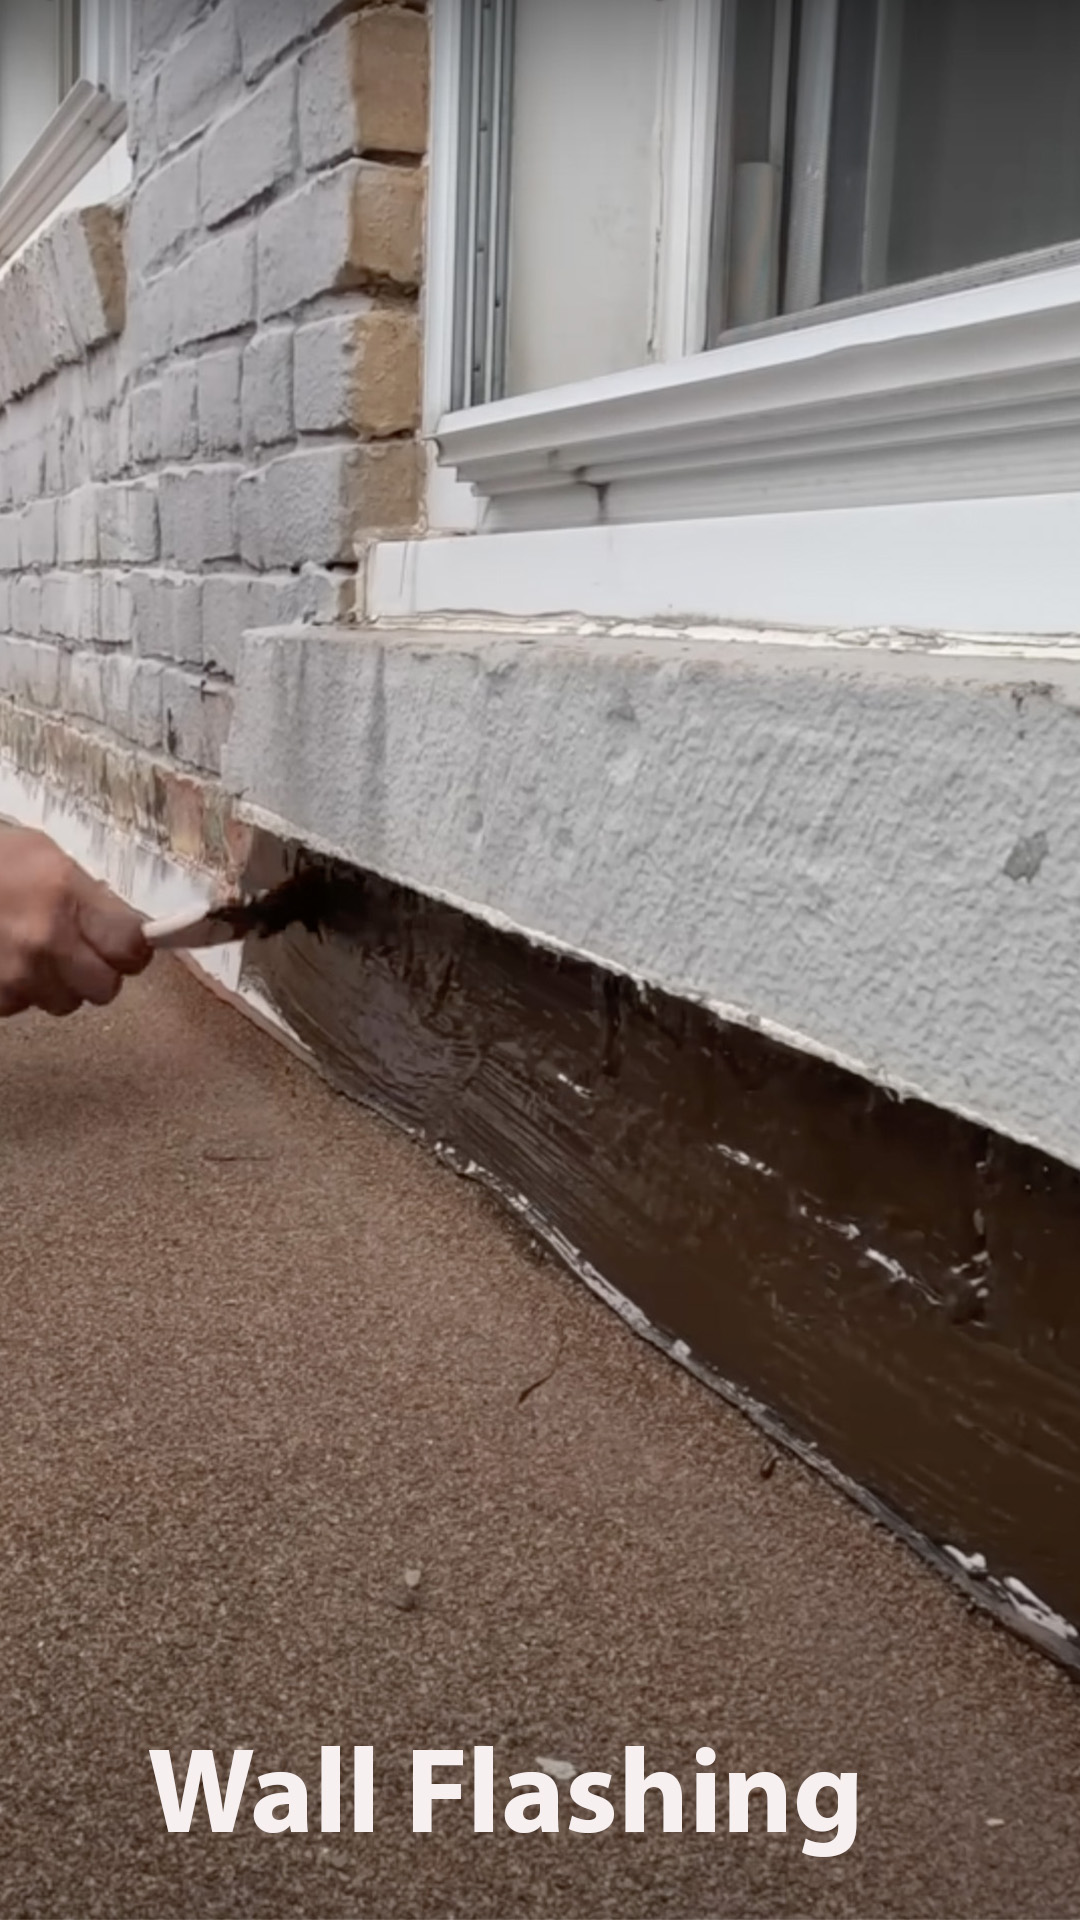
Stucco and brick walls -
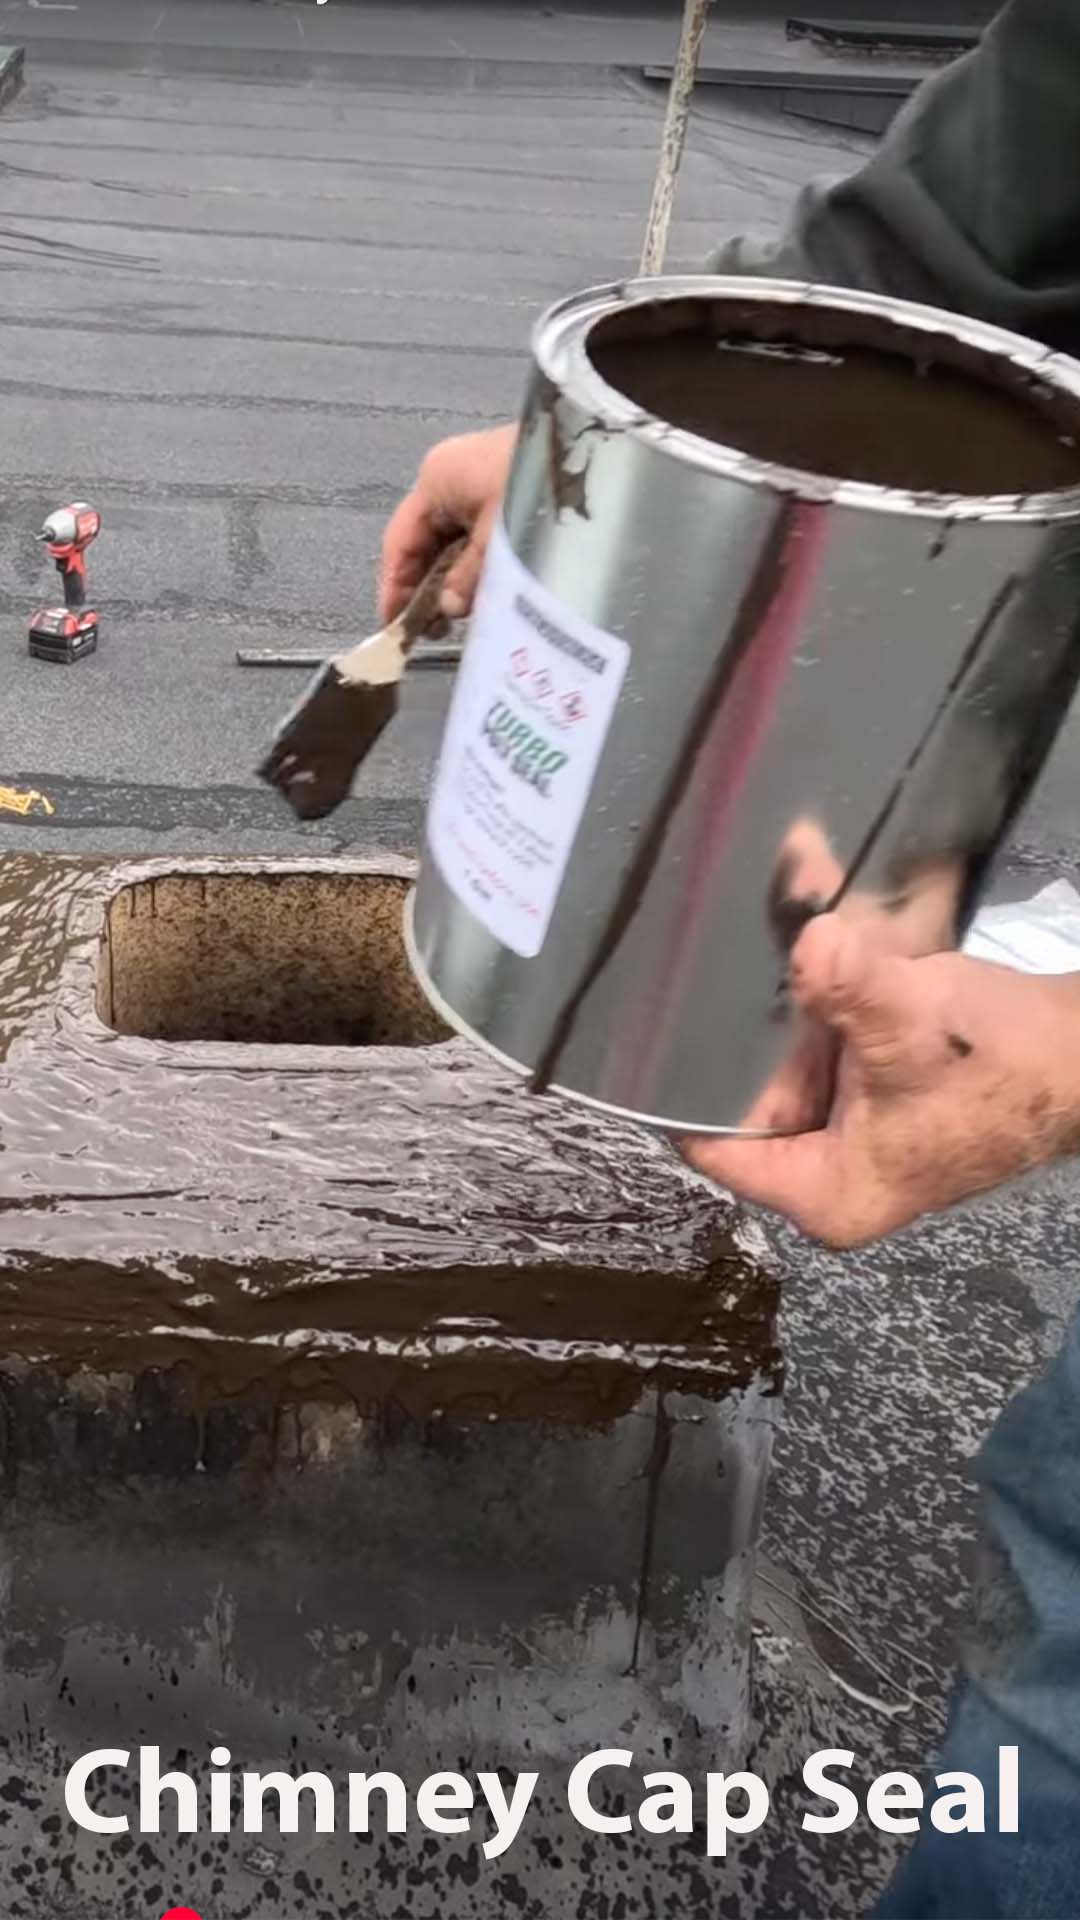
Chimney Crowns and flashing -
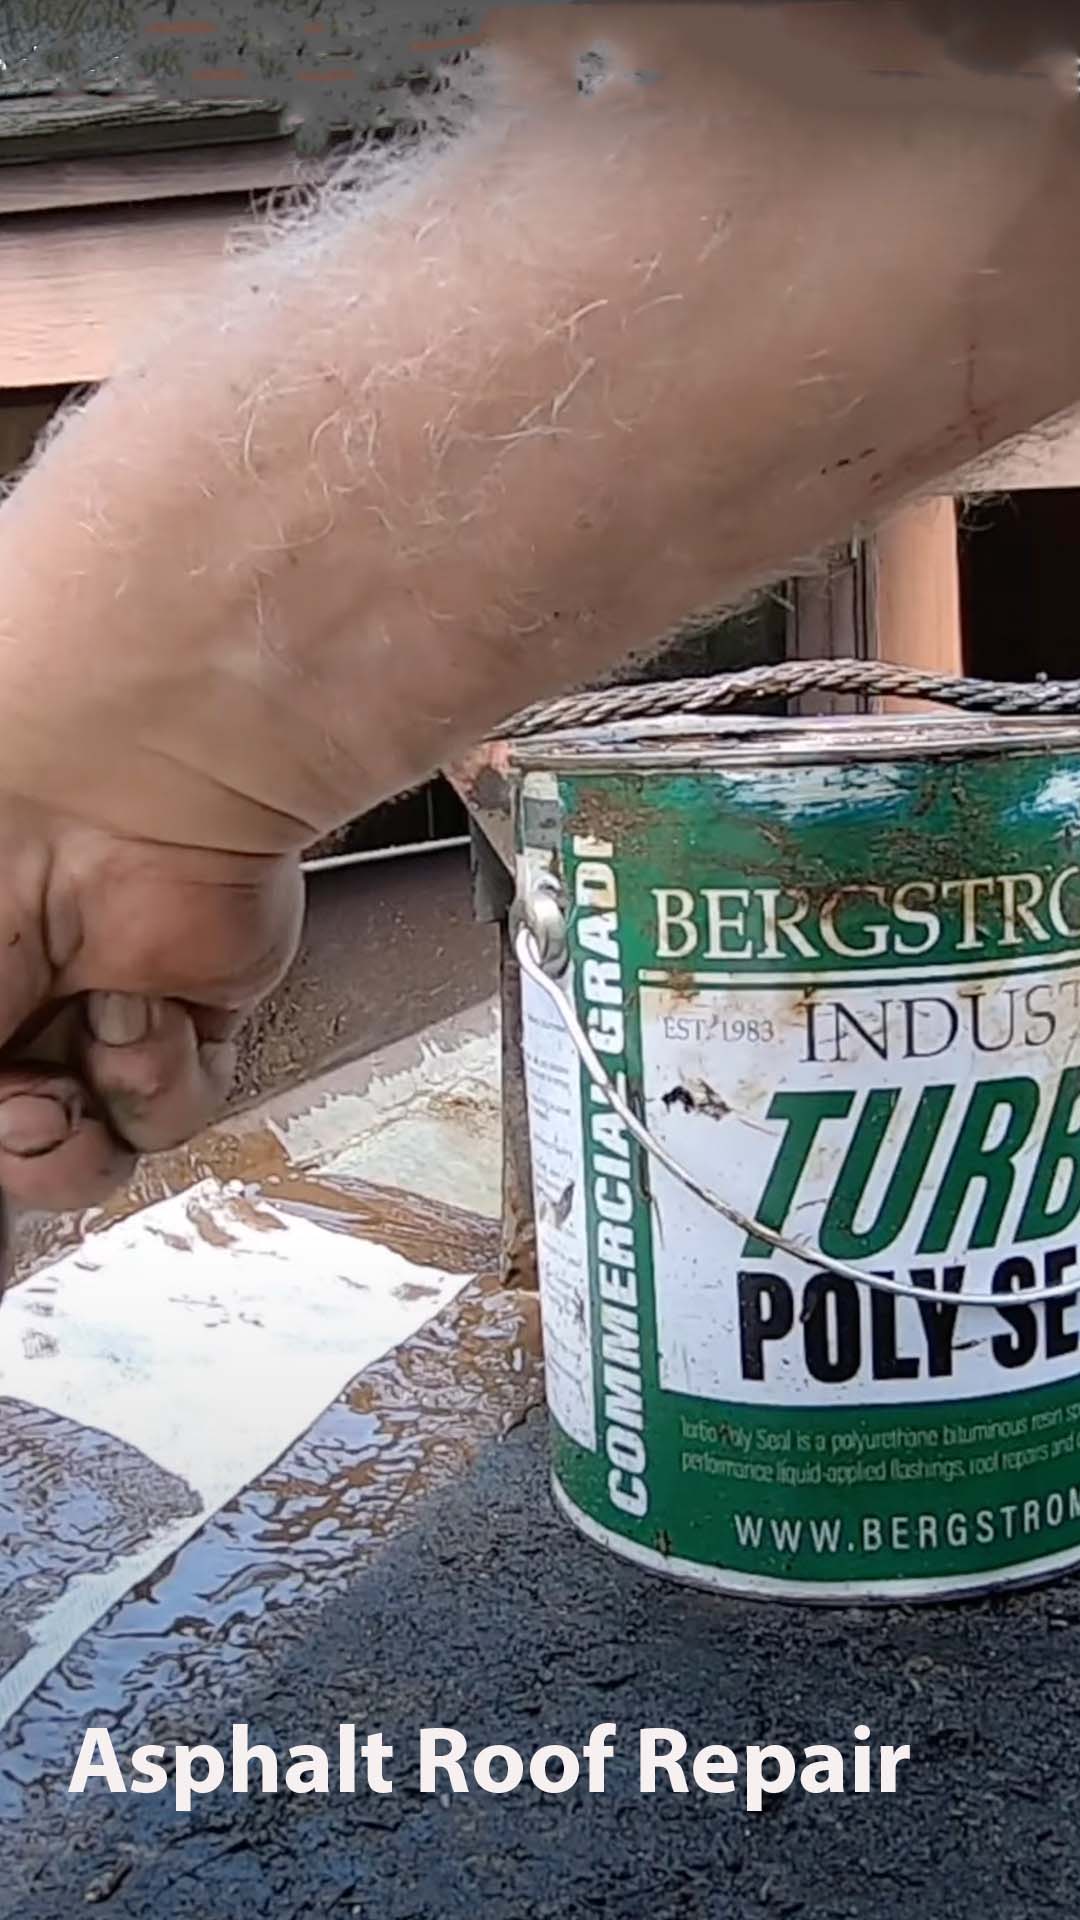
Seams on Asphalt, Modified Bitumen and TPO roofs -
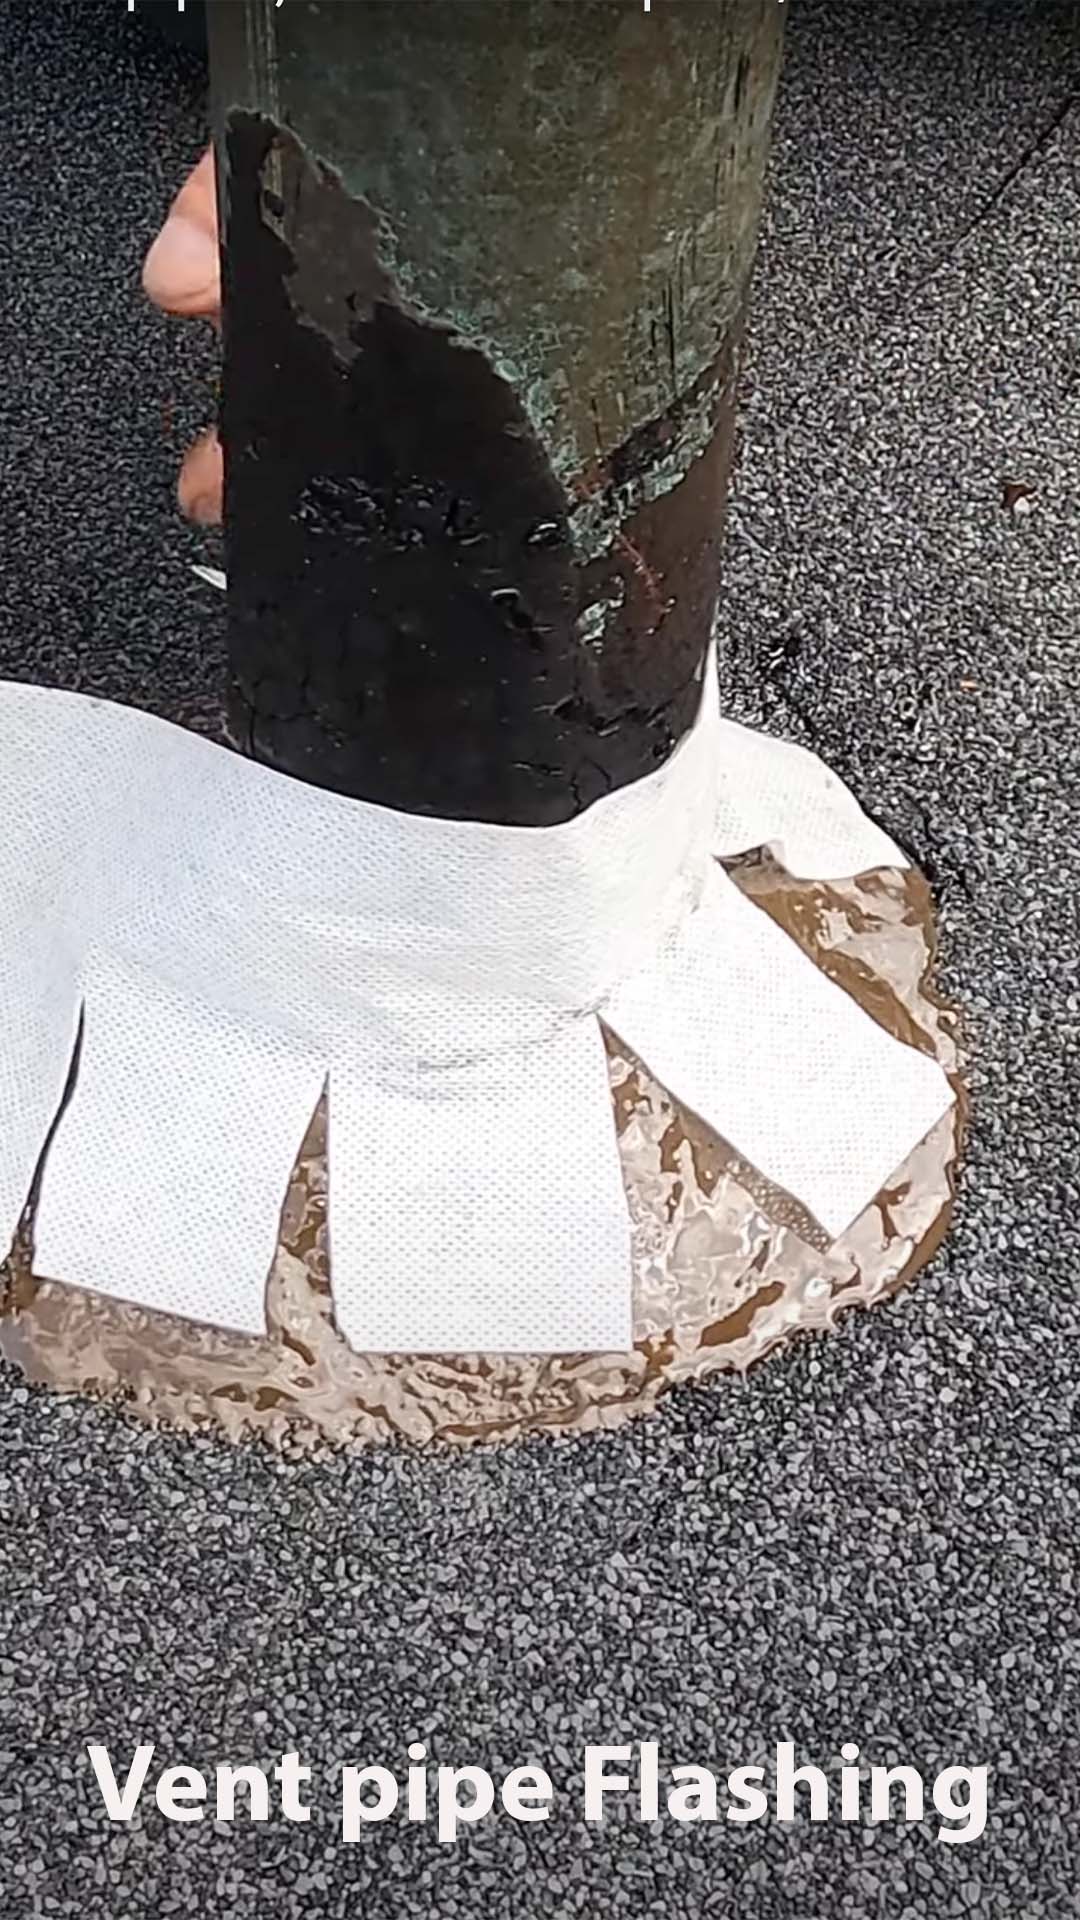
Vent pipe and smoke stack flashing -
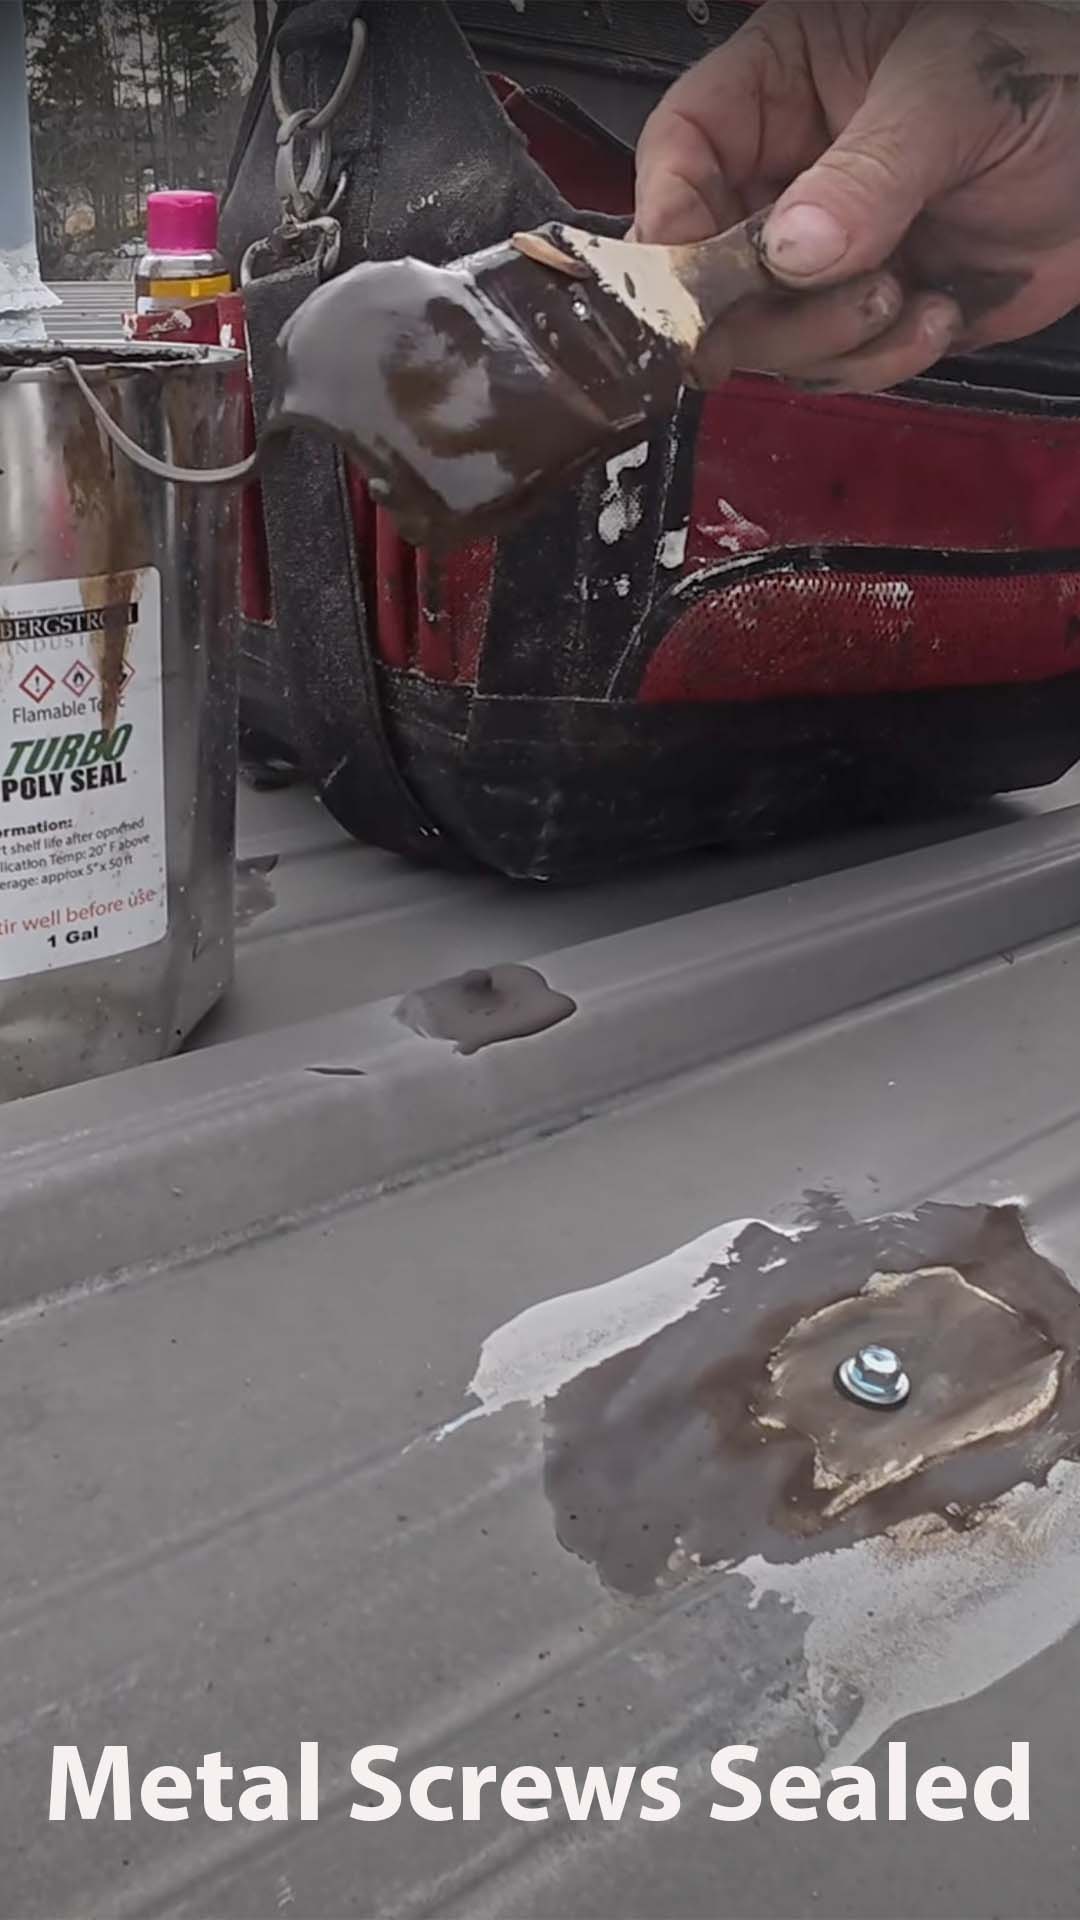
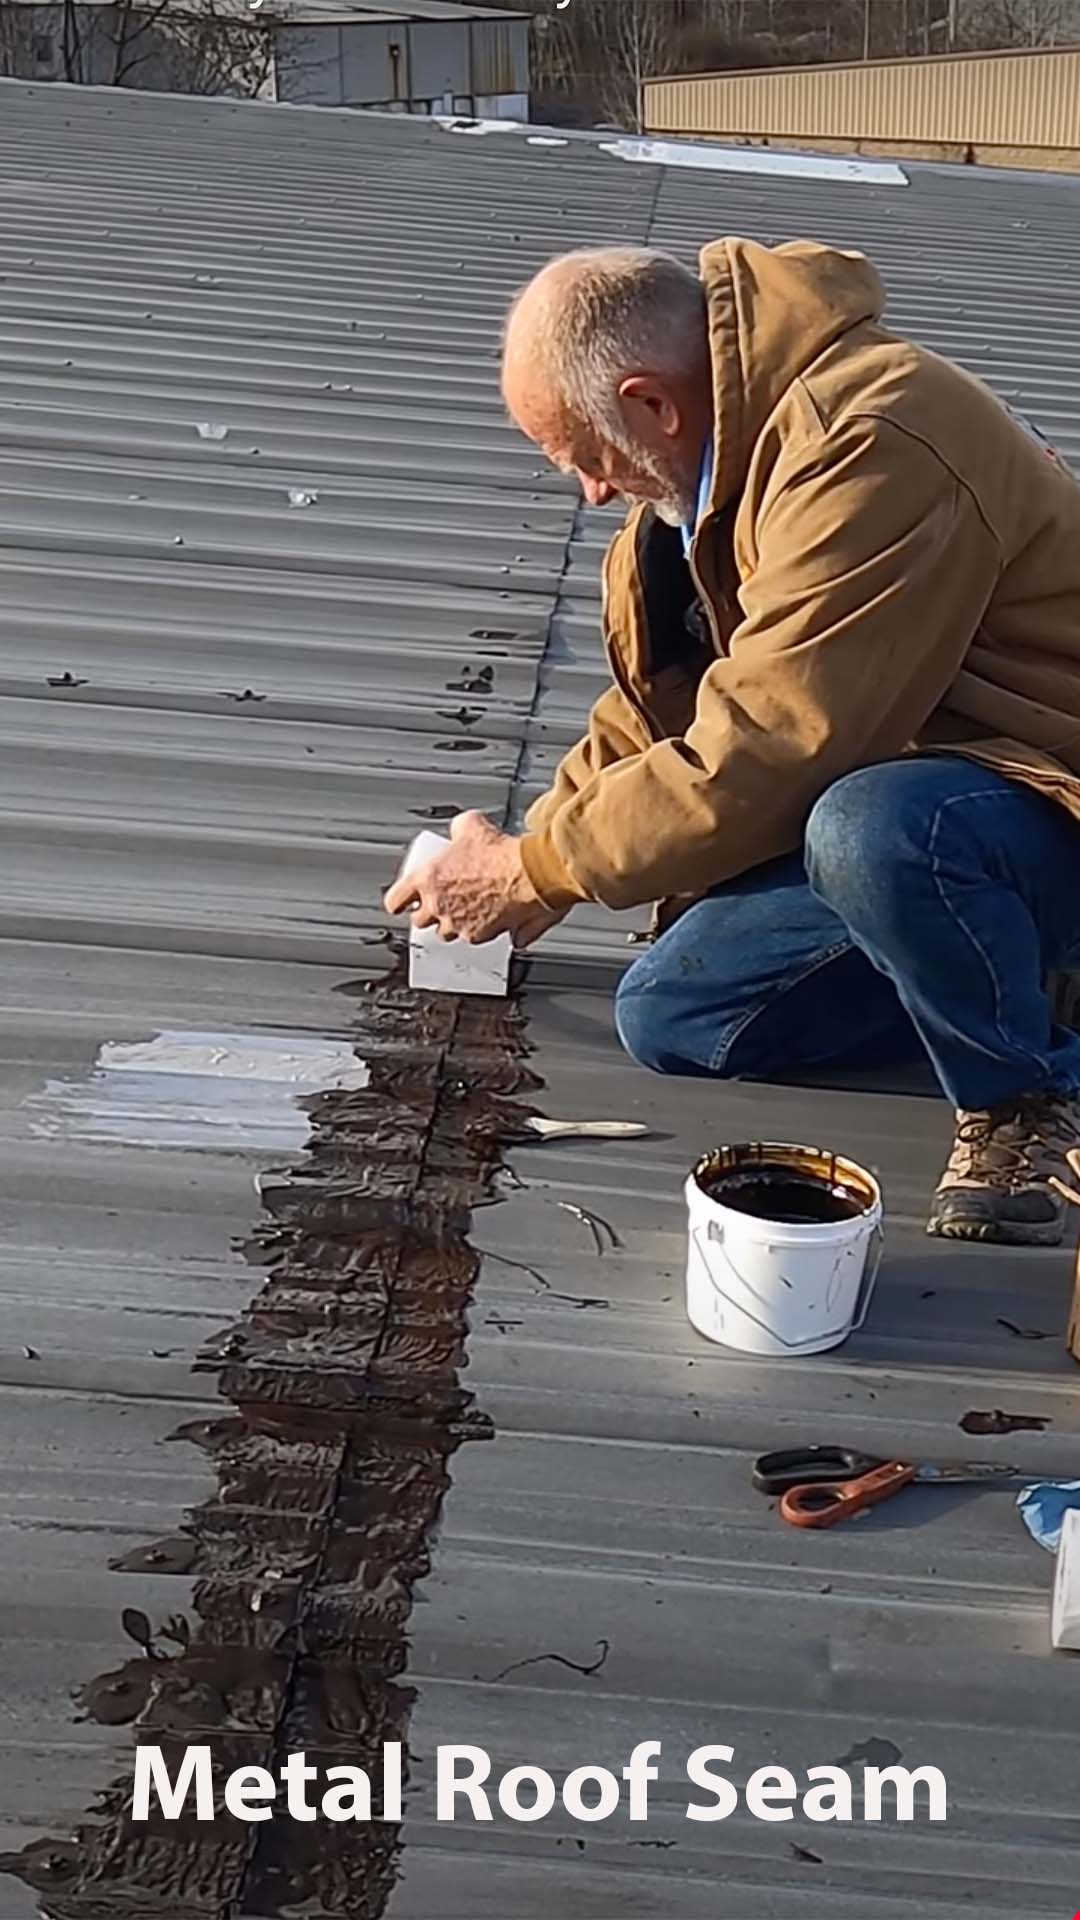
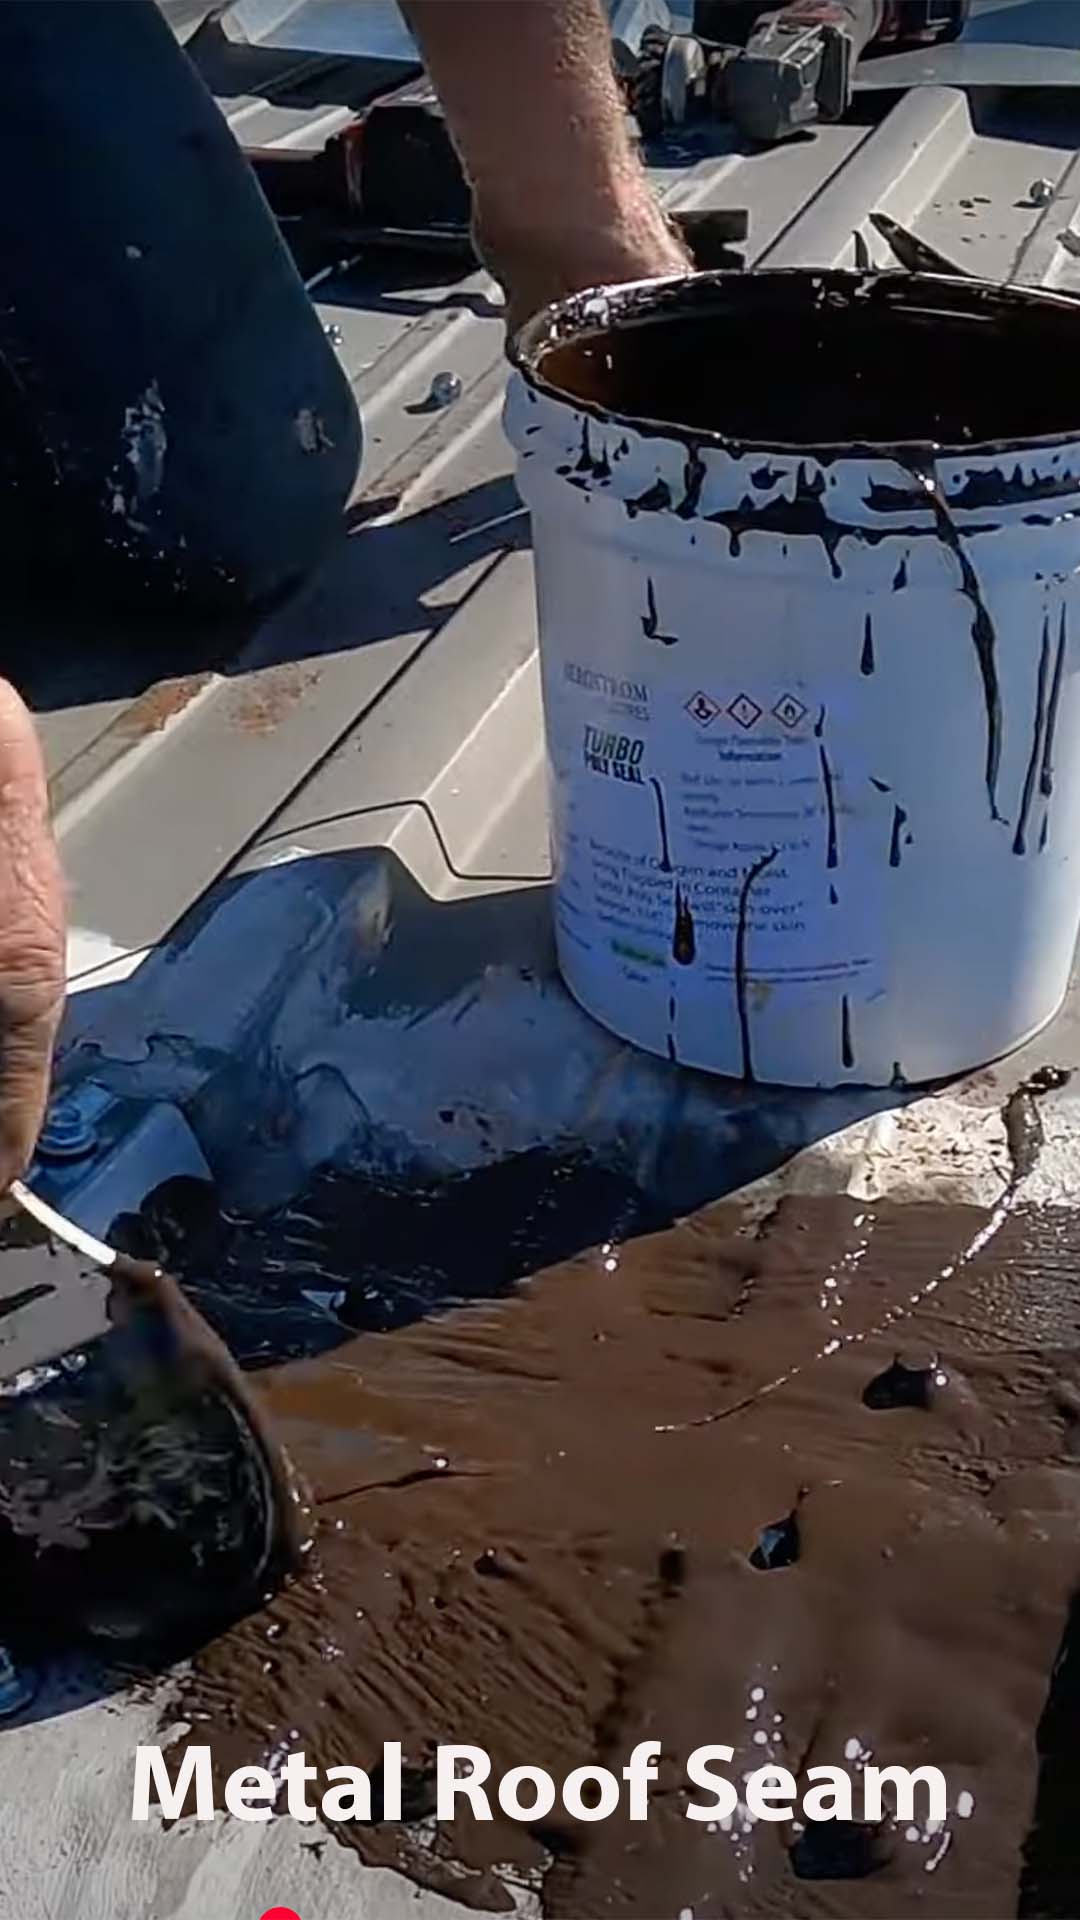
Metal Roof seams and screws -
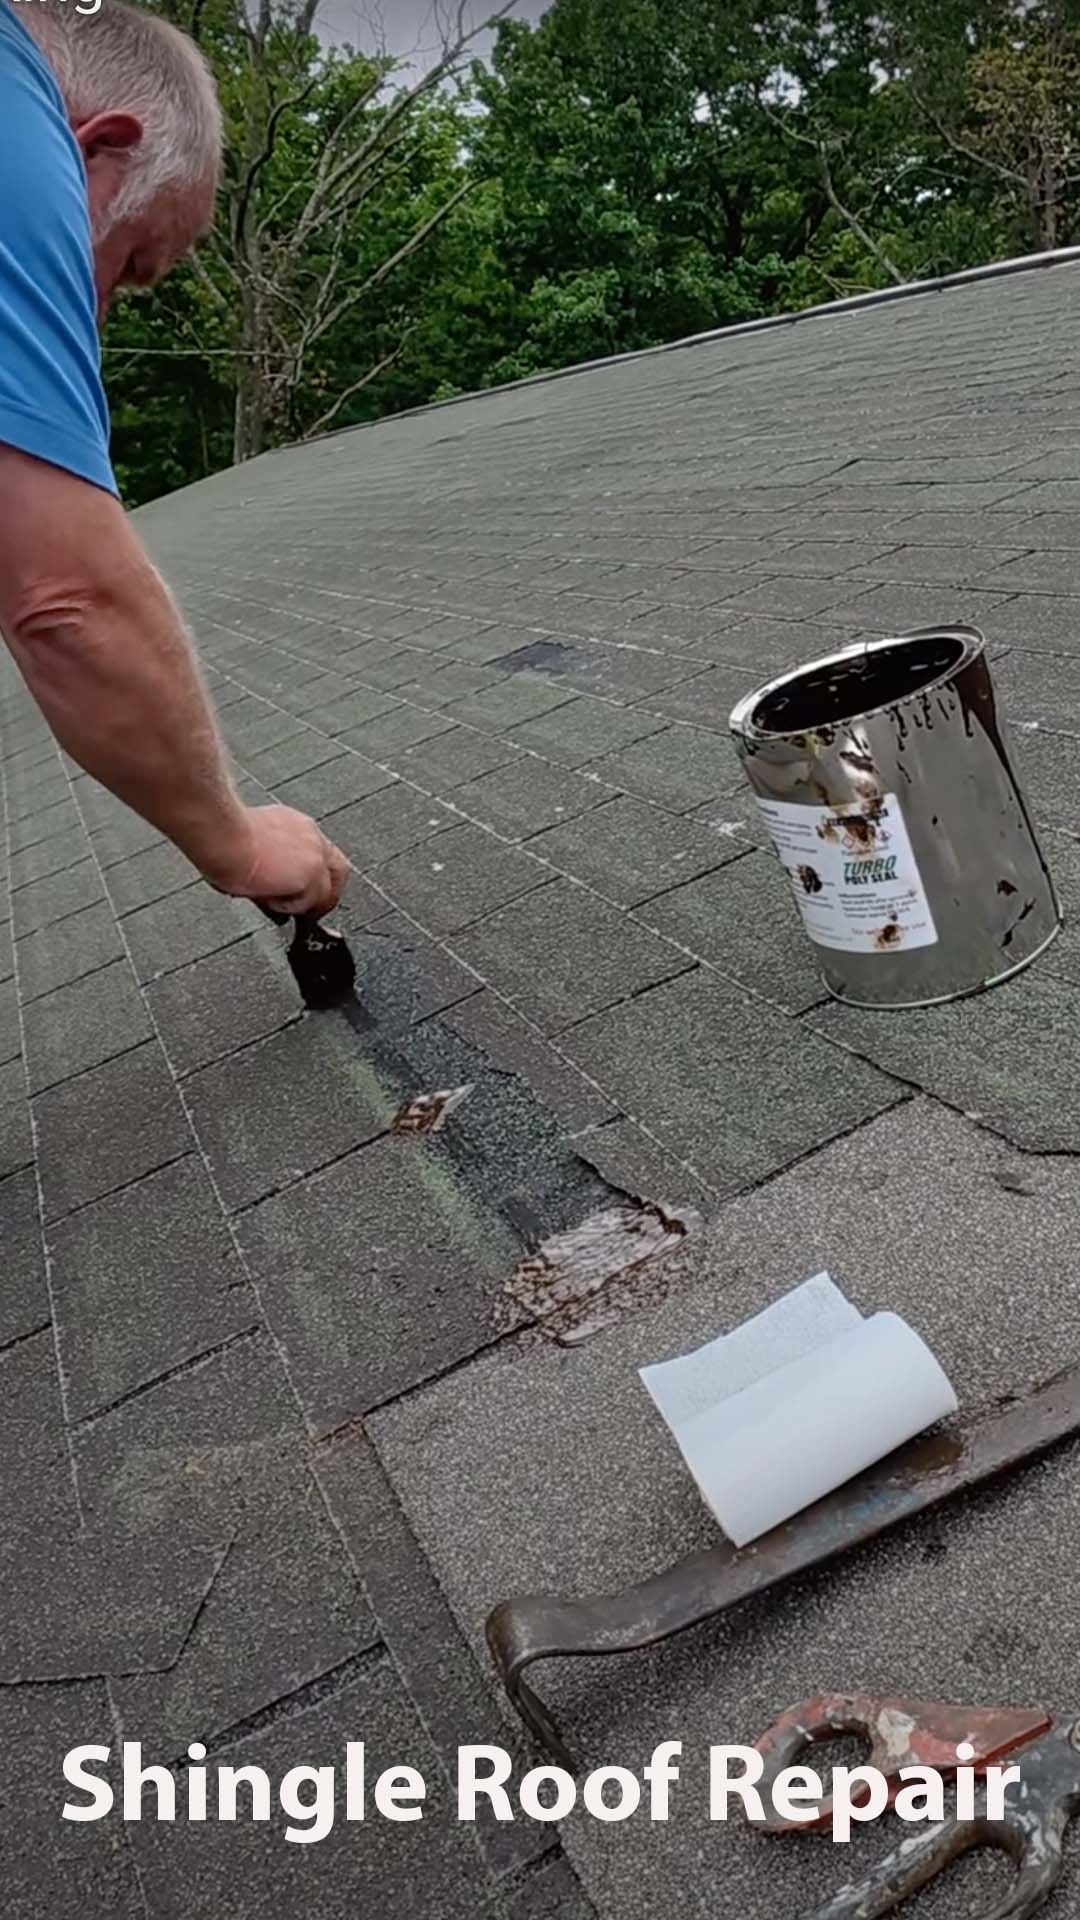
Asphalt Shingles -
Teracotta tiles -
Aluminum Metal -
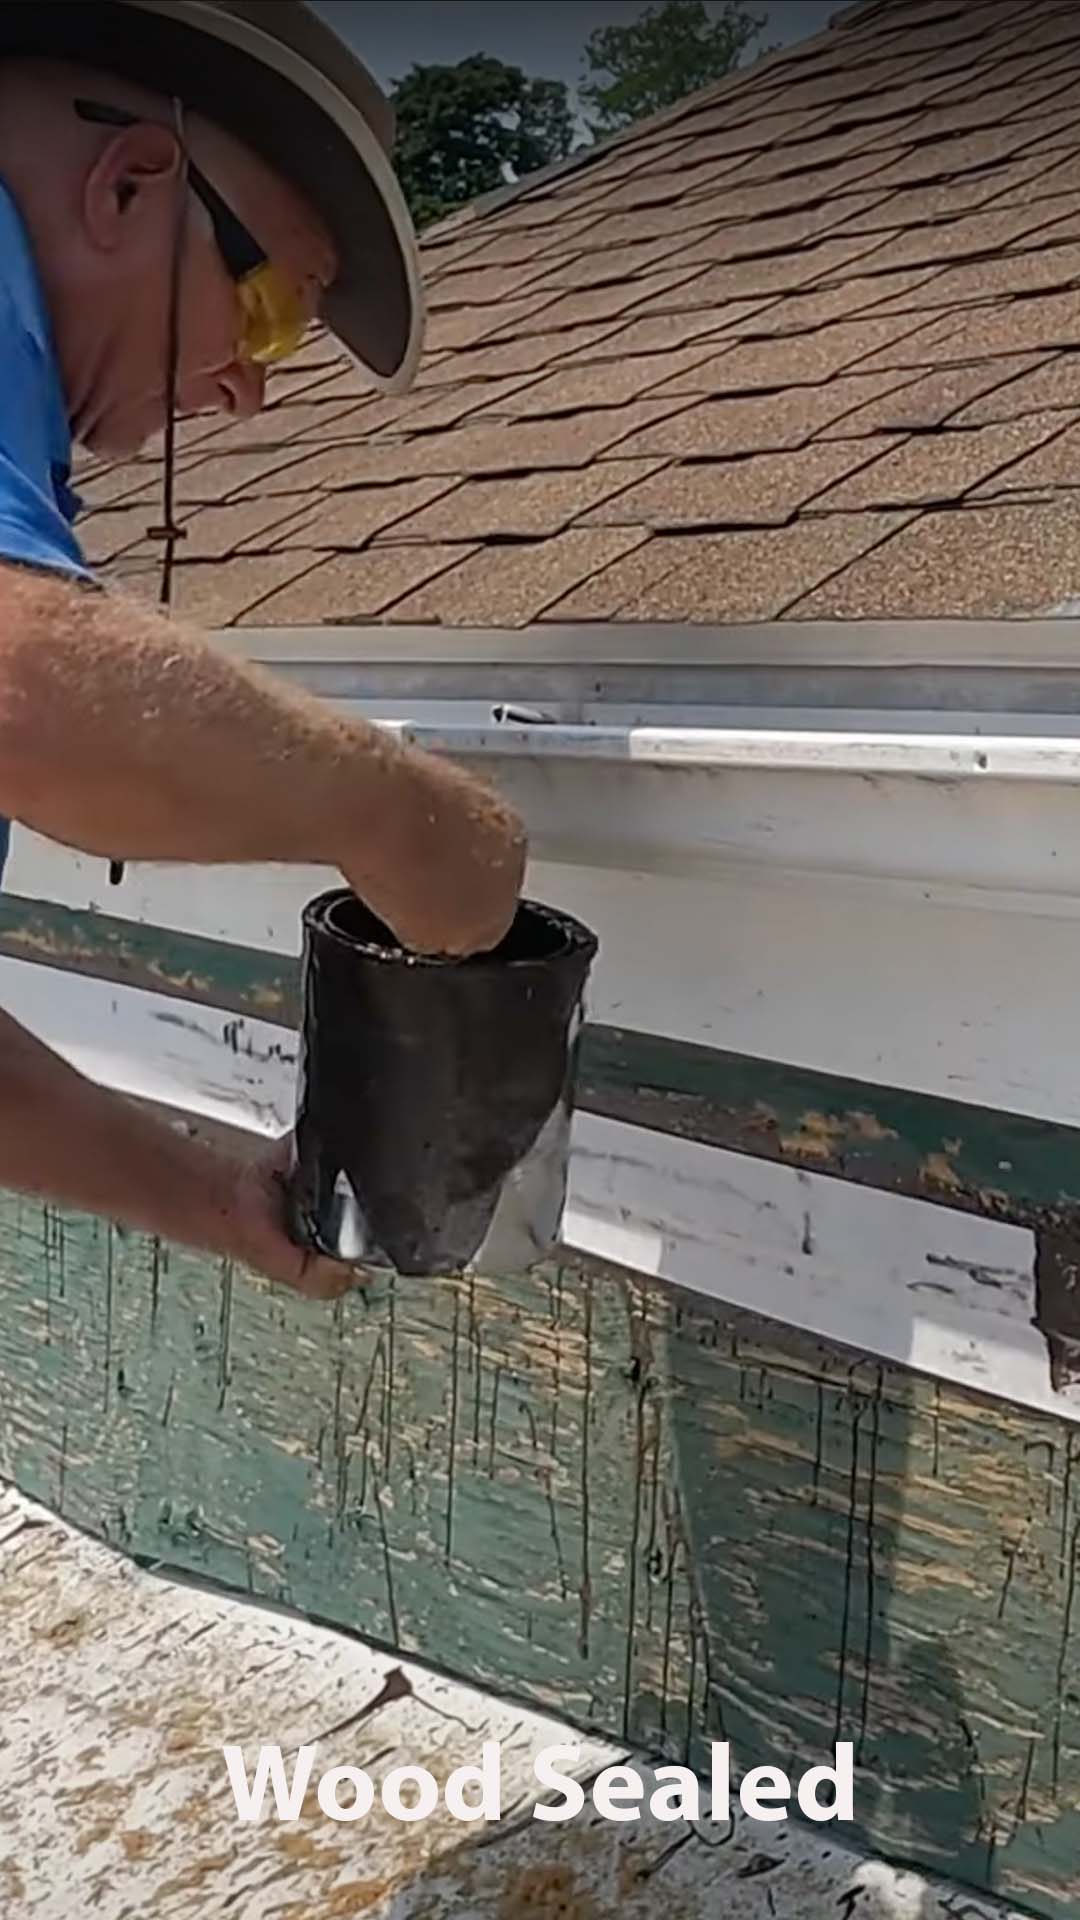
On wood -
Turbo Poly Seal can be painted with any paint -
Turbo with the fleece is pliable and flexible – it won’t crack under most circumstances -
Copper
-
Old Paint -
Wet Surface -
Silicone -
EPDM Rubber -
Plastic -
Glass
Instructions on How to Use Turbo Poly Seal
- Prepare surface – Use angle grinder with metal brush to remove silicone, oil and other debris. Other surfaces use rag and water to clean surface. Remove loose paint
- Stir content well
- Use disposable brush to apply 1st coat – make sure to cover 2 inches on either side of crack, hole, transition, or seam
- Cut polyester fleece to size and embed it into the 1st coat
- Apply another coat to cover the polyester fleece completely.
- Do not use fleece over metal screws – just dab the screws with Turbo
- Use Lacquer Thinners to clean up any mess.
- Dispose of the brush
- If there is any content left in container, make sure to close it very tight for later use. Plan to use the rest within weeks after opening the container. Turbo Poly Seal will cure in the container if left for to long
Chimney Crown
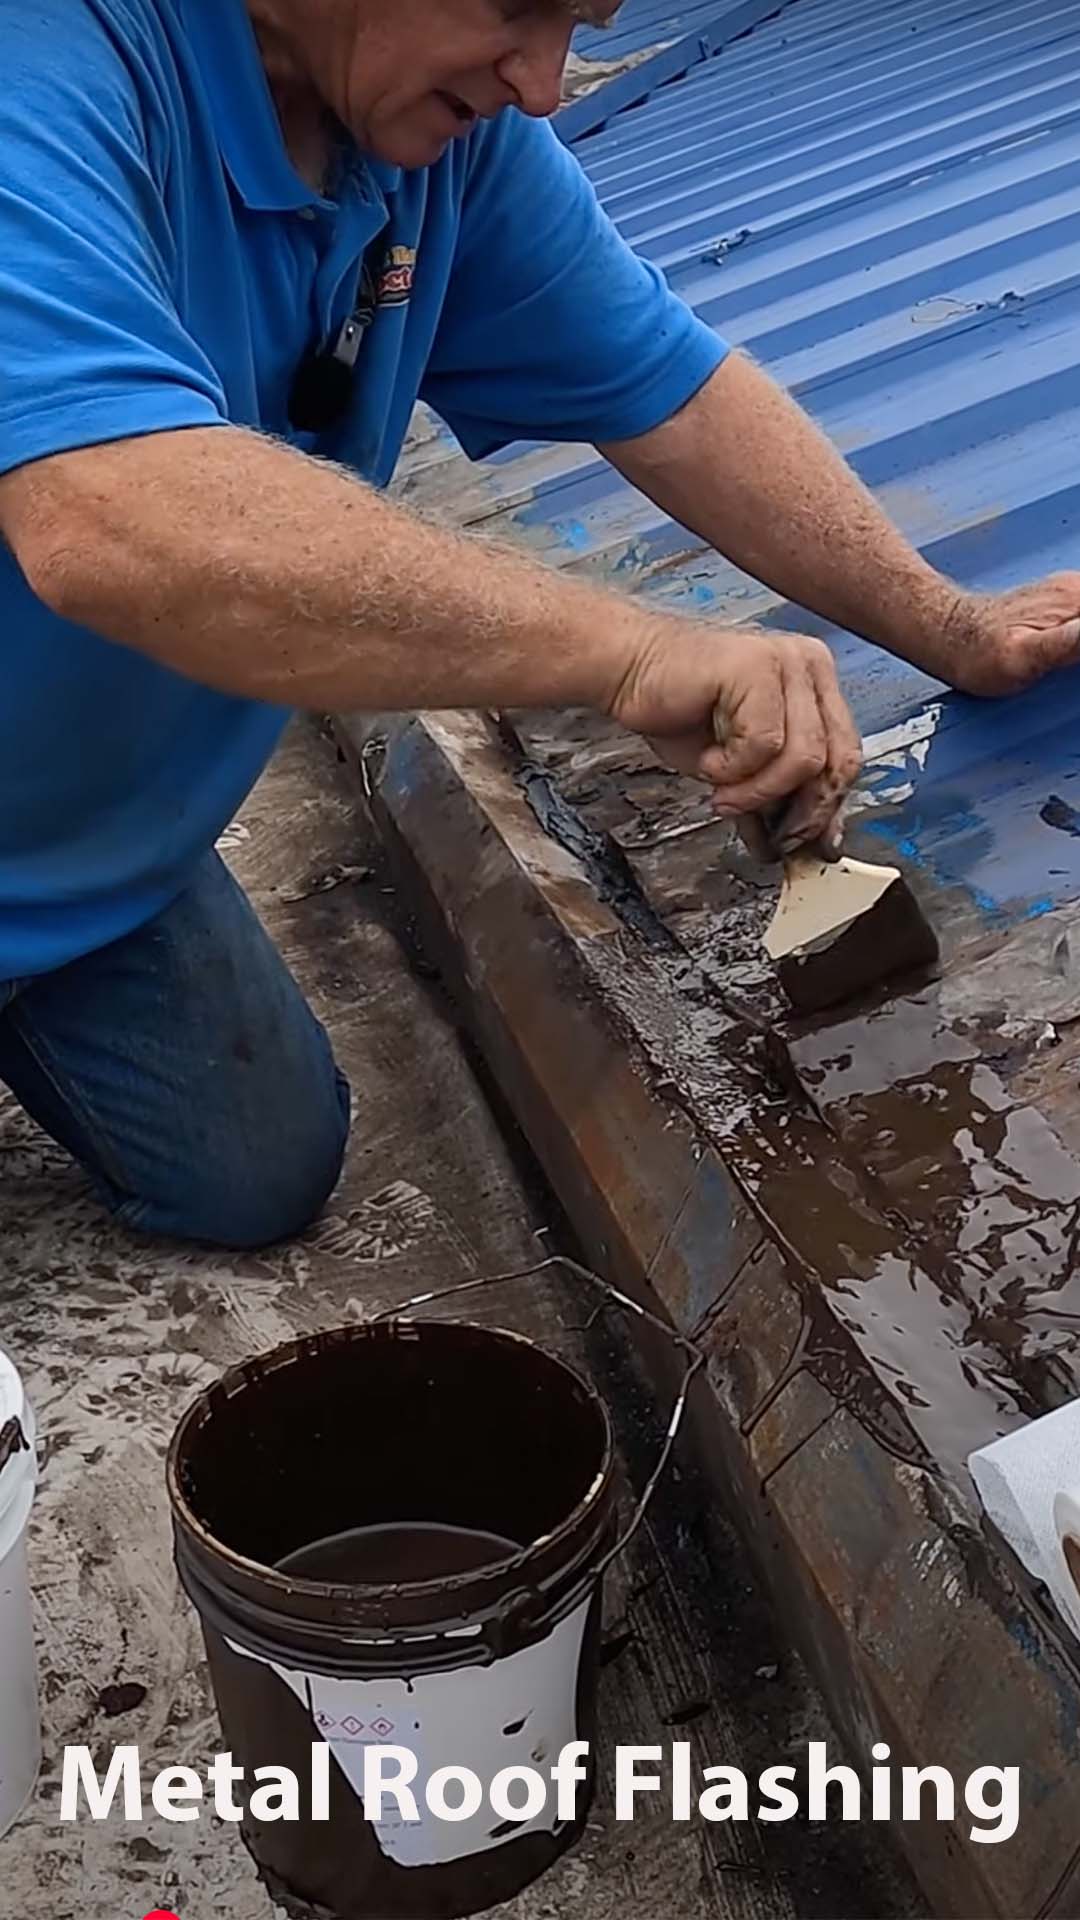
Metal Roof Seam
Rubber Roof
Vent Pipes
Real Reviews Collected from our site
Best stuff ever
One of the best roofing products I’ve ever purchased. Love this stuff.
Published date
12/17/23

John W.
Great product
Was able to apply this product just as per the video. The TBS and fleece appear look great and feel confident that will have no leaks.
Published date
11/18/23

Steven S
Chimney cap
I have used a lot of products in my lifetime. This stood out and is truly remarkable. It’s almost better than the original cement. It is a lot of brushing but well worth the effort. Awesome. I do wish it came in a half gallon container as a choice. I hate wasting anything.
Published date
11/04/23

Shania D
Turbo Poly
Very impressed by this product. Going to use as flashing. I also had some missing shipping items and they got back to me immediately and resolved. Thanks
Published date
09/25/23

Adam C
Preparation is the key to success
This stuff is really messy so get everything set up ahead of time to minimize difficulties.
Published date
12/08/23

Timothy G
Videos to help you:

Asphalt Tar Remover to clean your hands. This is gentle on your skin and made from plant oils.
19
6
YouTube Video VVVwZ0xtWTBTSk5tZTFMaHF0RHJEMDh3LkYwa0hTblFrclRz
Asphalt Tar Remover – hand cleaner
Re-roof your Mobile Home with the cheapest, easiest Rubber roof – Peel and Stick DIY
The material can be bought at Home Depot, and almost anyone can put a roof on a mobile Home.
64
5
YouTube Video VVVwZ0xtWTBTSk5tZTFMaHF0RHJEMDh3LjJPMzBiYlFDNWRV
Cheapest Easiest Rubber Roof For Mobile Home with Peel and Stick DIY
She got screwed over by a roofer and lost her late husband's vintage truck to him.
Turbo Poly Seal – https://bergstromm.com/
#skylights #metalroof
Chapters:
0:00 Skylight, vent on metal roof leaking
0:34 Inspecting leaks on a metal roof
1:45 Lady tells how she lost her Vintage Truck
2:36 Applying Liquid Flashing to the skylight
3:37 Vent flashing with Turbo Poly Seal
4:13 Tighten screws on the metal roof
5:13 Getting eggs from the lady
5:40 Lady says a prayer for us
50
6
YouTube Video VVVwZ0xtWTBTSk5tZTFMaHF0RHJEMDh3LmgxbFByaVlpMnlV
Old Lady's Skylights/ Vents leaking on a Metal Roof – we drove 3 hours to FIX it for FREE
If you have shingles on a Mobile Home that starts to leak, then this is your best option. This will ensure that you don't waste money on repairs, but buy a small section of new roofing each time you repair a leak.
33
2
YouTube Video VVVwZ0xtWTBTSk5tZTFMaHF0RHJEMDh3LlYwQXRPX0RsTFpF
Bad Shingles on a Mobile Home or Trailer Roof Leak Repair
How to seal an RV/ Tuck Camper roof – never have to do it again
#rvlife #campers
@AllRoof.
22
2
YouTube Video VVVwZ0xtWTBTSk5tZTFMaHF0RHJEMDh3Lm5FUllFeXhBZ05R
DIY Truck Camper Roof Seal: Never Leak Again
Making a transition from a carport roof or attached room to a Mobile Home.
#mobilehomes #mobile
@AllRoof.
26
3
YouTube Video VVVwZ0xtWTBTSk5tZTFMaHF0RHJEMDh3LmZoZnluRjRfOHBJ
Mobile Home Roof Leak Repair – transition from Carport/room to main roof
We got a text from a stranger asking for help. So we did fix his roof and see what happened
@AllRoof.
Turbo Poly Seal – https://bergstromm.com/
See the full version in the link below.
https://youtube.com/shorts/RadJ8lQI5dE
58
3
YouTube Video VVVwZ0xtWTBTSk5tZTFMaHF0RHJEMDh3LlRjVUhqT1B0QjNR
We helped a random guy fix his mobile home roof #mobilehomes
We helped a random person fix his mobile home roof from leaking
You could be the next one we help – See the phone number at the end of the video and text me your info – we will choose the lucky one and call you to fix your roof for you
Turbo Poly Seal – https://bergstromm.com/
87
5
YouTube Video VVVwZ0xtWTBTSk5tZTFMaHF0RHJEMDh3LlJhZEo4bFFJNWRF
Mobile Home Roof Leak Repair #mobilehomes
Someone contacted us via text message and asked if we could help fix the leaks on his mobile home. When we got there, we were a little shocked by how bad it was. Instead of a repair, we also did a section of his roof.
Turbo Poly Seal – https://bergstromm.com/
Chapters:
0:00 Mobile Home Roof leak repair
1:39 Analyzing the roof
4:00 Preparing to make transition
5:20 Installing Rubber roof material
9:46 Making transition from rubber to metal roof
48
7
YouTube Video VVVwZ0xtWTBTSk5tZTFMaHF0RHJEMDh3LlMyTXFRMGNJd0Nz
My wife an I helped a random person stopping leaks on his Mobile Home Roof – see the results
If you want to seal your RV/ Truck camper roof once and for all, then this is the method. It requires a lot of work and is somewhat costly, but ultimately, it is worth it.
Turbo Poly Seal and Super Silicone Seal – https://bergstromm.com/
16-step instructions for preparing and sealing an RV or truck camper roof:
1. Remove obstacles: Detach any roof racks or attachments that block access to the roof surface.
2. Strip old materials: Use an angle grinder with a steel-bristle brush to clear away caulk, paint buildup, and residue.
3. Expose critical areas: Strip paint around the air vent flashing and at least two inches beyond it.
4. Clean joints: Remove sealant or caulking along the roof perimeter and joints.
5. Prepare the surface: Use the angle grinder to take off most of the old paint—there’s no need to grind down to bare metal.
6. Clear debris: Blow the roof clean of dust using a leaf blower.
7. Wipe down: Use lacquer thinner to clean the entire surface; this is essential since the grinder can melt and spread silicone.
8. Tape off edges: Apply painter’s tape around the perimeter, leaving a 1.5-inch space from the termination bar.
9. Apply base coat: Brush a thick coat of Turbo Poly Seal over the termination bar and onto the roof.
10. Install fleece: Cut polyester fleece into two-inch strips and place them over the termination bar, ensuring no gaps underneath.
11. Seal the fleece: Apply another coat of Turbo Poly Seal to fully cover the fleece.
12. Add protective coat: After about 40 minutes, apply a coat of Silver Coat protection over the Turbo Poly Seal.
13. Remove tape: Carefully pull off the painter’s tape.
14. Final roof coating: Wait 24 hours, then use a nine-inch roller with a quarter-inch nap to evenly apply Super Silicone Seal across the roof.
15. Cure time: Allow the silicone to cure for 48 hours before walking on the roof.
16. Reattach fixtures: Once everything is cured, reinstall the roof racks and any other attachments.
Chapters:
0:00 How to Seal RV Camper Roof
1:05 Cleaning up old caulking and paint
4:55 Lacquer Thiiners to wipe everything clean
5:35 Applying Turbo Poly Seal on the edges
7:05 Coat entire surface with Super Silicone Seal
Chapters:
0:00 RV camper roof sealed
1:05 Cleaning and preparing
5:26 Seal the trim with Turbo Poly Seal
7:08 Coating roof with Super Silicone Seal
8:45 Results are amazing
54
8
YouTube Video VVVwZ0xtWTBTSk5tZTFMaHF0RHJEMDh3LkxUNkQ2eEU1Rlh3
Ultimate Guide to Waterproofing Your RV Roof
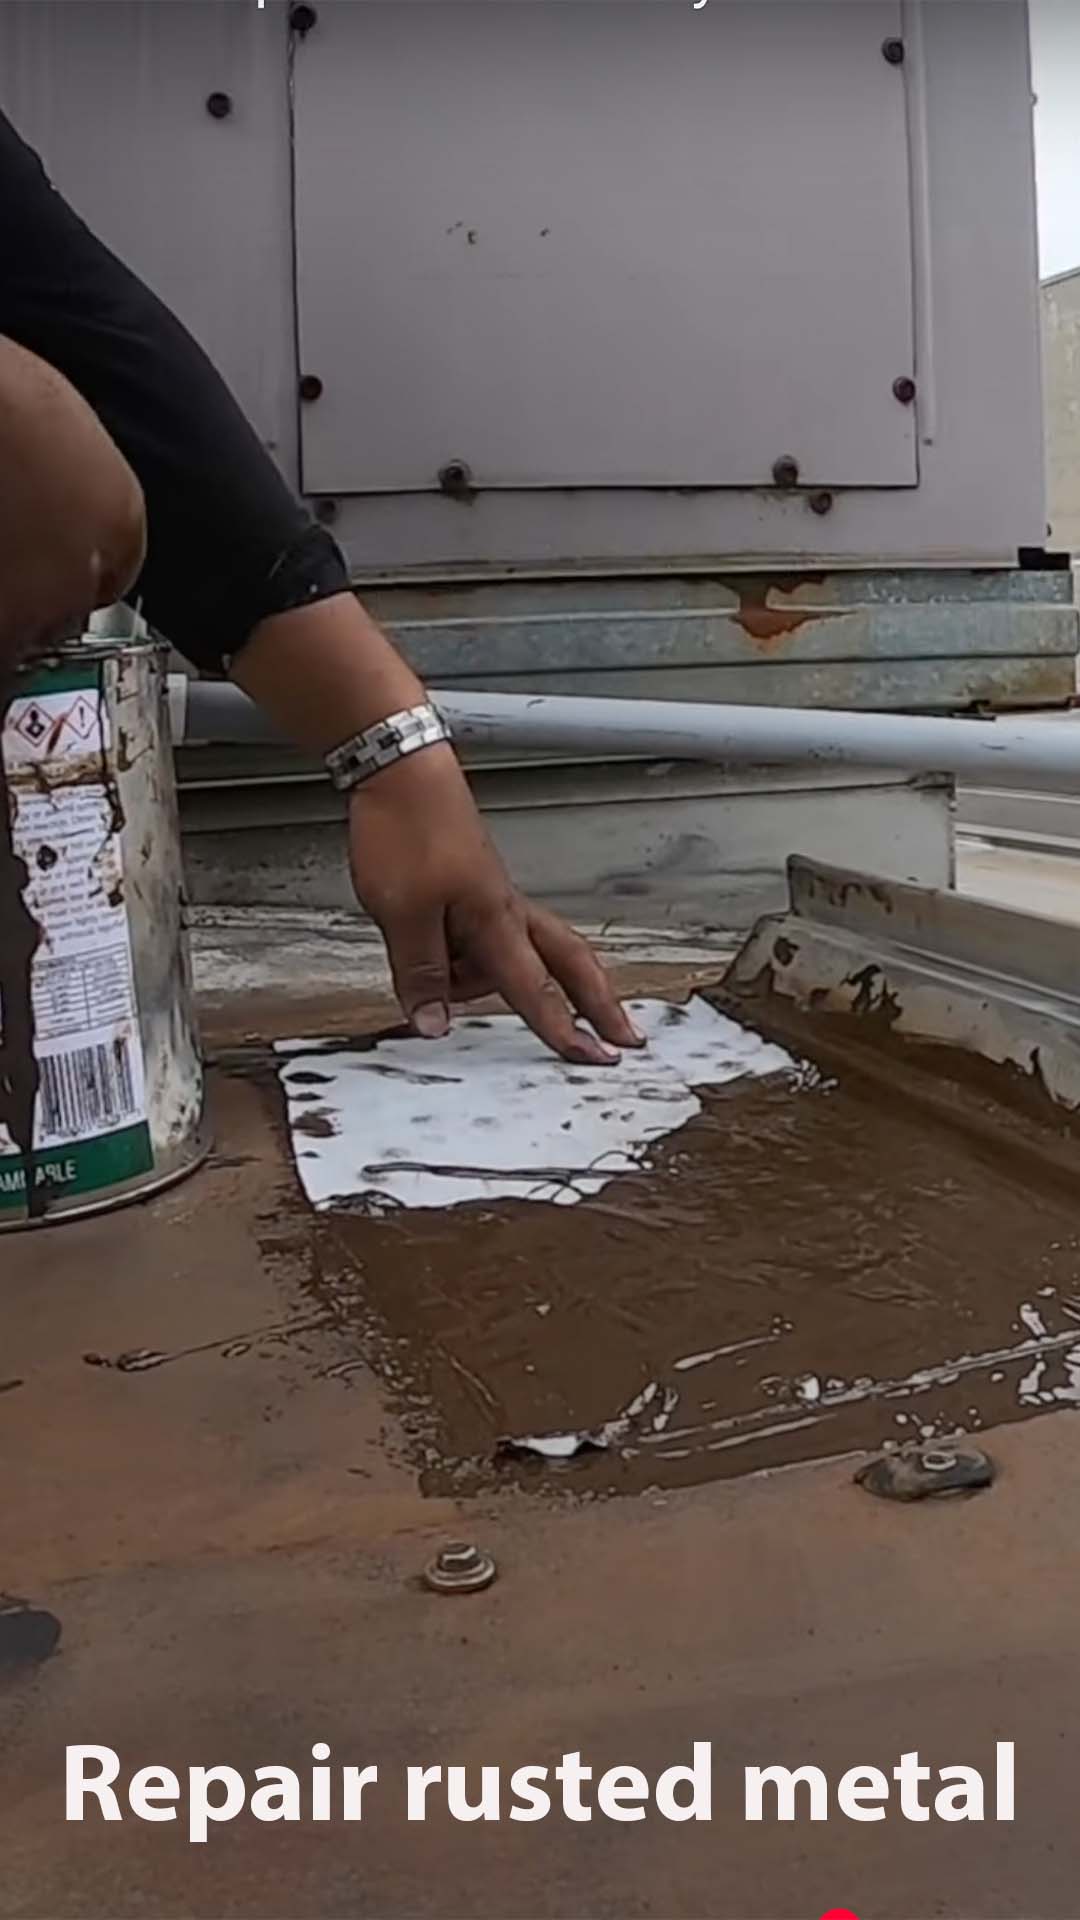
Super Silicone Seal is easy and fast to fix leaks on rusted metal roofs, ducts, EPDM rubber roofs, and skylights #diy #airconditioner
Super Silicone Seal – https://bergstromm.com/
Steps on Repairing Rusted Metal of Roofs and Air Conditioning Ducts;
1. Remove the rust, caulking, and other materials used by others before
2. Use an angle grinder with a steel brush to clean most debris off
3. Use Lacquer Thinner to wipe any old tar, silicone, or oils off
4. Pour out Super Silicone Seal over the surface and spread it with a brush
5. Use a Polyester Fleece to cover seams and pin holes
6 Add another coat of sealant over the fleece
118
5
YouTube Video VVVwZ0xtWTBTSk5tZTFMaHF0RHJEMDh3Lmg2bGpZNzdCd3cw
Rusted AC Duct sealed prevent air loss through holes
Super Silicone Seal is easy and fast to fix leaks on rusted metal roofs, ducts, EPDM rubber roofs, and skylights #diy #airconditioner
17 Steps for repairing rusted metal on roofs and air‑conditioning ducts using Super Silicone Seal:
1. Prepare and clean the area: Remove all rust, old caulk, tar, paint, and other coatings. Start with a flat bar or hammer claw to pry off large chunks, then use an angle grinder with a wire brush or 120‑grit sandpaper to strip away remaining silicone, asphalt, and paint until the metal is clean and slightly rough
2. Wear gloves and eye protection.
3. Wipe the surface: After grinding, wipe the area with a rag soaked in lacquer thinner to remove tar, silicone residue, or oils that could prevent adhesion
4. Let the surface dry completely.
5. Mask off the repair zone: For a neat finish, apply painter’s tape roughly 2½ inches on either side of the crack, seam, or hole
6. Replace any rusted screws with new pan‑head screws before sealing to minimize movement
7. First coat: Use a paintbrush to apply a generous coat of Super Silicone Seal over the cleaned area, extending at least 2 inches beyond the damage
8. On cylindrical surfaces like ducts, cut small tabs into the polyester fleece so it can wrap neatly
9. Embed fleece: Immediately press a strip of polyester fleece into the wet sealant. Work out all air bubbles and wrinkles so the fabric sits flat and fully contacts the sealant
10. The fleece reinforces the repair and spans seams and pinholes.
11. Second coat: Apply a second coat of Super Silicone Seal over the fleece, saturating it thoroughly and making sure no fibers are exposed
12. For ducts or pipes, wrap the fleece around the entire circumference and coat it thoroughly
13. Finishing and cure time: Remove the painter’s tape while the sealant is still wet for clean edges
14. The sealant skins over in about 30 minutes and can withstand rain after roughly one hour, but it needs about 24 hours to cure fully
15. During this period, avoid walking on or disturbing the repair.
16. Optional topcoat and clean‑up: A protective topcoat can be applied after 4–12 hours if additional UV protection or colour matching is desired
17. Wipe away any drips with a clean rag and discard used brushes. Remember to wear gloves, use disposable brushes, and keep safety glasses on throughout the process
Chapters:
0:00 – AC Duct rusted with holes
0:15 – Preparing the surface
0:34 – Pouring Super Silicone Sealant
1:18 – Results after 5 years
25
1
YouTube Video VVVwZ0xtWTBTSk5tZTFMaHF0RHJEMDh3LkR2a0Nhd21nb01F
How I Fixed Rusty AC Ducts Without Replacing Them
These Hidden leaks can cost you a lot of money if you don't know where to look.
Super Silicone Seal – https://bergstromm.com/
160
6
YouTube Video VVVwZ0xtWTBTSk5tZTFMaHF0RHJEMDh3LkluYUxwZGdiT1BZ
Your Metal Roof is Hiding a Costly Leak?
Most people are caught by surprise when they can't find this leak. Not everyone is aware of this leak and will give up looking for it. After many, many trips to this roof, I finally figured out where the roof was leaking
Super Silicone Seal – https://bergstromm.com/
Chapters:
0:00 Hidden leak on a Metal Roof
0:33 Metal snips and cut the seam open
1:04 Use the grinder to clean
1:16 Lacquer thinners to clean
1:27 Super Silicone Seal to seal Hidden seam
26
6
YouTube Video VVVwZ0xtWTBTSk5tZTFMaHF0RHJEMDh3LkE4SjFoRkd5d3Vz
Is Your Metal Roof Hiding a Costly Leak?
How to repair a flat roof leak in less than a minute
Turbo Poly Seal – https://bergstromm.com/
8 Steps on Making a Roof Repair:
1. Locate the leaky area. Most likely around vent pipes, flashing, and penetrations through the roof
2. If necessary, brush off any dirt or debris so it is dust-free.
3. If cualking was used before, remove it.
4. Use Turbo Poly Seal – Stir the content.
5. Brush 1 coat over the area of repair
6. Cut a piece of the Polyester Fleece and place it over the 1st coat
7. Paint a final coat covering the fleece entirely.
8. If necessary, a Silver Coat Protection can be used to coat over the Turbo Poly Seal after it is cured to protect against ultraviolet light.
256
5
YouTube Video VVVwZ0xtWTBTSk5tZTFMaHF0RHJEMDh3LkdOdkJhMnZ5UjBj
Flat Roof Leak Repair in less than a minute
Repairing a valley from leaking on a Metal Roof #diy #metalroofing
Turbo Poly Seal – https://bergstromm.com/
8 Steps to Making a Roof Repair:
1. Where more than 1 metal panel crosses over another can cause leaks, like a valley
2. If necessary, brush off any dirt or debris so it is dust-free.
3. If cualking was used before, remove it.
4. Use Turbo Poly Seal – Stir the content.
5. Brush 1 coat over the area of repair
6. Cut a piece of the Polyester Fleece and place it over the 1st coat
7. Paint a final coat covering the fleece entirely.
8. If necessary, a Silver Coat Protection can be used to coat over the Turbo Poly Seal after it is cured to protect against Ultra Violets
142
9
YouTube Video VVVwZ0xtWTBTSk5tZTFMaHF0RHJEMDh3LmFmR0ZCQ2U3Q013
Metal Roof Valley Leak Repair
How to stop leaks on a Metal Roof Valley
Turbo Poly Seal – https://bergstromm.com/
22
1
YouTube Video VVVwZ0xtWTBTSk5tZTFMaHF0RHJEMDh3LmJfUHAzbVRYRzV3
Metal Roof Valley Leak Repair #diy #flatroofing
Repair A/C Curb flashing with what I had on the roof
Super Silicone Seal – https://bergstromm.com/
98
5
YouTube Video VVVwZ0xtWTBTSk5tZTFMaHF0RHJEMDh3Lkhra2M3Y1Vvb3F3
AC Curb flashing Repair
Watch this video before you coat a roof. Metal roofs should not be coated
Super Silicone Seal – https://bergstromm.com/
145
3
YouTube Video VVVwZ0xtWTBTSk5tZTFMaHF0RHJEMDh3Lk41TU12UEpibl93
Why not coat a metal roof #diy #roofmaintenance #roofrepair
Watch this before you have your roof coated; it will save you a lot of money. Also, how to make a seam repair.
Super Silicone Seal – https://bergstromm.com/
Chapters:
0:00 Why not coat a metal roof
1:00 Preparing the seam
1:27 Seal seam with Super Silicone Seal
1:56 Results of previous repair
47
2
YouTube Video VVVwZ0xtWTBTSk5tZTFMaHF0RHJEMDh3LlFQTHJhODBva2tB
Watch this before you Coat your Metal Roof – shocking finds and How to Fix Seams
Seal an AC wall unit from leaking
Super Silicone Seal – https://bergstromm.com/
157
12
YouTube Video VVVwZ0xtWTBTSk5tZTFMaHF0RHJEMDh3LkxLSTdfd2VkUkRN
AC Flashing Repair on a flat roof
How to repair a leaky seam on a flat roof
Turbo Poly Sewal – https://bergstromm.com/
8 Steps to Making a Roof Repair:
1. When a Rubber Roof Seam needs to be sealed
2. If necessary, brush off any dirt or debris so it is dust-free.
3. If cualking was used before, remove it.
4. Use Turbo Poly Seal – Stir the content.
5. Brush 1 coat over the area of repair
6. Cut a piece of the Polyester Fleece and place it over the 1st coat
7. Paint a final coat covering the fleece entirely.
8. If necessary, a Silver Coat Protection can be used to coat over the Turbo Poly Seal after it is cured to protect against ultraviolet light.
187
5
YouTube Video VVVwZ0xtWTBTSk5tZTFMaHF0RHJEMDh3LmJFZkxBeWlPaHJv
Rubber Roof Seam Repair in just minutes
Easiest, fastest rubber roof installation for any DIYer. No skills are needed, and it will last 20-30 years. You can almost install this over any surface.
Turbo Poly Seal – https://bergstromm.com/
Chapters:
0:00 How to Install a Rubber Roof
0:35 Parapet wall in bad shape
1:05 Screw down surface
2:48 Laying down base sheet
3:53 Laying down the Cap sheet
4:18 Prep parapet wall for membrane
5:19 Installing membrane over parapet wall
8:49 Vent flashing
9:56 Results after 3 years
61
8
YouTube Video VVVwZ0xtWTBTSk5tZTFMaHF0RHJEMDh3LnNhLXRfR1J0T3k0
How to install your own Peel and Stick Rubber Roof DIY
You are crazy not to apply Silver Coat protection for your roof. This will protect it against Ultraviolets and also reduce the temperature by 60º
Chapters:
0:00 Silver Coat Protection
0:24 The purpose of Silver Coating
1:16 Spider cracks due to UVs
2:32 Repairing holes in the roof
3:22 How to repair a seam on Torch Down Roof
51
15
YouTube Video VVVwZ0xtWTBTSk5tZTFMaHF0RHJEMDh3LkhHdmxmdnl0NENN
Silver Coating reduces the temperature by more than 60º F. and protects the roof against UVs
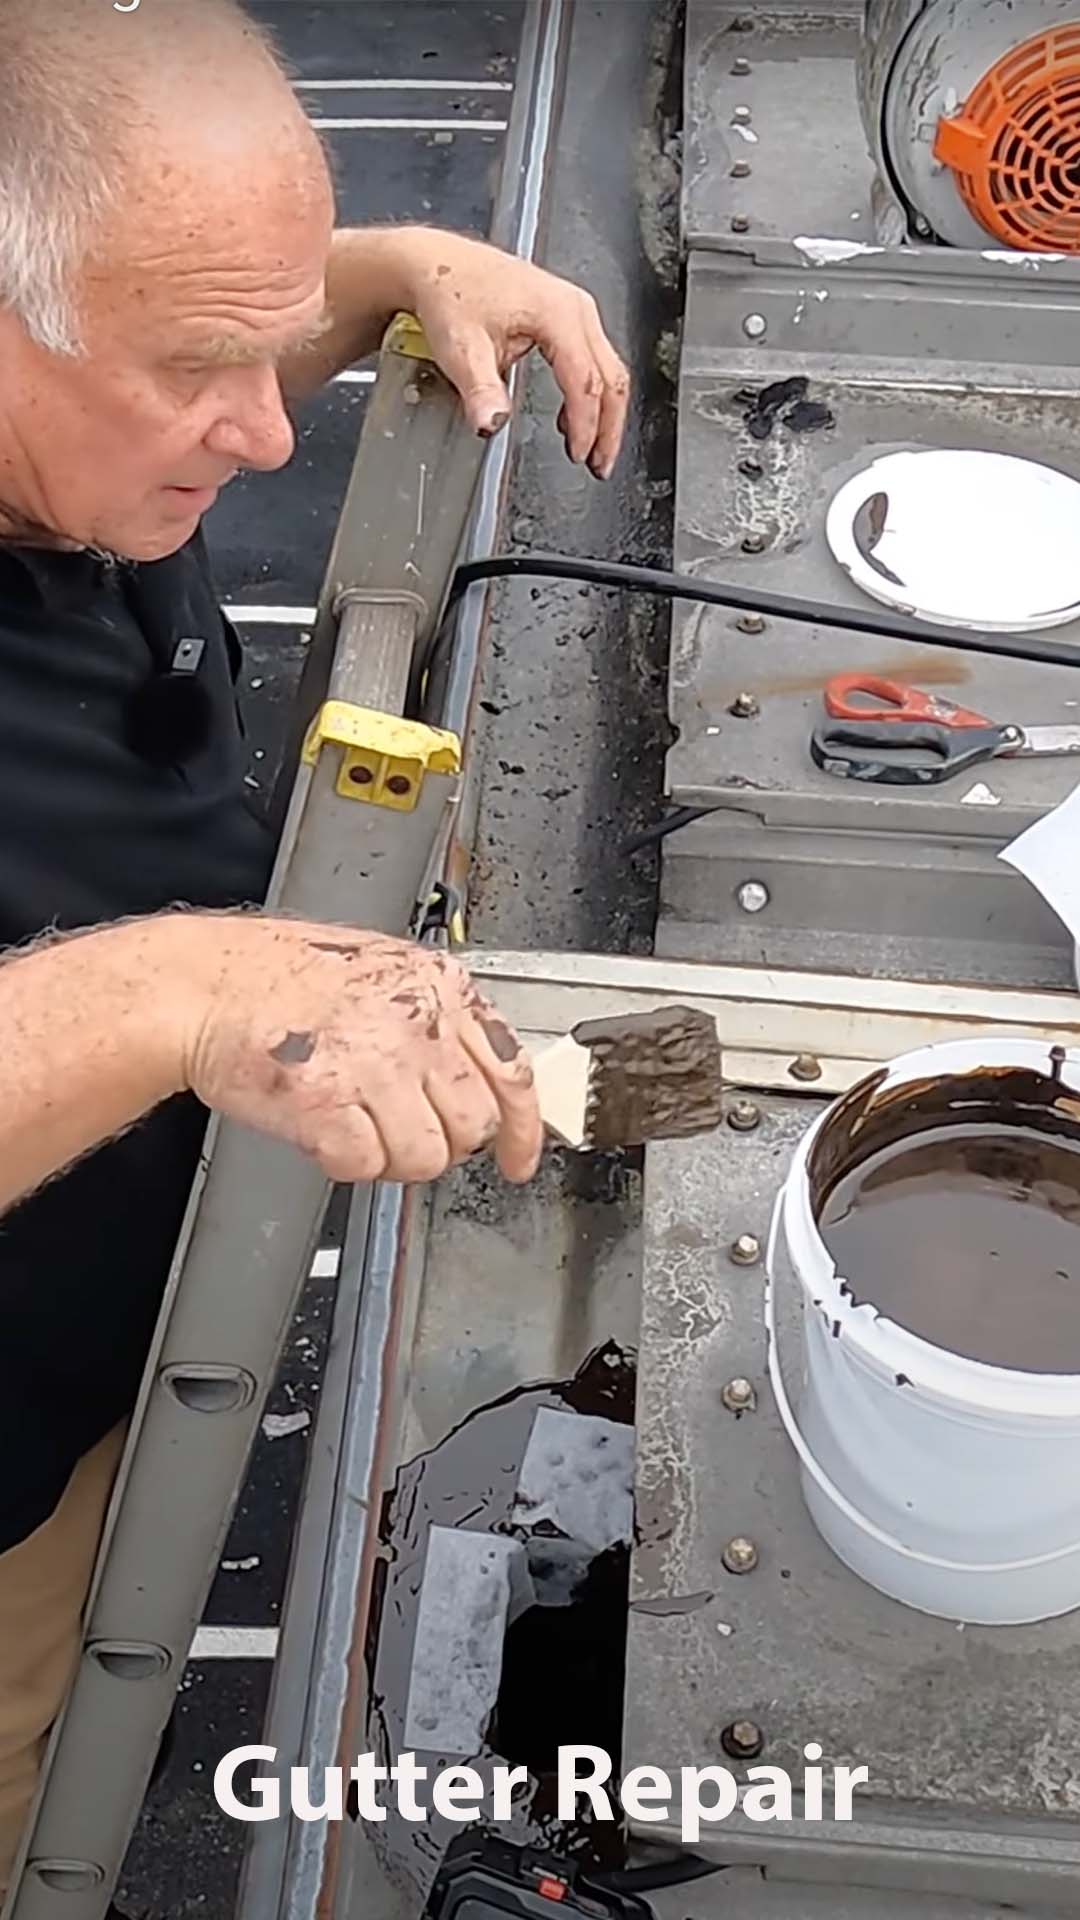
What is the purpose of a Gutter filter?
Gutter Filter – https://bergstromm.com/product/z-gutter-leaf-filter/
156
5
YouTube Video VVVwZ0xtWTBTSk5tZTFMaHF0RHJEMDh3LmVNZFRXdnk4eDQw
What is the purpose of a Gutter filter
Repairing a shingle that is leaking on our church
Turbo Poly Seal – https://bergstromm.com/
7 Steps to Making a Roof Repair:
1. Repairs where shingles have blown off or nails are showing
2. If necessary, brush off any dirt or debris so it is dust-free.
3. If cualking was used before, remove it.
4. Use Turbo Poly Seal – Stir the content.
5. Brush 1 coat over the area of repair
6. Cut a piece of the Polyester Fleece and place it over the 1st coat
7. Paint a final coat covering the fleece entirely.
8. If necessary, a Silver Coat Protection can be used to coat over the Turbo Poly Seal after it is cured to protect against ultraviolet light.
201
16
YouTube Video VVVwZ0xtWTBTSk5tZTFMaHF0RHJEMDh3Lmt4ZG9PQ2Q2ZVZz
Shingle Roof Repair
How to make a Shingle Roof Leak Repair. DIY is easy and cheap
Chapters:
0:00 SBS Cap sheet to patch shingle roof
0:47 Remember the Hook Blade- Important
1:05 Shingles are falling apart
1:34 Lifting up shingles
2:08 Installing the Cap sheet
4:51 Seal the joint between shingles
5:21 Turbo Poly Seal to seal shingle joints
53
7
YouTube Video VVVwZ0xtWTBTSk5tZTFMaHF0RHJEMDh3LjNPMzBmUXNPSXlB
Shingle Roof Leak Repair – Church Roof leaking
How to repair TPO roof leaks
@AllRoof.
Super Silicone Seal – https://bergstromm.com/
72
8
YouTube Video VVVwZ0xtWTBTSk5tZTFMaHF0RHJEMDh3LnJPRTVCUjc2SXU4
TPO Leak Repair #roof #diy
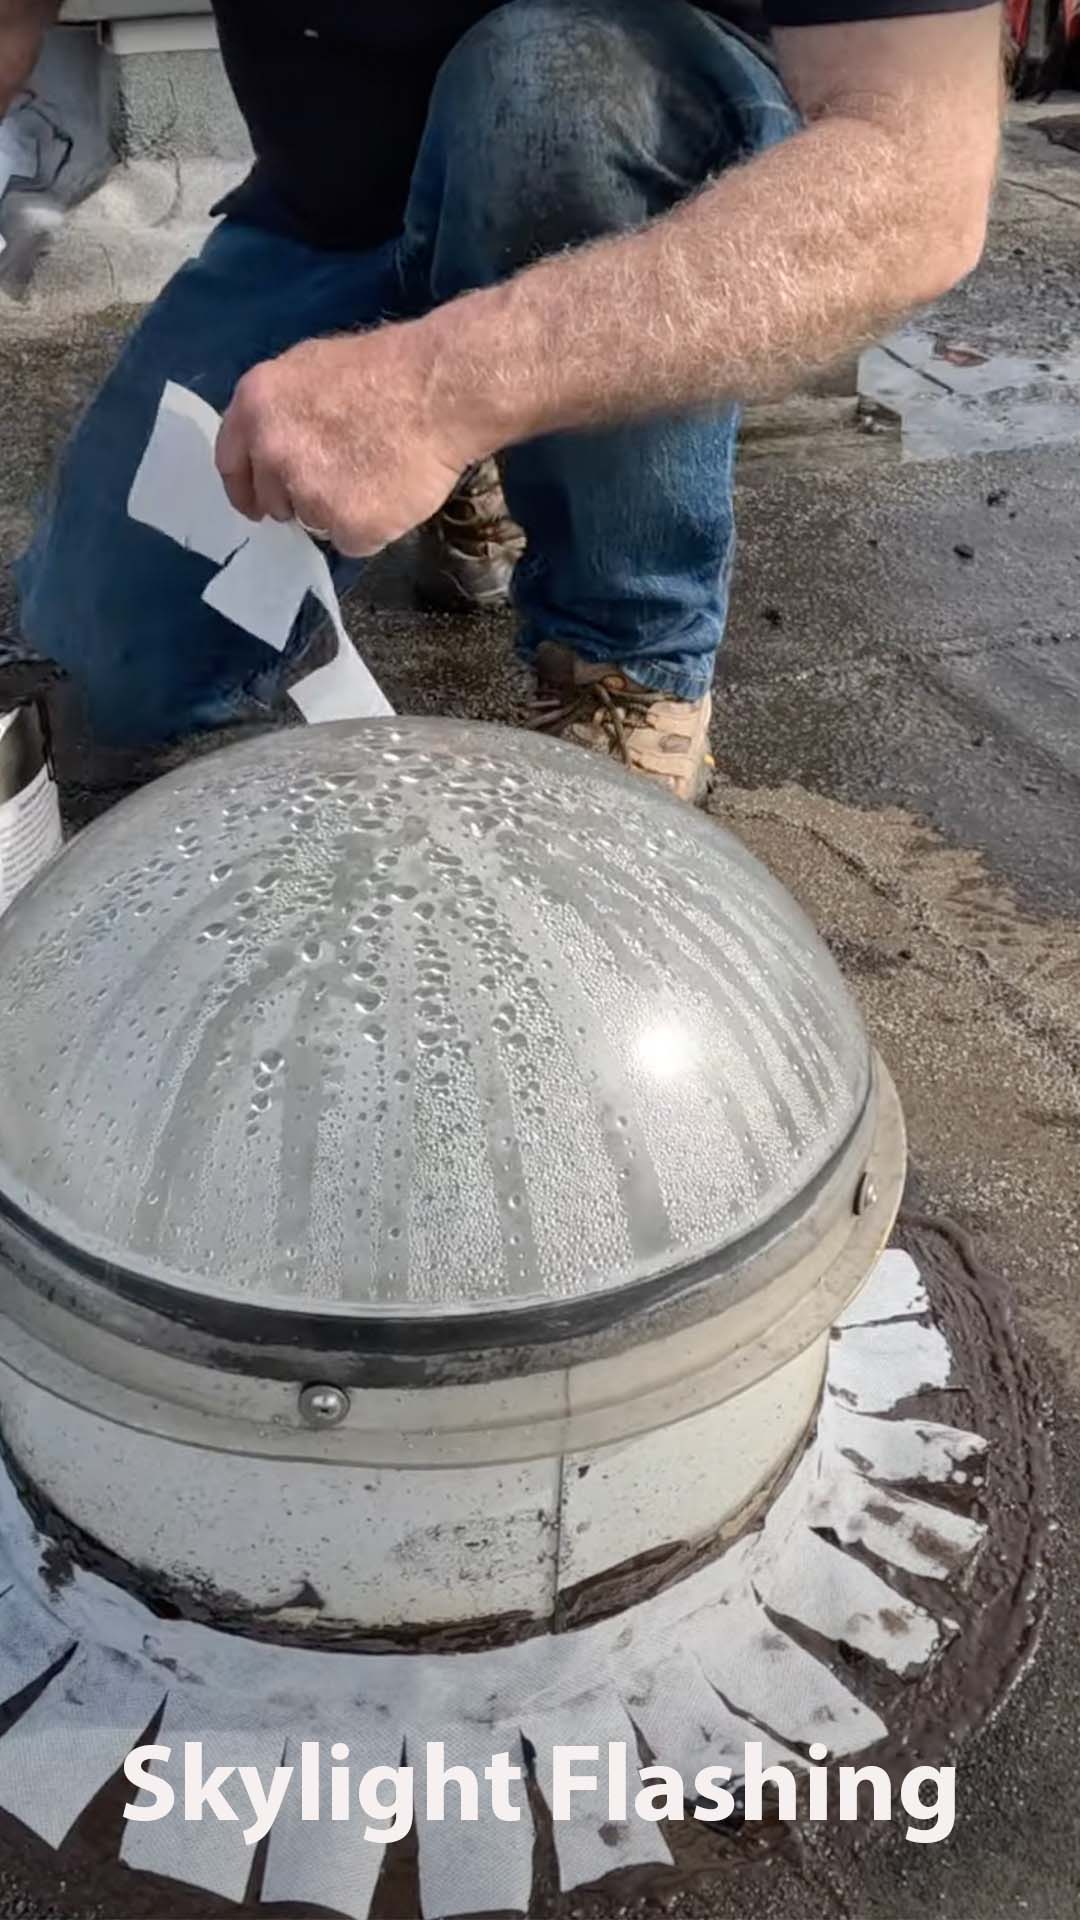
Repair a skylight leak @AllRoof.
Super Silicone Seal – https://bergstromm.com/
77
4
YouTube Video VVVwZ0xtWTBTSk5tZTFMaHF0RHJEMDh3LkpvbGRnbE1hQTBv
Skylight Leak Repair #skylights
An easy fix for chimney flashing leaks. Any homeowner can fix their own chimney leak very easily
Turbo Poly Seal – https://bergstromm.com/
@AllRoof.
7 Steps to Making a Roof Repair:
1. Locate the leaky area. Most likely around vent pipes, flashing, and penetrations through the roof
2. If necessary, brush off any dirt or debris so it is dust-free.
3. If cualking was used before, remove it.
4. Use Turbo Poly Seal – Stir the content.
5. Brush 1 coat over the area of repair
6. Cut a piece of the Polyester Fleece and place it over the 1st coat
7. Paint a final coat covering the fleece entirely.
8. If necessary, a Silver Coat Protection can be used to coat over the Turbo Poly Seal after it is cured to protect against Ultra Violets
169
12
YouTube Video VVVwZ0xtWTBTSk5tZTFMaHF0RHJEMDh3LjZpaFZZMlA5Tm1j
How to repair chimney flashing leak #chimney #diy