Chimney Leak Repair. Chimney leaks are common due to incorrect flashing installation. For the most part, flashing is never installed properly and caulking is used to seal the slot where the metal flashing is inserted into the chimney. To repair leaks on a chimney, a few steps must be taken to ensure a proper repair that will last.
This a link to a bunch of Chimney and video articles: https://flatroofdoc.com/chimney-repairs/
Here are 4 things you should never use to make Chimney leak Repairs
- Caulking – whether it is latex, silicone, or urethane caulking, it will always fail.
- Tar – any tar out of a can will fail – it dries and cracks
- Tapes – It is very tempting to get a roll of tape. Tape does not work on uneven surfaces; it will leak from the onset
- Spray Sealant out of a can – that is by far the worst so-called sealant
Watch this video to see how to make CFhimney Leak Repairs
9 Steps on Chimney Leak Repairs
The Crown of the Chimney
The top part of a Chimney
In most chimney cases, a cement slab is on top of a chimney. This cement slab will crack and also separate from the bricks where it was poured. Water can get through these cracks, and leaks will appear inside your house. Use Turbo Poly Seal to make repairs. Watch the video to see how to seal the chimney crown.
The Flashing on a Chimney
The bottom part connecting to the roof
Flashing is the metal at the bottom of the chimney that connects the chimney to the roof. In most cases, this flashing is slotted into the chimney, and caulking is used to seal it. This caulking will dry out and shrink, and the seal will break, causing leaks. Watch the video on how to seal the flashing with Turbo Poly Seal.
Field Stone Chimneys
Chimneys that have natural stone
When a chimney is built or decorated with natural field stones, it has a 90% chance of leaking. It is very hard to detect leaks and seal them from leaking. You are much better off rebuilding the chimney using bricks or concrete. You can use Alex Plus clear caulking to seal the fieldstone’s cracks.
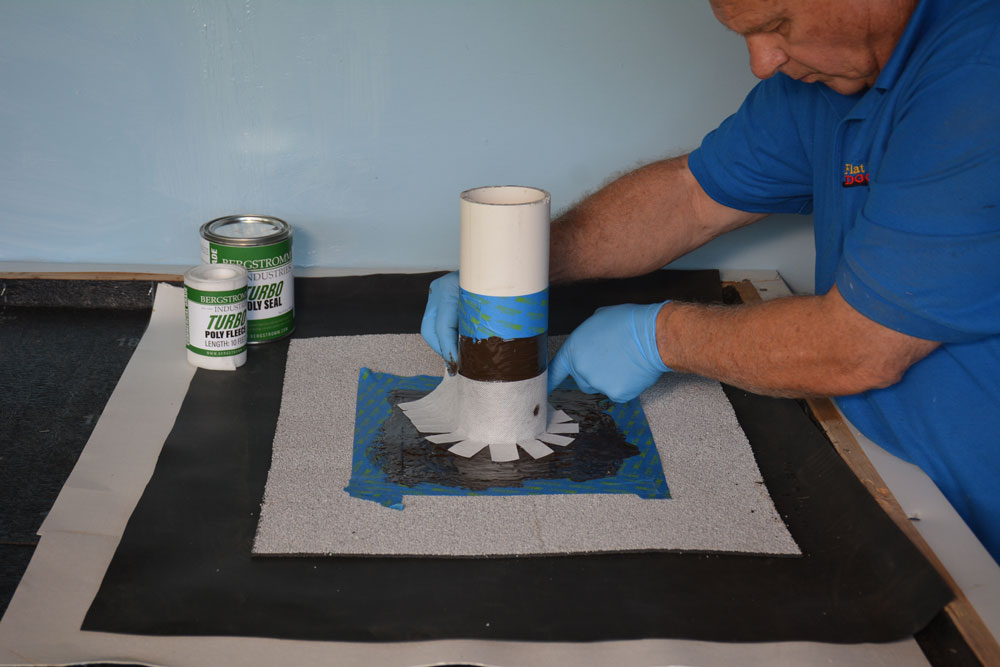
- Use an angle grinder with a wire brush to clean all existing caulking, paint, and tar from the flashing or chimney crown.
- Remove any loose cement grout where necessary.
- Use masking tape to tape off the area where you seal the chimney.
- Make sure to allow at least 2″ of space on either side of the crack where you will apply the sealant.
- Use Turbo Poly Seal to brush the 1st coat on the surface, covering 2″ on each side of the crack.
- Cut a polyester fleece and apply it over the 1st coat of sealant.
- Brush the 2nd coat of Turbo Poly Seal to cover the Polyester fleece.
- Remove the masking tape after 5 minutes of curing.
- Apply Silver Coat protection after 24 hours of curing.
Cleaning up
Use Asphalt Tar Remover to clean your hands and clothes after working with Turbo Poly Seal.
Take a few drops and rub it into your hands.
Let it sit for a few minutes, and then use water or a wet rag to wash your hands clean.