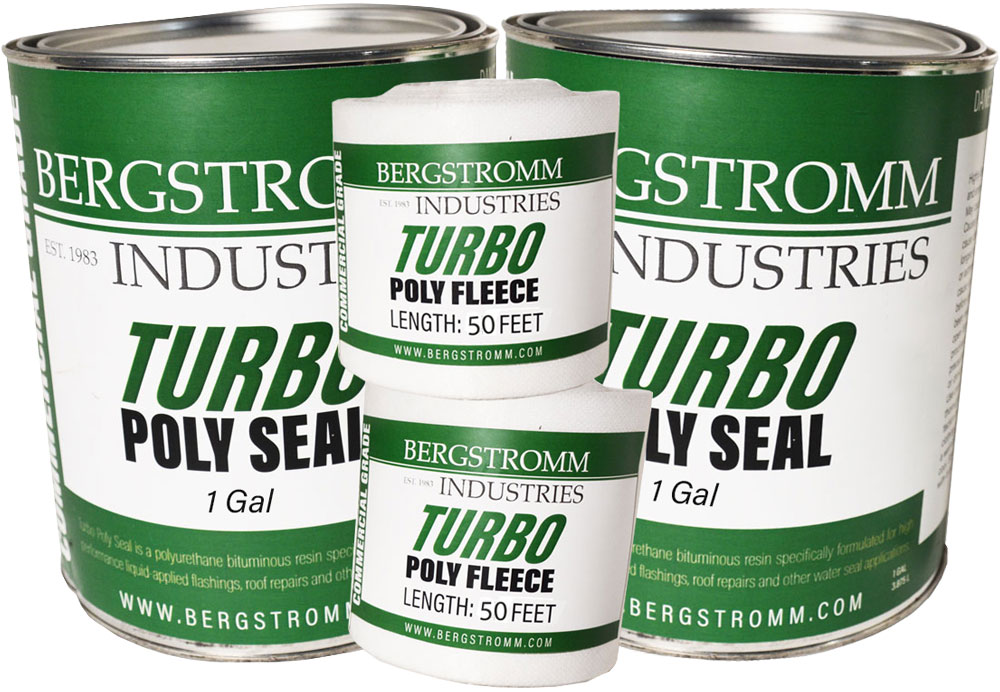
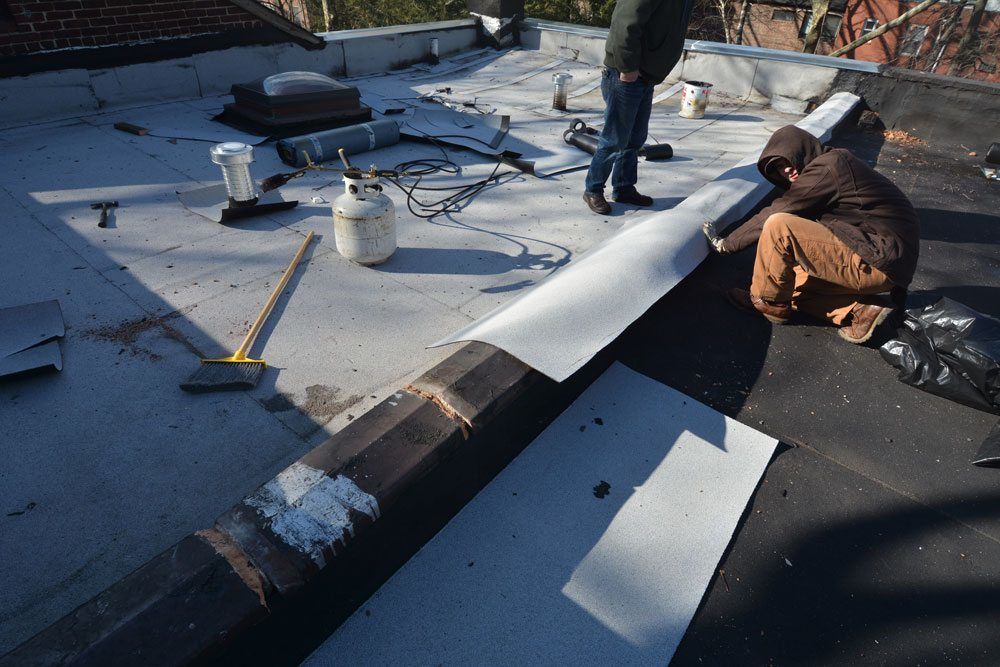
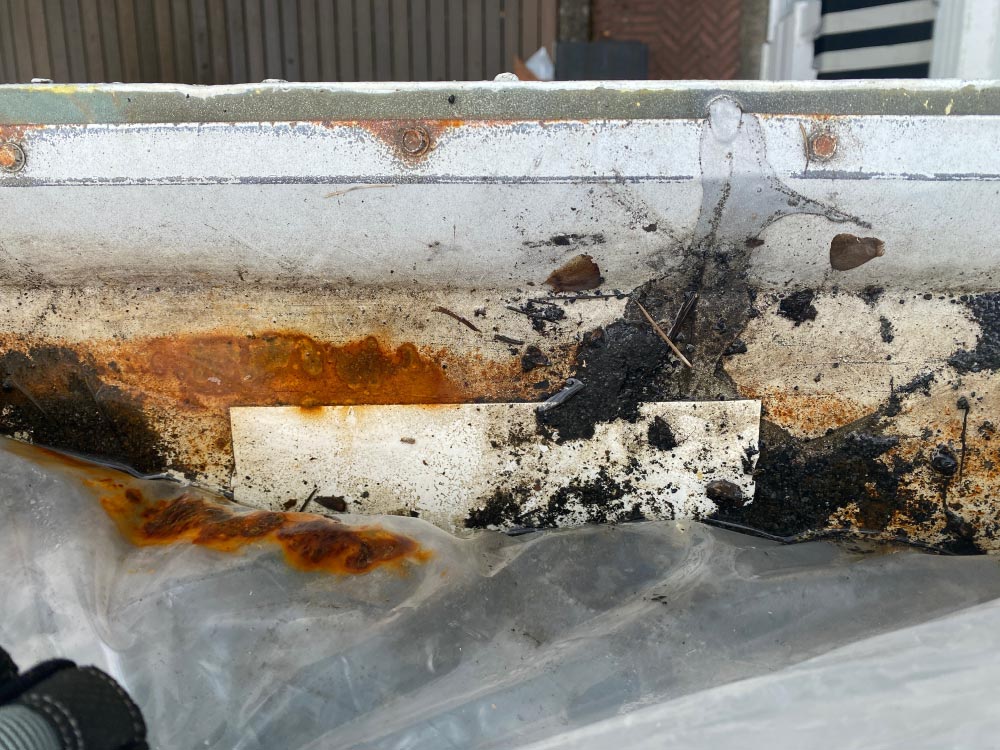
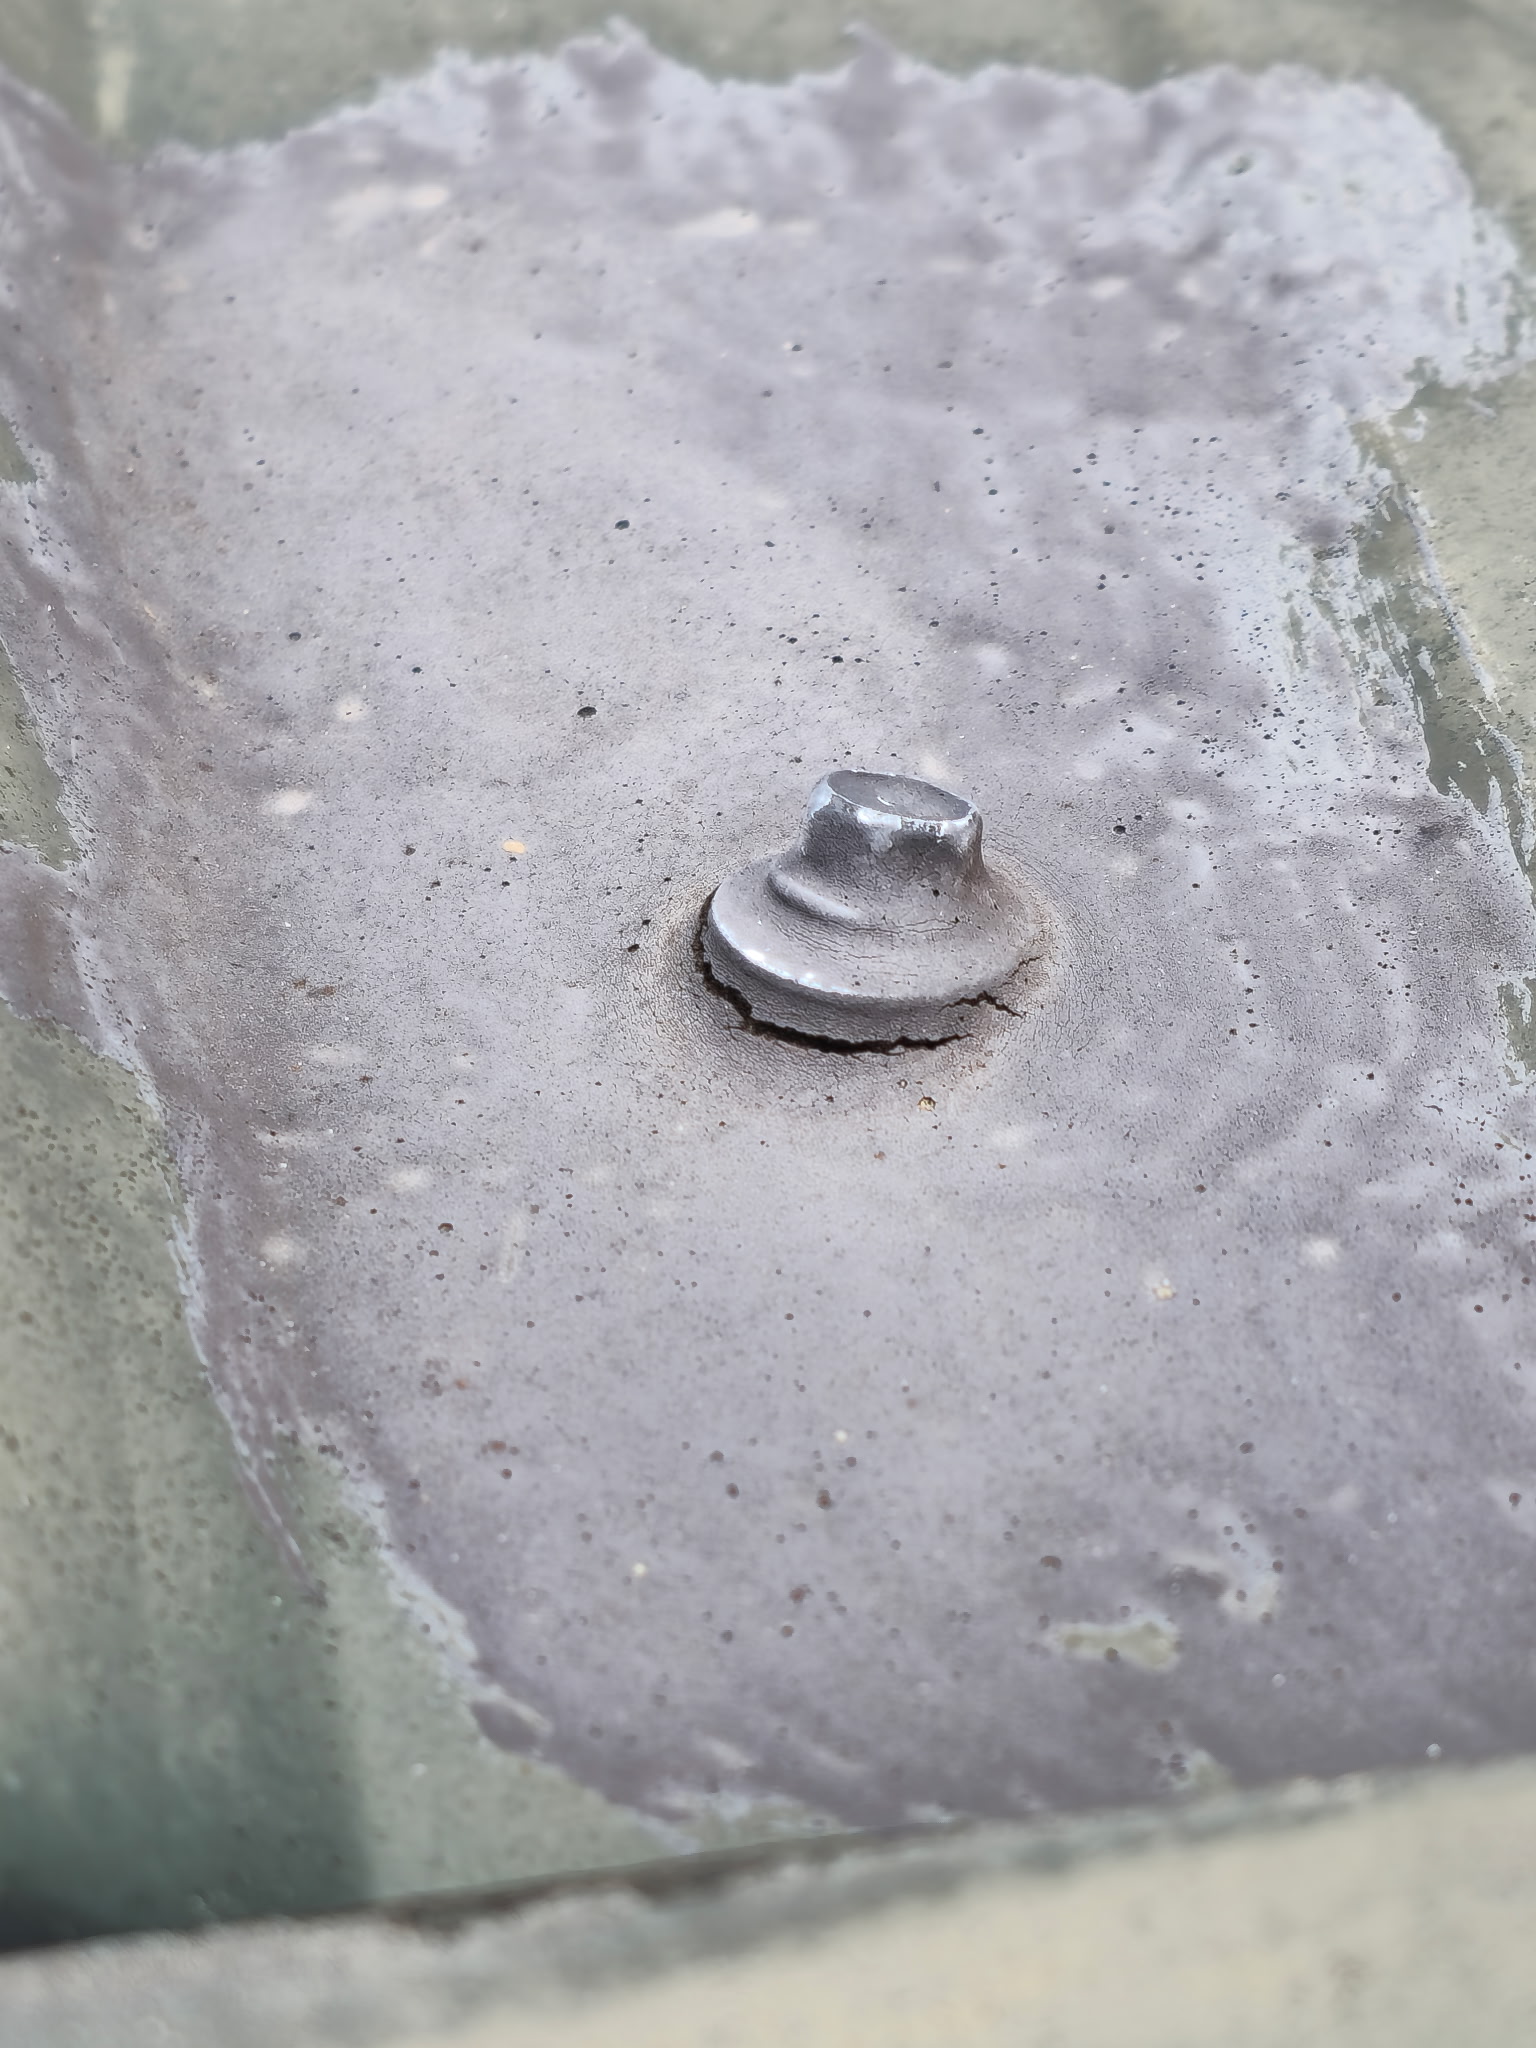
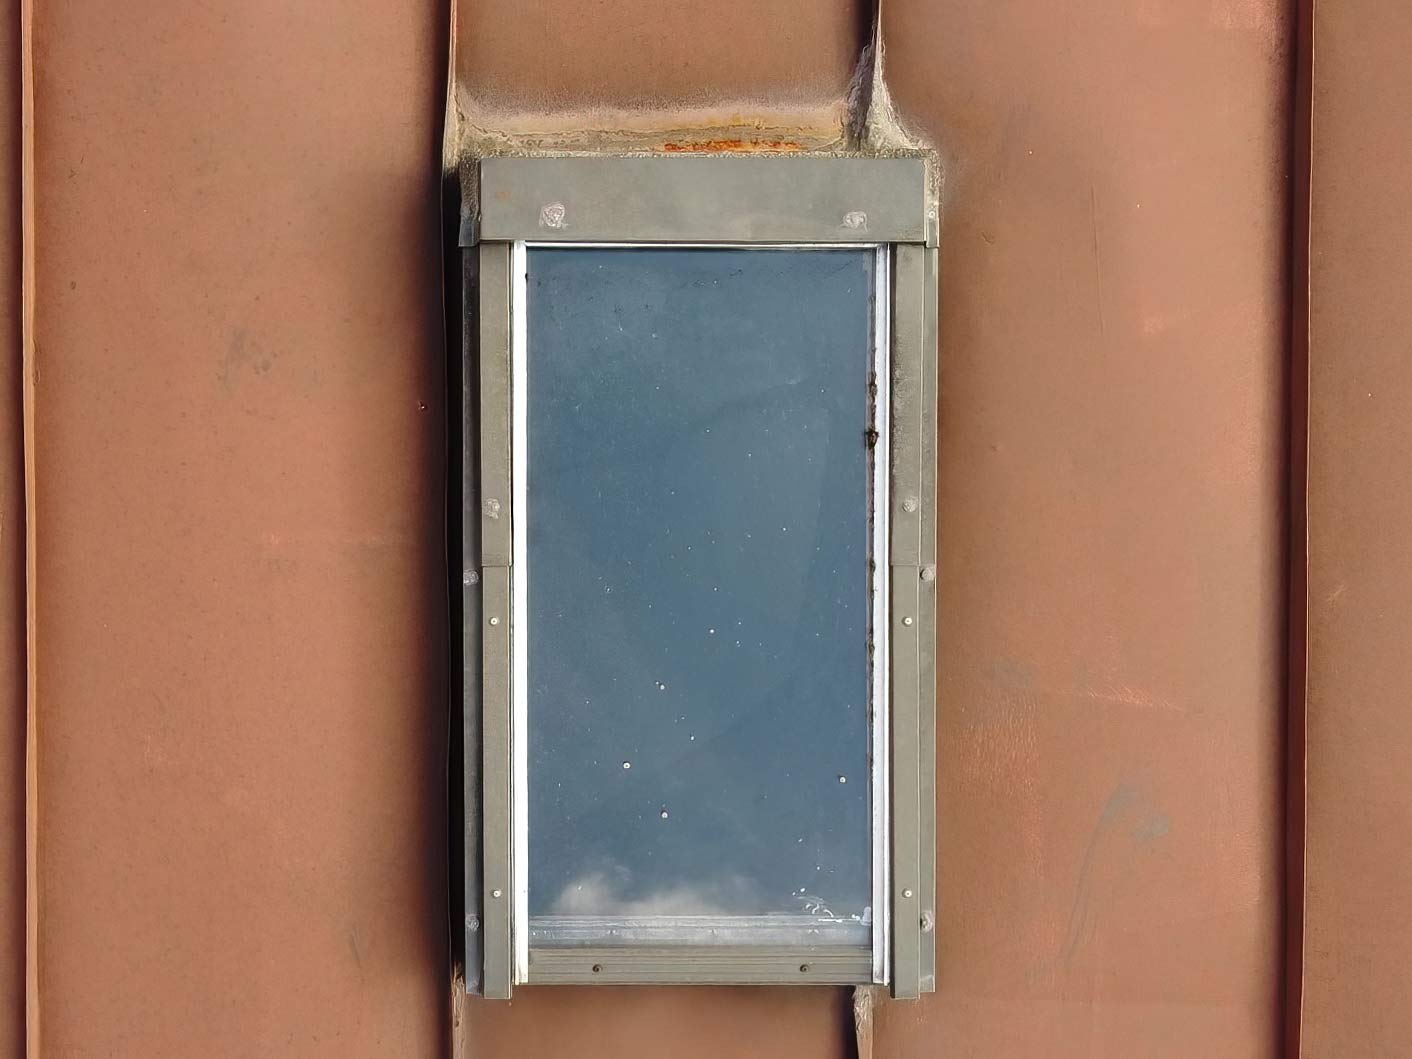
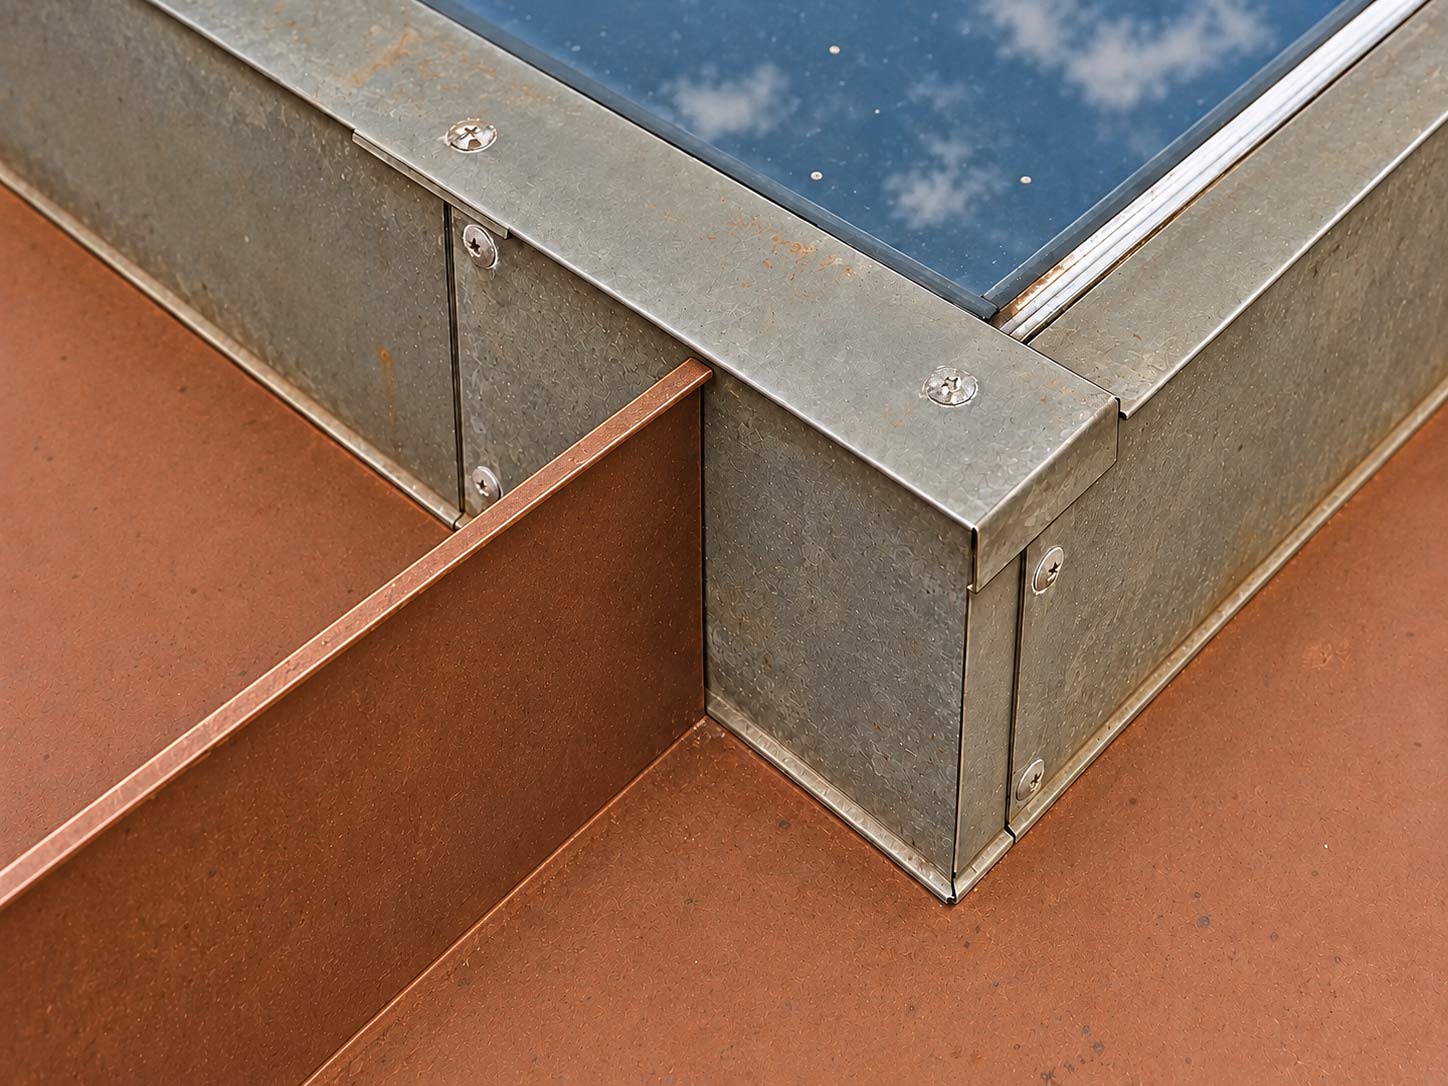
Turbo Poly Seal Easy Roof Leak Sealant 2 Gal + 2 Rolls Fleece
Turbo Poly Seal repairs roof leaks on metal, modified bitumen, torch-down roofing, flashing, chimney caps, and concrete. Use with Poly Fleece to reinforce cracks, seams, and transitions.
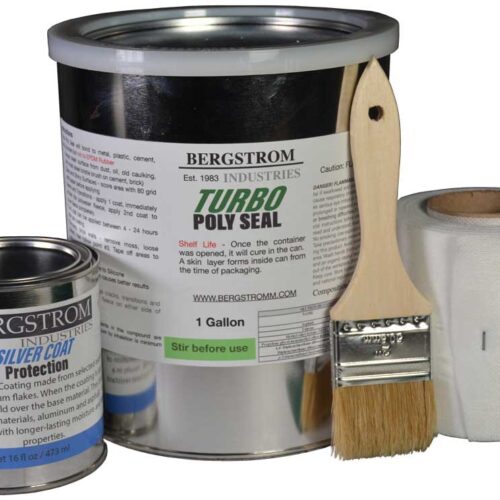
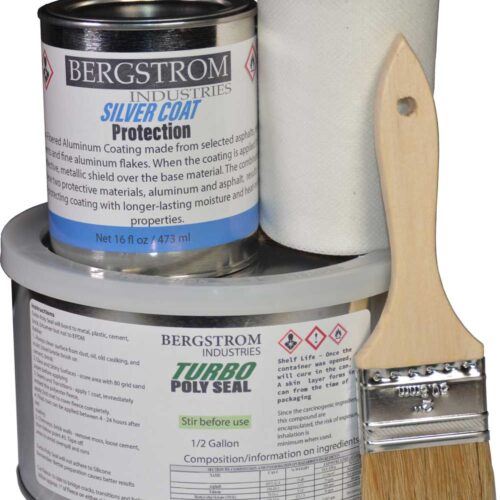
Kit includes: 2 gallons of Turbo Poly Seal and two 50-foot rolls of 4-inch-wide Poly Fleece (100 feet total).
Approximate coverage: 70–80 linear feet of repair using 4-inch fleece, including the first coat and topcoat. Coverage varies with surface texture and application thickness. The included fleece length does not equal sealant coverage.
Apply to a clean, completely dry surface. Not for EPDM rubber, glass, or silicone-coated surfaces. For EPDM rubber or glass repairs, consider Super Silicone Seal, which also requires a dry surface.
Approximately 35–40 linear feet using 4-inch fleece, including the first coat and topcoat. Coverage varies with surface texture, temperature and application thickness.
Approximately 40–45 linear feet using 4-inch fleece, including the first coat and topcoat. Coverage varies with surface texture and application thickness.
How much fleece comes with the kit?
The 1/2-gallon kit includes 25 feet of 4-inch fleece; the 1-gallon kit includes 50 feet. The 2-gallon kit includes two 50-foot rolls. Included fleece length is not a sealant-coverage guarantee.
The 1/2-gallon kit includes 25 feet of 4-inch fleece; the 1-gallon kit includes 50 feet. The 5-gallon bucket does not include fleece. Included fleece length is not a sealant-coverage guarantee.
Can it be applied to a wet surface?
No. Prepare the surface and let it dry completely before applying Turbo Poly Seal.
No. Every application surface must be completely dry, including surfaces cleaned with a wet rag.
Can it be used on EPDM rubber roofing?
No. Do not apply Turbo Poly Seal directly to EPDM rubber roofing.
Yes. Apply to clean, completely dry EPDM. No sanding or primer is required.
Does it adhere to glass or Plexiglas?
Not to glass. It can bond to Plexiglas and metal for the documented skylight frame-to-Plexiglas repair.
Yes. It can bond to glass and Plexiglas for glazing-to-frame repairs. Follow the surface-specific preparation instructions.
Can it be applied over an existing silicone coating?
No. Remove silicone caulking and silicone roof coatings from the bonding area.
Firmly attached existing silicone coating can remain. Remove loose silicone, wipe clean with a wet rag and allow the surface to dry completely.
How is TPO prepared?
Wipe with a rag and lacquer thinner, remove silicone caulking from the repair area, and let the surface dry completely before applying sealant and fleece.
Wipe clean with a wet rag and let it dry completely. No sanding or primer is required.
Can it be applied over asphalt or torch-down roofing?
Yes. The repair area must be clean, completely dry and smooth enough for fleece to lie flat. Remove or smooth bumps before applying.
Do not use on asphalt or plain torch-down membrane. Granulated torch-down is suitable only while the granulated surface remains intact; use Turbo if preparation exposes plain asphalt.
How is a metal roof prepared?
Remove old repair materials and loose rust. Firmly attached original factory paint may remain. Clean the bonding area and let it dry completely. Do not add new primer or paint beneath the repair.
Remove dust, oil, debris and loose or flaking rust. Firmly attached factory paint may remain. Let the surface dry completely before application.
Should the product be stirred?
Yes. Stir thoroughly by hand until the sealant has a consistent brown appearance throughout.
Yes. Stir thoroughly. Use a drill with a paint-mixing attachment for a 5-gallon bucket; hand stirring is sufficient for smaller containers.
Can the sealant be thinned?
No. Use exactly as supplied. Do not add solvents or thinner.
No. Use exactly as supplied. Do not add solvents, thinner or other materials.
What brush should I use?
Use an inexpensive, 2-inch disposable brush.
Use an inexpensive, 2-inch disposable brush for repairs. Whole-roof coating uses a 1/2-inch-nap roller.
How are horizontal repairs reinforced with fleece?
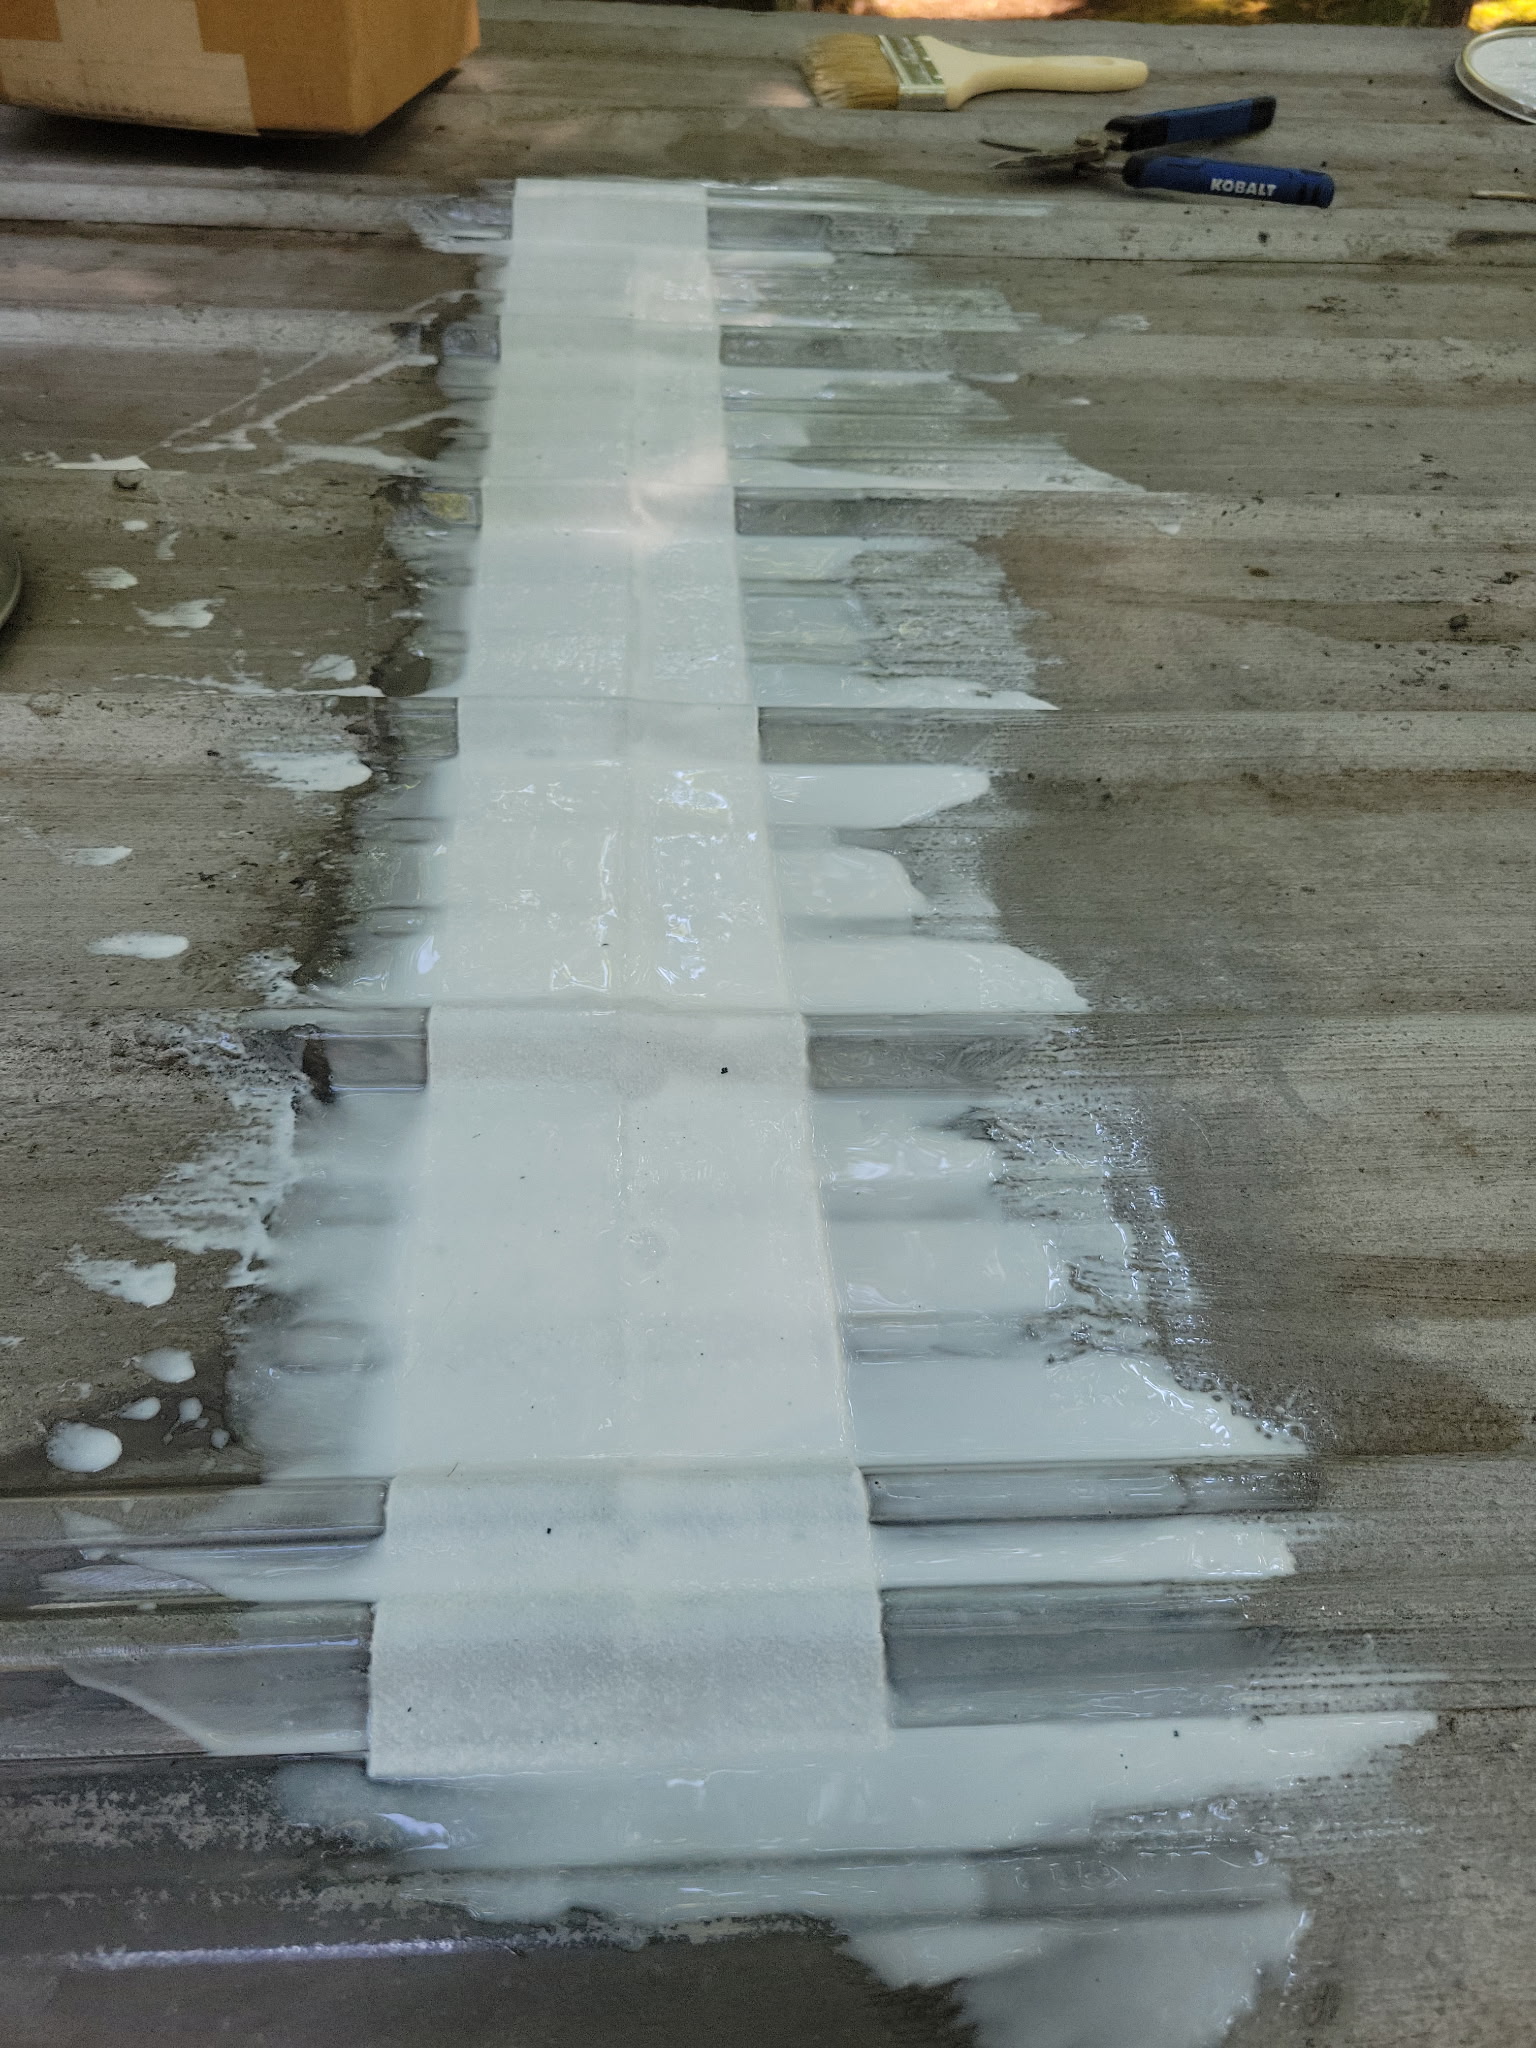
Apply a thin first coat, immediately embed fleece, and apply a thick topcoat while the first coat is wet. Overlap adjoining fleece by 1/2 inch with sealant between the layers. Fully cover the fleece.
Apply a thick first coat, immediately embed fleece, and apply a thick topcoat. No wait is needed between these layers. Fully cover the fleece so no fabric pattern or exposed fleece remains visible.
How are upright flashing transitions repaired?
Bridge compatible, clean, dry wall and metal surfaces with fleece embedded in sealant, then fully cover the fleece. Existing groove filler can remain if it is not loose or preventing the fleece from lying flat; the repair must bond to the exposed compatible surfaces.
Apply a thin first coat and let it become tacky. Embed fleece and add another thin coat. Wait 30–45 minutes before the additional coat that fully covers the fleece.
How are metal-roof screws sealed?
After tightening the screw and seating the washer flat, cover the screw head and washer with a dab of sealant. No fleece is needed over the screw.
After tightening the screw and seating the washer flat, cover the screw head and washer with a dab of sealant. No fleece is needed over the screw. Patch abandoned screw holes with fleece and sealant.
How are metal-roof seams repaired?
Fasten separated panels tightly together before sealing. Reinforce the seam with fleece and sealant, following the panel profile. Keep seam fleece off the screws and seal screw heads separately.
Fasten separated panels tightly together before sealing. Reinforce the seam with fleece and sealant, following the panel profile. Keep seam fleece off the screws and seal screw heads separately.
Can it repair gutter seams?
Yes. Secure loose joints with commercial rivets, clean and dry the area, and seal from inside the gutter with fleece following the bottom and both sides.
Yes. Secure loose joints with commercial rivets, clean and dry the area, and seal from inside the gutter with fleece following the bottom and both sides.
Can it repair a concrete chimney crown?
Yes. Reinforce every crack with fleece and fully cover it. One coat on concrete covers approximately 15 square feet per 1/2 gallon; areas reinforced with fleece require more material.
Yes. Reinforce every crack with fleece and fully cover it. Follow the chimney-crown preparation and repair instructions; the surface must be completely dry.
Which skylight repairs can it be used for?
Primarily skylight curb flashing, especially curb corners. It can also seal the documented Plexiglas-to-metal-frame transition. It does not adhere to glass and is not a solution for every skylight leak.
It can seal compatible glass- or Plexiglas-to-frame joints using sealant and fleece. Clean and prepare the bonding areas, embed and fully cover the fleece, and remove masking tape immediately after the topcoat.
Can it repair a cracked EPDM vent boot?
Only as the documented reinforced cover anchored to the pipe above and the compatible roof surface below. It does not bond to EPDM. Follow the full vent-boot repair instructions.
Yes. Reinforce with fleece extending onto the pipe and compatible surrounding roof surface. Follow the thin-coat vertical method on upright sections.
What application temperatures are recommended?
Recommended air temperature: 20–110°F. Ideal: 25–90°F. The surface must be completely dry; cold weather slows curing and high heat makes the sealant runnier.
Recommended air temperature: 20–110°F. Ideal: 25–90°F. The surface must be completely dry. Cold weather delays rain readiness and curing.
How soon can rain fall on the repair?
Allow approximately 10–15 minutes as a conservative estimate; about 5 minutes may be enough on a warm day. Surface skin formation is different from full cure. Cold-weather timing varies.
Allow about 30 minutes on a warm day. Below 32°F, allow 3–4 hours. Rain readiness is different from full cure.
How long does curing take?
Allow approximately 24–48 hours as conservative guidance. Heat speeds curing; cold conditions slow it.
Allow approximately 24 hours under suitable conditions. Cold weather can extend curing time.
Can it be recoated with the same sealant?
A fresh repair can receive another coat within a few hours. Once cured, wait 6–12 months for the standard maintenance recoat and wipe the uncoated surface with a dry rag. Earlier recoating or repairs covered with paint or Silver Coat require the separate preparation instructions.
Yes. There is no mandatory waiting period for adding more sealant to a fresh repair, apart from the waits in the vertical application method. For an older repair, wipe clean with a wet rag and let it dry completely.
Can it be painted or given a protective coating?
Yes. Silver Coat or non-fibered aluminum asphalt is recommended for protective coating; paint can also be used. Follow the separate protective-coating instructions.
No paint or protective topcoat is needed. The sealant is UV-resistant and not paintable. It can be recoated with Super Silicone Seal.
How long can a properly applied repair last?
Bergstrom Industries estimates approximately 10–12 years without a protective coating. Actual service life depends on preparation, application and conditions.
Bergstrom Industries estimates approximately 12–20 years. Actual service life depends on preparation, application and conditions.
How should containers be stored?
Store tightly sealed in a cool place. Recommended use: unopened within 3–4 months of shipping; opened within 3–6 months. Uncured material may remain usable longer, but this is not guaranteed.
Store tightly sealed in a cool place. Recommended use: unopened within 3–4 months of shipping; opened within 3–4 months. Uncured material may remain usable longer, but this is not guaranteed.
What if a skin forms inside the container?
Remove the surface skin and use the uncured sealant beneath it. Do not use material that has hardened throughout.
Remove the surface skin and use the uncured sealant beneath it. Do not use hardened material.
How do I clean wet spills from tools or surrounding surfaces?
Wipe up the bulk with paper towels, then clean surface residue with lacquer thinner. Follow the cleaner's precautions. This is a surface-cleanup method, not a skin-cleaning instruction.
Immediately wipe off the uncured sealant with a damp rag. It is not water-soluble. Clean it up while it is still wet.
What common application mistakes should I avoid?
Poor preparation, insufficient stirring, exposed fleece, and voids where fleece does not follow the roof profile. Check and correct the repair while it is wet, and follow the recoating instructions.
Poor preparation, insufficient stirring, exposed fleece, and voids where fleece does not follow the roof profile. Follow the appropriate horizontal or vertical application method.
Need more answers?
Explore preparation tips, repair instructions, and product information.
Turbo Poly Seal: Important Information and Application Guide
Turbo Poly Seal is a thick, professional-grade urethane-asphalt sealant designed for repairing roof leaks, seams, flashing, cracks, and transitions. Its heavy consistency helps it remain in place on vertical and sloped surfaces.
For cracks, seams, and transitions, always reinforce the repair with Poly Fleece.
Best Uses
Turbo Poly Seal can be used for:
Metal roof seams, screws, rusted areas, and panel transitions
Torch-down and modified-bitumen roof seams
Older, weathered TPO surfaces
Roof-to-wall and roof-to-metal flashing
Vent pipes, stove pipes, electrical conduits, and other penetrations
A/C curbs and equipment curbs
Parapet walls and metal cap seams
Chimney caps and concrete crown cracks
Gutter seams and pitch pockets
Concrete, cement, brick, block, stucco, and wood cracks
Areas exposed to ponding water after the repair has cured
Do Not Use Turbo Poly Seal On
Turbo Poly Seal is not recommended for:
EPDM rubber roofing
Glass or skylights
Silicone caulking or silicone-coated surfaces
Wet surfaces
Certain plastics
Full-roof coating applications
Basement wall waterproofing
For EPDM roofs, glass, skylights, and full-roof coatings, use Super Silicone Seal instead.
Poly Fleece Is Essential
Always use Poly Fleece when repairing:
Cracks
Seams
Gaps
Flashing
Joints
Transitions between two different materials
Poly Fleece reinforces the repair and helps prevent movement from cracking or separating the sealant.
Fleece is generally unnecessary when covering an individual screw head or coating a small, smooth area without a crack or joint.
Surface Preparation
Proper surface preparation is the most important part of creating a lasting repair.
Before applying Turbo Poly Seal:
Make sure the surface is completely clean and dry.
Remove dirt, loose paint, rust, debris, oil, tar, and old caulking.
Use a grinder with a stiff wire brush when necessary to remove rust, deteriorated coatings, caulk, and hardened tar.
Remove all loose material that could separate from the roof.
Wipe previously caulked or silicone-treated surfaces with lacquer thinner to remove residue.
Allow the surface to dry completely before applying the sealant.
Even a thin, invisible layer of silicone can prevent Turbo Poly Seal from bonding properly.
Safety note: Follow the manufacturer’s safety instructions when using grinders, wire brushes, lacquer thinner, or other solvents. Wear suitable eye protection, gloves, and respiratory protection, and keep solvents away from flames and ignition sources.
Applying Turbo Poly Seal
Mask the repair area for clean, straight edges.
Apply a generous first coat over the repair.
Extend the coating approximately two inches beyond each side of the crack, seam, or transition.
Embed Poly Fleece into the sealant while the first coat is still wet.
Press the fleece into the coating and remove wrinkles or trapped air.
Apply a second coat over the fleece until it is completely covered.
Apply an additional coat if necessary after the previous layer has set.
Turbo Poly Seal cures in approximately 24 hours. Weather, temperature, humidity, and coating thickness can affect curing time.
Existing Tar and Asphalt Coatings
Turbo Poly Seal can adhere to asphalt and tar, but the repair will be only as strong as the material underneath.
Remove tar that is dry, cracked, loose, or peeling.
Do not apply over deteriorated caulk or unstable roof cement.
After careful inspection, sound, firmly bonded asphalt or tar may remain.
When in doubt, remove the old repair material and apply Turbo Poly Seal to a solid surface.
Aluminum Asphalt or Silver Coating
Turbo Poly Seal can bond to aluminum asphalt coating. However, the silver coating may separate from the roof surface underneath it.
Remove any loose, peeling, brittle, or poorly bonded coating before repairing. The condition of the underlying coating determines the strength of the finished repair.
Application Temperature
For best results, apply Turbo Poly Seal when the air and roof-surface temperatures are between approximately 25°F and 100°F.
Do not apply it to wet, frosted, or icy surfaces.
Coverage
Approximate coverage depends on the surface and the thickness of the application:
Up to approximately 35 -40 linear feet on smoother seams and flashing
Approximately 30 square feet on rough surfaces such as concrete chimney caps
Rough, uneven, porous, or badly deteriorated surfaces will require more material.
UV Protection
Turbo Poly Seal is not inherently UV protected. After it has cured, protect the completed repair with:
Silver Coat aluminum asphalt coating, or
A compatible exterior-grade latex or oil-based paint
Allow Turbo Poly Seal to cure for approximately 24 hours before applying the protective coating.
Storage After Opening
Exposure to air and moisture can cause a thick skin to form inside the container.
To extend storage life:
Replace the lid immediately after use.
Clean the lid and container rim before closing.
Seal the container as tightly as possible.
Store it upright in a dry, temperature-controlled location.
Protect it from freezing, excessive heat, and moisture.
A skin may form on the surface during shipping or storage. This is normal and does not necessarily affect the usable material underneath it.
Cleanup
Clean tools and accidental spills before the sealant cures. Use asphalt and tar remover or lacquer thinner where appropriate.
Always test solvents on a small area first and follow all label safety instructions.
Shipping Information
Turbo Poly Seal is sold online and is not available at Home Depot or Lowe’s.
We currently cannot ship it to Canada, Hawaii, or Alaska.
UPS normally collects orders on business days.
Typical delivery time is approximately 2–4 business days after shipment.
Metal containers may arrive dented because of carrier handling. A dented container usually does not affect the product if it remains sealed and not leaking.
Before Starting Your Repair
Confirm that Turbo Poly Seal is compatible with the surface.
Make sure the repair area is clean and completely dry.
Remove loose or deteriorated repair materials.
Use Poly Fleece over every crack, seam, gap, and transition.
Protect the finished repair from UV exposure after it has cured.
If you’re unsure about the roof material, contact us and send clear photographs before applying the product.
Watch Turbo Poly Seal Application Videos
See real roof repairs and step-by-step demonstrations:
METAL ROOF REPAIR - a must see for all METAL ROOF owners -Turbo Poly Seal
120.3K views
Questions & Answers
Find repair advice, photos and videos from our knowledge catalog.
Enter a word or question to search Turbo Poly Seal answers.
No matching answers. Try fewer words, search the entire catalog, or text Naas for help.
Super Silicone Seal · Application | Turbo Poly Seal · Painting and protection
Can I paint over Turbo Poly Seal or Super Silicone Seal?
Extracted from the Flat Roof Doctor inbox — al•••••@yahoo.com
Turbo Poly Seal is a Combination of Asphalt and Urethane resins. Painting over it is advisable
Customer question — Sep 18, 2025
Hello, Can your product can be painted over after it cures?
Thank you, Janice Henson
Reply from Naas
Only Turbo Poly Seal can be painted over with any type of paint. We sell aluminum asphalt-based paint, "Silver Coat Protection," for that purpose. Silver Coat Protection is asphalt-based, which makes it compatible with Turbo Poly Seal.
Super Silicone Seal can not be painted. No paint will adhere to its surface. This sealant comes in black and white. They are both the same except for the color.
Additional details
Turbo Poly Seal is thicker and therefore easier to use on steep surfaces
Super Silicone Seal is runnier and harder to apply on slanted areas
Photos
Using a Roller to apply Silver Coat Protection over Turbo Poly Seal
Can I paint over Turbo Poly Seal or Super Silicone Seal? — separate customer conversation
Extracted from the Flat Roof Doctor inbox — do•••••@comcast.net
Painting over Turbo Poly Seal
Customer question — Nov 1, 2023
Hi,
Can you paint this product after it has dried with a normal red roof metal paint?
Thanks,
Don
Reply from Naas
Yes, it is advisable to paint over Turbo Poly Seal to protect it from UV. Any paint is suitable
Additional details
When you apply Turbo Poly Seal, you can coat it almost immediately afterward. It forms a dry skin within 5-10 minutes after application, allowing you to paint over it.
You can use a disposable 2" brush or roller to apply Silver Coat Protection. We recommend using a non-fibrous asphalt coating.
Photos
Using a roller to paint Silver Coat Protection over the Turbo Poly Seal
Turbo Poly Seal · Compatibility | Turbo Poly Seal · Preparation | General roof repairs · Walls and transitions
TPO-to-wall transitions: surface condition and vertical application
Extracted from the Flat Roof Doctor inbox — me•••••@gmail.com
Customer question — Sep 1, 2025
A customer asked which product to use at the joint between a TPO roof and a concrete wall.
Another asked whether Turbo Poly Seal adheres to TPO.
Reply from Naas
For vertical transitions, I prefer Turbo Poly Seal because it is less runny and easier to apply on an upright surface.
New TPO may have an oily or plastic-like surface film left over from manufacturing that can interfere with adhesion. Clean it thoroughly with lacquer thinner and allow it to dry before applying Turbo Poly Seal.
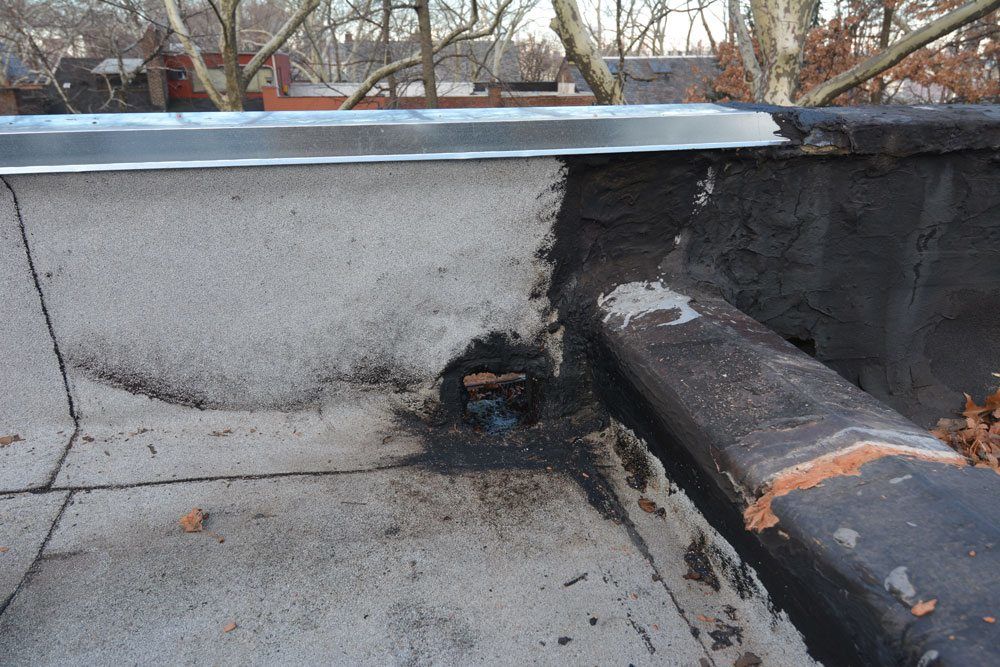
The image below shows a transition from a torch-down roof to a concrete wall. The same repair principle applies where other roofing materials meet a parapet wall.
Roofers commonly use a termination bar to secure the membrane to the wall, then apply caulking along the top edge. If that caulking cracks or separates, water can enter behind the membrane.
Turbo Poly Seal does not adhere to EPDM rubber. However, on an EPDM roof, it can still seal the joint between the wall and the metal termination bar, provided the repair bonds to the wall and metal—not the EPDM membrane.
To seal this transition, apply Turbo Poly Seal to the clean, dry wall and termination bar. Immediately embed polyester fleece across the joint, covering the termination bar and extending onto the wall above it. Apply another coat of Turbo Poly Seal, completely covering the fleece.
This creates a reinforced seal across the wall-to-bar joint instead of relying on a narrow bead of caulking.
Additional details
As far as we know, Turbo Poly Seal will adhere to most roof surfaces, except EPDM Rubber
Photos
Making a Transition repair between a parapet wall and a termination bar
Who owns Bergstrom Industries, and what roofing experience does he have?
Questions & Answers
Question
Who owns Bergstrom Industries, and what roofing experience does he have?
Answer
Naas Ferreira is the owner of Bergstrom Industries. He has 35 years of hands-on roofing experience, primarily in flat-roof installation and finding and repairing roof leaks.
Ordering and support · About Bergstrom Industries
What roof systems and leak problems has Naas Ferreira worked on?
Questions & Answers
Question
What roof systems and leak problems has Naas Ferreira worked on?
Answer
Naas Ferreira's installation experience is mainly with torch-down and EPDM rubber flat roofs. His leak-diagnosis and repair experience includes shingle, TPO, built-up, metal, torch-down and peel-and-stick roofs, as well as skylight, chimney, vent-pipe, gutter and parapet-wall leaks.
Ordering and support · Cancellations
How can an order be cancelled before shipment?
Questions & Answers
Question
How can an order be cancelled before shipment?
Answer
Cancellation before shipment: the customer receives a full refund, including shipping. The 25% re-packaging deduction for returns does not apply to this full refund. The preferred way to request cancellation before shipment is to send a text message to 203-858-0080. The cancellation text must include the customer's order number and last name.
Ordering and support · Cancellations
What is the cancellation cutoff?
Questions & Answers
Question
What is the cancellation cutoff?
Answer
UPS pickup and cancellation cutoff (all times Eastern Time): UPS collects packages every weekday after 4 p.m. Cancellation must be requested before 4 p.m. on weekdays, before the order ships. For orders placed over the weekend, cancellation can be requested anytime before Monday at 4 p.m.
Ordering and support · Consultation and crew training
Does Naas Ferreira still take on roofing projects?
Questions & Answers
Question
Does Naas Ferreira still take on roofing projects?
Answer
Yes. Naas Ferreira selectively accepts roofing projects. He also offers roof consultation and helps train local crews in maintaining industrial and commercial roofs. When he does not take on a roofing job, he recommends his son, Andre Ferreira, who operates his own separate roofing company, Allroofusa.
Ordering and support · Consultation and crew training
Where does Naas Ferreira provide on-site consultation and crew training?
Questions & Answers
Question
Where does Naas Ferreira provide on-site consultation and crew training?
Answer
Naas Ferreira is based in Pennsylvania and can travel anywhere in the United States for selected roof-consultation and local-crew training projects, including maintenance of industrial and commercial roofs. Contact him to discuss the project and availability.
Ordering and support · Consultation and crew training
What does roof consultation or crew training cost?
Questions & Answers
Question
What does roof consultation or crew training cost?
Answer
Phone and FaceTime consultations with Naas Ferreira are free. On-site consultation and crew training are quoted individually based on the project and travel required.
Ordering and support · Consultation and crew training
How can I request roof consultation or crew training?
Questions & Answers
Question
How can I request roof consultation or crew training?
Answer
Text Naas Ferreira at 203-858-0080 first if possible; phone calls are also welcome. Introduce yourself and include the project address, roof type, project photos, and the help you need, such as consultation or crew training. Photos may be included with the first text. Arrange a suitable time for a phone or FaceTime consultation.
Ordering and support · Customer support
How can customers find a relevant repair video?
Questions & Answers
Question
How can customers find a relevant repair video?
Answer
YouTube channel: Flat Roof Doctor (@FlatRoofDoctor): https://www.youtube.com/@FlatRoofDoctor — Each video addresses a particular object or roof area. Bergstrom Industries recommends using the channel's search bar to find the video relevant to the customer's specific object, area or leak issue; there is no single starting video for every situation.
Ordering and support · Customer support
How can customers get free roof-photo advice?
Questions & Answers
Question
How can customers get free roof-photo advice?
Answer
Text Naas Ferreira at 203-858-0080 first if possible; phone calls are also welcome. Introduce yourself and include the project address, roof type, the help you need, and photographs of the project. You may include photos with your first text.
Useful photos include close-ups of the roof surface, seams, vent-pipe flashing, skylight flashing and any other possible problem areas. Send photographs rather than recorded videos for photo-based advice.
Roof-photo advice is free, including before purchasing a product. Phone and FaceTime consultations are also free; arrange a suitable time with Naas. He will ask for additional information if needed.
Ordering and support · Customer support
Finding a missed leak: taking responsibility and following up
Questions & Answers
Question
Finding a missed leak: taking responsibility and following up
Answer
Customer text conversation
Finding a missed leak: taking responsibility and following up
Selected messages from a roofing project in Queens, New York, during 2018 and 2019. The exchange shows the repair work, a missed seam, return visits and a later investigation of another possible leak source.
[Customer]
February 2, 2018
Naas, how did everything go?
[Naas]
We got the work done. We took the scupper apart and rebuilt it. We also found a better approach for the parapet wall, working over the caps rather than removing them. I'll send before-and-after pictures when I download them.
[Customer]
Thank you for your efforts. Let's talk tomorrow.
[Naas]
February 6, 2018
We tried today, but it was too wet. We'll return on Thursday or Friday.
[Naas]
February 9, 2018
All done. I didn't detect everything on the earlier visit.
[Customer]
I'm not sure what you mean. Did you find a possible leak source?
[Naas]
I missed a seam. I was in charge that day.
[Customer]
Leave it to the kids. Haha.
[Naas]
LOL. I think they are better in some areas.
[Customer]
February 11, 2018
I hope these pictures help locate the issue. I appreciate your help finding a resolution.
[Naas]
This helps a lot. Many thanks.
[Customer]
March 2, 2018
All clear per our client. Thanks.
[Customer]
December 17, 2019
Naas, hello. The roof in Queens is leaking. Please call me.
[Naas]
December 23, 2019
I just got here. I'm getting on the roof now.
[Customer]
December 24, 2019
Thank you for coming out again.
[Naas]
We made it back in the early morning hours. I strongly suspect the leak was coming from the gable-end board. Everything else looked good.
We sealed the cracks and the gap between the slate and the gable board with urethane caulk, then finished the remaining area with tar when the caulk ran out.
The skylight remained another possibility, although I thought it was less likely. If that proved to be the source, the next step would be to remove the skylight, cut back the membrane and redo the flashing.
[Customer]
Thank you for the update.
Thanks for coming again. I'm praying that it stops. Please let me know how you prefer to be paid—check, Venmo, etc.
About this conversation
Follow-up from Naas, added September 22, 2026:
"The repair ultimately worked, and the leak stopped. I had missed a seam during the earlier work and acknowledged that to the customer. We returned to investigate and address the remaining problem."
Selected excerpts from the original 2018–2019 text exchange, edited for clarity and length. Dates are retained to distinguish the earlier work from the later return visit. The closing outcome is Naas's later confirmation, not a quoted customer text. Contact details, addresses and unrelated payment discussions are omitted. The customer's closing offer to pay is retained. This is a project-specific account, not a general product-application guide.
The project photos were added from Naas's Flat Roof Doctor article to illustrate the earlier scupper and parapet work; their placement does not establish when they were sent in the original text exchange.
Project photo: scupper before repair, covered with old tarProject photo: scupper prepared after removing old tarProject photo: clay parapet caps prepared for the membraneProject photo: membrane installed over the parapet caps
Ordering and support · Customer support
Helping a Chattanooga homeowner plan a roof repair and understand an estimate
Questions & Answers
Question
Helping a Chattanooga homeowner plan a roof repair and understand an estimate
Answer
Customer text conversation
Helping a Chattanooga homeowner plan a roof repair and understand an estimate
A homeowner in Chattanooga, Tennessee, contacted Naas after watching his videos. Their exchange began with questions about an older mobile-home roof and continued several months later with questions about a contractor's estimate. These are selected messages, edited for spelling, grammar and length.
[Customer]
Dear Flat Roof Doctor,
After watching your YouTube videos, I'm still uncertain what I need to do with this roof. I know I'm probably outside your normal range, but I'm hoping you and your awesome wife are up for a road trip!
If not, would you please give me step-by-step instructions and tell me which materials and tools are needed? The home measures approximately 72 feet by 10 feet, with a small raised area over the living room.
I don't know whether peel-and-stick cap sheets would work or whether I need base sheets and a drip edge as well. Would I need fleece and Turbo Poly Seal around the vents? Can the ripples be covered, or does the roof need to come off?
Please want a road trip. 🙏🏻 I would love to meet you two YouTube celebrities! 😊
[Naas]
You're a little outside my usual range, but it's not impossible. I'm planning to go to Pensacola later in the summer, although you may not want to wait that long. I'll look at the pictures now and respond.
[Naas]
A peel-and-stick membrane without a base sheet would be fine for this roof. Clean up the lower edge, possibly with a grinder and wire brush, before applying it. The cleaning is the hardest part.
[Customer]
Thank you so much for your response. Oh, so it does have a drip edge? I was told it didn't.
After cleaning the edge, will I need Turbo Poly Seal around all the vents? If so, how much would be enough?
[Naas]
I don't think there is a drip edge. What I meant was to clean about five inches of the metal roof edge, all the way around, including the gable ends.
After cleaning that edge, apply asphalt primer, then install the peel-and-stick membrane. Use Turbo Poly Seal around the vents and pipes.
[Customer]
Thank you so much! I can't fully express how grateful I am and how much I appreciate your instructions. I have been driving myself crazy trying to figure out what to do. Bless you!
[Naas]
No problem. When you get started and want to clarify anything, FaceTime me. Whenever you need advice, just call or text.
[Customer]
Several months later
Hello again, Flat Roof Doctor,
There is a handyman willing to do the roof because I'm afraid of heights and can't carry that much weight up a ladder. His estimate seems high to me, and the measurements have been different each time.
Previously, we measured 72 by 10 feet, or 720 square feet. This time we got 12 by 68 feet, or 816 square feet, but the handyman says 910 square feet.
Approximately how much should labor cost? He also doesn't want to sand or grind the edges. He wants to install a drip edge instead. Would the edges still need to be sanded?
[Naas]
How much does he want for labor? If he installs new drip edges, there's no need for that sanding. That would be a better approach.
[Customer]
He said $6,000 or more for labor and approximately $3,600 or more for materials. That wouldn't include Turbo Poly Seal because he doesn't seem to know what it is.
Would the drip edges be nailed or glued to the existing roof?
[Naas]
My estimate is approximately nine rolls of peel-and-stick membrane. The rolls and drip edge would come to about $2,000, plus approximately $500 for his expenses. Including Turbo Poly Seal, you're looking at roughly $2,800.
Offer him $4,000 for labor and $2,800 for materials. He would still make good money.
[Customer]
Okay. Thank you. Have a great weekend!
About this conversation
This is a record of a project-specific consultation, not a complete installation specification. The original conversation date was not supplied. All prices, quantities and proposed labor amounts are estimates discussed at that time, not current quotes or guaranteed costs. The differing roof measurements were not resolved in this exchange. Product selection, substrate preparation and whether a base sheet is required must be checked against the chosen roofing system's installation instructions and the actual roof conditions. Some customer questions remained unanswered in these excerpts. No completed repair or final outcome was reported. The customer's name and telephone number have been omitted.
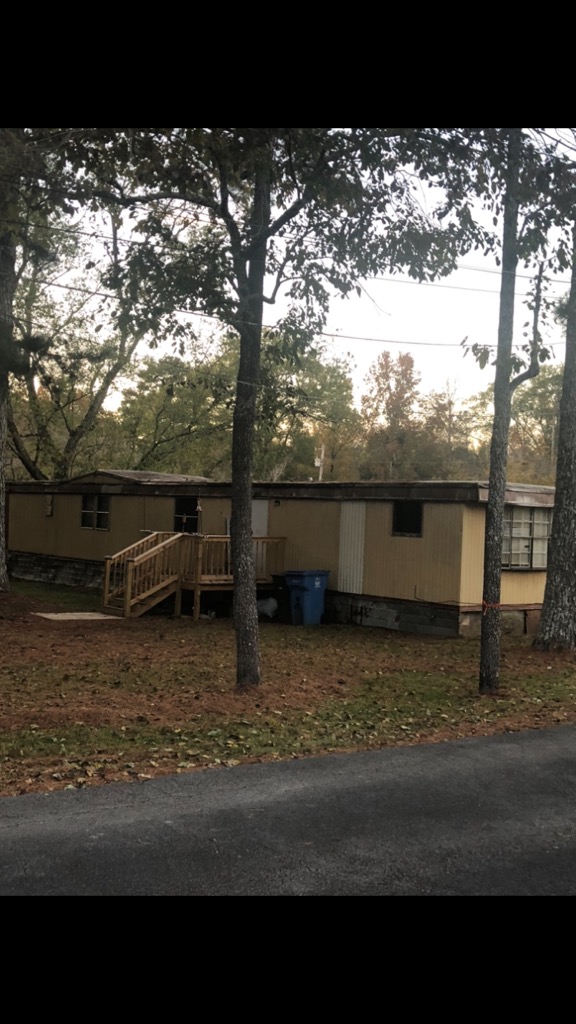
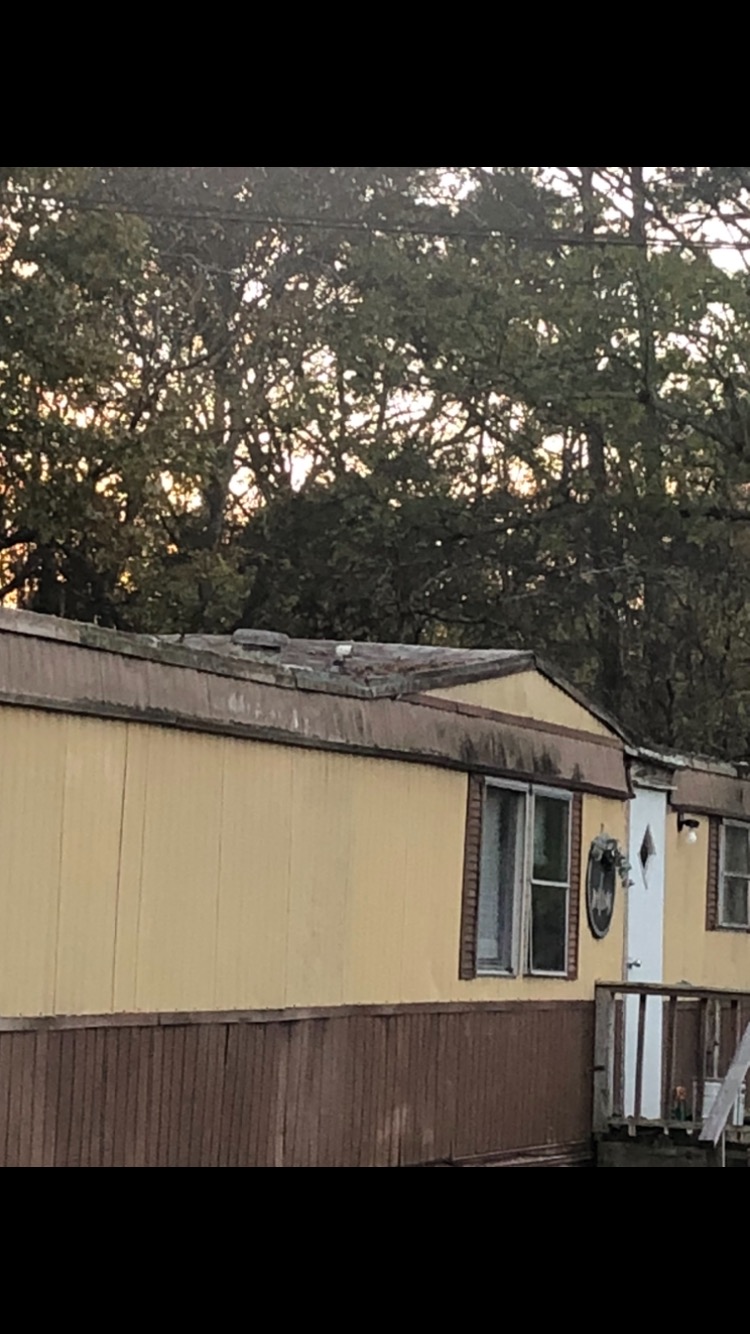
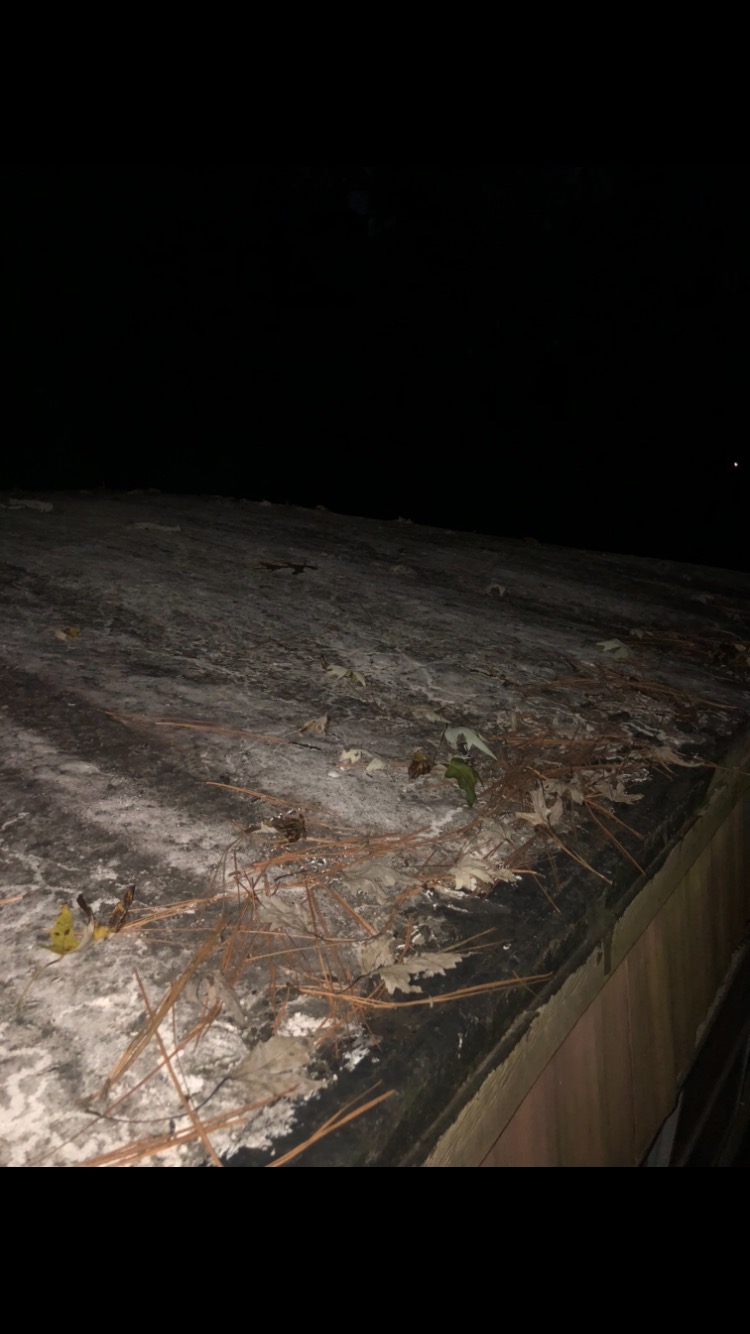
Customer photo: Chattanooga homeCustomer photo: roofline and raised roof sectionCustomer photo: existing roof edgeCustomer photo: roof surface and seams
Ordering and support · Customer support
Helping a Portage, Indiana, homeowner find hands-on roofing help
Questions & Answers
Question
Helping a Portage, Indiana, homeowner find hands-on roofing help
Answer
Customer text conversation
Helping a Portage, Indiana, homeowner find hands-on roofing help
A homeowner in Portage, Indiana, sent roof photos after calling Naas and watching his videos. The customer was uncomfortable working at heights and asked about getting help in person.
[Customer]
Hi, I called you a little while ago. I took pictures of what I could see of my roof. Do you think the method you used in your video would work for my roof?
I'm afraid of heights, and I didn't have anyone to hold the ladder. It is a flat roof, though.
[Naas]
I'll talk to my son and see whether he would be interested in coming out that way to do it. I can see that the edges need to be cleaned with an angle grinder, along with the areas around the vents. It's a little more involved.
Get back to me in a few days.
[Customer]
Okay. I live in Portage, Indiana. I can buy the materials and pay you, but I don't have a lot of money.
Thank you if you're able to come out here.
[Customer]
Hi, have you decided whether you would be able to come out this way and do my roof? Thanks.
[Naas]
I'm passing the information to my son. He will be in touch.
[Customer]
Okay.
About this conversation
Customer messages and roof photos supplied for this account. Spelling and grammar have been edited for clarity, and the telephone number has been removed. This exchange records an offer to pass the information to Naas's son; it does not confirm that a visit was arranged or that a repair was completed.
Helping Emanuel Christian School plan roof and brick-wall repairs
Questions & Answers
Question
Helping Emanuel Christian School plan roof and brick-wall repairs
Answer
Customer text conversation
Helping Emanuel Christian School plan roof and brick-wall repairs
Emanuel Christian School in West Virginia contacted Naas after purchasing a former county school to expand its school. During the exchange, the school identified a concrete deck beneath ½-inch black fiberboard, and Naas withdrew his initial screw recommendation.
[Customer]
We purchased a county school to expand our Christian school this year and have a lot of repairs. Can you suggest the best of your products for this job and the appropriate quantities? Thank you, and God bless.
[Customer]
All penetrations through the roof need to be sealed. Most of the seams are deteriorating—approximately 1,500 linear feet.
We also need to fill a separation in the brick wall that is 2½ inches wide and 26 inches long.
We are in West Virginia, if the climate matters.
[Naas]
I suggest securing the loose seams with long roofing screws and the large washers or plates used for EPDM roofs. After cleaning all seams and letting them dry completely, use Super Silicone Seal with polyester fleece to cover every seam. This will help preserve the roof.
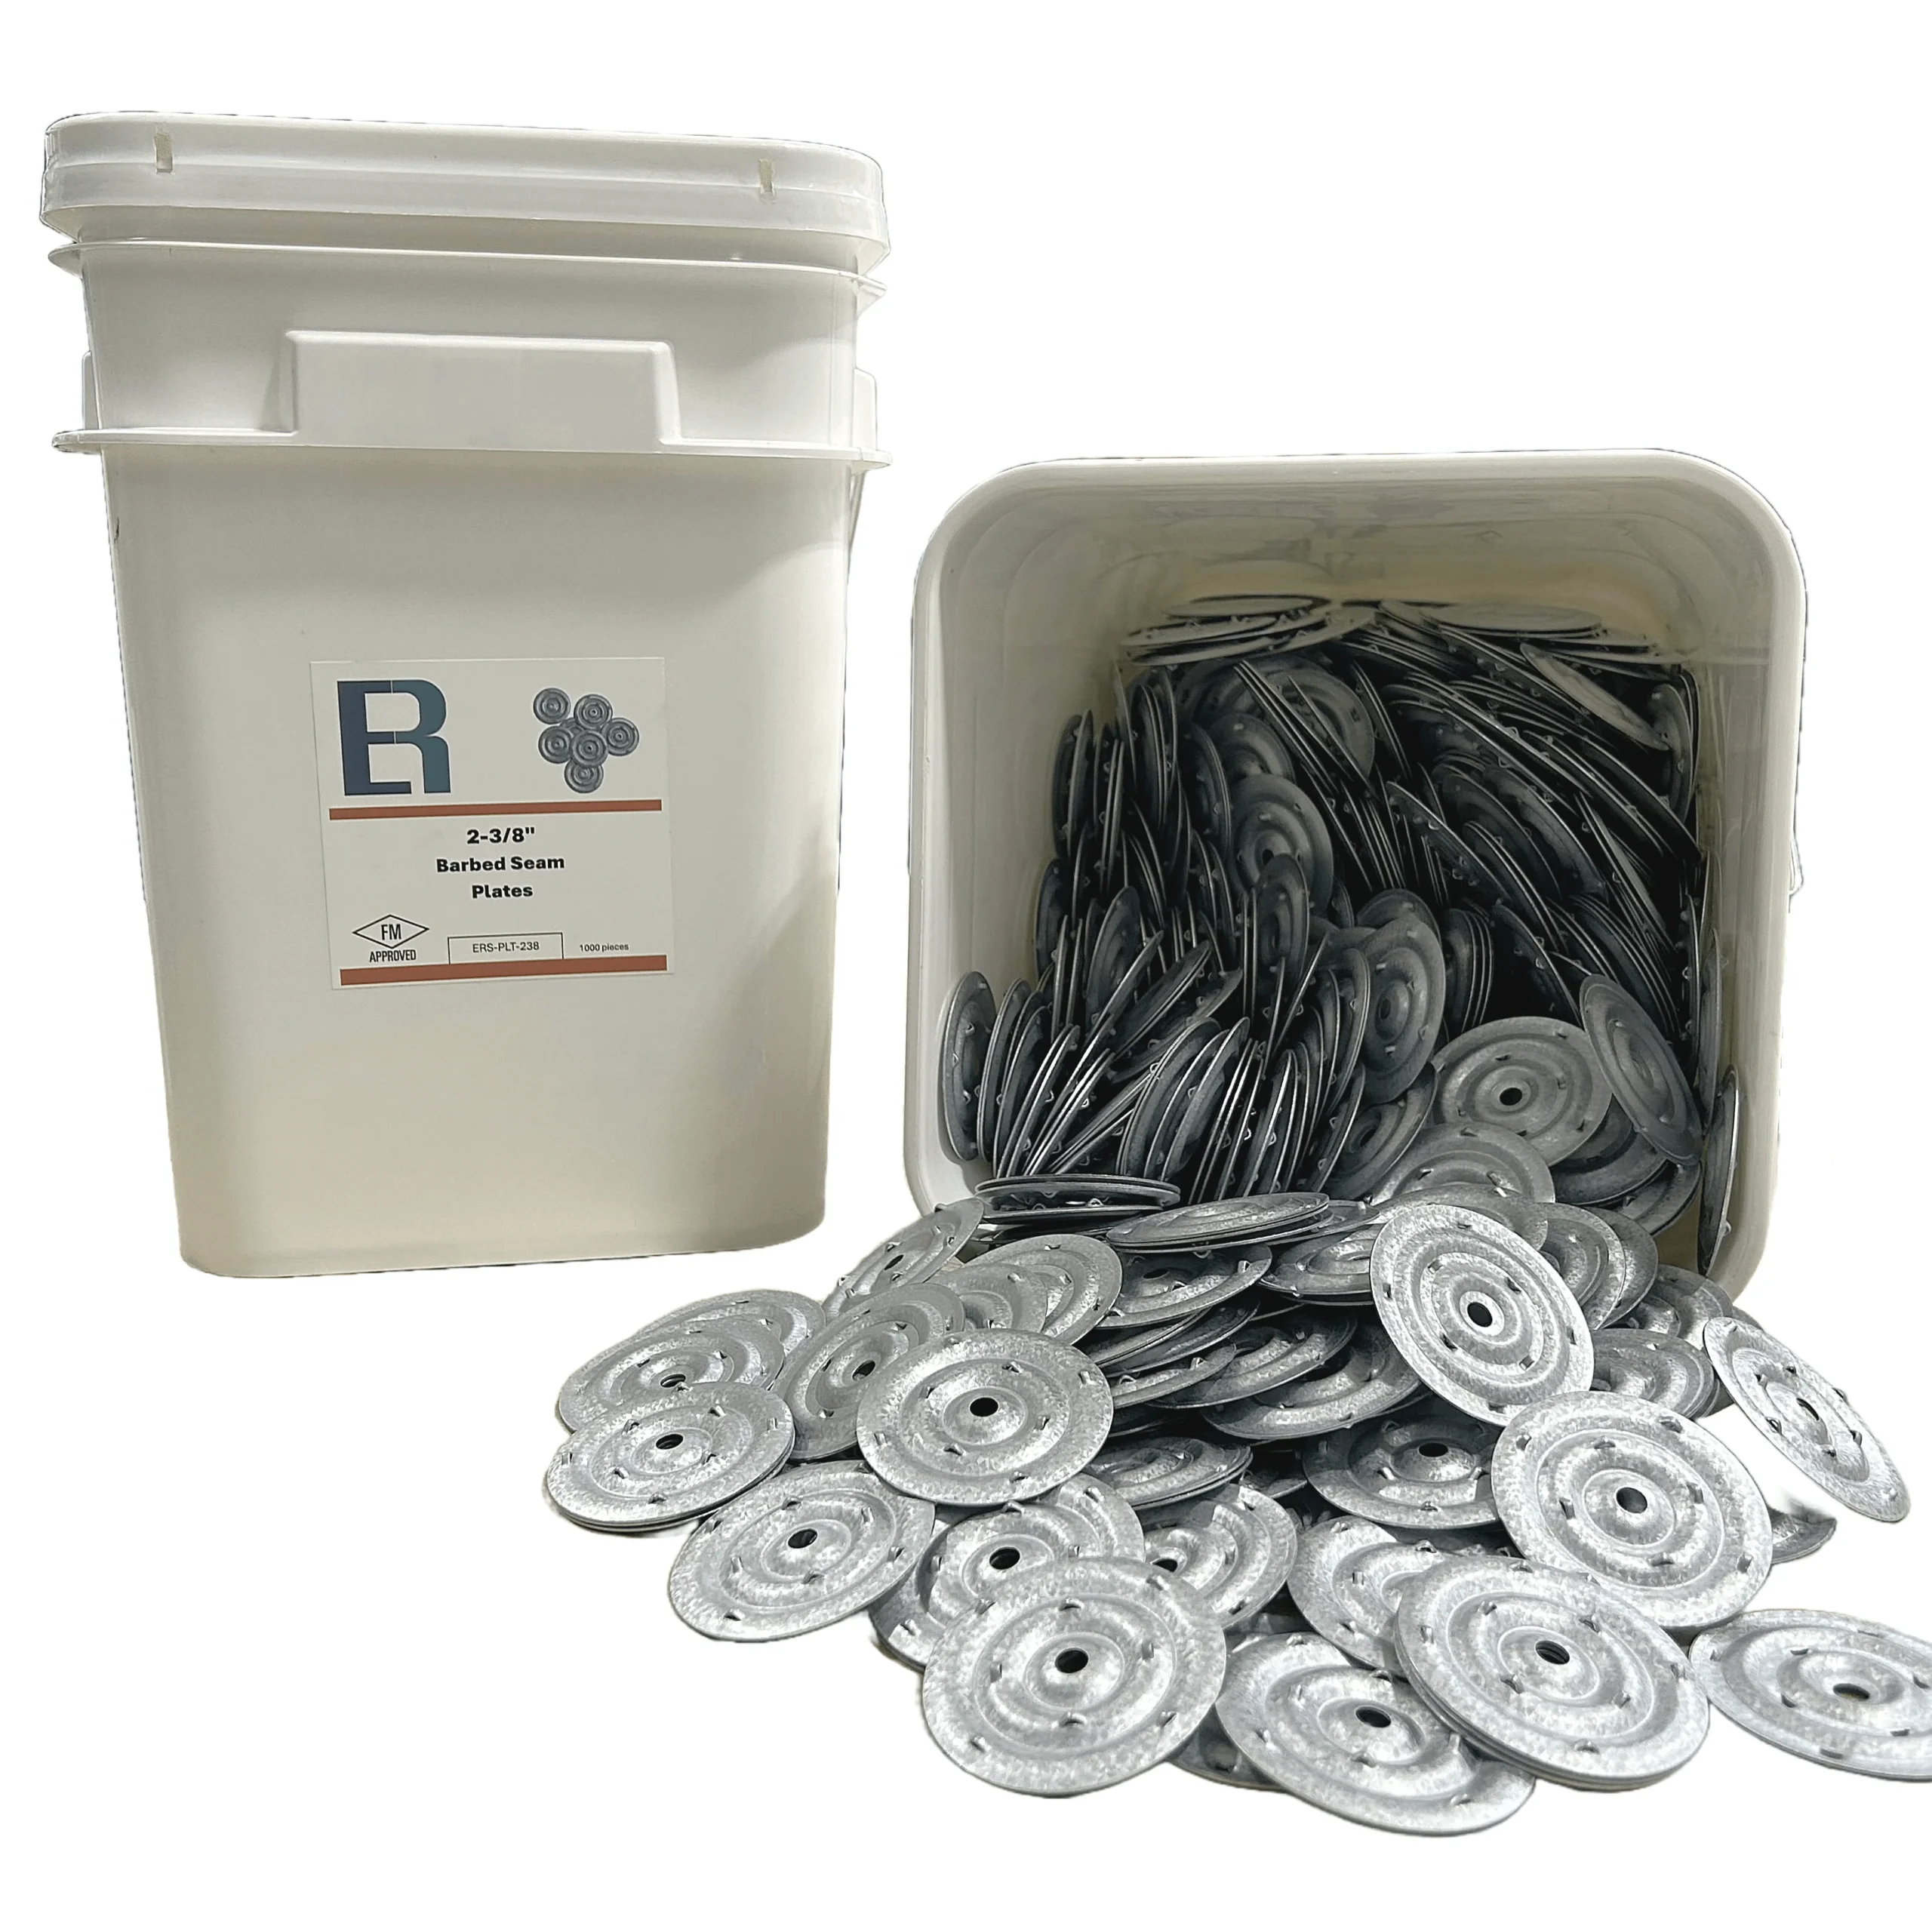
Here are references for roofing seam plates and fasteners:
Purchase seam plates:
https://essentialroofingsupply.com/products/2-3-8-barbed-metal-seam-plates
Purchase roofing fasteners:
https://essentialroofingsupply.com/products/12-ace-skinnynstrong-all-purpose-fastener
You can purchase these at a local roofing supply company. I'm not sure whether Home Depot carries them.
Smaller plates will also work. You don't need 3-inch plates for this repair; plates around 2 inches would be better.
For cracks in the brick walls, use Turbo Poly Seal with polyester fleece.
[Customer]
I realize it's hard to calculate, but approximately how many linear feet will a 5-gallon bucket of Super Silicone Seal cover?
[Naas]
Approximately 250–300 feet, or possibly more.
[Customer]
Thank you so much. On Monday or Tuesday morning, I will be placing an order for your black Super Silicone Seal and Turbo Poly Seal.
[Naas]
Check whether the roof deck is concrete or wood before you start the project. If it is concrete, the screws I suggested won't work, and we will rely on the Super Silicone Seal repair.
[Customer]
It's concrete with ½-inch black fiberboard.
[Naas]
Forget the screws. Make sure you clean every seam thoroughly with soap, water and a stiff-bristle brush. The cleaning takes longer than applying the silicone.
[Customer]
Yes, sir.
[Naas]
I can see some moss growing on some of the seams.
[Customer]
On the north side, yes, sir.
[Naas]
I'm trying to think of a way to make the cleaning easier, but soap and water are important.
[Customer]
Yes, sir.
[Naas]
Have a hose up there to wash everything off.
[Naas]
In my experience, the EPDM surface may not need much cleaning where it is already in good condition. A light dry scrub could work in those areas. Where moss is growing, clean thoroughly.
[Customer]
Okay.
[Naas]
Additional cleaning-tool reference for this catalog: a drill-mounted scrub brush may help make the cleaning easier.
https://www.uline.com/Product/Detail/H-11775/Brooms-and-Brushes/Drill-Scrub-Brush-Medium
About this conversation
The initial screw and plate suggestion was withdrawn after the customer identified the concrete deck. The hardware links remain as part of the conversation's chronology, not as the final recommendation for this roof. The later cleaning discussion distinguished lightly soiled areas from moss-covered seams. Dry power-tool work and washing must be separate operations; do not use an ordinary angle grinder with water. All washed surfaces must dry completely before applying Super Silicone Seal and polyester fleece.
The 250–300-linear-foot figure was Naas's approximate estimate for this customer's project, not a guaranteed coverage specification. The exchange did not establish application width, thickness or a final order quantity. The customer expressed an intention to order; no purchase or completed repair outcome was confirmed.
Naas later clarified for this catalog that the 2½-inch-wide brick gap should be filled first, then covered with Turbo Poly Seal and polyester fleece.
We edited selected messages for spelling and clarity, and removed the telephone number. We omitted a suggestion involving an angle grinder with water for electrical safety.
Photo supplied by Emanuel Christian School — 1Photo supplied by Emanuel Christian School — 2Barbed metal seam platesRoofing fastenersStiff-bristle hand brush for cleaning roof seams
Ordering and support · Returns and refunds
Where can an eligible return be sent?
Questions & Answers
Question
Where can an eligible return be sent?
Answer
Customers do not need to contact Bergstrom Industries before returning an unopened package that meets the return conditions. Customers pay the return shipping cost. Unopened packages may be returned to Bergstrom Industries at the sender's address on the shipping label or to:
Bergstrom Industries
850 Greenlick Hollow Rd
Mt Pleasant, PA 15666.
Ordering and support · Returns and refunds
How should a return be packaged?
Questions & Answers
Question
How should a return be packaged?
Answer
Pack securely with paper cushioning in a double-walled cardboard box. Seal with paper tape, not plastic tape, and handwrite the purchaser's name on the carrier label. Insured, trackable shipping is recommended. Receipt of goods or proof of return delivery is needed for a refund.
Ordering and support · Roofing referrals
Who is Andre Ferreira, and how can I contact Allroofusa?
Questions & Answers
Question
Who is Andre Ferreira, and how can I contact Allroofusa?
Answer
Andre Ferreira is Naas Ferreira's son and operates his own separate roofing company, Allroofusa. Naas recommends Andre for roofing jobs he does not take on. Call or text Andre directly at 203-803-6483 to discuss your project.
Ordering and support · Roofing referrals
What areas does Andre Ferreira's company Allroofusa serve?
Questions & Answers
Question
What areas does Andre Ferreira's company Allroofusa serve?
Answer
Allroofusa is based in Norwalk, Connecticut. Andre Ferreira serves areas including Brooklyn, the Bronx, New Jersey and New York, extending north to Massachusetts. Call or text Andre at 203-803-6483 to confirm availability for your location.
Ordering and support · Shipping
What should customers do about dented or spilled shipments?
Questions & Answers
Question
What should customers do about dented or spilled shipments?
Answer
Metal containers may arrive dented during shipping. Bergstrom Industries attributes some dents to rough handling by UPS. The company also reports that high temperatures inside UPS trucks during summer can cause Turbo Poly Seal to expand in the container and pop the lid off.
A dented container does not affect the product, and the product can still be used. Bergstrom Industries says customers should notify Bergstrom Industries only if the contents have spilled. If there is spillage, take a photograph of the inside of the damaged package and email it to [email protected]. Bergstrom Industries offers a replacement if the contents have spilled during shipping. Report spillage as soon as possible, because it takes a few days to send out a replacement package. The customer does not need to return the spilled container or damaged package. Bergstrom Industries operates on an honour system and trusts customers who report shipping damage.
Ordering and support · Shipping
What if the shipment spilled?
Questions & Answers
Question
What if the shipment spilled?
Answer
For spilled shipments, see the separate replacement guidance in the damaged-shipment entry.
Ordering and support · Shipping
When are orders dispatched?
Questions & Answers
Question
When are orders dispatched?
Answer
Order dispatch: Bergstrom Industries aims to ship weekday orders placed before 4 p.m. Eastern Time on the same day. Orders placed after 4 p.m. Eastern Time ship the following business day.
Ordering and support · Shipping
How are tracking updates sent?
Questions & Answers
Question
How are tracking updates sent?
Answer
Tracking notifications: Bergstrom Industries' app automatically emails the customer a tracking number when the shipping label is created. Additional emails follow during shipping, including emails from UPS showing the package's location or progress.
Ordering and support · Shipping
What if tracking says delivered but the package is missing?
Questions & Answers
Question
What if tracking says delivered but the package is missing?
Answer
Tracking says delivered, but the package cannot be found: check that the delivery address corresponds to the address provided when ordering. Enter the tracking number on the UPS website and review the available delivery/address details. If these checks do not resolve the issue, text Bergstrom Industries at 203-858-0080 for help locating the package. Include the order number and last name in the missing-package text.
Ordering and support · Warranty
Does Turbo Poly Seal have a warranty or guarantee?
Questions & Answers
Question
Does Turbo Poly Seal have a warranty or guarantee?
Answer
No. Bergstrom Industries states that Bergstrom Industries does not offer a warranty or guarantee on Turbo Poly Seal because it cannot know how the product will be used, the conditions in which it is applied, or how the surface is prepared.
Super Silicone Seal · Application
How should the sealant be mixed?
Questions & Answers
Question
How should the sealant be mixed?
Answer
Stir thoroughly before use. For a 5-gallon container, use a drill with a paint-mixing attachment. Hand stirring is sufficient for smaller containers.
Super Silicone Seal · Application
Can anything be added or used to thin it?
Questions & Answers
Question
Can anything be added or used to thin it?
Answer
Use Super Silicone Seal exactly as supplied. Never add thinner, solvents or other materials.
Super Silicone Seal · Application
What brush is recommended?
Questions & Answers
Question
What brush is recommended?
Answer
Use an inexpensive, 2-inch disposable brush.
Super Silicone Seal · Application
How are horizontal repairs applied?
Questions & Answers
Question
How are horizontal repairs applied?
Answer
Apply a thick first coat, immediately embed polyester fleece, then apply a thick top coat. No waiting is required between layers. Completely cover the fleece so no fabric pattern or exposed fleece remains visible.
Super Silicone Seal · Application
How are vertical surfaces repaired?
Questions & Answers
Question
How are vertical surfaces repaired?
Answer
Apply a thin first coat and let it partially cure until tacky. Check tackiness with a light touch; use a gloved fingertip in accordance with the SDS skin-protection instructions. Embed the fleece, apply another thin coat, then wait 30–45 minutes before applying the additional coat that fully covers the fleece.
Super Silicone Seal · Application
What should be checked on sloping surfaces?
Questions & Answers
Question
What should be checked on sloping surfaces?
Answer
Inspect after 30–40 minutes. If silicone has flowed away and left fleece exposed, apply an additional top coat to cover it completely.
Super Silicone Seal · Application
How far should adjoining fleece pieces overlap?
Questions & Answers
Question
How far should adjoining fleece pieces overlap?
Answer
For ordinary adjoining fleece pieces, a 1/2-inch overlap is sufficient, with Super Silicone Seal between the overlapping layers.
Super Silicone Seal · Application
Why does Super Silicone Seal seem too thin to stay on the fleece?
Questions & Answers
Question
Why does Super Silicone Seal seem too thin to stay on the fleece?
Answer
Customer text conversation
When Super Silicone Seal seems too runny: a first-time roof repair
A customer contacted Naas while working with Super Silicone Seal and polyester fleece. This exchange shows the customer's question, Naas's assessment of the supplied photo, and the customer's response after further mixing.
[Customer]
The Super Silicone Seal is so thin it won't stay on the fleece. How do we remedy this? Please help.
[Naas]
From the image, I can see some translucent material. That tells me it has not been mixed properly.
[Customer]
Okay. We stirred it with a stick. We will use an attachment on our drill and mix it slowly. Is that acceptable?
That seems to be working. Do I need to remove the seam repair I sent pictures of, or can I add more on top?
[Naas]
I think you can go over it again.
[Customer]
Thank you so much for getting back to me so promptly. I really appreciate your help. This is my first roof repair. 😄
My last, too! Lol. It's a job for professionals like yourself.
[Naas]
Lol.
About this conversation
Naas's observations:
I am often asked, "Should I stir it?" Thorough mixing is an important part of preparing Super Silicone Seal for use. It is thinner than Turbo Poly Seal, but in this case I believed the unusually runny, translucent appearance indicated inadequate mixing. In my assessment, the roof slope was not the main issue. The customer reported that further mixing seemed to help.
I also noticed what appeared to be an existing coating beneath the repair. From the photo, I was concerned that the surface might not have been cleaned adequately. The photo does not establish exactly what coating was present or what preparation had been done. Mixing and surface preparation are separate issues: improving the consistency does not resolve a possible bonding problem beneath the repair.
The text exchange has been edited for spelling, grammar and clarity, and the phone number has been removed. The recommendation to go over the repair again was advice for this particular customer based on the supplied image, not a general instruction to cover every failed repair. No completed repair or long-term result has been reported.
Customer-supplied photo accompanying a question about runny Super Silicone Seal on fleece
Super Silicone Seal · Business policies
Do shared shipping-damage, return and cancellation policies apply?
Questions & Answers
Question
Do shared shipping-damage, return and cancellation policies apply?
Answer
Yes. The same shipping-damage replacement, return and cancellation policies recorded in Business information apply to Super Silicone Seal.
Super Silicone Seal · Chimneys and walls
How are chimney flashing and parapet transitions treated?
Questions & Answers
Question
How are chimney flashing and parapet transitions treated?
Answer
Use the thin-coat vertical method: first coat, wait until tacky, embed fleece, another thin coat, then wait 30–45 minutes before the coat that fully covers the fleece.
Super Silicone Seal · Cleanup
How are wet spills cleaned?
Questions & Answers
Question
How are wet spills cleaned?
Answer
Immediately wipe uncured Super Silicone Seal off tools and surrounding surfaces with a damp rag while the sealant is still wet. It is not water-soluble.
Super Silicone Seal · Cleanup
How is cured residue removed?
Questions & Answers
Question
How is cured residue removed?
Answer
Cured Super Silicone Seal is difficult to remove. Try a scraper carefully without damaging the underlying surface.
Super Silicone Seal · Commercial A/C ducts
How is rooftop ductwork protected?
Questions & Answers
Question
How is rooftop ductwork protected?
Answer
Remove flaking rust, clean and dry the exterior ductwork, reinforce every joint and seam with fleece even if no holes are visible, and patch holes with fleece and Super Silicone Seal. Coat the entire exterior. Use white to reduce heat absorption. Approximate one-coat coverage is 70 square feet per gallon; reinforced areas require more material.
Super Silicone Seal · Compatibility
Which surfaces are excluded?
Questions & Answers
Question
Which surfaces are excluded?
Answer
Do not use Super Silicone Seal on asphalt or plain, non-granulated torch-down membrane. It can be used on granulated torch-down membrane.
Super Silicone Seal · Compatibility
Can existing silicone from another manufacturer remain?
Questions & Answers
Question
Can existing silicone from another manufacturer remain?
Answer
Super Silicone Seal can adhere to an existing silicone coating from another manufacturer. Firmly attached silicone can remain: wipe it clean with a wet rag and let it dry completely. Remove loose silicone before repairing.
Super Silicone Seal · Coverage and kits
What sizes and colors are available?
Questions & Answers
Question
What sizes and colors are available?
Answer
Super Silicone Seal is available in 1/2-gallon, 1-gallon and 5-gallon containers, in both black and white.
Super Silicone Seal · Coverage and kits
How much fleece is included?
Questions & Answers
Question
How much fleece is included?
Answer
The 1/2-gallon kit includes 25 feet of 4-inch fleece. The 1-gallon kit includes 50 feet. Fleece must be purchased separately for the 5-gallon container.
Super Silicone Seal · Coverage and kits
What is seam-repair coverage?
Questions & Answers
Question
What is seam-repair coverage?
Answer
Using 4-inch fleece and both coats: approximately 40–45 linear feet per gallon. Proportional planning estimates: 20–22.5 linear feet per 1/2 gallon and 200–225 linear feet per 5 gallons. Coverage varies with surface texture and application thickness.
Super Silicone Seal · Coverage and kits
What is concrete chimney-crown coverage?
Questions & Answers
Question
What is concrete chimney-crown coverage?
Answer
Approximately 40 square feet per gallon for one coat on a concrete chimney crown. Reinforcement with fleece requires additional sealant.
Super Silicone Seal · Customer reviews
Where can I read customer reviews of Super Silicone Seal?
Questions & Answers
Question
Where can I read customer reviews of Super Silicone Seal?
No additional fastening is required for the described EPDM seam repair. Cover the seam with 4-inch fleece embedded in Super Silicone Seal and fully cover the fleece.
Super Silicone Seal · EPDM repairs
Which color is recommended on black EPDM?
Questions & Answers
Question
Which color is recommended on black EPDM?
Answer
Black blends with black EPDM. Where appearance is not a concern, white is recommended to reduce heat absorption. The company reports that the white repair can be approximately 30°F cooler than the surrounding black surface, helping slow membrane deterioration.
Super Silicone Seal · EPDM repairs
How do I prepare an EPDM rubber roof seam before applying Super Silicone Seal?
Questions & Answers
Question
How do I prepare an EPDM rubber roof seam before applying Super Silicone Seal?
Answer
Clean the seam and surrounding repair area with water and a rag.
Remove old repair materials using a scraper, lacquer thinner, or a stiff-bristle brush, as needed.
If the seam has separated, make sure both layers lie flat against each other. If tension pulls them apart, secure them with 2½-inch washers and 3-inch roofing screws.
The seam and surrounding repair area must be completely dry before applying Super Silicone Seal.
Once the seam is secured and the area is completely dry, repair it with Super Silicone Seal and polyester fleece.
Super Silicone Seal · EPDM repairs
Should I reinforce the seams before coating an older EPDM roof?
Questions & Answers
Question
Should I reinforce the seams before coating an older EPDM roof?
Answer
Customer text conversation
An older EPDM roof: reinforce the seams before coating
A building owner asked about maintaining an older, previously patched EPDM roof with no known active leaks. These selected messages focus on Naas's advice about seam reinforcement, preparation and coating.
[Customer]
Good afternoon. I've been watching your videos for some time and really appreciate the education and honesty. We purchased a building with an older EPDM roof that has been patched over the years. I'm not aware of any active leaks, but we want to address it before a larger problem arises. Could I send you a YouTube link and get your opinion?
[Naas]
Send pictures here, or send the link.
[Customer]
Here is the roof video:
[Naas]
It appears to be in good shape. From my experience, the seams are where problems can start as the adhesive ages. My first suggestion is to reinforce every seam with Super Silicone Seal and polyester fleece. The seams are the priority.
If the budget allows, you can then coat the entire roof with Super Silicone Seal. I suggest white to help reduce heat.
Wash the seams thoroughly with a rag and water, let them dry completely, then apply the sealant and fleece.
[Customer]
I think we will want to coat the whole roof. But I saw one of your videos about an auto parts store with a silicone-coated roof, and it seemed that coating it had not helped. Could you explain?
[Naas]
Coating alone is not what I recommend. The steps need to be done in order.
In the example you mentioned, the seams had already come apart, and no fleece had been installed over them. Coating alone did not fix that problem.
[Customer]
Perfect, I understand now. Reinforce the seams with fleece first, and then coat the entire roof. Thank you very much!
[Naas]
Yes. Those seams can gradually pull farther apart. A coating over the seam alone can crack as the seam moves. The fleece reinforces the repair and helps prevent cracking over the seam.
[Customer]
Lastly, is silver-coat protection necessary?
[Naas]
Not on silicone. The silver coating we discussed is for torch-down or asphalt-based roofs.
[Customer]
Perfect. Thanks again!
[Naas]
You're welcome. You can call or text anytime you need advice.
About this conversation
Selected excerpts from a customer text exchange, edited for clarity and length. Phone number omitted. This was advice based on a supplied video, not an on-site inspection. No completed repair or follow-up result has been reported.
Follow the Turbo placement and fastening methods: tighten seams/end caps with commercial rivets, clean and dry, and seal from inside with fleece following the bottom and both sides. For an outlet, use two fleece pieces, one on each half, with corner tabs extending 2 inches into the spout and the remainder flat on the gutter. Replace a loose outlet if needed and rivet the leader pipe to secure it.
Super Silicone Seal · Gutters and drains
How are roof drains and scuppers reinforced?
Questions & Answers
Question
How are roof drains and scuppers reinforced?
Answer
Use the same fleece placement as Turbo: cover drain-bowl cracks locally; bridge membrane-to-bowl transitions 2 inches on each side; use tabbed fleece 2 inches into the bowl-to-pipe joint with a second piece covering tabs. For scuppers, bridge membrane-to-metal transitions and cover corners, vertical sections and split seams.
Super Silicone Seal · Metal pinholes
How are pinholes found and sealed during whole-roof coating?
Questions & Answers
Question
How are pinholes found and sealed during whole-roof coating?
Answer
After the coating cures, inspect for pinholes that remain open. White makes dark open points easier to see. Dab additional Super Silicone Seal into unsealed pinholes. If a hole still will not seal, patch it with fleece extending at least 1 inch beyond the hole on every side, embedded and completely covered.
Super Silicone Seal · Metal roofs
How is metal prepared?
Questions & Answers
Question
How is metal prepared?
Answer
Wipe off dust, debris and oils and let the surface dry completely. Remove loose and flaking rust with an angle grinder fitted with a steel brush; complete removal of all rust is unnecessary. Firmly attached factory paint can remain. The company states that Super Silicone Seal is a rust inhibitor.
Super Silicone Seal · Metal roofs
How are metal-roof screws and abandoned holes repaired?
Questions & Answers
Question
How are metal-roof screws and abandoned holes repaired?
Answer
Part of maintenance every 10 years
Tighten screws before sealing: Use a Milwaukee screw gun or any other tool to torque down existing screws. Neoprene washers shrink over time and loosen, so this is part of maintenance.
If a screw will not tighten and spins loosely, try a larger screw; if it still will not tighten, relocate it about 2 inches away.
Correct angled screws so the washer lies flat and tight.
Patch the abandoned hole with fleece and Super Silicone Seal.
Apply a dab over the screw head and washer without fleece.
95% of commercial roofs neglect this. This type of maintenance is very important to prevent a sudden roof replacement.
Additional details
Schedule a maintenance procedure every 5-7 years to inspect the condition of the screws. The neoprene washer dries out and shrinks, allowing water to seep in. This could rust the metal beam where the fastener is attached or cause the wood beam to rot.
Photos
Tightening Metal Roof Screws
Super Silicone Seal · Metal roofs
How are metal-roof seams fastened and reinforced?
Questions & Answers
Question
How are metal-roof seams fastened and reinforced?
Answer
Fasten panels tightly together before sealing. Follow the Turbo method: use hex-head screws and washers about 2 inches back from the edge to leave room for fleece; 2–5 screws may be needed depending on separation. Keep seam fleece off the screws and seal screw heads separately. Follow the panel profile, sealing the bottom of the seam and ending fleece at the tops of the raised ribs on both sides.
Super Silicone Seal · Preparation
Must every surface be dry?
Questions & Answers
Question
Must every surface be dry?
Answer
All application surfaces must be completely dry before applying Super Silicone Seal.
Super Silicone Seal · Preparation
How is granulated torch-down prepared?
Questions & Answers
Question
How is granulated torch-down prepared?
Answer
Brush the surface with a broom, then use a leaf blower to remove loosened dust and debris. Allow the surface to dry completely.
Super Silicone Seal · Preparation
How are previous repairs and silver coating handled?
Questions & Answers
Question
How are previous repairs and silver coating handled?
Answer
Remove previous caulking and coatings from the repair area so the underlying defect can be identified. For silver coating on granulated torch-down, the company describes an angle grinder with a metal brush, or heating the old coating with a propane torch and scraping with a trowel. If removal exposes plain asphalt, use Turbo Poly Seal instead.
Super Silicone Seal · Preparation
How is EPDM prepared?
Questions & Answers
Question
How is EPDM prepared?
Answer
Thoroughly clean EPDM with water and a rag to remove caked-on dirt. Remove old tar, caulking and previous repair materials with a round-nose trowel or metal scraper, taking care not to damage the membrane. If needed, use lacquer thinner to clean the repair area. Let it dry completely.
Super Silicone Seal · Preparation
Does EPDM require sanding or primer?
Questions & Answers
Question
Does EPDM require sanding or primer?
Answer
No sanding or primer is required. Apply Super Silicone Seal directly to clean, completely dry EPDM. Do not add paint or another adhesive beneath it; the company states that these can compromise adhesion.
Super Silicone Seal · Preparation
How is TPO prepared?
Questions & Answers
Question
How is TPO prepared?
Answer
Wipe TPO clean with a wet rag and allow it to dry completely. No sanding or primer is required.
Super Silicone Seal · Preparation
How do I prepare an EPDM rubber roof seam before applying Super Silicone Seal?
Questions & Answers
Question
How do I prepare an EPDM rubber roof seam before applying Super Silicone Seal?
Answer
Clean the seam and surrounding repair area with water and a rag.
Remove old repair materials using a scraper, lacquer thinner, or a stiff-bristle brush, as needed.
If the seam has separated, make sure both layers lie flat against each other. If tension pulls them apart, secure them with 2½-inch washers and 3-inch roofing screws.
The seam and surrounding repair area must be completely dry before applying Super Silicone Seal.
Once the seam is secured and the area is completely dry, repair it with Super Silicone Seal and polyester fleece.
Super Silicone Seal · Recoating and durability
Is a protective top coating required?
Questions & Answers
Question
Is a protective top coating required?
Answer
No protective coating is required. Super Silicone Seal is UV-resistant and can remain exposed. The company states that other coatings do not adhere to it.
Super Silicone Seal · Recoating and durability
Can Super Silicone Seal be recoated with itself?
Questions & Answers
Question
Can Super Silicone Seal be recoated with itself?
Answer
Yes. For an older repair, wipe it clean with a wet rag and let it dry completely. A fresh repair has no mandatory wait before adding more Super Silicone Seal.
Super Silicone Seal · Recoating and durability
Should products be switched on an existing repair?
Questions & Answers
Question
Should products be switched on an existing repair?
Answer
Prefer Turbo Poly Seal on Turbo Poly Seal, and Super Silicone Seal on Super Silicone Seal. If switching products, completely remove the previous repair, clean the underlying surface and let it dry before starting again.
Super Silicone Seal · Recoating and durability
What repair life is expected?
Questions & Answers
Question
What repair life is expected?
Answer
Bergstrom Industries estimates 12–20 years for properly prepared and applied repairs, in both black and white.
Super Silicone Seal · Safety and SDS
How should unused sealant and containers be disposed of?
Questions & Answers
Question
How should unused sealant and containers be disposed of?
Answer
Follow applicable local waste-disposal requirements for leftover Super Silicone Seal and its containers.
Super Silicone Seal · Skylights
Does it adhere to glass and Plexiglas?
Questions & Answers
Question
Does it adhere to glass and Plexiglas?
Answer
Yes. Super Silicone Seal adheres to glass and Plexiglas and can seal the joint to the skylight frame.
Super Silicone Seal · Skylights
How are glass, Plexiglas and the frame prepared?
Questions & Answers
Question
How are glass, Plexiglas and the frame prepared?
Answer
Wipe glass with water and a rag, then scuff the bonding area with 120-grit sandpaper. Scuff oxidation on the aluminum frame as well. For Plexiglas, clean the surface; lightly sanding the bonding area is optional. Remove dust and let all surfaces dry completely.
Super Silicone Seal · Skylights
How is the glazing-to-frame joint sealed?
Questions & Answers
Question
How is the glazing-to-frame joint sealed?
Answer
Use the previously recorded tape-and-fleece method: mask to leave 1 inch of glazing exposed beside the frame; use 2-inch fleece, fill the groove and bridge onto glazing and frame with fleece and Super Silicone Seal. Fully cover the fleece and remove masking tape immediately after the top coat.
Super Silicone Seal · Skylights
Can cracks in glass or Plexiglas be sealed?
Questions & Answers
Question
Can cracks in glass or Plexiglas be sealed?
Answer
Use Super Silicone Seal with fleece extending at least 1 inch beyond the crack on each side and past both ends. Embed and fully cover the fleece.
Super Silicone Seal · Storage
How long can unopened and opened containers be stored?
Questions & Answers
Question
How long can unopened and opened containers be stored?
Answer
Unopened: recommended use within 3–4 months from shipping. After opening: recommended use within 3–4 months with the lid tightly sealed. Store in a cool place.
Super Silicone Seal · Storage
Can older material and material beneath a skin still be used?
Questions & Answers
Question
Can older material and material beneath a skin still be used?
Answer
Remove any surface skin and use the uncured material beneath it. Material that has not cured may remain usable beyond the recommended storage period, even after a year.
Super Silicone Seal · Troubleshooting
What are common application mistakes?
Questions & Answers
Question
What are common application mistakes?
Answer
Inadequate cleaning or preparation, poor stirring, insufficient coverage over fleece, and voids where the fleece does not follow the metal roof's profile.
Super Silicone Seal · Troubleshooting
How is a void corrected while wet?
Questions & Answers
Question
How is a void corrected while wet?
Answer
The fleece does not stretch. Pull it so it slides from one end to provide enough material to follow the profile. If this exposes the end of the seam, add a fleece piece overlapping the existing fleece by at least 1 inch, with sealant between layers and complete top coverage.
Super Silicone Seal · Troubleshooting
How are cured voids and damaged fleece repaired?
Questions & Answers
Question
How are cured voids and damaged fleece repaired?
Answer
Fill a void found after curing with additional Super Silicone Seal. If fleece is cracked or torn, add new fleece extending at least 1 inch beyond the damaged area on every side, embedded in fresh sealant and fully covered.
Super Silicone Seal · Troubleshooting
How is a peeling repair removed and redone?
Questions & Answers
Question
How is a peeling repair removed and redone?
Answer
Remove failed material. The company describes a grinder where the substrate permits, followed by lacquer thinner to remove the remaining thin silicone residue. On EPDM, do not use a grinder: lift loose material with a round-nose trowel or metal scraper, then use lacquer thinner if needed. Allow the cleaned surface to dry completely and repeat the fleece repair.
Super Silicone Seal · Vent boots
Can it bond directly to EPDM vent boots?
Questions & Answers
Question
Can it bond directly to EPDM vent boots?
Answer
Yes. Cover the cracked boot using overlapping fleece, extending 2 inches onto the pipe and 2 inches beyond the boot onto the surrounding compatible roof surface. Cut tabs to conform to the shape. Use thin coats and the vertical tack/wait method on upright sections.
Super Silicone Seal · Weather and curing
What air temperatures are recommended?
Questions & Answers
Question
What air temperatures are recommended?
Answer
Recommended air temperature: 20–110°F. Ideal air temperature: 25–90°F, the same recommendations as Turbo Poly Seal.
Super Silicone Seal · Weather and curing
When can a repair withstand rain?
Questions & Answers
Question
When can a repair withstand rain?
Answer
Allow about 30 minutes on a warm day. Below 32°F, allow 3–4 hours before rain exposure.
Super Silicone Seal · Weather and curing
How long does curing take?
Questions & Answers
Question
How long does curing take?
Answer
Allow approximately 24 hours for full curing under suitable conditions. Cold weather can extend this time.
Super Silicone Seal · Weather and curing
Can a cured repair be submerged?
Questions & Answers
Question
Can a cured repair be submerged?
Answer
Super Silicone Seal can withstand standing water and submersion once fully cured.
Super Silicone Seal · Whole-roof coating
Which whole roofs can be coated, and why?
Questions & Answers
Question
Which whole roofs can be coated, and why?
Answer
Super Silicone Seal can coat entire EPDM, TPO and metal roofs. The company reports benefits including sealing small metal pinholes, extending EPDM roof life by over 15 years, and reducing roof-surface temperature by over 30°F when white is used.
Super Silicone Seal · Whole-roof coating
How is an entire roof prepared?
Questions & Answers
Question
How is an entire roof prepared?
Answer
Repair seams, cracks and flashing defects with Super Silicone Seal and fleece before general coating. Clean the roof with water, brooms, mops and squeegees; a low-pressure washer may also be used. Let it dry completely.
Super Silicone Seal · Whole-roof coating
What coat, tool and coverage are recommended?
Questions & Answers
Question
What coat, tool and coverage are recommended?
Answer
Apply one coat with a 1/2-inch-nap roller at approximately 70 square feet per gallon. Do not spray.
Super Silicone Seal · Whole-roof coating
When can the roof be walked on and recoated?
Questions & Answers
Question
When can the roof be walked on and recoated?
Answer
Allow approximately 24 hours before occasional maintenance foot traffic; longer if cold weather delays cure. Renew the coating when the underlying roof starts showing through. Clean with the same water-based method, let it dry completely, and apply one renewal coat with a 1/2-inch-nap roller at about 70 square feet per gallon.
Turbo Poly Seal · A/C curbs
How are open A/C curb corners repaired?
Questions & Answers
Question
How are open A/C curb corners repaired?
Answer
A/C curb corners: inspect for corners that have cracked open and cover those openings with Turbo Poly Seal and polyester fleece, following the general corner and fleece application guidance.
Turbo Poly Seal · A/C curbs
How is the A/C curb membrane sealed beneath the metal pan?
Questions & Answers
Question
How is the A/C curb membrane sealed beneath the metal pan?
Answer
A/C curb membrane-to-metal-pan transition: fasten the membrane tightly to the curb with screws, then use Turbo Poly Seal and polyester fleece to bridge from the compatible membrane to beneath the metal pan. This is the membrane/flashing transition described by Bergstrom Industries.
Turbo Poly Seal · Application
Can fleece remain exposed?
Questions & Answers
Question
Can fleece remain exposed?
Answer
Polyester fleece must be embedded in the sealant and fully covered. Exposed fleece deteriorates quickly in sunlight.
Turbo Poly Seal · Application
What is the standard fleece width and placement?
Questions & Answers
Question
What is the standard fleece width and placement?
Answer
General fleece rule from Bergstrom Industries: use 4-inch polyester fleece for most repairs, centered over a seam or transition with 2 inches on each side. Metal-roof screws receive sealant without fleece. Retain the expressly documented special repair dimensions and methods below.
Turbo Poly Seal · Application
Can Turbo Poly Seal be thinned?
Questions & Answers
Question
Can Turbo Poly Seal be thinned?
Answer
Use Turbo Poly Seal only as supplied. Do not thin it or add solvents.
Turbo Poly Seal · Application
How should Turbo Poly Seal be stirred?
Questions & Answers
Question
How should Turbo Poly Seal be stirred?
Answer
Before use: Bergstrom Industries recommends always stirring Turbo Poly Seal. The company explains that a greenish surface in the container indicates the urethane separating from the asphalt. If this is visible, stir the material very thoroughly before applying it. Vigorous hand stirring is sufficient. Continue stirring until the sealant has a consistent brown appearance throughout; Bergstrom Industries identifies this as the visual sign that it is thoroughly mixed.
Turbo Poly Seal · Application
What brush should be used?
Questions & Answers
Question
What brush should be used?
Answer
Recommended tool: an inexpensive, 2-inch disposable brush. Turbo Poly Seal is difficult to clean from the brush afterward, so do not use an expensive brush.
Turbo Poly Seal · Application
What is the coat-and-fleece application sequence?
Questions & Answers
Question
What is the coat-and-fleece application sequence?
Answer
Prepare the repair surface and ensure it is completely dry.
Apply a relatively thin first coat of Turbo Poly Seal. The polyester fleece comes in 4-inch-wide rolls, so paint the first coat slightly wider than 4 inches to embed the entire width of the fleece.
Position the fleece so it extends 1 inch beyond the crack on each side and 1 inch past both ends, as recommended by Bergstrom Industries. Immediately embed the fleece into the wet first coat, before a surface skin forms. A skin will prevent proper embedding.
Where two pieces of fleece meet, overlap them by 1/2 inch and apply Turbo Poly Seal between the overlapping pieces.
While the first coat is still wet, apply a relatively thick top coat, fully covering the fleece. The fleece is designed to let Turbo Poly Seal flow through its pores so the top coat connects with the first coat.
Check the top-coat coverage: neither the fabric pattern nor any white fleece should remain visible. The top coat must cover the fleece completely.
Turbo Poly Seal · Application
What application mistakes should be avoided?
Questions & Answers
Question
What application mistakes should be avoided?
Answer
Common application mistakes identified by Bergstrom Industries:
- Too little Turbo Poly Seal over the fleece, leaving it exposed to UV.
- Fleece that does not conform to the metal-roof profile, leaving voids beneath it that cannot be sealed properly.
- Insufficient stirring before use.
- Attempting to add another coat after the specified recoating window has passed.
Prevent voids during installation: pay special attention to pressing and embedding the fleece into the roof profile while applying it. The company cautions against relying on a later coat to correct a bridged void.
Turbo Poly Seal · Application
What should be checked while the repair is still wet?
Questions & Answers
Question
What should be checked while the repair is still wet?
Answer
Immediate application check, as specified by Bergstrom Industries: check that the fleece follows the roof profile and is completely covered with Turbo Poly Seal. While the application is still wet, add more Turbo Poly Seal into any voids as needed so it can flow into them and close the gaps. This is a wet-stage correction, not a later cured-repair recoating method.
Turbo Poly Seal · Chimneys
What is chimney-crown coverage and when is fleece needed?
Questions & Answers
Question
What is chimney-crown coverage and when is fleece needed?
Answer
A 1/2-gallon container of Turbo Poly Seal covers approximately 15 square feet of a concrete chimney crown with one coat.
For a crown with only a few cracks, coat the crown and reinforce every crack with polyester fleece. Embed and fully cover the fleece with Turbo Poly Seal using the general fleece application entry.
For the severely deteriorated condition described by Bergstrom Industries, with large pieces detaching and crumbling, cover the entire crown with fleece and Turbo Poly Seal. This requires more sealant.
Fleece is essential over every crack: Bergstrom Industries explains that without it, the cured Turbo Poly Seal will crack along the existing cracks in the concrete.
Turbo Poly Seal · Chimneys
How is a deteriorated concrete chimney crown prepared?
Questions & Answers
Question
How is a deteriorated concrete chimney crown prepared?
Answer
Concrete chimney crown preparation, as described by Bergstrom Industries:
Bergstrom Industries reports that little preparation is needed for the repair demonstrated in the supplied video, and that Turbo Poly Seal can be applied over moss and loose cement on the crown. The edge of the slab where it meets the bricks must be clean to make a tight seal. Bergstrom Industries clarifies that 'loose cement' means large pieces of the crown that are detaching and crumbling, not just surface grit or small flakes. For this condition, Bergstrom Industries requires fleece and Turbo Poly Seal over the entire crown. Fleece must cover every crack because, without it, the cured sealant will crack along existing concrete cracks. How detached pieces are handled remains to be documented.
Turbo Poly Seal · Chimneys
What should be checked at chimney flashing?
Questions & Answers
Question
What should be checked at chimney flashing?
Answer
Chimney flashing inspection before sealing, as described by Bergstrom Industries: a common arrangement has the metal flashing extending up the chimney, with a 1/2-inch bent edge inserted into a groove or mortar joint in the brickwork. This transition is often caulked, and the company notes that the caulking can fail over time. Check whether the caulking is still intact and whether the flashing has loosened or pulled away from the chimney, allowing water to pass behind it.
Turbo Poly Seal · Chimneys
How is chimney flashing bridged to brickwork?
Questions & Answers
Question
How is chimney flashing bridged to brickwork?
Answer
Chimney metal-to-brick transition repair, as provided by Bergstrom Industries: this method describes flashing that is still essentially in place. Prepare the brick bonding surface by removing moss and loose debris, then brush it clean with a stiff-bristle brush or a soft metal hand brush. The surface must be completely dry before application. Leave the existing caulking in the groove as filler, regardless of caulking type. If it has large protruding lumps, remove the caulking or smooth the lumps so the fleece can conform to the transition. Apply Turbo Poly Seal over a 2-inch-wide area on the metal and a 2-inch-wide area on the brick on either side of the transition. Immediately embed the fleece across the transition, then apply a top coat fully covering the fleece. Follow the dry-surface and fleece-embedding requirements in the surface-preparation entries and the general fleece application entry. Bergstrom Industries confirms that this repair relies on bonding to the exposed brick and metal on either side, with the fleece bridging over the old caulking. The retained caulking serves as groove filler; this method does not rely on adhesion to silicone. At a chimney outside corner along this metal-to-brick transition, fold the fleece around the 90-degree corner.
Turbo Poly Seal · Cleanup
How are wet and dried spills cleaned from roof surfaces?
Questions & Answers
Question
How are wet and dried spills cleaned from roof surfaces?
Answer
Accidental Turbo Poly Seal spills on surrounding surfaces, as described by Bergstrom Industries: while wet, remove the bulk with plenty of paper towels, then clean the residue with lacquer thinner. For dried residue on surfaces, the company describes using a rag well wetted with lacquer thinner and vigorous rubbing.
Turbo Poly Seal · Cleanup
How is Turbo residue removed from hands?
Questions & Answers
Question
How is Turbo residue removed from hands?
Answer
Turbo Poly Seal residue on hands or skin: Bergstrom Industries recommends its Asphalt and Tar Remover, described by the company as gentler on skin: https://bergstromm.com/product/asphalt-and-tar-remover/. Apply about 1/2 teaspoon to the hands and rub it over the areas with Turbo residue. Keep rubbing until the asphalt dissolves and visibly comes off the skin. The company reports that dissolution begins almost immediately. After a few minutes, wipe off with a paper towel, then wash with water. The lacquer-thinner procedure above is for surrounding surfaces, not the skin-cleanup method. Bergstrom Industries confirms that this tar-remover method also removes dried Turbo residue from skin.
Which cleaner is used for hands, tools and roof surfaces?
Questions & Answers
Question
Which cleaner is used for hands, tools and roof surfaces?
Answer
Cleanup product selection, as clarified by Bergstrom Industries: use Asphalt and Tar Remover mainly for hands and tools. Wipe cleaned tools; a water rinse is not required for tools. Retain the hand-cleanup instruction above to wipe and then wash with water. For roof-surface cleanup, use the lacquer-thinner method described above. This clarification supersedes the earlier broad suggestion to use tar remover on roof surfaces.
Turbo Poly Seal · Cleanup
What can be tried on stained clothing?
Questions & Answers
Question
What can be tried on stained clothing?
Answer
Turbo Poly Seal on clothing: Bergstrom Industries says removal is difficult and may not be successful. Its suggested attempt is Asphalt and Tar Remover with repeated rubbing, followed by rinsing with water; no removal guarantee is given.
Turbo Poly Seal · Compatibility
Can Turbo Poly Seal be used on EPDM?
Questions & Answers
EPDM Rubber Compatibility
Question
Can Turbo Poly Seal be used on EPDM?
Answer
No. Turbo Poly Seal is not compatible with EPDM rubber roofing and must not be used on it. Turbo Poly Seal contains asphalt and urethane resins, which are not compatible with synthetic rubber such as EPDM.
Additional details
Super Silicone Seal bonds excellently with EPDM Rubber. It will bond to glass, EPDM, and metal.
Turbo Poly Seal · Compatibility | Turbo Poly Seal · Skylights
Does it adhere to glass or Plexiglas?
Questions & Answers
Turbo Poly Seal vs Glass
Question
Does it adhere to glass or Plexiglas?
Answer
Turbo Poly Seal does not adhere to glass. Bergstrom Industries distinguishes Plexiglas from glass and states that Turbo Poly Seal adheres to Plexiglas and metal skylight frames; the specified skylight use is to make a transition seal between the metal frame and the Plexiglas.
In this video, we made a transition from a metal roof to a Plexiglas skylight.
Plexiglass to metal transition with Turbo Poly Seal
Turbo Poly Seal · Compatibility
Can it be applied over silicone?
Questions & Answers
Question
Can it be applied over silicone?
Answer
Turbo Poly Seal can be applied over caulking used as a filler in gaps or grooves. Although it will not adhere to silicone caulking, the polyester fleece can bridge the gap, allowing Turbo Poly Seal to bond to the clean surfaces on either side.
Any silicone from previous repairs that covers the surrounding bonding surfaces must be removed before applying Turbo Poly Seal.
When removing silicone with an angle grinder and steel wire brush, friction can spread a thin film of silicone across the metal. After grinding, thoroughly wipe the surface with lacquer thinner and a clean rag to remove this residue. Allow the surface to dry completely before applying Turbo Poly Seal.
Photos
Applying Turbo Poly Seal over copper flashing and brick wall
Bergstrom Industries' practical identification clue: use a scraper or screwdriver to lift a small piece of the existing material. In the company's experience, silicone feels rubbery, while a chip from a latex-based coating feels hard and stiff.
If the coating type is still unclear, Bergstrom Industries recommends a small adhesion test:
Clean the test spot by wiping it with a wet rag—the easier option, according to Bergstrom Industries—or use lacquer thinner. Allow the surface to dry completely before applying the dab.
Apply a dab of Turbo Poly Seal.
Allow it to cure before testing. Bergstrom Industries says the test dab may be ready in as little as 8 hours; test only after it has cured.
Try to peel off the cured dab.
Bergstrom Industries interprets easy peeling as an indication of silicone and resistance to peeling as an indication of a latex coating or paint.
Turbo Poly Seal · Compatibility
Can existing silver coating remain?
Questions & Answers
Silver Coat Protection vs Turbo Poly Seal
Question
Can existing silver coating remain?
Answer
Turbo Poly Seal can bond to aluminum asphalt (silver coating), but the repair depends on how well the existing coating adheres to the roof. If the coating peels, the repair can lift with it.
Check the silver coating before starting:
Is it flaking or peeling? Remove any loose coating from the repair area before applying Turbo Poly Seal.
Is a thin coating flaking across a wider area? Remove the coating throughout the repair area, even where some sections still appear attached.
Is the coating fresh and firmly bonded? Turbo Poly Seal may be applied over it once the coating has fully dried and is securely attached to the surface beneath it.
For the most reliable bond on a torch-down roof, remove the silver coating from the repair area before applying Turbo Poly Seal.
Additional details
See this video below on preparing a metal roof seam for the Turbo Poly Seal application
Turbo Poly Seal can be applied over an old tar repair when the surface is clean, completely dry and smooth enough for the polyester fleece to lie flat.
Address large bumps that prevent the fleece from lying flat:
• Hard bumps: use the claw of a hammer.
• Soft bumps: use a trowel or flat bar.
After smoothing soft tar, Turbo Poly Seal can be applied immediately. There is no need to wait for the tar to harden.
Additional details
If the tar around the vent pipe flashing is still in good condition—firmly attached and free of cracks—you can apply Turbo Poly Seal directly over it. Make sure the surface is clean and completely dry before applying.
Watch the video below to see how it’s done.
Photos
Applying Turbo poly Seal over vent pipe flashing full of Tar
What is the color of Turbo Poly Seal after curing?
Answer
Turbo Poly Seal is dark brown when first applied and gradually fades to a lighter brown as it's exposed to UV light. Without a protective coating, it lasts about 10–12 years in full sun.
Photos
Turbo Poly Seal is a Dark brown Color when appliedThe color of Turbo Poly Seal after it has been exposed to the UVs after 5 years
Approximate Turbo Poly Seal coverage using 4-inch-wide polyester fleece and both coats:
• 1/2 gallon: 15–20 linear feet.
• 1 gallon: 35–40 linear feet.
Coverage varies with temperature. In cold weather, Turbo Poly Seal has higher viscosity and goes on thicker, reducing coverage. In hot weather, it is thinner and can go a little farther.
Additional details
Turbo Poly Seal tends to build up more thickly on flat surfaces than on vertical surfaces, so horizontal repairs generally use more sealant. Avoid spreading it too thinly to make it go further.
Completely cover the polyester fleece. If you can still see the fabric’s weave after brushing on the top coat, apply more Turbo Poly Seal until the pattern is no longer visible.
Watch the video below to see how to apply Turbo Poly Seal on a metal roof.
Photos
Using a 2" brush to coat the Fleece completelyEmbedding the fleece into the 1st coat of Turbo Poly Seal
The 1/2-gallon kit includes 25 feet of 4-inch fleece; the 1-gallon kit includes 50 feet. The 2-gallon kit includes two 50-foot rolls. Included fleece length is not a sealant-coverage guarantee.
Turbo Poly Seal · Customer reviews
Where can I read customer reviews of Turbo Poly Seal?
Questions & Answers
Question
Where can I read customer reviews of Turbo Poly Seal?
How do I seal metal flashing against a brick or chimney wall?
Questions & Answers
Flashing against a brick wall. Copper flashing on Chimneys
Question
How do I seal metal flashing against a brick or chimney wall?
Answer
Remove loose paint and caulking from the repair area using an angle grinder and a stiff wire brush.
Wipe away all dust from the brick and metal surfaces.
If necessary, secure the loose metal flashing with concrete nails.
Existing caulking can remain inside the groove as a filler, provided it does not cover the surrounding brick or metal bonding surfaces.
If the groove or gap is too wide, fill it with butyl or silicone caulk. Keep the caulk inside the gap, off the surrounding brick and metal surfaces. The polyester fleece bridges this small filled gap, while Turbo Poly Seal bonds to the clean brick and metal on either side.
Make sure the surface is completely dry. Apply Turbo Poly Seal across the brick-to-metal transition, immediately embed polyester fleece into the wet sealant, and apply a top coat that fully covers the fleece.
When covering a transition between copper or metal flashing and a brick wall, you can cut the 4" fleece in half to save on the product. As long as the fleece adheres to either side of the slot or gap, it will work
Photos
Repair photoApplying Turbo Poly Seal over the flashing and brick yp bridge the gap
Fieldstone chimneys can be particularly difficult to seal against leaks because the mortar between the stones can crack, as can the mortar in the groove where the flashing meets the chimney.
Secure the skirt flashing with concrete nails.
Brush off loose cement and debris. Make sure the repair area is completely dry.
Apply one coat of Turbo Poly Seal across the flashing-to-stone joint, covering approximately 2 inches onto the flashing and 2 inches onto the chimney surface.
Embed polyester fleece into the freshly applied sealant.
Apply another coat of Turbo Poly Seal over the fleece, covering it completely.
Gutter seam preparation: use commercial rivets to make the seams tight before applying Turbo Poly Seal. Bergstrom Industries specifies that the repair area must be clean and completely dry before application. Seal gutter seams from the inside of the gutter only. The polyester fleece must follow the entire seam across the gutter bottom and up both sides. Embed and fully cover the fleece with Turbo Poly Seal following the general fleece application entry.
Turbo Poly Seal · Gutters and drip edges
How are leaking gutter end caps repaired?
Questions & Answers
Question
How are leaking gutter end caps repaired?
Answer
Leaking gutter end caps: Bergstrom Industries confirms the same method applies. Use commercial rivets to make the joint tight, and ensure the repair area is clean and completely dry. Seal from the inside only, with fleece following the entire end-cap joint across the bottom and up both sides. Embed and fully cover the fleece with Turbo Poly Seal following the general fleece application entry.
Turbo Poly Seal · Gutters and drip edges
How is a downspout outlet repaired?
Questions & Answers
Question
How is a downspout outlet repaired?
Answer
Downspout outlet repair, as provided by Bergstrom Industries: if the outlet (eave spout) is loose, it may need to be removed and replaced with a new one. Rivet the leader pipe (downspout) to the eave spout to secure it before applying the Turbo Poly Seal treatment. To apply the fleece, place fleece over one half of the outlet. Cut tabs at each corner so that 2 inches of fleece extend down into the spout and the remaining fleece lies flat on the gutter. Repeat with a second piece on the other half of the outlet. Follow the general fleece application entry for embedding and fully covering the fleece with Turbo Poly Seal.
Turbo Poly Seal · Gutters and drip edges
What if water runs behind the gutter?
Questions & Answers
Question
What if water runs behind the gutter?
Answer
Water flowing behind the gutter, as addressed by Bergstrom Industries: screw the gutter tightly against the fascia board so the drip edge diverts water into the gutter. If the drip edge still does not extend far enough, install a new drip edge that does.
Turbo Poly Seal · Gutters and drip edges
How is a separated membrane-to-drip-edge joint repaired?
Questions & Answers
Question
How is a separated membrane-to-drip-edge joint repaired?
Answer
Membrane separated from an otherwise sound drip edge: Bergstrom Industries specifies refastening with 3-inch roofing nails, wiping the drip edge clean, brushing the membrane clean and blowing off dust with a leaf blower. On the completely dry surfaces, apply Turbo Poly Seal and two layers of 4-inch fleece over the transition, with sealant between the fleece layers and a complete top coat. Finish with the aluminum asphalt coating identified by the company as Silver Paint Protection on its website. The company confirms double fleece and Silver Paint Protection as standard for all of these Turbo Poly Seal drip-edge repairs, including replacement drip edges. Its stated reasons are UV exposure and wear from gutter cleaning and sweeping roof debris.
Turbo Poly Seal · Gutters and drip edges
How to repair a gutter with Turbo Poly Seal
Questions & Answers
Question
How to repair a gutter with Turbo Poly Seal
Answer
Customer text conversation
How to repair a gutter with Turbo Poly Seal
In this text-message conversation, Michael asks Naas how to repair a leaking gutter with previous patches. They discuss Turbo Poly Seal and polyester fleece, preparation, and what to do about existing tape and tar.
[Customer]
Hello, Michael here. I'm responding to your email asking for pictures. I don't have new ones, but these were sent in a previous email.
The brightest white area in the first photo is sealing tape. I plan to remove it, at least to check for wood rot around the ogee gutter. Because of the roof's pitch, I'll need to rent scaffolding to inspect it more closely and do the work. That's why I don't have better pictures.
[Naas]
It looks to me as though a metal gutter was installed over a copper gutter—the green area I can see. The metal also appears to stop short of the copper gutter's edge. Water could flow between those layers and cause leaks.
I suggest keeping the existing metal in place, cleaning the repair areas and using Turbo Poly Seal to seal the transition from the metal gutter to the copper. Also repair the seams inside the metal gutter, including the corner and downspout seams.
[Customer]
Thanks again. I'll assess the wood after removing the taped sections, since they cover holes in both the copper and steel. I'll leave as much metal as possible unless I need to remove large sections of rotten wood.
[Naas]
Use the metal gutter as your base and make the necessary repairs.
[Customer]
Can I apply it over Flex Seal tape that's still holding firmly?
[Naas]
Flex Seal has many products, and I don't know the composition of the one you have. I see you're referring to the tape. I think it has a plastic surface, so I'm uncertain about adhesion to it.
In your case, I was thinking of covering the repair areas with Turbo Poly Seal and fleece, including a few areas where the tape remains.
[Customer]
Okay.
[Naas]
Cut the fleece into 2-inch strips. You might be able to put Turbo Poly Seal and fleece over the tape without removing it, and over the tar. I think it may stick to that.
Make sure everything is dry, and apply Turbo Poly Seal and fleece wherever repairs are needed.
[Customer]
Okay, I'm roping up and won't have access to my phone. Thanks for the guidance.
[Naas]
Take care.
More repair questions? Browse the Knowledge Catalog:
https://bergstromm.com/bergstrom-industries-knowledge-catalog/
About this conversation
Selected messages have been edited for clarity, with Michael's email address and telephone number removed. The catalog link was also supplied by Naas as a source of further answers.
The gutter construction and possible leak path are Naas's photo-based assessment. His comments about covering existing tape were tentative, project-specific advice; the tape's composition and adhesion were not verified. The condition of any concealed wood was not established by the photos, and sealing the gutter does not repair decayed wood. The customer left to begin work; no completed repair or leak-resolution result was reported.
Continued leaking after a repair: Bergstrom Industries emphasizes that identifying the actual cause of a leak is one of the most important steps before any repair. The company's stated position is that a continuing leak means the original source was not identified, rather than a failure of Turbo Poly Seal. Revisit the leak-source diagnosis before attempting further repairs. For the company's free photo-based advice process, see original record TPS-025.
Turbo Poly Seal · Leak diagnosis
Where should someone look for a leak source?
Questions & Answers
Question
Where should someone look for a leak source?
Answer
Finding the source: leaks can have many causes and are often not obvious to the eye. Bergstrom Industries identifies these possible problem areas: shingles on a low-slope roof, flashing against walls, parapet walls, roof-to-parapet-wall transitions, vent-pipe flashing and skylights. Someone without roofing experience may not know what to look for. Bergstrom Industries recommends visiting the Flat Roof Doctor YouTube channel (@FlatRoofDoctor): https://www.youtube.com/@FlatRoofDoctor and using the channel's search bar to find a video about the specific object, roof area or problem. Each video addresses a particular object or area, so the appropriate starting video depends on the customer's issue.
Turbo Poly Seal · Leak diagnosis
When might an indoor leak come from A/C condensate?
Questions & Answers
Question
When might an indoor leak come from A/C condensate?
Answer
Suspected A/C condensate leaks: Bergstrom Industries identifies continued indoor leaking when no rain has fallen as a clue that the A/C condensate system may be the source. Contact an HVAC technician to investigate.
Turbo Poly Seal · Leak diagnosis
Where should wind-driven-rain leaks be investigated?
Questions & Answers
Question
Where should wind-driven-rain leaks be investigated?
Answer
Leaks during wind-driven rain: Bergstrom Industries recommends first inspecting flashing, window wells, chimney cracks and parapet-wall cracks. In the company's experience these are common sources under these conditions, and the roof surface itself is less likely to be the source. The company finds controlled hose tests unhelpful in most cases and favors visual inspection by someone who knows what to look for.
Turbo Poly Seal · Leak diagnosis
What should a visual leak inspection check?
Questions & Answers
Question
What should a visual leak inspection check?
Answer
Visual leak-inspection checklist supplied by Bergstrom Industries:
- Flashing that is loose and moves in its wall groove.
- Missing caulking.
- Cracks in brickwork above flashing.
- Cracks at chimney corners where the roof meets the chimney.
- Cracked clapboard siding.
- Open storm windows.
- Drip edge that directs water behind the gutter instead of into it.
- Cracked vent boots.
- Cracked flashing around vent pipes.
Turbo Poly Seal · Metal roofs
How is a metal roof prepared?
Questions & Answers
Question
How is a metal roof prepared?
Answer
Metal roof preparation, as provided by Bergstrom Industries:
If no previous repairs have been attempted, wipe the repair area clean with a wet rag. Original factory-applied paint that is firmly attached should remain and should not be removed.
If paint or coating was previously applied as a repair, remove all of that repair material from the repair area using an angle grinder with a stiff wire brush.
If silicone caulking was used, remove it mechanically. Bergstrom Industries recommends wiping the area with lacquer thinner and a rag to remove the silicone film left by grinding.
Where rust is present, use an angle grinder with a steel wire brush to remove coarse rust and loose rusted material. Bergstrom Industries says removing every trace of rust is unnecessary.
Allow the cleaned surface to dry completely before applying Turbo Poly Seal.
No primer is needed on exposed or previously rusted metal. Do not apply new primer or paint before Turbo Poly Seal; this does not mean removing firmly attached original factory paint. Bergstrom Industries advises that paint could react with Turbo Poly Seal and states that Turbo Poly Seal itself acts as a rust inhibitor.
Turbo Poly Seal · Metal roofs
How are metal-roof screws sealed?
Questions & Answers
Question
How are metal-roof screws sealed?
Answer
Metal roof screws: do not use fleece over the screw. Apply a dab of Turbo Poly Seal that covers the screw head and washer completely, sealing around the washer where it meets the roof surface. Follow the metal-surface preparation instructions in the surface-preparation entries and ensure the surface is completely dry before application.
Turbo Poly Seal · Metal roofs
What if a metal-roof screw will not tighten?
Questions & Answers
Question
What if a metal-roof screw will not tighten?
Answer
Loose metal roof screws — Bergstrom Industries' repair sequence before sealing:
Always tighten the screw securely before applying sealant.
If the screw will not tighten securely, replace it with a larger screw.
If the larger screw still will not tighten, remove it and fasten the roof with a new screw in a new location approximately 2 inches away.
Cover the abandoned screw hole with polyester fleece embedded in Turbo Poly Seal and fully covered using the fleece application steps above.
Seal the new screw head and washer with a dab of Turbo Poly Seal, covering both and sealing where the washer meets the roof surface. Do not use fleece over the new screw.
Turbo Poly Seal · Metal roofs
How are angled screws and washer gaps corrected?
Questions & Answers
Question
How are angled screws and washer gaps corrected?
Answer
Damaged washers and angled screws: Bergstrom Industries advises that Turbo Poly Seal should be sufficient to seal a damaged washer provided the washer is tight and lies flat against the roof surface. A screw installed at an angle can leave a gap beneath one side of the washer. The company explains that Turbo Poly Seal can crack across this gap and allow leaks. Before sealing, ensure the washer sits tight and flat against the roof surface.
Repairing the angled screw illustrated in the supplied photograph: remove the screw, choose a new position and drive the screw straight so the washer sits tight and flat against the roof surface. Cover the abandoned hole with fleece and Turbo Poly Seal, following the hole-patching method above. Seal the relocated screw head and washer with a dab of Turbo Poly Seal.
Customer photo: cracked sealant and an opening beneath one side of the roof screw washer
Turbo Poly Seal · Metal roofs
How are panels secured before sealing a metal-roof seam?
Questions & Answers
Question
How are panels secured before sealing a metal-roof seam?
Answer
Metal roof seams: before covering a seam with Turbo Poly Seal and fleece, Bergstrom Industries advises ensuring that the panels are tight against each other. A gap that is too large allows movement at the seam during temperature changes, which can cause the Turbo Poly Seal and fleece to crack.
Securing panels at a metal roof seam: use hex-head screws with washers to bring the panels tight together. Position the screws approximately 2 inches back from the panel edge at the seam, leaving room to apply the fleece and Turbo Poly Seal. Do not place screws right at the edge, and do not cover the screws with the seam fleece. Seal the screw heads and washers separately with a dab of Turbo Poly Seal using the screw-sealing method above.
Number and spacing of seam screws: these depend on how much the panels are separated. Bergstrom Industries advises that 2–5 screws may be needed to bring the affected panels tight together; the aim is a tight seam rather than a fixed spacing between screws.
Extent of fleece at a metal roof seam: Bergstrom Industries describes best practice as sealing the bottom of the seam and ending the fleece at the top of each raised rib on either side. Here, 'risers' means the raised ribs bordering the flat section of the metal panel. Embed and fully cover the fleece using the application steps above.
Embedding fleece in corners: when applying the fleece around the raised ribs, use the brush to push it tightly into the corners. Ensure the fleece is fully embedded in the wet Turbo Poly Seal at each corner.
How do I prepare a metal roof seam before applying Turbo Poly Seal?
Questions & Answers
Question
How do I prepare a metal roof seam before applying Turbo Poly Seal?
Answer
Make sure the seam is tight and secure any loose panels with suitable screws. Remove old silicone caulk, loose rust, dirt, and debris. Where the repair will bond, remove paint or coatings using an angle grinder fitted with a stiff wire brush. Wipe the exposed metal with lacquer thinner to remove remaining residue. Allow the surface to dry completely before applying Turbo Poly Seal and polyester fleece.
Why did the sealant crack around a roof screw? A customer-call example
Questions & Answers
Question
Why did the sealant crack around a roof screw? A customer-call example
Answer
A customer-call account from Naas Ferreira
A customer called because his metal roof still leaked after he applied Turbo Poly Seal over the screws. He was upset and requested a refund. I asked him to send a close-up photo of one of the coated screws so I could see what was happening.
From the photo, my assessment was that the screw had been driven at an angle, leaving one side of the washer raised above the roof. The sealant had cracked around that raised side. I explained that applying more sealant would not correct the screw's position or eliminate the unsupported gap beneath the washer.
My advice was to remove the screw and reinstall it straight, with the washer seated flat against the roof. Once it is properly secured, apply a dab of Turbo Poly Seal over the screw head and washer.
If the screw cannot be installed straight and secured in the existing hole, reposition it a few inches away where it can fasten securely. Drive it straight and seat the washer flat. Patch the abandoned hole with polyester fleece embedded in Turbo Poly Seal, then apply a top coat that completely covers the fleece. Apply a dab of Turbo Poly Seal over the new screw head and washer.
The distinction matters: use fleece and sealant to bridge the abandoned hole; use a dab of sealant over the properly seated screw. Sealant alone should not be relied on to bridge an unsupported gap.
The customer then said he needed to go back and straighten many other screws. That was his response after understanding the explanation. I have not received confirmation that he completed those repairs or that the leaks stopped.
About this account
Based on Naas's recollection of a customer phone call and the supplied photo, edited for clarity. This is not a verbatim transcript. The angled screw is Naas's photo-based assessment; a photo alone does not establish every possible leak source. The customer is not identified, and no completed repair or refund outcome is claimed.
Customer photo: an opening beneath one side of the coated roof screw and washer
Turbo Poly Seal · Overview
What is Turbo Poly Seal used for?
Questions & Answers
Question
What is Turbo Poly Seal used for?
Answer
Turbo Poly Seal is used to repair leaks and seal the following areas:
• Chimneys: chimney flashing and chimney crowns.
• Roofing: torch-down roofs, asphalt roofs, shingle roofs, modified bitumen roofs, and seams on torch-down, modified bitumen, and TPO roofs. Turbo Poly Seal adheres to TPO.
• Metal roofs: metal roof seams and screws.
• Shingle roof details: ridge caps.
• Gutters and transitions: gutter seams, metal transitions, and wood-to-metal transitions.
• Walls: cracks in block, brick, and concrete walls; parapet walls; and metal caps on parapet walls.
• Roof penetrations and drainage: roof drains, vent flashing, and stove pipe flashing.
• Windows and doors: around window and door frames where caulking has failed.
Turbo Poly Seal · Parapets
What should be inspected on parapet caps?
Questions & Answers
Question
What should be inspected on parapet caps?
Answer
Parapet-wall cap inspection and repairs, as provided by Bergstrom Industries: inspect seams in the metal cap covering the wall. The company describes seams about every 10 feet and identifies them as a recurring leak source. Repair leaking seams with Turbo Poly Seal and polyester fleece, following the metal preparation in the surface-preparation entries and the dry-surface and fleece application requirements in the general fleece application entry. Also inspect half-round clay pipes used as caps on top of parapet walls for breaks or cracks. Bergstrom Industries recommends repairing these with Turbo Poly Seal and polyester fleece, following the general dry-surface and fleece requirements.
Turbo Poly Seal · Parapets
How is a failed roof transition beneath clay caps replaced?
Questions & Answers
Question
How is a failed roof transition beneath clay caps replaced?
Answer
Older built-up hot-tar roof transition beneath clay parapet caps, as described by Bergstrom Industries: on many roofs, the roofing extends up the parapet wall and terminates beneath the half-round clay caps. The company identifies this termination as a recurring problem area, often covered with repeated tar patches that fail over time. For this condition, its preferred solution is to remove the clay caps, smooth the surface, and install a torch-down membrane covering the wall top and extending toward/over the roof. When membrane is installed over the parapet wall instead of a metal cap, extend it down the wall far enough to overlap the existing roof membrane by at least 6 inches. Alternatively, have a metal cap fabricated to achieve the same coverage. This replacement approach addresses the failed transition beneath the caps; the earlier Turbo Poly Seal and fleece guidance addresses cracks or breaks in the clay caps themselves.
Turbo Poly Seal · Parapets
How is a parapet termination-bar transition sealed?
Questions & Answers
Question
How is a parapet termination-bar transition sealed?
Answer
Parapet-wall termination bars, as described by Bergstrom Industries: some EPDM or torch-down roof membranes extend partway up the wall, with the upper edge mechanically fastened using a termination bar. Caulking along the top edge is intended to prevent water entry; the company identifies this junction as a frequent leak source. Its proposed repair is to bridge from the block, concrete or brick wall over the termination bar with polyester fleece embedded in Turbo Poly Seal and fully covered with a top coat. If the wall is relatively clean, Bergstrom Industries says no additional wall preparation is needed. The existing requirement for completely dry surfaces still applies. For an EPDM roof, Bergstrom Industries confirms that this repair bonds only to the wall and metal termination bar, without applying Turbo Poly Seal onto the EPDM. The EPDM incompatibility restriction in the EPDM compatibility entry remains unchanged. Leave the existing caulking along the top edge of the termination bar in place beneath the fleece bridge.
Turbo Poly Seal · Parapets
How is grooved parapet flashing sealed?
Questions & Answers
Question
How is grooved parapet flashing sealed?
Answer
Parapet metal flashing inserted into a wall groove, as described by Bergstrom Industries: some parapet walls have metal flashing inserted into a groove in the wall, with caulking sealing the groove at the wall-to-metal transition. Leave this caulking in place and apply the Turbo Poly Seal and polyester fleece treatment across the transition. Follow the general dry-surface, fleece-embedding and full top-coat requirements in the surface-preparation entries and the general fleece application entry. Retaining caulking does not establish adhesion to silicone; the fleece bridges the transition with bonding to the exposed wall and metal.
Turbo Poly Seal · Parapets
What shrinkage should be checked beneath a metal cap?
Questions & Answers
Question
What shrinkage should be checked beneath a metal cap?
Answer
Roofing membrane extending to the top of a parapet wall, as described by Bergstrom Industries: on some installations, the membrane covers the entire wall up to the top, where the metal cap forms the transition. Inspect this junction to make sure the membrane has not shrunk and pulled away from underneath the metal cap.
Turbo Poly Seal · Parapets
How are cracks and large gaps in parapet masonry treated?
Questions & Answers
Question
How are cracks and large gaps in parapet masonry treated?
Answer
Parapet masonry inspection, as provided by Bergstrom Industries: look for cracks in the brickwork or wall that could allow water entry and cause leaks. For sealing these wall cracks, Bergstrom Industries requires filling gaps wider than 1/2 inch with caulking before applying Turbo Poly Seal and polyester fleece. Gaps 1/2 inch wide or narrower do not require separate filler. Embed and fully cover the fleece following the general fleece application entry, with completely dry surfaces. For filling gaps wider than 1/2 inch, Bergstrom Industries states that any caulking may be used, including tube-applied roof cement (described as tar in a tube). The company supplied this example: Roofers Choice 15 Plastic Black Roof Cement Caulk, 10.1 oz., model RC015004: https://www.homedepot.com/p/Roofers-Choice-15-Plastic-Black-Roof-Cement-Caulk-10-1-oz-RC015004/202091010. This is a gap-filler instruction; it does not establish that Turbo Poly Seal adheres to every caulking type. Bergstrom Industries confirms that Turbo Poly Seal and fleece can be applied immediately after placing the gap filler; no waiting period for the filler to cure is required for this method. Smooth the filler flush with the wall surface so the fleece can lie flat over the repair.
Turbo Poly Seal · Parapets
How is the cap-membrane overlap fastened to the inside wall?
Questions & Answers
Question
How is the cap-membrane overlap fastened to the inside wall?
Answer
Securing the cap-membrane overlap where the transition is down the parapet wall, as provided by Bergstrom Industries: the Turbo Poly Seal version of this method assumes torch-down or peel-and-stick membrane is used. Use screws with 2-inch-diameter washers to secure the membrane to the wall at the transition. Position the screws in the seam/overlap area so they hold the existing roof membrane and the cap membrane together against the wall. Then cover the screws and washers with polyester fleece and Turbo Poly Seal. The previously confirmed minimum membrane overlap is 6 inches. Existing Turbo Poly Seal material-compatibility restrictions remain applicable. Space the screws 12 inches apart. If EPDM membrane is used, Bergstrom Industries specifies polyester fleece and Super Silicone Seal to cover the screws and washers instead of Turbo Poly Seal. Apply individual fleece-and-sealant patches over each washer and its screw; a continuous fleece strip along the seam is not required for this fastener treatment. Bergstrom Industries recommends Essential Roofing Supply's Essential Plates 2-inch Metal Seam Plates as the washers for securing the membrane to the wall: https://essentialroofingsupply.com/products/2-metal-seam-plates. For these parapet membrane fasteners, Bergstrom Industries supplies Jake Sales Blue Carbon Steel Hex Head Concrete Anchor Screws, 3/16-inch diameter by 1-1/4-inch length (the size displayed on the supplied product page), as its screw example: https://jakesales.com/products/blue-carbon-steel-hex-head-concrete-anchor-screws-carbon-steel-hardened-interior-exterior-coated-rust-and-corrosion-resistant-screws. Extend each fleece patch about 1 inch beyond the washer edge on all sides. For a 2-inch-diameter washer, a centered 4-inch fleece patch provides this coverage. For this described overlap on the vertical parapet wall, Bergstrom Industries specifies that the overlap edge itself needs no additional sealant; the screws are sufficient to hold the membrane layers together. The company's explanation is that water will not blow upward beneath this overlap. This instruction is specific to the described vertical-wall detail. The individual fleece-and-sealant patches over the screws and washers remain required.
Turbo Poly Seal · Parapets
How far should membrane extend down the outside wall?
Questions & Answers
Question
How far should membrane extend down the outside wall?
Answer
Outside face of the parapet wall, as specified by Bergstrom Industries: extend the cap membrane 4 inches down the outside face. Secure it using the same screws and 2-inch-diameter washers specified for the inside face, with screws spaced 12 inches apart.
Turbo Poly Seal · Parapets
How is an optional metal cap installed over membrane?
Questions & Answers
Question
How is an optional metal cap installed over membrane?
Answer
Optional metal cap over the membrane: Bergstrom Industries states that, once the parapet membrane is installed, a metal cap may be installed over it for aesthetic purposes. Fasten this optional metal cap with screws through its sides, not through its top. Space the metal-cap screws 3 feet apart. Bergstrom Industries states that these metal-cap screw heads need no sealant. With the membrane underneath, the metal-cap joints need no sealing. For this membrane-under-metal-cap arrangement, the company also states that the underlying membrane joints need no sealing provided they do not align with the metal-cap seams; offset the membrane joints and metal-cap seams by 2 feet. Allow no more than two membrane joints beneath each 10-foot metal-cap section. Overlap adjoining membrane sections by 4–6 inches. Overlap adjoining metal-cap sections by 4 inches.
Turbo Poly Seal · Parapets
How are exposed parapet membrane seams joined and sealed?
Questions & Answers
Question
How are exposed parapet membrane seams joined and sealed?
Answer
Exposed parapet membrane seams when no metal cap is installed, as specified by Bergstrom Industries: join torch-down membrane seams with a torch, then apply polyester fleece and Turbo Poly Seal over the exposed edge of the completed seam. For EPDM, join the membrane using EPDM tape, then apply polyester fleece and Super Silicone Seal over the exposed edge of the completed seam. Turbo Poly Seal remains incompatible with EPDM. For exposed peel-and-stick membrane seams without a metal cap, Bergstrom Industries specifies Turbo Poly Seal with polyester fleece extending 2 inches onto each side of the seam (a centered 4-inch strip). For both new and older peel-and-stick membrane in this application, no special cleaning is needed beyond removing dirt, moss or loose debris when present. The surface must be completely dry before application.
Turbo Poly Seal · Parapets
How is membrane that pulled out beneath a cap repaired?
Questions & Answers
Question
How is membrane that pulled out beneath a cap repaired?
Answer
Repairing membrane that has shrunk and pulled out from beneath a metal cap, as specified by Bergstrom Industries: first secure the existing membrane with fasteners. Remove the metal cap. Cut a new membrane piece sized to overlap the existing membrane and extend back to the top of the wall. Fasten the new piece and reinstall the metal cap. For an EPDM overlap, use EPDM tape followed by polyester fleece and Super Silicone Seal.
Turbo Poly Seal · Parapets
How are cracked or partly missing clay caps repaired?
Questions & Answers
Question
How are cracked or partly missing clay caps repaired?
Answer
Cracked, loose or partly missing clay parapet caps, as described by Bergstrom Industries: the company states that almost all cracked clay caps can be repaired with Turbo Poly Seal and polyester fleece. It states that the sealant-and-fleece treatment holds loose pieces together. Where a section is missing, shape the fleece to follow the cap's contour and use Turbo Poly Seal with the fleece to make a seal. If the opening to bridge is wider than 1/2 inch, first fill it with tar caulking, then cover it with the Turbo Poly Seal and fleece treatment. Follow the general clean, dry surface and fully embedded/covered fleece requirements. When asked whether the amount of missing clay alone creates a point at which it recommends replacement, the company answered no.
Turbo Poly Seal · Preparation
How is TPO prepared?
Questions & Answers
Question
How is TPO prepared?
Answer
TPO preparation, as provided by Bergstrom Industries:
Wipe the TPO surface with a rag and lacquer thinner to remove unwanted surface residue.
Remove any silicone caulking from the repair area.
Ensure the surface is completely dry.
Apply Turbo Poly Seal with polyester fleece.
Turbo Poly Seal · Preparation
How do I prepare a metal roof seam before applying Turbo Poly Seal?
Questions & Answers
Question
How do I prepare a metal roof seam before applying Turbo Poly Seal?
Answer
Remove any coating covering the seam and surrounding repair area using an angle grinder fitted with a steel wire brush.
If adhesive tape is present, carefully soften it with a propane torch and lift it off with a flat bar.
Use the angle grinder and steel wire brush to remove remaining adhesive and caulking.
Thoroughly clean around the fasteners that hold the metal panels together.
Once the surface has cooled and all flames are extinguished, wipe the repair area with a clean rag dampened with lacquer thinner to remove silicone and paint residue.
Allow the surface to dry completely before applying the repair materials.
Protective coating: Bergstrom Industries recommends waiting at least one hour after applying Turbo Poly Seal. Protective coating can also be applied later, including one year afterward. See the protective-coating entries for recommended coatings. This is separate from the wet-on-wet coat that covers the fleece.
Turbo Poly Seal · Protection and maintenance
What areas are recommended for preventive treatment?
Questions & Answers
Question
What areas are recommended for preventive treatment?
Answer
Other preventive-maintenance locations identified by Bergstrom Industries: beneath door sills opening onto flat roofs; parapet-wall cap joints; vent pipes; A/C curb flashing; skylight curb flashing; chimney flashing; and membrane-to-wall transitions. Apply the relevant repair detail and existing material-compatibility restrictions for each location.
Turbo Poly Seal · Protection and maintenance
How long may an exposed repair last?
Questions & Answers
Question
How long may an exposed repair last?
Answer
Turbo Poly Seal can remain exposed. Bergstrom Industries estimates a repair's life expectancy without a protective coating at approximately 10–12 years.
Turbo Poly Seal · Protection and maintenance
When should a protective coating be renewed?
Questions & Answers
Question
When should a protective coating be renewed?
Answer
Inspection and renewal: Bergstrom Industries does not specify a fixed inspection interval. Repair performance depends on the quality of preparation, application and coating thickness. The aluminum protective coating should last approximately five years before another coat is needed. The life of regular paint depends on its quality and the thickness applied.
Visible sign for recoating: renew the protective coating when Turbo Poly Seal begins showing through in small spots or patches.
Turbo Poly Seal · Recoating
When and how can Turbo Poly Seal be applied over an older repair?
Questions & Answers
Question
When and how can Turbo Poly Seal be applied over an older repair?
Answer
Applying another coat of Turbo Poly Seal over Turbo Poly Seal (Bergstrom Industries' guidance):
• Fresh repair: another coat can be added within 2–3 hours of application.
• Older repair: wait at least 6–12 months before applying Turbo Poly Seal over it. The old Turbo repair must have no protective coating present. To judge readiness within that time range, Bergstrom Industries looks for a surface that has turned light brown and feels slightly scuffed to the touch. The company explains that UV exposure has begun to break down the surface slightly, making it porous and allowing a strong bond to the new Turbo layer. After the 6–12-month waiting period, Bergstrom Industries says simply wipe the surface with a dry rag before applying the new Turbo coat.
• Between the fresh-repair window and 6 months: in Bergstrom Industries' experience, the two Turbo layers do bond after some time, but the bond is poor.
• If recoating is needed during that intervening period, Bergstrom Industries says thoroughly wiping the existing Turbo surface with lacquer thinner allows the new Turbo layer to bond again. Allow the surface to dry completely before applying the new layer.
• If the existing Turbo repair has a protective coating: Bergstrom Industries says remove that coating using the previously documented silver-coating or paint-removal method (see the surface-preparation entries), then wipe the exposed Turbo surface vigorously with lacquer thinner. Ensure the surface is completely dry, then apply Turbo Poly Seal.
• New fleece when recoating: if any cracks are visible in the existing repair, apply new polyester fleece over those cracks. Embed it in fresh Turbo Poly Seal and cover it completely, following the general fleece application entry.
Product switching (September 19, 2026): prefer Turbo on Turbo and Super Silicone on Super Silicone. If switching products, completely remove the prior repair, clean the underlying surface and let it dry before starting again.
Turbo Poly Seal · Roof drains
What should be inspected around a leaking roof drain?
Questions & Answers
Question
What should be inspected around a leaking roof drain?
Answer
Roof-drain leak inspection, as provided by Bergstrom Industries: when there is a leak around a drain, inspect the cast-iron drain bowl for cracks, the surrounding roof membrane for punctures, and seams next to the drain for looseness or separation.
Turbo Poly Seal · Roof drains
How is a cracked cast-iron drain bowl repaired?
Questions & Answers
Question
How is a cracked cast-iron drain bowl repaired?
Answer
Cracked cast-iron drain bowl, as provided by Bergstrom Industries: the company states that any crack in a cast-iron drain bowl can be repaired with Turbo Poly Seal. Apply fleece over only the crack; covering the entire bowl is not required. Remove the leaf strainer before starting preparation. Remove old tar first and clear away all debris. Thoroughly clean the repair surface using an angle grinder fitted with a steel brush. Ensure the surface is completely dry, then apply the Turbo Poly Seal and fleece treatment described in the general fleece application entry.
Turbo Poly Seal · Roof drains
How is the drain bowl-to-pipe joint repaired?
Questions & Answers
Question
How is the drain bowl-to-pipe joint repaired?
Answer
Drain bowl-to-pipe connection, as provided and confirmed by Bergstrom Industries: the lead connection between the bowl and pipe can crack or loosen and cause a leak. To repair this connection, cut small tabs along one side of a piece of fleece. Embed the uncut portion in Turbo Poly Seal extending 2 inches into the pipe, with the cut tabs spreading onto the bowl. Cut a second piece of fleece to cover all the tabs. Apply Turbo Poly Seal between the overlapping fleece layers and fully cover the fleece with the top coat, following the general fleece application entry. The prepared surfaces must be completely dry before application.
Turbo Poly Seal · Roof drains
How is the membrane-to-drain-bowl transition repaired?
Questions & Answers
Question
How is the membrane-to-drain-bowl transition repaired?
Answer
Roof membrane-to-drain bowl transition, as provided by Bergstrom Industries: the repair depends on how the roof installer attached the membrane at the drain. If the membrane appears to have separated from the bowl, thoroughly clean both the membrane and the bowl, then apply fleece and Turbo Poly Seal across the transition. Extend the fleece 2 inches onto the membrane and 2 inches onto the drain bowl. Follow the applicable surface preparation in the surface-preparation entries and fleece application in the general fleece application entry, including completely dry surfaces. The existing material-compatibility restrictions still apply, including the exclusion of EPDM in the EPDM compatibility entry.
Turbo Poly Seal · Roof drains
How is the drain clamping ring removed and reinstalled?
Questions & Answers
Question
How is the drain clamping ring removed and reinstalled?
Answer
Drain clamping-ring inspection, as provided by Bergstrom Industries: where a clamping ring is present, try to remove it and inspect the membrane close to where the ring was seated for a break. If a break is found, repair it with Turbo Poly Seal and polyester fleece. The existing surface-preparation, dry-surface and material-compatibility requirements remain applicable. Wait for the Turbo Poly Seal to cure before reinstalling the clamping ring. Bergstrom Industries advises that it should be ready after about 24 hours. Curing is temperature-dependent, as described in the curing and recoating entries; allow longer if the material has not yet cured.
Turbo Poly Seal · Roof drains
What if the drain clamping ring cannot be removed?
Questions & Answers
Question
What if the drain clamping ring cannot be removed?
Answer
If the drain clamping ring cannot be removed, Bergstrom Industries advises inspecting the membrane immediately beside the ring. The company explains that the ring can cause tears in the membrane over time. Make the necessary repairs to any tears found using Turbo Poly Seal and polyester fleece, subject to the existing surface-preparation, dry-surface and material-compatibility requirements.
Turbo Poly Seal · Roof drains
What winter damage should be checked around drains?
Questions & Answers
Question
What winter damage should be checked around drains?
Answer
Winter damage and drain maintenance, as provided by Bergstrom Industries: the membrane around a drain can be damaged during winter ice conditions. When ice is being removed from the drain mouth, chopping at it can accidentally strike and damage the membrane. As a maintenance procedure, remove all debris from the drain and thoroughly clean the membrane around the drain area so it can be inspected for damage.
Turbo Poly Seal · Roof drains
Do small drain tears and punctures require fleece?
Questions & Answers
Question
Do small drain tears and punctures require fleece?
Answer
Fleece requirement, confirmed by Bergstrom Industries: always use polyester fleece with repairs, including every tear or puncture around a drain, however small. Embed and fully cover the fleece following the general fleece application entry. The previously specified exception for sealing metal roof screws with a dab of Turbo Poly Seal remains in place.
Turbo Poly Seal · Roof drains
How often should roof drains be cleaned and inspected?
Questions & Answers
Question
How often should roof drains be cleaned and inspected?
Answer
Roof-drain cleaning and inspection frequency, as provided by Bergstrom Industries: base the schedule on how much debris falls onto the roof. Where nearby trees shed debris onto the roof, clean and inspect the drains once a month. For a roof with little debris, the company gives a roof in Arizona as an example where once a year may be sufficient. The determining factor is debris accumulation at the specific roof. Bergstrom Industries emphasizes that maintenance must be scheduled even where natural debris is limited. Crews accessing the roof to service air-conditioning units may leave paper, screws and other objects that can cause drain problems. Account for debris left by service crews as well as debris from trees when planning maintenance. In addition to scheduled maintenance, Bergstrom Industries recommends checking the roof after every service visit, especially on rubber roofs. The company places less emphasis on this additional check for metal roofs. This is inspection guidance; it does not change Turbo Poly Seal's material-compatibility restrictions.
Turbo Poly Seal · Roof drains
How should dust around a drain be removed?
Questions & Answers
Question
How should dust around a drain be removed?
Answer
Cleaning around the drain before inspection, as provided by Bergstrom Industries: use a hard-bristle broom or a scrubbing brush to thoroughly scrub the accumulated dust around the clamping ring and surrounding membrane. After scrubbing, use a leaf blower to blow all the loosened dust off the area so the membrane can be inspected.
Turbo Poly Seal · Safety and SDS
How should leftovers and empty containers be disposed of?
Questions & Answers
Question
How should leftovers and empty containers be disposed of?
Answer
Disposal: the supplied SDS, Section XIII, identifies product waste as hazardous and directs users to consult the relevant waste authorities; it says not to put product waste in normal garbage or sewers. Follow applicable disposal requirements for leftover material and containers. Bergstrom Industries clarified that its earlier garbage-disposal comment referred to empty containers, not partly full containers, and that partly full containers must follow local rules for flammable products. Ordinary-trash acceptance for empty containers with residue must be checked locally rather than assumed.
Turbo Poly Seal · Scuppers
How are scupper transitions and split metal seams repaired?
Questions & Answers
Question
How are scupper transitions and split metal seams repaired?
Answer
Scupper drains, as described by Bergstrom Industries: the attachment between the roof membrane and aluminum or copper scupper metal is a common trouble spot. Thoroughly clean both surfaces and ensure they are completely dry. Bridge the transition with Turbo Poly Seal and polyester fleece, covering the corners and vertical sections using the general fleece application method. Because tool access inside a scupper is difficult, the company specifies the sealant-and-fleece treatment without additional mechanical fastening for this detail. Repair split metal scupper seams with Turbo Poly Seal and fleece as well. The company confirms that this transition treatment also describes the repair where the scupper passes through the parapet wall; it is not a separate procedure. Existing membrane-compatibility restrictions remain applicable.
Turbo Poly Seal · Shingle roofs
How is a pitched-shingle-to-low-slope transition repaired?
Questions & Answers
Question
How is a pitched-shingle-to-low-slope transition repaired?
Answer
Pitched-shingle-roof to low-slope-roof transition, as specified by Bergstrom Industries: in most cases, the low-slope membrane should extend beneath at least four courses (rows) of shingles. If the existing membrane does not extend far enough, remove the affected shingles, add a membrane piece that extends sufficiently far beneath the shingles, and install new shingles over the membrane. Overlap the added membrane onto the existing roof membrane by 4–6 inches. Join torch-down membrane with a torch, peel-and-stick membrane using its adhesive, and EPDM using EPDM tape. The company specifies no additional sealant for these transition joints.
Turbo Poly Seal · Shingle roofs
What warns of an ice-related shingle transition leak?
Questions & Answers
Question
What warns of an ice-related shingle transition leak?
Answer
Inspection warning sign at this transition: Bergstrom Industries identifies shingles continuing down from the pitched roof onto the flatter roof area as an indication of a potential problem. This is especially relevant in snowy areas, where ice can collect at the bottom of the shingle roof and cause water to back up. Investigate this detail when tracing a leak.
Turbo Poly Seal · Shingle roofs
How are tears and splits in shingles repaired?
Questions & Answers
Question
How are tears and splits in shingles repaired?
Answer
Shingle tears and splits, as specified by Bergstrom Industries: cover the tear or split with Turbo Poly Seal and polyester fleece instead of replacing the individual shingle. Follow the general clean, dry surface and fleece application instructions.
Turbo Poly Seal · Shingle roofs
How is a partly missing shingle patched?
Questions & Answers
Question
How is a partly missing shingle patched?
Answer
Partly missing shingle: use part of a new shingle or a piece of flat metal and slide it at least 3 inches beneath the remaining tab of the damaged shingle. Apply Turbo Poly Seal with fleece to bridge the transition between the remaining shingle and the inserted piece. Leave the bottom part/edge uncovered by this treatment.
Turbo Poly Seal · Shingle roofs
What is recommended for lifted or curled shingles?
Questions & Answers
Question
What is recommended for lifted or curled shingles?
Answer
Lifted or curled shingles: when asked about shingles that have lifted or curled but are otherwise intact, Bergstrom Industries recommends replacing the roof.
Turbo Poly Seal · Shingle roofs
How are ridge caps protected where people step?
Questions & Answers
Question
How are ridge caps protected where people step?
Answer
Shingle-roof ridge caps in areas subject to foot traffic, as specified by Bergstrom Industries: apply Turbo Poly Seal with a 4-inch-wide strip of polyester fleece centered over the top of the ridge cap. Full-width coverage of the cap is not required. Treat areas beside chimneys, antennas and wherever people step or are likely to step while moving across the roof. Extend the treatment along the ridge as far as necessary to cover those areas; no fixed length is specified. Bergstrom Industries states that stepping on a ridge cap can crack it and describes the Turbo Poly Seal and fleece treatment as sealing leaks and providing a more durable, flexible surface that accommodates foot traffic. The company confirms that this method also applies to ridge caps over a ridge vent and recommends it as preventive maintenance before cracks develop in areas where people step. Follow the general clean, dry surface, fleece embedding and complete top-coat requirements.
Turbo Poly Seal · Skylights
Which skylight repairs are suitable?
Questions & Answers
Question
Which skylight repairs are suitable?
Answer
Skylights — limited uses, as specified by Bergstrom Industries: Turbo Poly Seal is not recommended as a general skylight-leak repair. Its main use on skylights is the curb flashing, especially the corners of the curb. In some cases it can be used on Plexiglas skylights; Bergstrom Industries states that it adheres to Plexiglas and the metal frame. Bergstrom Industries specifies that this exception is making a transition seal between the metal frame and the Plexiglas.
Turbo Poly Seal · Skylights
How are skylight curb corners patched?
Questions & Answers
Question
How are skylight curb corners patched?
Answer
Skylight curb-flashing corner repair, as provided by Bergstrom Industries: where the flashing is curved, use a 4-inch by 6-inch fleece patch. Cut a tab in the patch so it can be positioned on both sides of the corner. Cover the cut with an additional 2-inch-wide strip of fleece. Follow the general fleece application entry for embedding the fleece, applying Turbo Poly Seal between overlapping fleece pieces and fully covering the fleece with the top coat.
Turbo Poly Seal · Skylights
How is the Plexiglas-to-frame joint sealed?
Questions & Answers
Question
How is the Plexiglas-to-frame joint sealed?
Answer
Preparation for the Plexiglas-to-metal-frame transition, as provided by Bergstrom Industries: wipe the metal frame and Plexiglas clean with a rag. Remove any debris trapped in the groove between the Plexiglas and the frame. As with all Turbo Poly Seal applications, the surfaces must be completely dry before application.
Application at the Plexiglas-to-metal-frame transition, as provided by Bergstrom Industries:
Apply masking tape to the Plexiglas, leaving a 1-inch strip exposed next to the frame.
Cut the polyester fleece into 2-inch-wide strips.
Fill the groove between the Plexiglas and the metal frame with Turbo Poly Seal. Also coat the exposed Plexiglas up to the masking tape and the adjoining metal frame.
Once the groove is filled, immediately embed the fleece into the wet Turbo Poly Seal. The fleece must bridge the groove and cover part of the frame and part of the Plexiglas.
Apply another coat of Turbo Poly Seal over the fleece, fully covering it according to the general fleece application entry.
Remove the masking tape immediately after finishing the top coat.
Turbo Poly Seal · Skylights
Helping a homeowner in the Italian Alps plan a skylight repair
Questions & Answers
When repairing a skylight, remove old caulk and sealants. This practice ensures a more effective and long-lasting repair.
Question
Helping a homeowner in the Italian Alps plan a skylight repair
Answer
From the Flat Roof Doctor inbox
A skylight question from the Italian Alps
Gabriele Minotto, from Padova, Italy, contacted me after watching one of my skylight repair videos. The house with the leaking skylight is in the Italian Alps, so I reviewed the photo and researched a sealant available in Italy. Here is our exchange, adapted for clarity.
Customer email
From: Gabriele Minotto — Padova, Italy
To: Flat Roof Doctor
Subject: Advice on repairing my leaking skylight
Hello Flat Roof Doctor,
I watched your YouTube video and saw the great job you did on a skylight. I have a leaking skylight on my house in the Italian Alps.
Video referenced by the customer:
I think your method could work in my case too, but I am not sure what the white tape is that you used. Could you please help me choose the materials for the repair?
I have attached a photo of my leaking skylight.
Thank you in advance.
Gabriele Minotto
Padova, Italy
Reply from Naas
From: Naas Ferreira — Flat Roof Doctor
To: Gabriele Minotto — Padova, Italy
Subject: Preparing your skylight for a reinforced flashing repair
Good morning,
Thank you for sending the photo. Before choosing the repair material, I want to explain how I would prepare this skylight. The preparation is an important part of making the new repair bond to the metal.
In your photo, there appears to be rust beneath the existing sealant or caulking above the skylight. My first recommendation is to remove the old sealant and caulking from the area we need to repair.
Clean the skylight curb and surrounding metal roof thoroughly. I suggested using a rag with lacquer thinner on these metal surfaces. Check that it is compatible with the existing finish, keep it away from the glazing and seals, and allow the repair area to dry completely.
I prepared the illustration below to show the exposed curb and roof rib after removal of the old sealant. This is an illustration of the preparation, not a photo of work already completed on your roof.
For this particular skylight detail, my next recommendation is to cut the raised roof rib back about 5 inches from the curb using metal shears. That gives room to form a continuous reinforced transition between the curb and the roof surface. This change is specific to the detail shown; the cut seam must be assessed and weatherproofed as part of the repair.
Because you are in Italy, I also researched a material you could source locally. The product I recommended is ALSAN Flashing, listed on SOPREMA's Italian website. Use the reinforcement specified for that system and follow its current preparation and application instructions.
Here is the product information:
https://en.soprema.it/en/product/waterproofing/liquid-products/polyurethane/alsan-flashing
The final illustration shows the proposed arrangement: the rib set back from the skylight and a fleece-reinforced flashing transition extending onto both the curb and the roof. The illustration explains the idea; use the selected manufacturer's requirements for the actual installation.
I hope you find this helpful, and good luck with your repair.
Naas
Flat Roof Doctor — Bergstrom Industries
About this exchange
Shared with the customer's permission. Adapted from customer correspondence for clarity; subject lines added for presentation and personal contact details omitted. The preparation and proposed-repair images are digitally generated illustrations. This was advice based on a supplied photo, not an on-site diagnosis. Completion of the repair has not yet been reported.
Customer's original photo: skylight on a metal roof in the Italian AlpsPreparation illustration: old sealant removed, with the roof rib still meeting the skylight curbProposed repair illustration: rib cut back and fleece-reinforced flashing around the skylight curb; not a completed customer repair
Suggestion: The top of the skylight indicates it can be opened. After texting Gabriele, I confirmed that she never plans to open this skylight. So, in this case, I suggest sealing the skylight frame to the glass. Use Super Silicone Seal instead of Turbo Poly Seal. From my experience, these skylights start leaking at the top.
I asked Gabriele to send me a picture of where the water was dripping on the inside, and that confirmed my suspicion. See the picture she sent and watch this video to see how to seal a skylight with Super Silicone Seal
I have been using Super Silicone Seal with fleece for many years to repair skylight leaks, and it has been the best product.
A skin can form as Turbo Poly Seal at the surface begins to cure. Bergstrom Industries explains that this skin helps protect the remaining material underneath from curing. Customers can remove the skin and use the sealant underneath.
Turbo Poly Seal is no longer usable when the material underneath has completely hardened into a rubber-like material.
To remove the surface skin:
Use a flat-head screwdriver to pierce a hole in the skin.
Lift the skin with the screwdriver.
Grip the lifted skin as needed and peel it away from the container walls.
Turbo Poly Seal · Storage
How should Turbo Poly Seal be stored and resealed?
Questions & Answers
Question
How should Turbo Poly Seal be stored and resealed?
Answer
Storage location: keep the tightly sealed container at room temperature or in a cool place, such as a basement.
Unopened containers: use within 3–4 months from the shipping date, as recommended by Bergstrom Industries. Uncured material can remain usable beyond this period, even after a year, but longer usability is not a guaranteed or indefinite shelf life.
After opening: we recommend using Turbo Poly Seal within 3–6 months and keeping the container well sealed. Bergstrom Industries reports that, in the company's experience, well-sealed opened containers have remained usable for over a year.
Resealing the container:
Remove any spilled sealant from the rim groove where the lid seats. Use a rag and a screwdriver to reach into the groove.
Replace the lid on the container.
Use a small rubber mallet to tap the lid down until it makes a tight seal.
Turbo Poly Seal · Torch-down roofs
How do I repair a leaking seam on a torch-down flat roof?
Questions & Answers
Question
How do I repair a leaking seam on a torch-down flat roof?
Answer
Use a stiff-bristle brush to remove loose ceramic granules and debris around the leaking seam.
Use a leaf blower to clear away the remaining dust and loose material.
Make sure the surface is completely dry.
Apply Turbo Poly Seal along the seam, immediately embed polyester fleece into the wet sealant, and apply a top coat that fully covers the fleece.
One cause of cracking is applying Turbo Poly Seal over a crack without polyester fleece. Bergstrom Industries explains that the cured sealant will crack along the existing crack in the underlying concrete. Use fleece over every crack. For a chimney crown with large detaching and crumbling pieces, Bergstrom Industries requires fleece over the entire crown.
Turbo Poly Seal · Troubleshooting
How is peeling or lifting Turbo repaired?
Questions & Answers
Question
How is peeling or lifting Turbo repaired?
Answer
Peeling or lifting in an existing Turbo repair: remove the loose sections before applying fresh Turbo Poly Seal and fleece. Bergstrom Industries lists these removal tools: a hammer and flat bar, an angle grinder fitted with a stiff metal brush, the claw of a hammer, or a trowel. Bergstrom Industries attributes this peeling or lifting to inadequate preparation of the underlying surface. Prepare the exposed surface using the relevant surface-specific instructions (the surface-preparation entries), ensure it is completely dry, and follow the fleece application steps (the general fleece application entry). See the curing and recoating entries for recoating any remaining existing Turbo.
Turbo Poly Seal · Troubleshooting
How are bubbles or blisters repaired?
Questions & Answers
Question
How are bubbles or blisters repaired?
Answer
Bubbles or blisters in a Turbo repair: Bergstrom Industries identifies water trapped during application as a cause. Prevent this by ensuring the surface is completely dry before applying Turbo Poly Seal. To repair the affected area, Bergstrom Industries says to break the bubble or blister open and apply another Turbo treatment over the affected area. This treatment always includes a new piece of polyester fleece, embedded in fresh Turbo and fully covered following the general fleece application entry. The surface must be completely dry before applying Turbo Poly Seal.
Turbo Poly Seal · Troubleshooting
How can surface dryness be checked?
Questions & Answers
Question
How can surface dryness be checked?
Answer
Practical surface-dryness check before application: Bergstrom Industries says to touch the surface with your hand or use a paper towel to check for moisture. The surface must be completely dry before applying Turbo Poly Seal.
Turbo Poly Seal · Vent and stove pipes
How are vent-pipe surfaces prepared?
Questions & Answers
Question
How are vent-pipe surfaces prepared?
Answer
Exposed vent-pipe preparation before the reinforced boot cover (the general fleece application entry), as provided by Bergstrom Industries: for a metal vent pipe, wipe the surface clean with a rag. For PVC or ABS pipe, lightly sand the application area with coarse sandpaper. The surface must be completely dry before applying Turbo Poly Seal.
Turbo Poly Seal · Vent and stove pipes
How is a reinforced cover made over an EPDM vent boot?
Questions & Answers
Question
How is a reinforced cover made over an EPDM vent boot?
Answer
Reinforced cover for a cracked EPDM vent-pipe boot, as described by Bergstrom Industries:
Start on the vent pipe 2 inches above the rubber boot, using fleece and Turbo Poly Seal.
Continue downward with additional fleece and Turbo Poly Seal, overlapping the previous fleece by approximately 1/2 inch. Apply Turbo Poly Seal between overlapping pieces.
Continue until the entire rubber boot is covered and the repair reaches the roof surface. For the final transition, extend the fleece approximately 2 inches beyond the boot onto the compatible roof surface.
Cut tabs as needed so the fleece conforms to the boot’s shape. Embed and fully cover all fleece using the application steps above.
Bergstrom Industries confirms this is a reinforced cover anchored to the pipe above the boot and the compatible roof surface below; it does not rely on adhesion to the EPDM rubber. Turbo Poly Seal remains incompatible with EPDM (the EPDM compatibility entry).
Turbo Poly Seal · Vent and stove pipes
How do I repair a leak around a stove pipe on a flat roof?
Questions & Answers
Question
How do I repair a leak around a stove pipe on a flat roof?
Answer
Remove old tar and built-up caulking from previous repairs using a hammer claw or flat bar.
Remove any existing sealant or coating from the roof surface within the repair area.
Use an angle grinder fitted with a wire brush to remove silicone and smooth the surface around the stove pipe.
Wipe away remaining silicone residue with a rag and lacquer thinner. Allow the surface to dry completely.
For an asphalt-based or torch-down roof, use Turbo Poly Seal and polyester fleece to form new flashing around the pipe.
Brush a thick coat of Turbo Poly Seal onto the prepared roof surface and around the base of the pipe.
Cut a length of 4-inch-wide polyester fleece long enough to wrap around the pipe with a 4-inch overlap. Along one edge, make cuts every 2 inches, stopping at the center of the strip to form tabs.
Embed the fleece into the wet sealant. Lay the tabs flat against the roof and wrap the uncut half around the pipe. Apply sealant between the overlapping fleece layers.
Apply a top coat of Turbo Poly Seal, completely covering the fleece.
What air temperatures and surface conditions are recommended?
Questions & Answers
Question
What air temperatures and surface conditions are recommended?
Answer
Recommended application air temperature: 20–110°F. Ideal application air temperature: 25–90°F.
The recommended minimum is an air temperature of 20°F. Colder conditions can lead to rushed or inadequate surface preparation.
The recommended maximum is 110°F. At high temperatures, Turbo Poly Seal has lower viscosity, making it thinner and runnier and harder to control during application.
All surfaces, including TPO, must be completely dry before applying Turbo Poly Seal.
Turbo Poly Seal · Weather and curing
How soon can rain fall on the repair?
Questions & Answers
Question
How soon can rain fall on the repair?
Answer
Turbo Poly Seal forms a dry skin on its surface within a few minutes of application. This skin protects the coating from rain while the material underneath continues curing. Bergstrom Industries recommends approximately 10–15 minutes before rain exposure as a conservative estimate. On a warm day, approximately 5 minutes can be enough.
Turbo Poly Seal · Weather and curing
How long does full curing take?
Questions & Answers
Question
How long does full curing take?
Answer
Surface skin formation is different from full curing. Curing time depends on temperature: Turbo Poly Seal may cure within a few hours on a hot day, while cold conditions slow curing and can extend it beyond 24 hours. We recommend allowing 24–48 hours for curing as conservative guidance.
Turbo Poly Seal · Weather and curing
When can a repair be submerged?
Questions & Answers
Question
When can a repair be submerged?
Answer
Turbo Poly Seal can be used in areas with standing water and can be submerged, provided the surface was completely dry at the time of application.
Recommended waiting time after application before submersion, by air temperature:
• 20–30°F, including 30°F: 4 hours.
• Above 30°F: 2 hours.
Turbo Poly Seal · Windows, doors and wood
How is wood prepared for a metal transition?
Questions & Answers
Question
How is wood prepared for a metal transition?
Answer
Wood preparation for wood-to-metal transitions, as specified by Bergstrom Industries: scrape off peeling paint before applying Turbo Poly Seal. Firmly attached paint in good condition may remain. The wood must be clean, completely dry and not rotten.
Turbo Poly Seal · Windows, doors and wood
How are window and door frames sealed to the wall?
Questions & Answers
Question
How are window and door frames sealed to the wall?
Answer
Window and door frame-to-wall joints, as specified by Bergstrom Industries: where possible, use a 2-inch-wide strip of polyester fleece with Turbo Poly Seal across the joint. The company states that the method applies to all frame materials, subject to the existing Turbo Poly Seal restrictions for glass, silicone and EPDM. Leave existing caulking as filler unless it is loose or prevents the fleece from lying flat. The repair bonds to the compatible exposed frame and wall surfaces; retaining caulking as filler does not establish adhesion to silicone. Where space is limited, use a narrower fleece strip; the minimum recommended total strip width is 3/4 inch. Follow the general clean, completely dry surface, immediate fleece embedding and full top-coat requirements.
Turbo Poly Seal · Windows, doors and wood
How is movement at a wood-to-metal joint handled?
Questions & Answers
Question
How is movement at a wood-to-metal joint handled?
Answer
Wood-to-metal joint movement, as described by Bergstrom Industries: Turbo Poly Seal with polyester fleece accommodates movement at the joint. Use the general fleece application method, normally 4-inch fleece centered 2 inches onto each side of the transition, on prepared compatible surfaces. The installer must assess the joint and decide whether mechanical fastening is needed before sealing; Bergstrom Industries leaves that call to the installer. For wood preparation, see the surface-preparation entries.
Turbo Poly Seal · Windows, doors and wood
How is flashing beneath a door sill rebuilt?
Questions & Answers
Question
How is flashing beneath a door sill rebuilt?
Answer
Door sill opening onto a flat roof: Bergstrom Industries notes that these locations often have accumulated previous repair attempts. First remove all old tar and caulking beneath the sill. Use Turbo Poly Seal and polyester fleece to create new flashing running from the compatible roof membrane up the wall plate to the underside of the sill. At both ends of the sill, use small pieces of fleece with Turbo Poly Seal to make the transition and cover the gaps. Follow the general clean, completely dry surface, fleece overlap, embedding and full top-coat requirements.
METAL ROOF REPAIR - a must see for all METAL ROOF owners -Turbo Poly Seal
120.3K views
Additional Information
Weight
22 lbs
Dimensions
17 × 7 × 9 in
Coverage
When applied to rough surfaces such as a cement slab chimney cap, Turbo Poly Seal covers approximately 30 square feet per gallon. On smoother materials like metal or rubber seams, it can cover around 45 linear feet per gallon.
Important
Always use Polyester Fleece when sealing seams, cracks, or transitions between surfaces. It is not necessary when applying a coating to a smooth, continuous surface. If you apply sealant directly over a transition without using Polyester Fleece, it will eventually crack at that point. This is why incorporating the fleece is essential—it reinforces the coating and prevents failure at weak spots.
Surface Adhesion
Turbo Poly Seal is compatible with Modified Bitumen Rubber, Cement, Brick, Metal, TPO, Copper, and Aluminum.
It does not adhere to EPDM Rubber, Glass, certain plastics, or Silicone.
UV Protection
Use Turbo Poly Seal to repair flashing, metal roof seams, and rusted areas. To protect it from UV damage, apply Silver Coat or any exterior-grade paint (latex or oil-based). While Turbo Poly Seal can last 5 to 8 years without UV protection, applying a topcoat significantly extends its lifespan.
Cracks on vertical chimney surface
To seal cracks on chimneys, use Alex Plus Clear caulk, available at Home Depot.
Silver Coat Protection Metal Rust Proofing 1 Pint
Weight
1 lbs
Silver Coat
Protective Coating for Turbo Poly Seal:
1. Let the Turbo Poly Seal cure for 10 minutes
2. Stir the content of Silver Coat well to mix the aluminum flakes into the asphalt liquid
3. Use a brush and apply 1 coat over the Turbo Poly Seal
Extra Poly Fleece — 50-foot roll (optional)
Weight
.2 lbs
Polyester Fleece
Polyester Fleece is designed for use with Turbo Poly Seal and Super Silicone Seal. Its flexible yet durable construction reinforces cracks, seams, and transitions. The fleece must not remain exposed to sunlight, as UV exposure will cause it to deteriorate quickly. Always embed it completely into the sealant and apply a full protective layer of sealant over it.
Asphalt and Tar Remover 2 oz
Weight
.5 lbs
Weight
2oz
Returns & Refunds
To qualify for a return, send the unused product back in its unopened original packaging within 20 days of the date we shipped your order. The deadline applies to when you hand the return package to the carrier, not when it arrives back at our address.
Refunds exclude original shipping charges and are subject to a 25% restocking fee. Customers are responsible for return shipping costs.
Metal cans may arrive with minor dents from shipping. Minor cosmetic dents should not affect the sealant when the container remains sealed and does not leak.
If your order arrives leaking or with a damaged seal, please contact us promptly for assistance.